


Knot of the Week: Highwayman’s Hitch
 Continuing with our “Knot of the Week” series, we present the Highwayman’s Hitch. This knot is another interesting one to talk about, due to its history. The Highwayman’s Hitch was supposedly used back in the late 1800s by stagecoach robbers. According to Wikipedia, Highwayman describes a robber who traveled by horse rather than foot.
The Highwayman would tie up his horse alongside the stagecoach he was robbing using the Highwayman’s Hitch, enabling him to make a fast getaway. The hitch will hold fairly strong, yet will release very quickly with a simple tug on the free end.
Highwayman’s Hitch »
(Strength: 2/Security: 3/Stability: 2/Difficulty: 2)
Please refer to our Knot of the Week introduction post for a description of what these ratings mean.
Make sure the Highwayman’s hitch is tight, or it won’t hold whatever you’ve tied up. While this knot will seem stable when pulling on the standing part of the line, it does have a tendency to collapse and should not be used as a lifesaving knot.
Uses:
- Tying up a Zodiac to dock cleats
- A situation where you need to release a knot with one hand
- Towing another boat or canoe that would need to be quickly released
- Tying up your horse to rob a stagecoach
Pay particular attention to the standing end and the release end, it’s easy to get them mixed up while tying this knot.
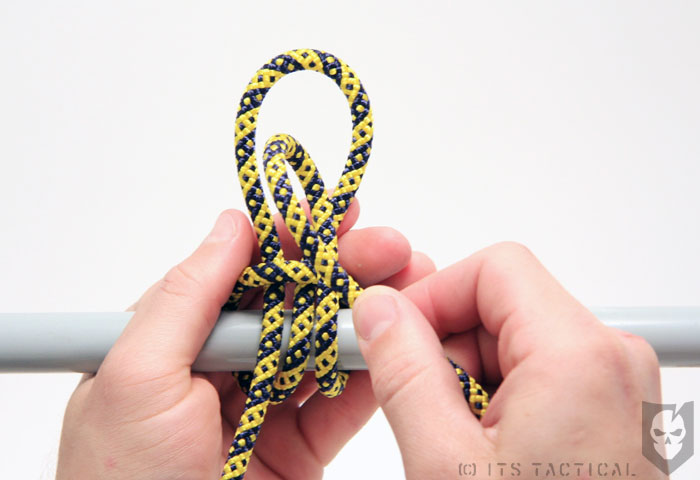
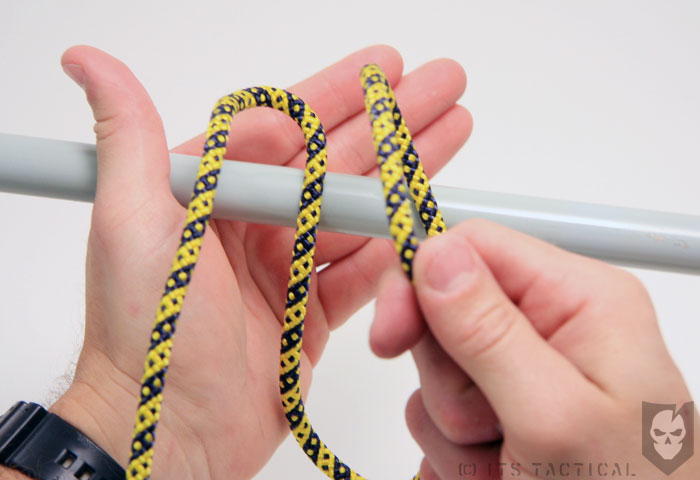
Instructions:
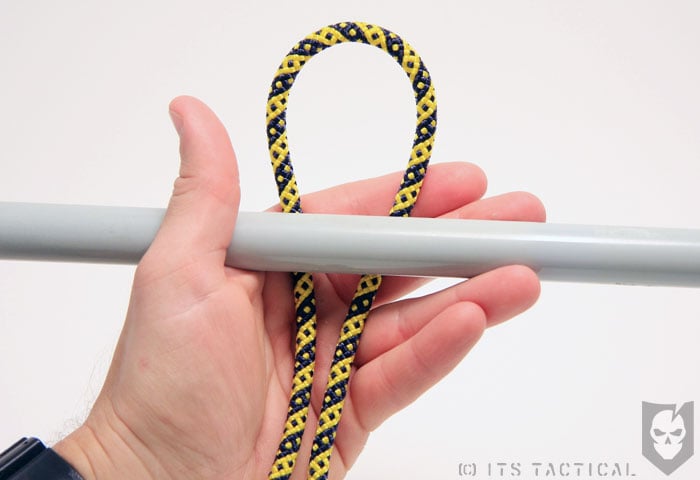
- Begin with a single loop (bight) in your rope behind the object you’ll be tying off to
- The left side of the loop will be the standing end, or what your boat is attached to
- The right side of the line will be the release end you’ll pull for a quick getaway
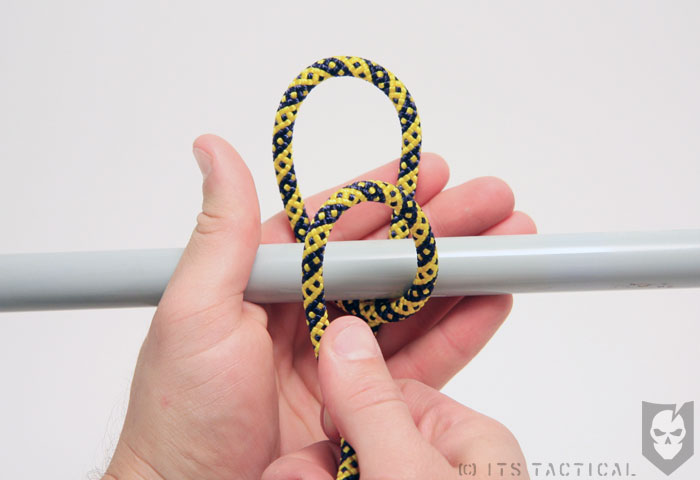
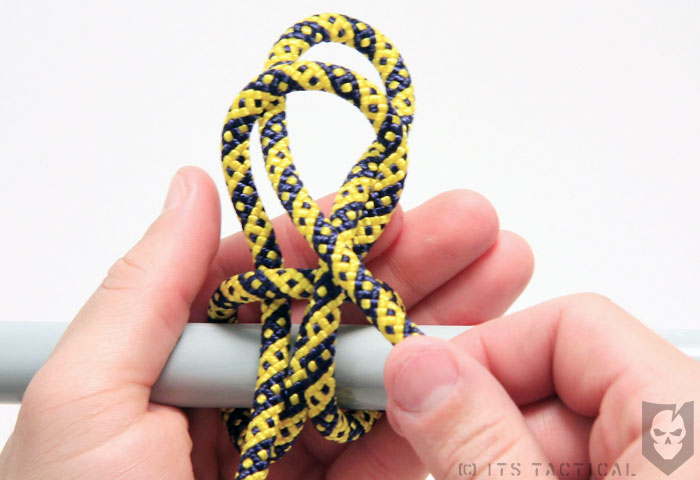
- Take the standing end (left end) and form another loop
- Tuck this loop into your original loop
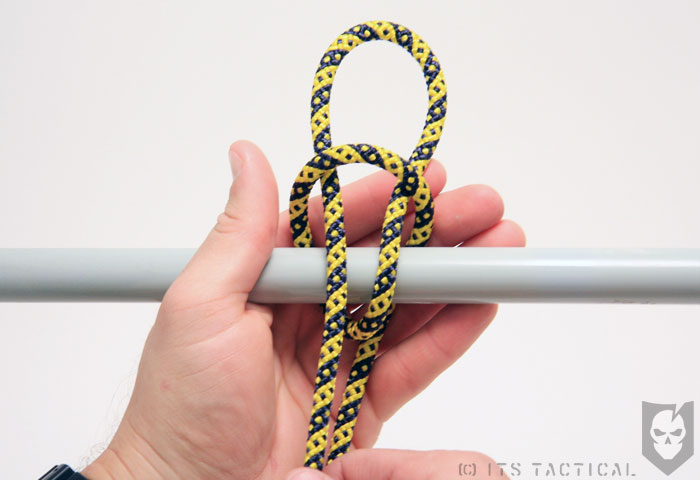
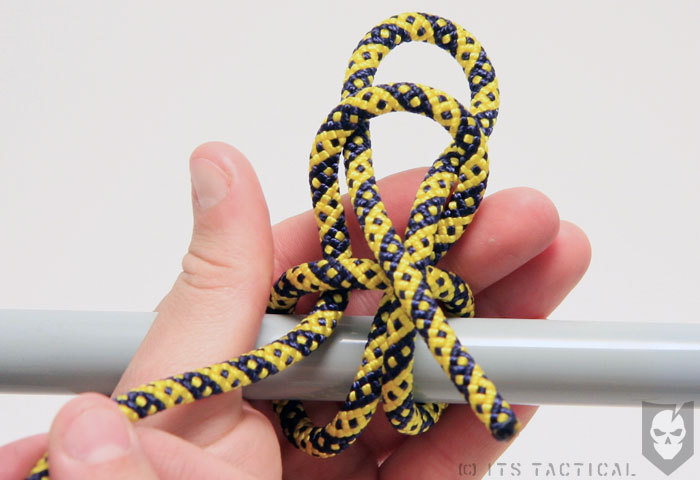
- Now take the release end (right end) of your rope and form another loop
- This loop will go inside the last loop made
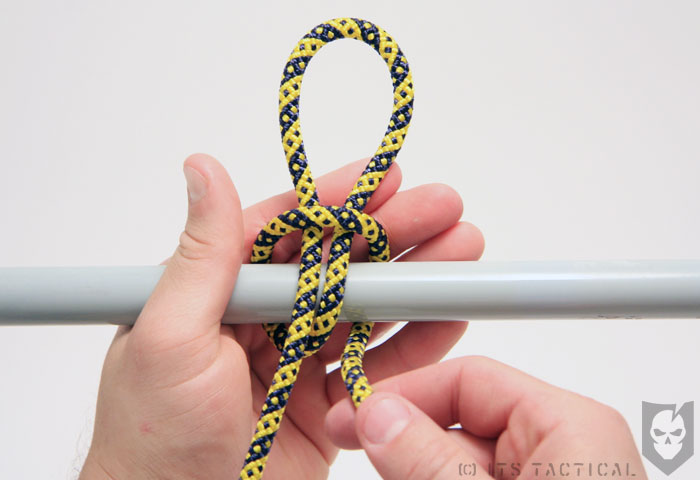
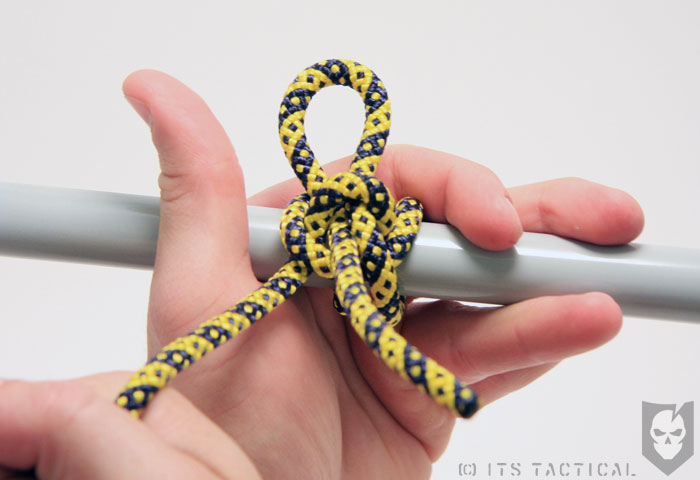
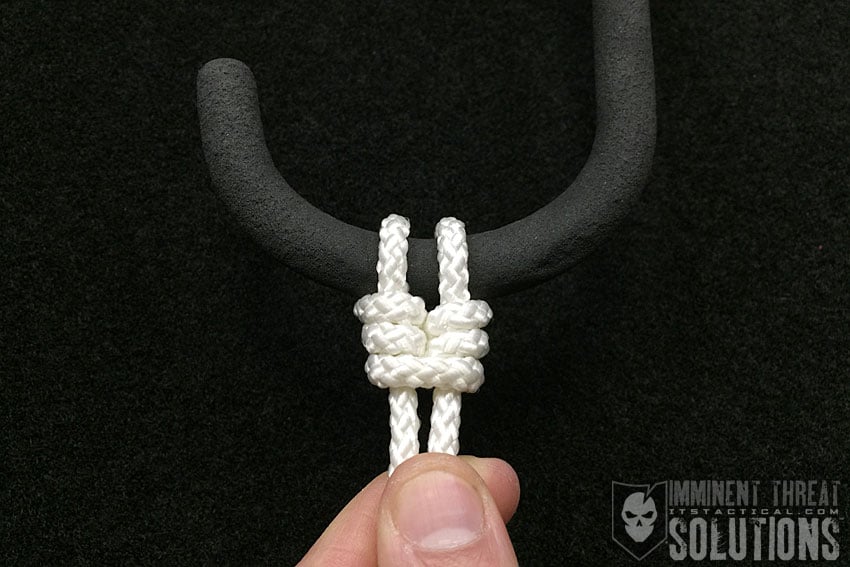
- At this step it’s important to tighten the knot by pulling on the standing end
- Pulling on the standing end will lock the quick release portion of the knot in
- Now just simply tug on the release end to run from the sheriff!
Let us know if the comments if the instructions were follow along with, we’ll be going over some knot terminology next week so hopefully we can avoid any confusion in the future.
View the gallery below and follow along with the steps above!

Check back next week as we continue our “Knot of the Week” series with some knot terminology!


Discussion