


How to Tie Knots Like a Navy SEAL: Part 3

Photo U.S. Navy (Released)
This week’s “Knot of the Week” continues with the third of five knots taught to Navy SEAL candidates at BUD/s for their Underwater Knot Tying Test.
During the test, the students must tie each knot on a single breath hold at the bottom of a 15 foot pool.
The instructors descend with the students to the bottom of the pool to observe and check that each knot is tied correctly.
Instructors play an integral role in BUD/s training, and are constantly right there with students to not only guide them, but to ensure safety on evolutions.
We’ll have a special video presentation during the last week of the five-part series, combining all the knots and showing them tied underwater like the test.
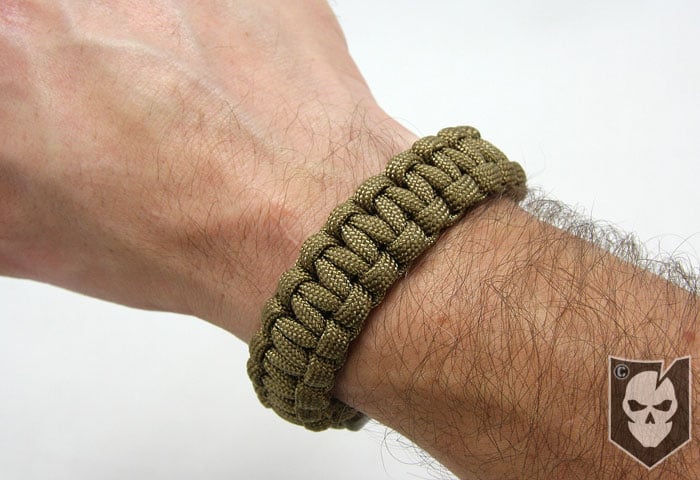
The third knot from the test we’ll showing today, is the Becket’s Bend (also known as a Sheet Bend).
Becket’s Bend » Bends
(Strength: 2/Secure: 2/Stability: 2/Difficulty: 2)
Please refer to our Knot of the Week introduction post for a description of what these ratings mean.
There’s a method to our madness in showing the Square Knot before the Becket’s Bend last week, as the two are tied similarly.
Much like the Square Knot, the Becket’s Bend is used to splice together two lines of Det Cord (Detonation Cord) when working with Demolitions.
The Becket’s is more secure than the Square Knot in certain applications. To add additional strength to the knot, a second turn can be added with the working end when tying.
As with the Square Knot, a six-inch tail must be left in both ends after tying. This prevents moisture from entering the Det Cord through the exposed ends.
Uses:
- In demolition to splice Det Cord
- Joining two ropes of unequal diameter
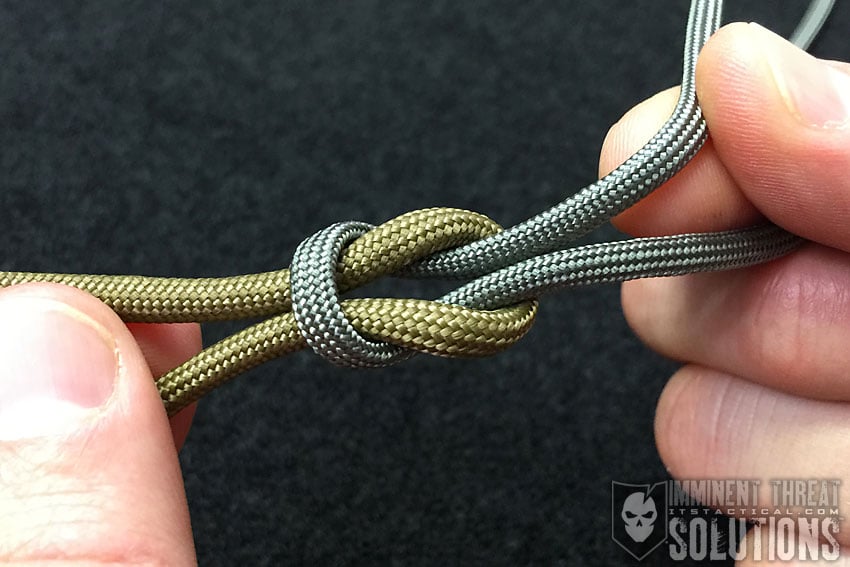
Tying Instructions:
- Form a bight in the standing end, ensuring that the bitter end is hanging down
- Insert the working end through the backside of the bight
- Pass the working end around the back of the bight
- Tuck the working end behind the working part of the line
- Tighten by pulling the bight, the working part and the working end of the line
View the gallery or YouTube video below and follow along with the steps above!
[flickrset id=”72157622168371279″ thumbnail=”square” overlay=”true” size=”medium”]

Discussion