


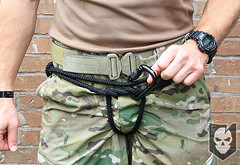
 We return to our regularly scheduled Knot of the Week today with the Swiss Seat. The Swiss Seat is also often referred to as a rappel seat, as it’s purpose is to serve as an emergency rappelling harness.
Many survival and E&E kits contain a carabiner and a 12 ft. section of rope just for this purpose. Not to sound overly dramatic, but in an emergency, just these two items could mean the difference between life and death.
A Swiss Seat can also be used to transport an injured victim to safety if no rappelling harness is available to them.
We highly recommend that before carrying a 12 ft. section of rope for a Swiss Seat, you see if it’s the right amount of rope for you.
In the YouTube video below, the waist size shown is a 32″ and the rope is just the right length. Your mileage may vary.
Swiss Seat » Misc.
(Strength: 3/Secure: 3/Stability: 4/Difficulty: 4)
Please refer to our Knot of the Week introduction post for a description of what these ratings mean.
Uses:
- Emergency Rappelling Harness
- Transporting an Injured Victim to Safety
Instructions:
Make sure you have enough rope left over to properly back up the square knot tied in the Swiss Seat.
- Find the center of the rope
- Hold the bight of the center against your left hip if right handed or right hip if left handed
- *The reason for this is that when tying the final square knot, you want it opposite from your rappelling brake hand*
- Drop the bight and wrap the rope around your waist
- If wrapped correctly you should now have one end that is longer than the other
- Make one overhand knot and a consecutive second wrap (it doesn’t matter which side)
- Allow the running ends to hang down
- Pull the running ends through your legs and around your backside, squatting to tighten
- Feed each side up and behind the waist wrap creating a half hitch to lock
- Tie a square knot off to the side of your body you originally started on
- Backup the square knot with an overhand knot in each working end
- If you have excess rope, consider carrying less or simply tucking it into a pocket
- Attach a locking carabiner through the initial wrapped portion of the Swiss Seat as well as the wrap with the square knot
- Ensure the gate is facing you to avoid it rubbing on the rope, and “screw down so you don’t screw up!”
View the gallery or YouTube video below and follow along with the steps above!
[flickrset id=”72157622392249745″ thumbnail=”square” overlay=”true” size=”medium”]

Discussion