


Build Your Own Ghillie Suit for Under $75
Build Your Own Ghillie Suit for Under $75
Last time, we explained the rationale behind the need to have a ghillie suit in one’s arsenal. This segment will explain the construction methods of one of the easiest ghillie suit designs, the decoy bag suit. The title may be a little misleading because the ultimate decision on the total cost for this project will depend on your ability to hunt for a bargain. Between Amazon, Wal-Mart, eBay and other craft or sporting goods retailers, there’s a good chance that you can come in quite a bit under budget.
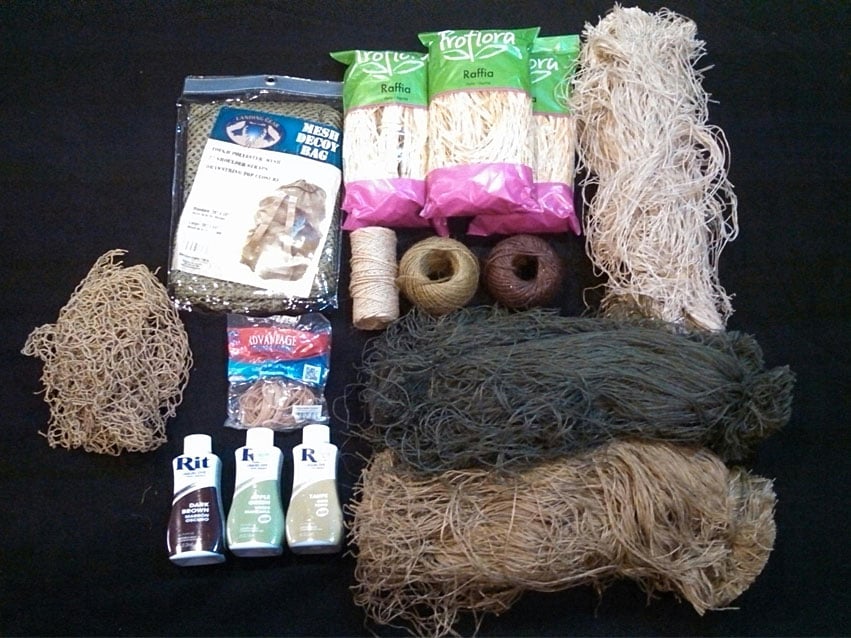
Materials
- 30″ x 38″ Decoy Bag
- 3 bags of Raffia Grass
- 1 pound of Mixed-Color Synthetic Burlap
- 3 bottles of RIT fabric dye (used here are Dark Brown, Apple Green, Taupe)
- 1 package of Rubber Bands
- 2 rolls of Jute Twine
- 1 Seam Ripper
One of the most affordable homemade ghillie suit designs is a ghillie suit constructed from a mesh decoy bag. When used in conjunction with ghillied headgear, this design is well-suited for outdoor sports and hunters who need the maximum amount of concealment, while offering enough mobility throughout the field or stalking prey without worrying about tripping hazards. Essentially, the decoy bag suit provides 360° torso coverage with some distinct advantages.
Benefits and Drawbacks
One of the greatest advantages of this suit is that it’s one of the fastest suit designs to construct. Because this suit isn’t attached to a base uniform, some of the preparation work required by other suit designs isn’t needed. The only major modification for the decoy bag ghillie suit is the removal of the shoulder straps with a seam ripper and cutting the openings for the head and arms. All other steps focus upon preparing the camouflaging material and tying it to the suit.
The suit does have some drawbacks, but most of these are easily overcome. Because of the sleeveless design, the arms may not be adequately camouflaged for certain applications. However, this design does allow bowhunters to enjoy the advantages of a ghillie suit without worrying about the bowstring catching material on the arms. Additional options like pockets are harder to engineer for this particular suit, but because of the options for clothing underneath the decoy bag suit are numerous, this isn’t an issue for most users. You may wish to cut slots into the bag to access the pockets of other clothing without having to remove the ghillie suit. A single, centralized access slot in the chest or abdomen area is sufficient for reaching necessary gear stored in the pockets with either hand. The legs are also more exposed with this suit, but tying longer lengths of camouflaging material at the leg opening will help remedy this drawback. Crouching is a natural action to take while stalking or even hiding from others and the suit will cover more of the legs when this technique is used.
Overall body style and shape doesn’t affect the effectiveness of this suit design for most individuals. Average people who are 5’6” or taller, who normally wear large or extra-large size shirts/jackets and have a waist size of 32” – 42” size pants should have no problem with this design. You’ll also still have room for additional layering in colder climates and environments. The larger 36″ x 50″ size decoy bags will easily accommodate big and tall sizes. This design is also adaptable to the growth spurts of teenagers and can be worn well into adulthood.
Build Your Own
Step 1: Obtain a mesh decoy bag that will allow you to wear it without restricting your movement. Common bag sizes are 30″ x 38″ and 36″ x 50″. Some bags have camouflage patterns, but most are olive drab or brown. These bags are inexpensive and found at most sporting good stores with even a modest hunting department.
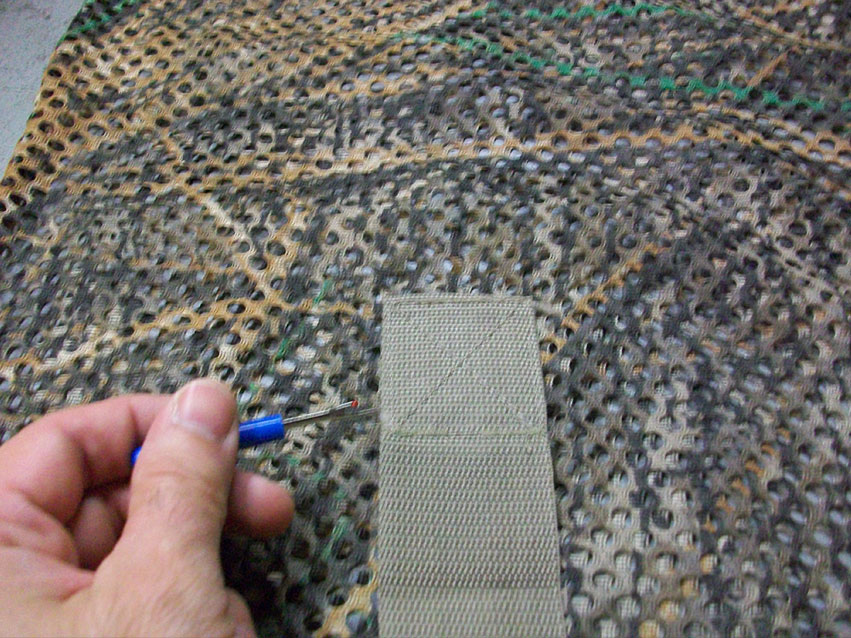
Figure 1: Carefully remove the carrying straps from the decoy bag with a seam ripper.
Step 2: Using a seam ripper, carefully remove the shoulder straps. A sharp pocket knife or razor blade will work in a pinch, but a seam ripper (available at any fabric store for about $3) is the safest tool. Try to avoid cutting the mesh. After the shoulder straps are removed, you may choose to spray paint a couple of vertical or diagonally-oriented lines or splotches to break up the solid color. If you intend to cover 80% or more of the decoy bag with camouflaging material or the bag has a camouflage pattern printed on the mesh fabric, spray painting is unnecessary.
Step 3: Lay the bag flat on a table or suitable workspace with the bottom end of the bag towards you. Divide the bottom in equal thirds with a marker. Using a pair of scissors, cut open the center portion, leaving the two end portions intact.
Step 4: From the bottom edge of the bag, measure 10-14 inches on each side towards the bag opening and mark your measurements. Taking the scissors again, cut both sides of the bag starting from the bottom and cutting towards the measured points.
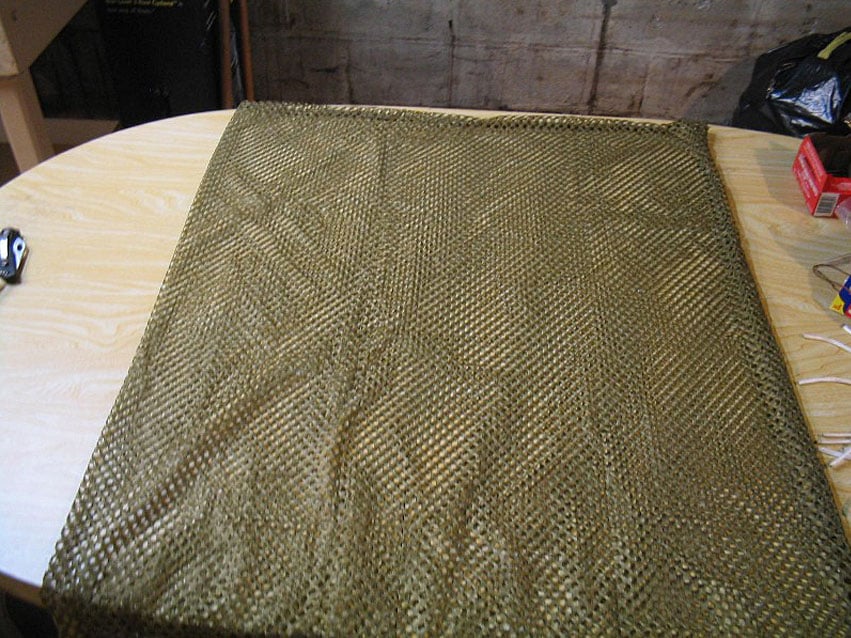
Figure 2: Preparing to cut the head and arm holes.
Step 5: After you’ve cut the head and arm openings, pull the decoy bag over your head to check for proper fit. The bag should have plenty of room to don the suit over layers of other clothing if necessary. If the openings are too large, you can tie the edges together with camouflaging material, yarn or string to reduce the size of the openings.
Step 6: The mesh is large enough to pass small bundles of stranded camouflaging material through the holes, but adding netting accommodates larger strips and materials. Adding random areas of netting will allow for the addition of wider strips of burlap or other materials if you choose. Lay the netting over the desired area of the decoy bag and tie it with 550 paracord or strands of camouflaging material through the openings of both the netting and the decoy bag.
Step 7: Choose the environmental colors needed for the suit. Determine the most dominant color in the environment, which will be your base color for the camouflaging material. Use all the other colors in the environment for blending.
Step 8: If hand dyeing, begin preparing the camouflaging material by shredding natural colored burlap material into individual strands. Save about one yard of burlap for cutting larger strips and dye them if desired. After obtaining four to five pounds of burlap, divide the strands into piles for the colors you selected for your decoy bag suit.
Set aside two pounds for the base color and use the remaining material for the blending colors, using about one half pound per color. Jute twine works well for this suit and cutting it into 10 – 14 inch lengths prior to the dye bath ensures even dyeing. After dyeing the material, allow it to dry and begin tying the material to the suit.
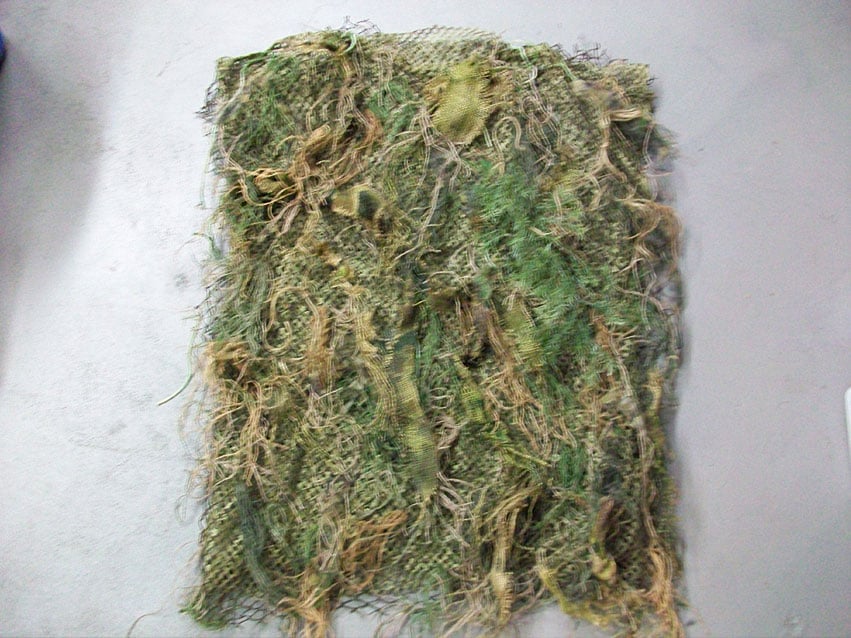
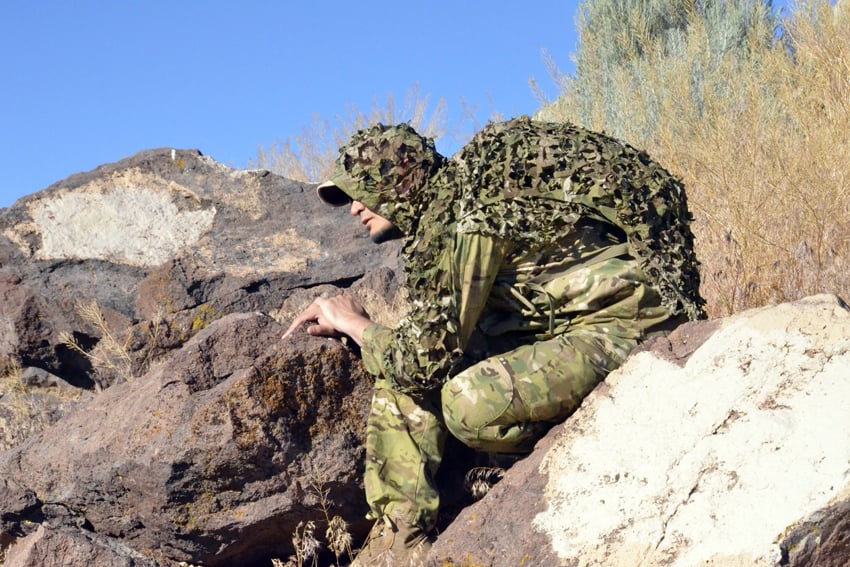
Figure 3: Worn like a smock, the ventilated decoy bag works well in warmer climates. This decoy bag ghillie suit has netting on both sides and contains both natural and synthetic burlap, jute twine, screen-printed mesh, raffia grass and artificial foliage.
Step 9: When tying the camouflaging material to the decoy bag, start at the leg opening and work upwards toward the neck and shoulder area. Bundle 4-8 strands together, pass one end through the mesh and bring the strands back through an adjacent hole in the mesh. Vary the lengths of the bundles as you go and tie a half-hitch or square knot to secure the material. Continue this procedure, spacing the bundles about an inch apart while going up and around the decoy bag 360 degrees.
Burlap isn’t the only material you can choose to use on your decoy bag ghillie suit. Yarn reduces some of the fire hazards associated with burlap, but treating the suit with a fire retardant after completion is still recommended. The major disadvantage with yarn is that it’s too warm for most ghillie suit applications. However, in late autumn or winter, hunters may find the added warmth a welcome presence, while in a static position. Unless you plan to use synthetic burlap, all other material choices will not be fire retardant or water repellant unless specifically treated.
Step 10: After completing the base color, rotate through the other colors, tying them randomly around the suit. Assemble bundles consisting of 3-4 individual strands, but this time, tie the knots towards one end and allow most of the bundle to hang freely. This will help develop the contrast of the suit and provide more texture. Adding the camouflaging material takes time and can be done while watching television, listening to music or some other activity that doesn’t require your full, undivided attention.
Step 11: Next, apply vegetation loops along with any artificial or natural vegetation to blend into the environment where you will be using your ghillie suit. Earth colored elastic hair bands or natural colored rubber bands work very well. Rubber bands are cheaper and will dry out over time, but are easily replaced.
Natural Vegetation
The use of natural vegetation is the single most important customizing option you can employ on your ghillie suit. It would be foolish to construct a ghillie suit and not use vegetation native to the environment where you use the suit. The major pitfall of natural vegetation is that it starts to wither and brown after just a few hours. Certain types of natural vegetation are available at hobby and craft stores. Dried raffia grass is very popular and suitable for dyeing. It’s extremely effective in grassland, desert and winter environments. Spanish moss is another option that is available in different colors and adds another element of texture to your suit. Carpet moss is also available at hobby stores in either the model train or silk flower sections.
Not all natural vegetation types work however. You should avoid plants that cause skin irritations such as poison ivy, poison sumac, nettles and certain varieties of cacti. However, if you’re trying to conceal a secret cache of supplies, fabricating some foliage to look like poison ivy may keep the casual investigator away. However, if you’re in an area known to have poison ivy, wear long sleeves and gloves. If you know you’ve come in contact with the oil from the plant, generously wipe down the effected area with isopropyl alcohol to remove the oil. This will prevent the development of the painful rash associated with its contact.
Artificial Vegetation
If you’re going to use your ghillie suit in a certain area for an extended period, the use of artificial vegetation may be an option. One of the advantages to this method is the amount of fresh vegetation required to blend your suit into the environment. This also means that it takes less time to ‘”veg up” prior to putting on your suit and will last considerably longer than natural vegetation. Unless someone is practically on top of your position, or a botanist, chances are they won’t be able to tell the difference. There’s a wide selection at most hobby stores, but the selection typically corresponds with the current season. This means that during the spring and summer months, you typically won’t find fall and winter items displayed and vice versa.
One minor drawback to artificial vegetation is the glossy appearance commonly associated with most plastic plants. The use of a flat spray-paint of a matching color will remedy this. Not only can you paint the vegetation to reduce the glossy appearance, you can adjust the color of the leaves to match the season as well. The vegetation can be painted and repainted as often as needed. Leaves rapidly change color before and after they fall, so you might want several different shades, especially browns and yellows. Keep in mind that leaves never turn a uniform color all at once and that the color varies slightly on each side.
Step 12: After adding all the camouflaging material to the suit, blend the overall appearance of the suit by lightly applying spray paint or leftover liquid dye from a spray bottle. The trick is to use just enough to achieve the desired look without using too much. Allow the paint or dye to dry.
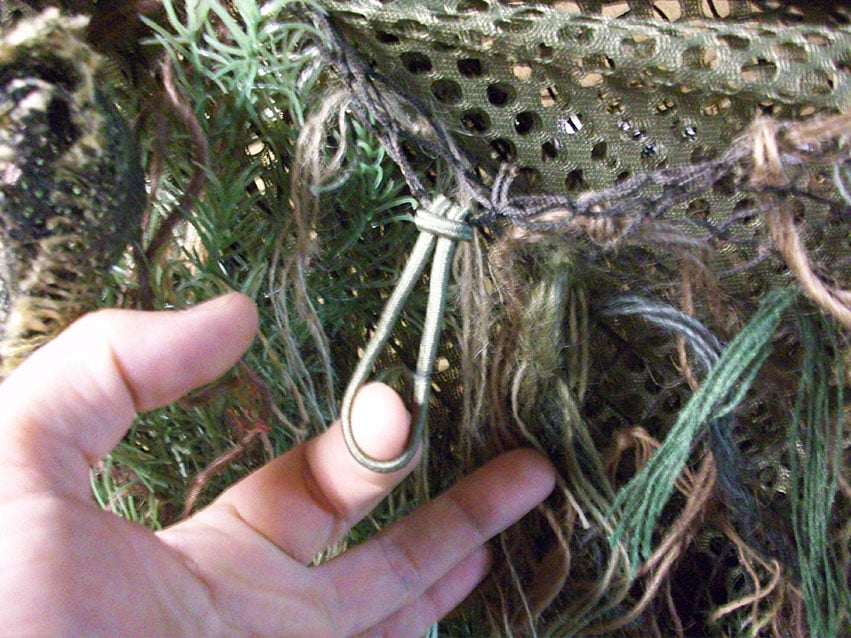
Figure 4: Attaching an elastic hair band to the netting for a vegetation loop.
Step 13: Hand wash the suit in a scent-free, UV brightener-free hunters soap and treat your completed decoy bag ghillie suit with a fire retardant spray specifically designed for natural and/or manmade fabrics, depending on the fabric you used. After you’ve washed to suit, you can choose to weather or season the suit by partially burying or dragging the suit through dirt or mud. This will help the suit blend into the environment better, as it will pick up dirt and ground debris, providing more effective coloration. A lightweight flame/fire resistant balaclava is highly recommended to protect the head and face, especially if the removal of the garment still requires the user to pull the suit over the head.
Editor-in-Chief’s Note: Please join us in welcoming Matthew Dermody of Hidden Success Tactical Concealment as a contributor on ITS Tactical. If you would like to learn about personal camouflage, concealment fieldcraft or even more information about ghillie suits, check out hiddensuccesstactical.com
Discussion