


Knot of the Week: Rigging a Tarp Shelter, Part 3
Today we’ll wrap up the last part in our Knot of the Week mini-series on rigging a tarp shelter.
I left off in part 2 with explaining how the tarp is attached to the trunk line with Prusik Loops and Prusik Knots, and introduced the guy-line system. We’ll get more in-depth into that system as well as demonstrating the Alpine Butterfly Loop and the Taut-Line Hitch.
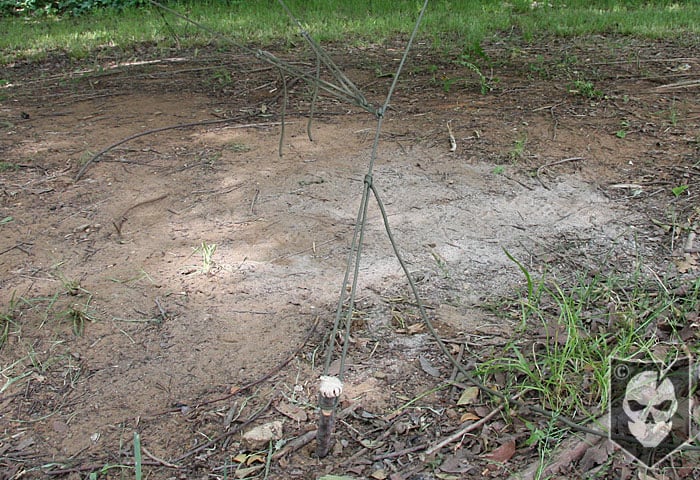
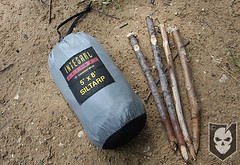
To create the guy-line system you’ll need at least five attachment points on each side of the tarp and quite a bit of paracord. As mentioned previously you’ll also need four stakes, but those can be made with a knife and some sticks you can typically find wherever you’re setting up at.
Guy-line Requirements
Before we get into how to tie these knots for the guy-line system, let’s talk paracord. I like using paracord for everything on this tarp, because I know I’ve always got 100+ feet of it at all times.
For each primary guy-line, that will be hitched around one of the four stakes, you’ll need 8-feet of paracord. The secondary guy-lines, on the next closest attachment points, will each require 5-feet and the tertiary lines need 6.5-feet.
In the video below, I’ve tied in each of the guy-lines to their respective attachment points using two half-hitches. Lately though I’ve been considering retying them with bowlines or something similar. The two half-hitches hold just fine, but taking the tarp in and out of the stuff sack I’ve noticed that I occasionally have to re-tighten them.
Cutting all the necessary paracord for the entire tarp shelter will take some time, but once its in place you can set-up and tear-down the tarp in a matter of minutes. Practice makes perfect though, so throw the tarp up in your backyard on occasion to practice setting it up.
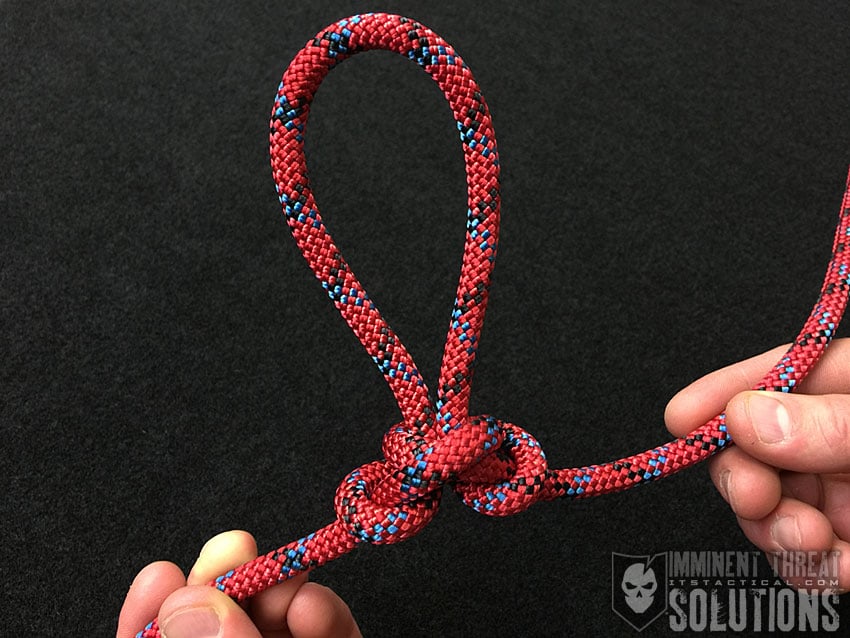
Alpine Butterfly Loop
(Strength: 5/Secure: 5/Stability: 3/Difficulty: 4)
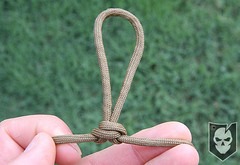 The first step after tying in all of the guy-lines, is to tie your Alpine Butterfly Loop in each of the primary guy-lines. The Alpine Butterfly acts as a anchor for the pulley system that is created by the secondary and tertiary guy-lines on each corner of the tarp. That pulley system is what evenly distributes the tension on each of the respective attachment points to stabilize the tarp in windy conditions.
An Alpine Butterfly is used to put a loop in a line that has tension coming from both ends. This knot will not weaken the strength of the line and is used by climbers and mountaineers to tie in a climber for protection against a fall.
Tying Instructions: Please refer to the photos here and YouTube video below.
[flickrset id=”72157624094253156″ thumbnail=”square” overlay=”true” size=”medium”]
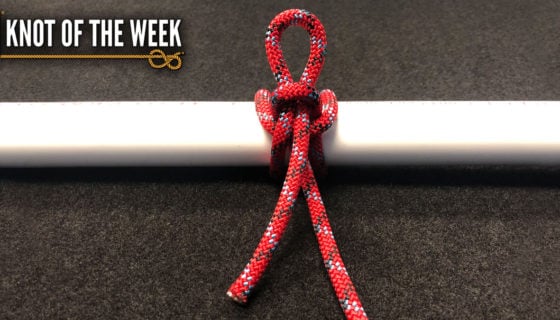
Taut-Line Hitch
(Strength: 3/Secure: 3/Stability: 3/Difficulty: 3)
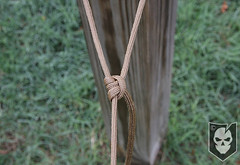 After each primary guy line has the Alpine Butterfly integrated, it’s time to stake them down. The best way to tie off these guy-lines to that stake in the ground is with a Taut-Line Hitch, this will allow you to adjust the tension on the line if needed. While this is the optimal knot to use in this situation, be aware that under heavy loads the hitch can release.
Not only will the primary guy-line have a Taut-Line Hitch, but each secondary and tertiary guy-line will also use one after being routed through the Alpine Butterfly Loop. This will again allow you to individually adjust the tension on these guy-lines to mitigate the amount of flex the tarp has in windy conditions.
Tying Instructions: Please refer to the photos here and YouTube video below.
[flickrset id=”72157624094230066″ thumbnail=”square” overlay=”true” size=”medium”]
Closing Notes
 I hope you’ve enjoyed the series and not only learning how to tie all these great knots, but also seeing how they all come together into a practical application.
Knot tying truly is a depreciable skill-set, and one that I hope everyone takes an interest in and passes along to friends, family and co-workers. With today’s generation of people that are completely dependent on all the fancy gadgets and electronics (guilty), developing skill-sets like these and retaining them is even more important.
Let me know if you have any questions about any of the knots used in this mini-series, and I hope you’ve enjoyed it. Now get a tarp and practice!
Oh, and before anyone asks, I don’t know why I said “happy tarping” at the end of the video, I know it’s absurd and I couldn’t edit it out!
Links to Part 1 and Part 2 of the series in case you missed them!
Discussion