


DIY AR-15 Build: Barrel and Free-Float Rail System Installation
DIY AR-15 Build: Barrel and Free-Float Rail System Installation
- DIY AR-15 Build: Upper Receiver Assembly Introduction
- DIY AR-15 Build: Ejection Port Cover and Forward Assist Installation
- DIY AR-15 Build: Barrel and Free-Float Rail System Installation
- DIY AR-15 Build: Front Sight Base Installation
- DIY AR-15 Build: Muzzle Device Installation
- DIY AR-15 Build – Bolt Carrier Group Installation
- DIY AR-15 Build – Welding and Checking the Headspace
- DIY AR-15 Build: Lubrication, Assembly and Firing
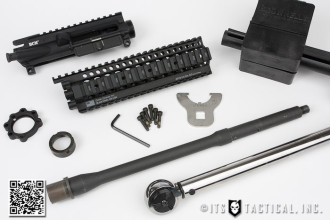
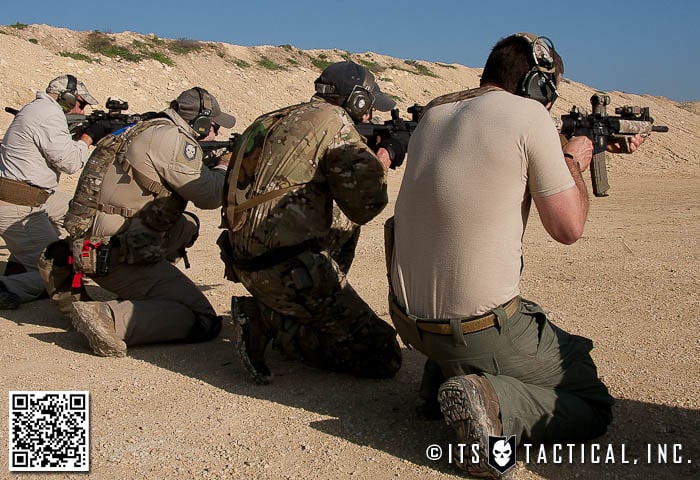
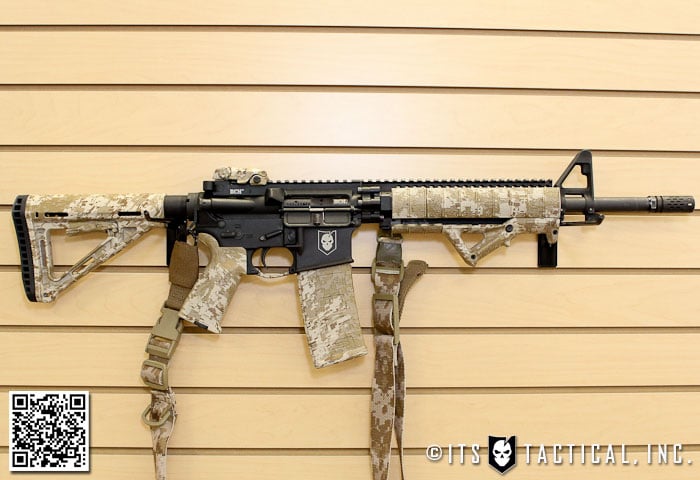
Continuing our DIY AR-15 Build, today we’ll be installing our Bravo Company 14.5″ Barrel and Daniel Defense 9″ Lite Rail onto our Upper Receiver.
You’ll not only need a torque wrench for this part of the build, but the Daniel Defense proprietary Barrel Nut Wrench. We’ve also got a few recommendations we’ll share in the article as well.
Something we didn’t realize when we initially gathered the parts for this build is that a standard AR Barrel Nut Wrench won’t cut it for installing the Daniel Defense Rail. The cuts on their Barrel Nut don’t match the standard AR pattern and their wrench must be used (which doesn’t come included).
Let’s get into how to properly install, torque and assemble these parts onto your AR-15 build!
Bravo Company Manufacturing Barrel
For this build we’ll be using a BCM Cold Hammer Forged 14.5″ Mid-Length Barrel with a 1:7 Twist. Did you just read that and say “what the heck does that mean?” Allow us to break it down for you and explain what kind of quality you should be looking for when you buy your next barrel.
Barrel Steel and Length
There are two kinds of barrels out there, chrome-moly vanadium and stainless steel. CMV is what the military uses and are typically cheaper to produce, but chosen also because it’s easier to machine CMV than it is stainless steel. SS is obviously going to be more rust proof, but isn’t necessarily any better than CMV. Both are good choices.
The grade of CMV steel that Bravo Company uses is Mil-Spec (MIL-B-11595E) and they state that this Mil-Spec grade steel maintains additional strength and rigidity over other CMV barrels due to an increase in carbon and/or vanadium in the alloy. This increases barrel life and performance through use in all types of extreme environments and temperatures.
There are three lengths that a barrel can have, which are relative to the Gas Tube length. Carbine, Mid-Length and Rifle. These relate to the distance of the gas tube to the Front Sight Base or Low-Profile Gas Block. Rail systems are commonly measured in this way so that you can match the correct length rail system to your rifle’s gas profile. Of course there’s a lot more to this, so make sure you know what you’re buying.
Cold Hammer Forging
On a barrel, Cold Hammer Forging is merely a production process that takes a short and fat steel tube and beats it around a rifling shaped mandrel, stretching it into a barrel as it goes.
This along with button rifling are two of the most common procedures for producing cost effective barrels that are reasonably accurate. HK, Noveske and Remington also use Hammer Forging. We decided to go with a 14.5″ barrel due to the fact that it still uses the same reliable mid-length gas system as a 16″ barrel and gives you the shortest profile (with welded BattleComp 1.5) without having to purchase a $200 tax stamp. (more on that in the next few articles)
If SBRs (Short Barreled Rifles) are what you’re after, we’ve got an article in the works that talks all about the laws surrounding those and how to obtain one through a trust.
Rifling Twist
Barrel twist is the rotation that the bullet makes within a specific length of travel, so a 1:7 twist means that the bullet twists one time for every 7 inches it travels. The rotation of the bullet helps stabilize it during flight, preventing tumble and in turn increasing accuracy. 1:7 is the common military twist to stabilize their rounds and not the best for everyone.
It’s the most common twist rate and the best for surplus ammunition, but definitely is not the most accurate. Our goal here with this build isn’t to assemble something super accurate though, it’s simply not needed unless you’re competing.
Chrome Lining
This lining dates back to the late 60s when stoppages were blamed on Army mismanagement, rather than the compound issue of combat troops not being issued a cleaning kit and having non-chrome lined barrels and receivers.
Chrome lining increases reliability by allowing spent cases to be pulled from the chamber easily, even when severely dirty. This of course is if your extractor is working properly and you’re using good ammo. With increased reliability also comes decreased accuracy, but we’re talking about a firearm that’s designed for combat and not shots out to 1,000 yards.
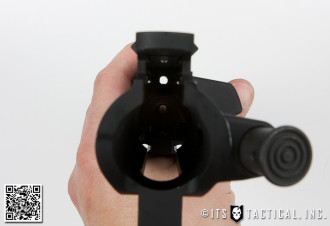
M4 Feed Ramps
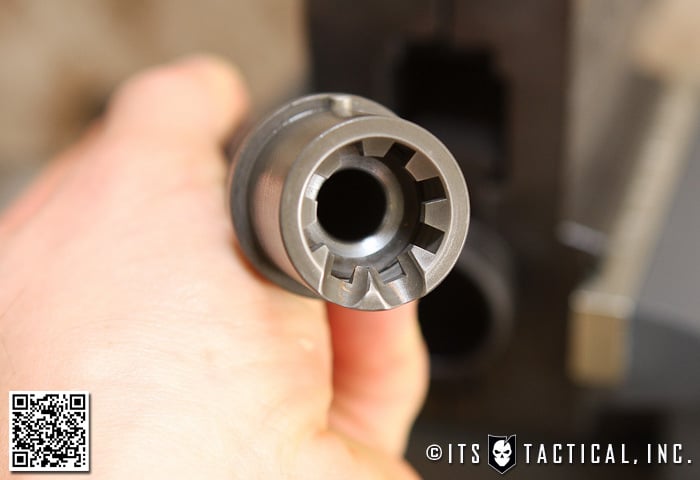
Feed Ramps are what guide each round into your chamber and something you’ll hear a lot of conflicting opinions on. Rifle Feed Ramps, which are the most common, feature the two Feed Ramp cuts into just the Receiver Extension. The Receiver Extension is the rearmost section of the barrel that we’ll be placing into the Upper Receiver.
M4 Feed Ramps feature two Feed Ramp cuts that extend through the Receiver Extension and into the Upper Receiver as well. This is important to understand and we’ve tried to provide a photo here to show the cuts.
The idea here is that as barrels get shorter, so does the gas system (typically). This leads to faster cycling and faster feeding of ammo. The M4 Feed Ramp enhances the angle on the Receiver Extension to ensure the proper feeding of ammo.
What you want to avoid is having a M4 Feed Ramp cut Upper Receiver and a Receiver Extension with Rifle Feed Ramps, as this could result in a malfunction from a round getting pushed into the gap that’s created. We’ve never heard of this happening, but it’s best to have properly matched parts.
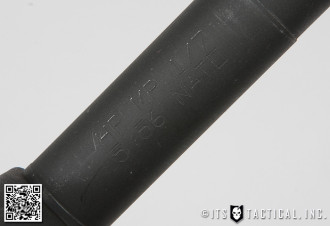
5.56 NATO Chamber
First here’s a short lesson in 5.56 versus .223. Many will tell you these two rounds are identical, but that’s simply false. .223 has a shorter throat than 5.56 and while there’s nothing wrong with this, let’s discuss why you want a 5.56 chamber.
If there’s any possibility that you’d ever in your life fire military surplus ammunition or even 5.56 ammunition, get a 5.56 chamber. The reason being is that you CAN fire .223 from a 5.56 chamber, but due to the shorter throat on the .223 you CAN’T fire 5.56 from a .223 chamber. The increased chamber pressure from military ammo being fired through the shorter throat in the chamber of a .223 can lead to extraction issues.
Surely someone will chime in with a tidbit here to say they fire 5.56 through their .223 chamber all the time, that’s great. Good luck with those extraction issues, if they haven’t happened by now.
High Pressure Testing and Magnetic Particle Inspection
These two quality assurance procedures are simply a way to know that what you’re buying has been thoroughly tested and inspected. Think of these as stamps of approval, as HP/MP are stamped on every Bravo Company Barrel. It’s attention to detail and that’s one thing we certainly look for here at ITS Tactical!
Straight from Bravo Company:
Military specifications require that barrels undergo a HPT (High-Pressure Test) load as a part of quality assurance procedures. Commonly referred to as a proof load, the M197 HPT is rated for 70,000 psi. BCM barrels are proof loaded and then MPI (Magnetic Particle Inspected) to detect any possible flaws in the barrels surface. The barrels are MP inspected with both circular and longitudinal magnetic fields per ASTME1444-01 (current Mil-Spec) to assure a high quality finished product. All BCM barrels are marked HP MP as our proof load marking.
Suffice to say that if you buy your barrel from a quality manufacturer, you’ll end up with a good product.
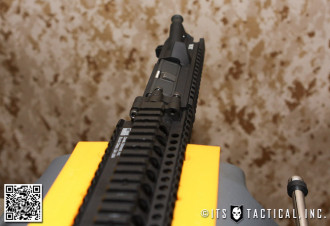
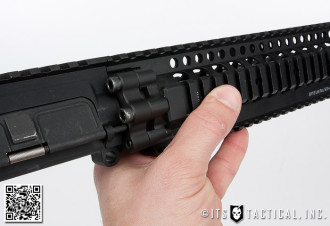
Free-Float Rail System
Installing an aftermarket free-float rail system to your AR-15 can be a great upgrade, as one of the primary benefits is that it installs to the upper receiver and doesn’t make contact with the barrel at all. This can be great in that it not only allows for better cooling, but pressure from your supporting hand shouldn’t effect your rounds on target (in theory).
In addition with Picatinny Rail Systems, you gain a mounting system that will allow you to attach all kinds of aftermarket accessories like flashlights, rail covers, foregrips and even IR Illuminators/Lasers.
What’s great about the Daniel Defense Lite Rail that we’ve chosen is that it uses a “Bolt-Up System” that allows the upper receiver to have a continuous uninterrupted upper rail platform. It’s also one of the lightest rails on the market.
Parts Needed
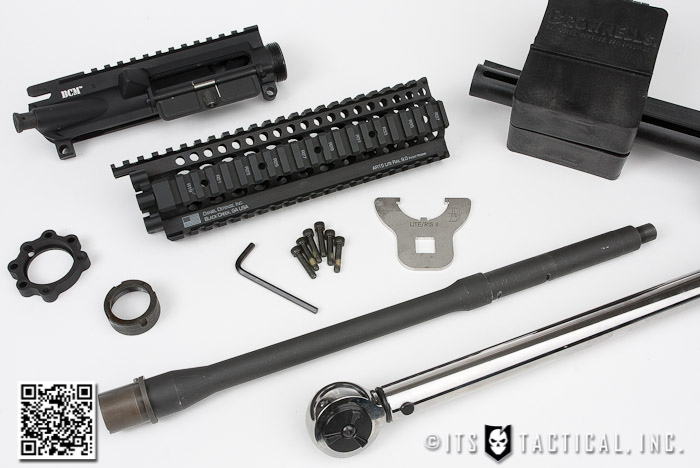
- Upper Receiver w/ Ejection Port Cover and Forward Assist Installed
- BCM Cold Hammer Forged 14.5″ Barrel with 1/7 Twist
- Daniel Defense AR15 Lite Rail 9.0
Tools Needed
- Vise
- Padded Vise Jaws
- Brownells Upper Receiver Action Block
- Daniel Defense LITE/RIS II Barrel Nut Wrench
- 1/2″ Drive Torque Wrench (capable of 20 — 100 foot pounds)
- Blue Loctite
Assembly Instructions

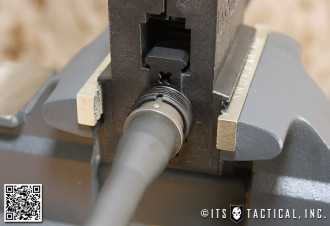
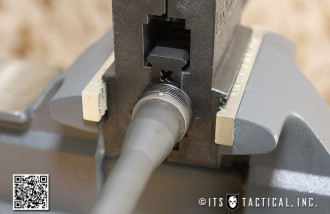
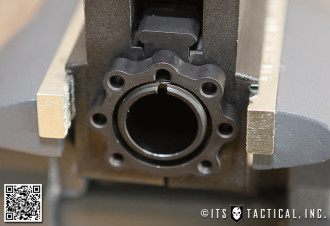
- Insert Upper Receiver into Upper Receiver Action Block and place into vise.
- Line up the pin in the Barrel Receiver Extension (Barrel) with the cut in the Upper Receiver.
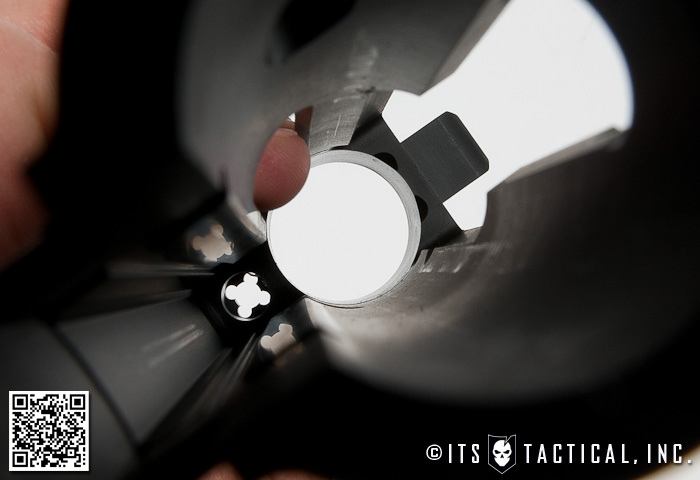
- Place Bolt-Up Plate over the Barrel with the counter bored side facing the muzzle.
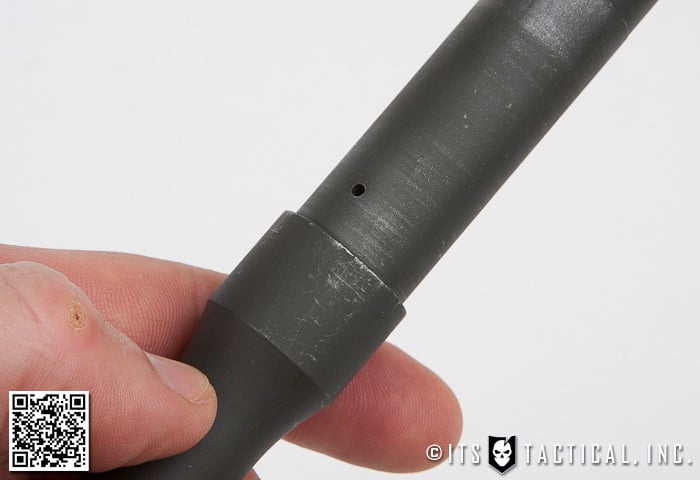
- *Ensure the Gas Tube hole in the Bolt-Up Plate aligns with the Gas Tube hole in the Upper Receiver.*
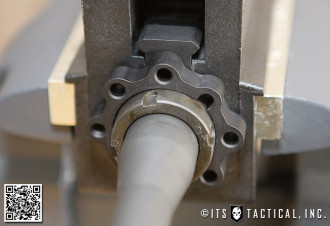
- Screw the Barrel Nut on finger tight.
- Torque the Barrel Nut between 50-70 foot pounds using the Daniel Defense LITE/RIS II Barrel Nut Wrench.
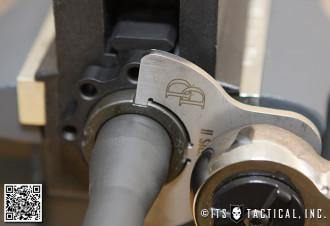
- Slide on the Rail System and mate it with the Bolt-Up Plate.
- Remove the Upper Receiver from the Upper Receiver Action Block and install the padded jaws on your vise.
- Clamp down the Rail System in the vise (bottom up) and hand tighten the two lower hex bolts (Blue Loctite optional)
- Install the remaining four hex bolts and tighten them all in an alternating fashion (Blue Loctite optional).
- *Ensure that the gas tube fits through perfectly at this point and throughout the installation*
Join us back here soon for our 4th installment in the DIY AR-15 Build (Upper Receiver) where we’ll be assembling the Front Sight Base!


Discussion