


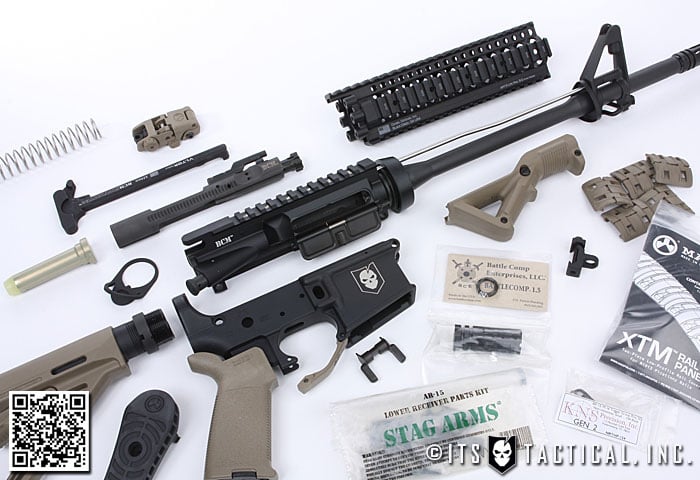
DIY AR-15 Build: Muzzle Device Installation
DIY AR-15 Build: Muzzle Device Installation
- DIY AR-15 Build: Upper Receiver Assembly Introduction
- DIY AR-15 Build: Ejection Port Cover and Forward Assist Installation
- DIY AR-15 Build: Barrel and Free-Float Rail System Installation
- DIY AR-15 Build: Front Sight Base Installation
- DIY AR-15 Build: Muzzle Device Installation
- DIY AR-15 Build – Bolt Carrier Group Installation
- DIY AR-15 Build – Welding and Checking the Headspace
- DIY AR-15 Build: Lubrication, Assembly and Firing
Today in our fifth installment of the DIY AR-15 Build Upper, we’ll be installing the Flash Hider. We won’t technically be installing a Flash Hider, but the BattleComp 1.5 Compensator.
The installation steps are virtually the same and we’ll get into detail on what the differences are between a Muzzle Brake, Flash Hider, Compensator and even a Flash Suppressor.
In lieu of the standard A2 style “Birdcage” Flash Hider, we’ll be installing the BattleComp 1.5″ Compensator to bring our barrel length to 16.1″ and comply with the National Firearms Act.
To further comply, we’ll be permanently attaching the BattleComp in an upcoming article, but first let’s walk through the installation steps. While simply threading and properly torquing the compensator might not seem like that big of a deal, we ran into an interesting issue that we wanted to share.
Let’s get into the next step in your AR-15 build!
What’s the Difference?
There are quite a few different choices out there when it comes to selecting a muzzle device, it all comes down to personal preference and what characteristic you care the most about.
Flash Hider / Suppressor
This is the standard and most likely what you’ll get when you purchase a pre-built upper or complete rifle. The purpose of a Flash Hider (also known as a Flash Suppressor) is to vent gasses away from the muzzle and disperse them.
This dispersion is to reduce the signature of the flash and with hiders that have a sealed bottom, to alleviate any dust signature. That is unless you’re going urban prone (i.e. shooting under a vehicle). While the most common muzzle device, the one thing a Flash Hider doesn’t do is control muzzle rise.
Muzzle Brake / Compensator
To control muzzle rise and recoil, a Muzzle Brake or Compensator can be used. Just as a Flash Hider vents gasses away from the muzzle, the Compensator is able to vent these gasses more efficiently, thus reducing muzzle rise and recoil.
This traditionally comes with a cost though. By reducing rise and recoil, you’re in turn increasing flash, muzzle blast and noise.
BattleComp
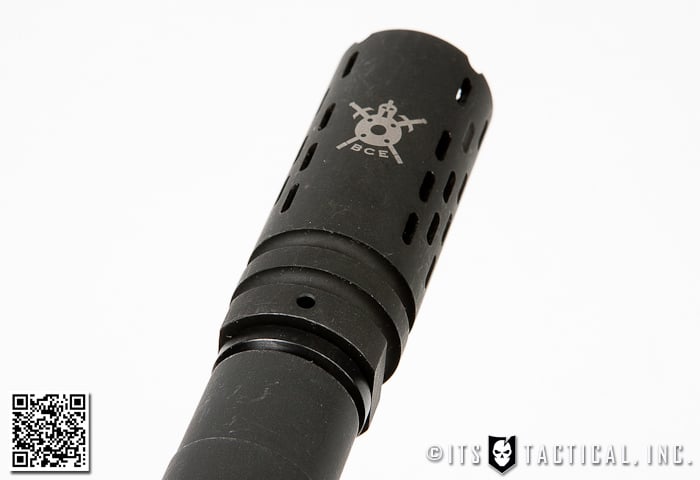
Now that you understand the traditional differences of the two types of muzzle devices, let’s talk about the BattleComp Compensator. While billed as a Compensator, it truly crosses muzzle device categories and creates a category of its own.
It’s not only efficient at controlling muzzle rise, but has no more flash than a standard A2 Flash Hider. On initial evaluation, follow up shots are quicker to acquire and didn’t appear to be any louder than the A2 Flash Hider. The BattleComp is also indexed, which means it has a sealed section at the bottom that must be lined up at the 6 o’clock position. This also decreases dirt kick-up and dust signature.
As you can see, BattleComp has really taken all the great characteristics from both hiders and brakes, yet none of the disadvantages. Are their hiders that decrease flash better and brakes that control rise better? We believer it’s possible, but from what we’ve seen, why wouldn’t you want a Compensator that gives you the best of both worlds?
Crush Washers vs. Peel Washers vs. Locking Nuts
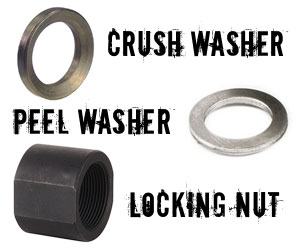 We’ll keep this simple, but there’s four different methods for attaching a muzzle device. Crush Washers, Peel Washers, Locking Nuts or nothing at all. Whether a muzzle device uses either of these will of course depend on which muzzle device you choose.
Crush Washers are designed to be “crushed” when tightened, creating the lock between the muzzle device and barrel shoulder. Something to note that is if you ever remove the muzzle device a new crush washer should be used to ensure the lock on reinstallation. For a muzzle device that doesn’t require alignment, a Crush Washer is superior.
Peel Washers are made in layers that you heat up and “peel” off to properly align a muzzle device that requires it. These can be difficult because you have to take into account the torque applied to the muzzle device into your selection on the height to “peel” the washer to. For a muzzle device that needs to be properly aligned like the BattleComp and the A2, a Peel Washer is superior.
Locking Nuts have the effect that two nuts turned opposite directions on a bolt do. They tighten against each other and lock. A Locking Nut is placed on the threaded barrel first, followed by the muzzle device. While the muzzle device is tightened down, the Locking Nut is held in place until the muzzle device reaches it and then turned in the opposite direction to lock it. These can be used in place of either Crush Washers or Peel Washers if there’s enough room (based on the muzzle device).
Pre-Crushing
Something that we ran into when installing the BattleComp 1.5 on our Bravo Company Mid-Length 14.5″ Barrel, was that at the proper torque for a muzzle device (15-20 ft. lbs.), the height of the crush washer wouldn’t allow us to align the BattleComp properly. Instead of ordering a Peel Washer, we wanted to figure out a way to use what was included with the BattleComp and demonstrate how to make it work for those that might run into the same issue.
What we came up with was pre-crushing the Crush Washer in the vise before torquing down the BattleComp. You’ll see in the video installation below that it’s not an exact science and will be a trial and error on how much to pre-crush the washer.
BattleComp gives no instructions on their Website or in the documentation they include with the 1.5 on how to install it, but here’s what’s included on their Website:
“Professional gunsmiths and certified armorers should know to use ONLY FINGER PRESSURE AND COPIOUS LUBRICATION to install a muzzle device until it touches the washer or shim, before completing the installation with the proper torque. BCE, LLC is not responsible for any damage caused by the forceful and/or improper installation of our muzzle device onto any barrel. No warranties are expressed or implied.”
What we’ve described with pre-crushing the Crush Washer is our experience and we’re not responsible for any damage that occurs as a result of your installation. When in doubt, take it to a gunsmith. However, we strongly believe that an AR is not a complicated build and should be able to be done by anyone, regardless of skill level.
This is why we created this series, to help everyone be able to enjoy a build of their own.
Parts Needed
- BattleComp 1.5 Compensator (Black Oxide)
- Crush Washer (BattleComp includes 2)
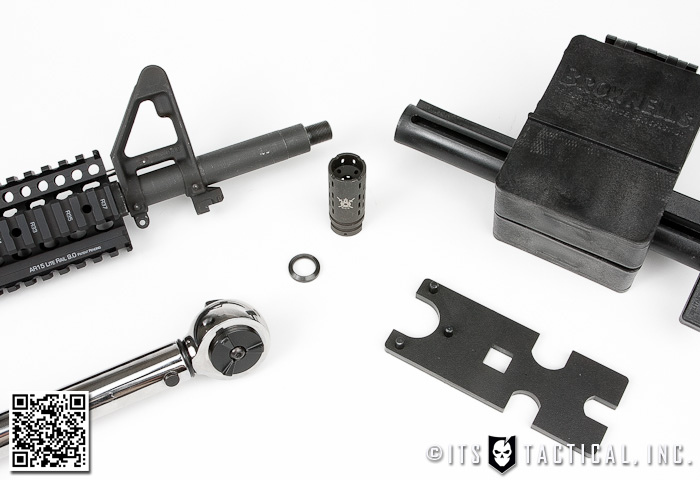
Tools Needed
- Vise
- Brownells Upper Receiver Action Block
- 1/2″ Drive Torque Wrench (capable of 20 — 100 foot pounds)
- Barrel Nut/Combination Wrench w/ 1/2″ Cut to accept Torque Wrench
Assembly Instructions
- These instructions do not describe pre-crushing the Crush Washer if needed.
- Place Upper Receiver into Action Block and into Vise.
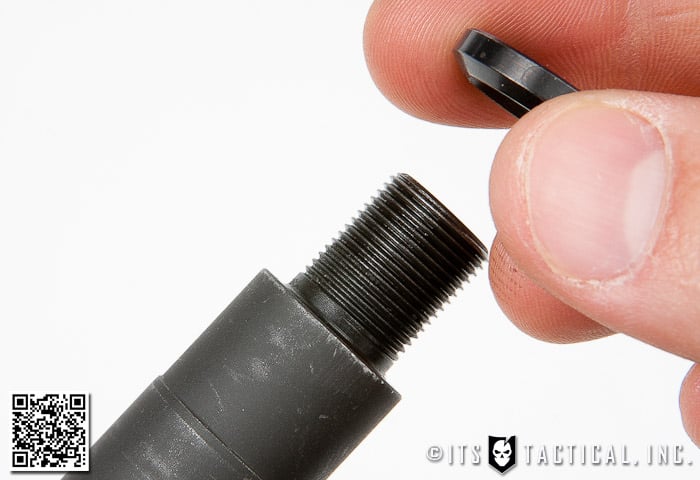
- Install the Crush Washer first, flared side to the shoulder of the barrel (see photos).
- Thread the BattleComp clockwise until finger tight against the Crush Washer.
- *BattleComps are now pre-lubed with CLP for ease of installation so no further lubrication was used*
- Proper torque for a Muzzle Device is 15 to 20 ft. lbs., start with 15 and work up.
- *The Torque Wrench we have states 20-100 ft. lbs. but is able to be dialed down to 15 ft. lbs.*
- Our BattleComp 1.5 required 22 ft. lbs. of torque to properly index the BCE Logo at the 6 o’clock position as notated on their Website.
- Once properly aligned and torqued, the BattleComp will need to be permanently affixed to bring the 14.5″ barrel to the legal 16″ length and avoid a $200 tax stamp to make an SBR (Short Barreled Rifle).
Join us back here soon for our 6th installment in the DIY AR-15 Build (Upper Receiver) where we’ll be installing the Bolt Carrier Group to complete the Upper Receiver!
Discussion