


DIY AR-15 Build: Lubrication, Assembly and Firing
DIY AR-15 Build: Lubrication, Assembly and Firing
- DIY AR-15 Build: Upper Receiver Assembly Introduction
- DIY AR-15 Build: Ejection Port Cover and Forward Assist Installation
- DIY AR-15 Build: Barrel and Free-Float Rail System Installation
- DIY AR-15 Build: Front Sight Base Installation
- DIY AR-15 Build: Muzzle Device Installation
- DIY AR-15 Build – Bolt Carrier Group Installation
- DIY AR-15 Build – Welding and Checking the Headspace
- DIY AR-15 Build: Lubrication, Assembly and Firing
Today had been a long time coming, in the past few months we’ve shown you how to take nothing but parts and turn it into a complete AR-15. Starting with our Lower Receiver assembly series and working up to the Upper Receiver assembly series, which culminates today with our final article.
In this article we’ll be going over proper lubrication, assembly, a final function check and finishing it up with firing our completed AR! Lubrication is a mandatory part of keeping your AR running and something to ensure you don’t neglect.
Lubrication
There’s a simple way to never forget what parts on your AR to lube. Lube all wear points. And by wear points, we mean that anything that visually shines from friction wear needs lube. Don’t be sparing here, your AR is a machine with many working parts and needs to be thoroughly lubed; just be smart about only lubing what truly needs it.
The lubrication we recommend is SLiP2000 EWL (Extreme Weapons Lubricant), hands down. It’s never done us wrong and if you’ve ever read Pat Rogers articles on the Bravo Company guns he’s been running for thousands and thousands of rounds without cleaning, you’re familiar with the fact that all he does is keep them properly lubed with SLiP2000.
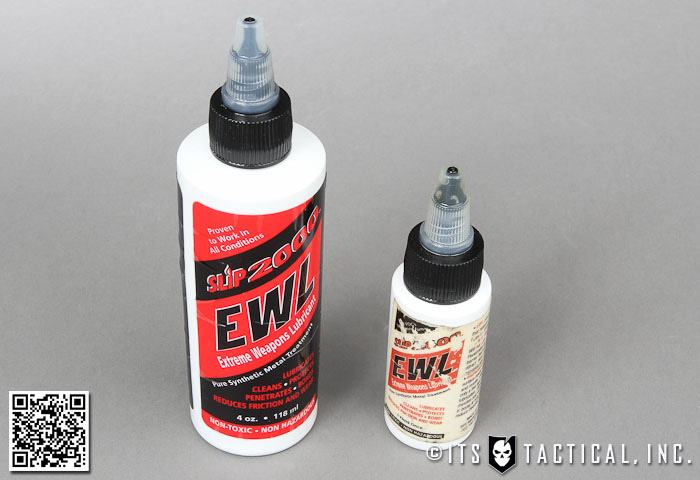
Don’t just use it because we’re mentioning it though, here’s a few facts to back up why we use SLiP2000. It’s a synthetic liquid lubricant that doesn’t contain mineral oil or petroleum. Why is this important? Petroleum-based lubricants will attract and hold firing residue, dust and dirt. SLiP2000 will also not separate, become sticky or dry out and leave any tacky residue behind.
Here’s a brief rundown of where to lube:
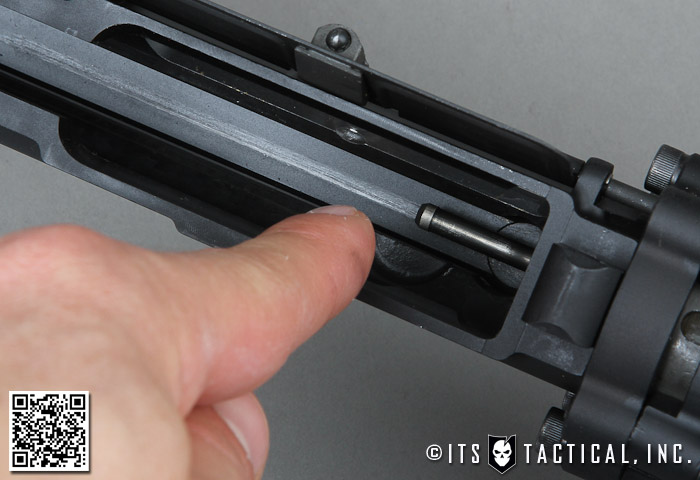
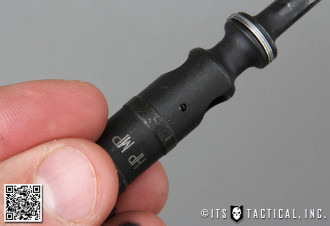
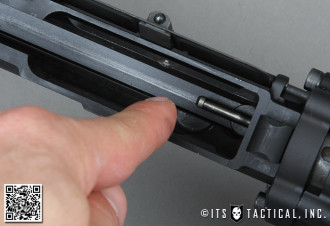
- Charging Handle Track / Top of Charging Handle
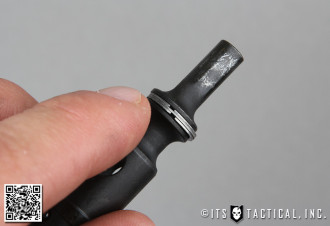
- Underside of Bolt Carrier
- Cam Pin and Cam Pin Slot
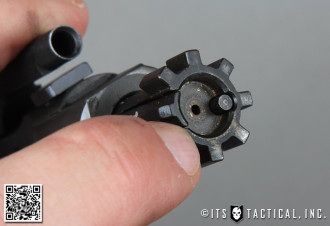
- Bolt Lugs
- Bolt Body (especially on rib)
- Gas Rings
- Drop Lube into Bolt Carrier Gas Ports (right side) during downtime on range/in the field
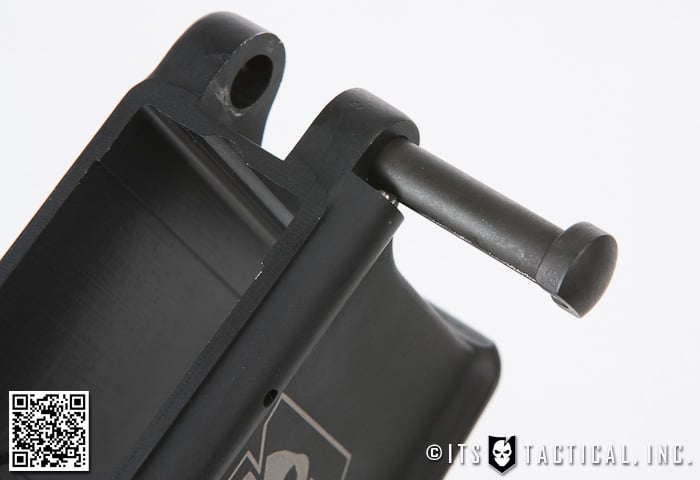
Upper and Lower Assembly
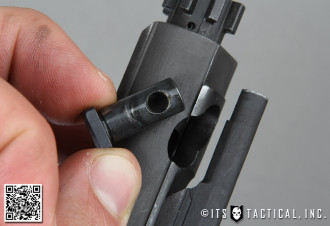
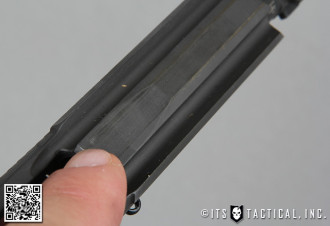
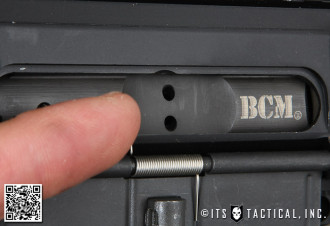
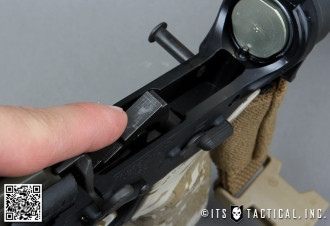
There’s not much to assembling the Upper and Lower Receivers at this point. Simply line up the front holes in the upper receiver with the Front Pivot Pin and press the pin through. Ensure the Rear Take Down Pin is extended and slide it through after bringing the upper down to mate with the lower.
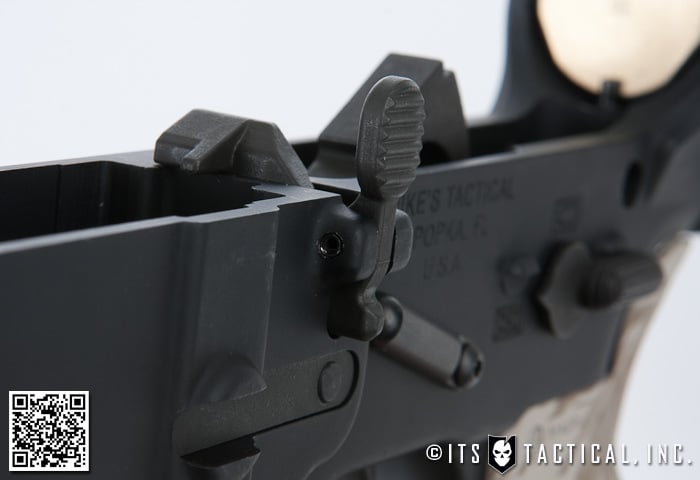
Function Check
- Perform a function check at this point by racking the Charging handle and placing the Safety Selector in the safe position.
- Squeeze the Trigger, ensuring that the Hammer doesn’t release and the Safety is doing it’s job.
- Rotate the Safety Selector to “fire” and squeeze the Trigger, hearing the Hammer fall.
- With the Trigger still pressed to the rear, rack the Charging Handle listening to the Hammer engaging the Disconnector.
- Slowly release the Trigger and you’ll hear the Hammer disengage from the Disconnector and engage the Trigger Sear. There will be an audible click.
Test Firing and AAR
There’s nothing left to do now, but inserting a magazine and follow the proper firearm safety rules to start shooting!
- Rule #1 — All guns are always loaded.
- Rule #2 — Never let the muzzle cover anything you are not willing to destroy.
- Rule #3 — Keep your finger off the trigger until your sights are on the target.
- Rule #4 — Identify your target, and what is behind it.
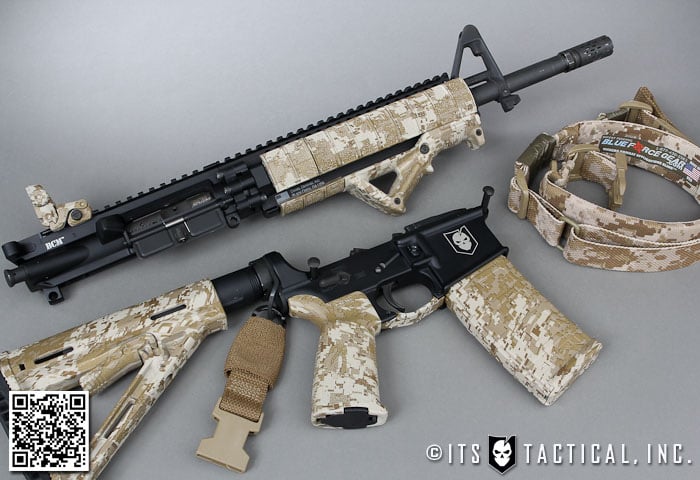
The only extra items we added to our AR-15 Build is to prep another one of our Blue Force Gear VCAS Sling Mods! Check out many other great slings too from Blue Force Gear!
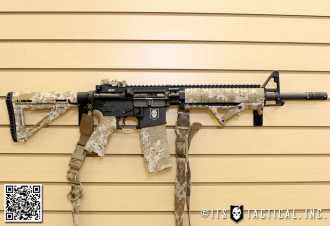
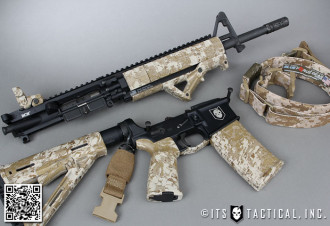
Our assembled ITS Tactical AR-15 fired without a hitch and we’re stoked that our build came together so well and were able to share each step with you! We couldn’t have done it without the support of our Plank Owners and Crew Leaders and we thank all of you!
This build was entirely funded by ITS Tactical and nothing we used was donated or sent to us for review, the parts and tools you’ve seen used are what we selected based on what we felt were the best of what’s out there! In all we spent right around $1700 without counting tools or shipping. Keep in mind this is with all the Magpul furniture and even the CRC Hydrographics Coating.
There’s obviously ways you could save money on your own build, but this is what we wanted to use on the ITS AR-15. It will also always be available for any of our Plank Owners and Crew Leaders to shoot anytime they’re in the area and want to come out shooting with us!
Stay tuned for more of our How to Keep your AR Running Series coming soon!

Discussion