


DIY AR-15 Build: Trigger Group Installation
DIY AR-15 Build: Trigger Group Installation
- DIY AR-15 Build: Introduction, Parts and Tools Required
- DIY AR-15 Build: Magazine Catch Installation
- DIY AR-15 Build: Bolt Catch Installation
- DIY AR-15 Build: Pivot Pin Installation
- DIY AR-15 Build: Trigger Group Installation
- DIY AR-15 Build: Safety Selector and Pistol Grip Installation
- DIY AR-15 Build: Trigger Guard Installation
- DIY AR-15 Build: Buttstock Installation
Today in part five of our DIY AR-15 Build you’ll learn how to install the Trigger Group in your Lower Receiver.
The trigger group is definitely something not to skimp on in terms of quality. We’ve never experienced any issues with the recommended Stag Arms Lower Parts Kit and feel confident recommending it’s components.
A failure point on the AR platform that can render your firearm unusable, is having a Hammer or Trigger Pin walk out on you. Literally.
We’ll show you how to prevent this problem as well as provide you step-by-step instructions for installing the Trigger Group.
Trigger Group Installation
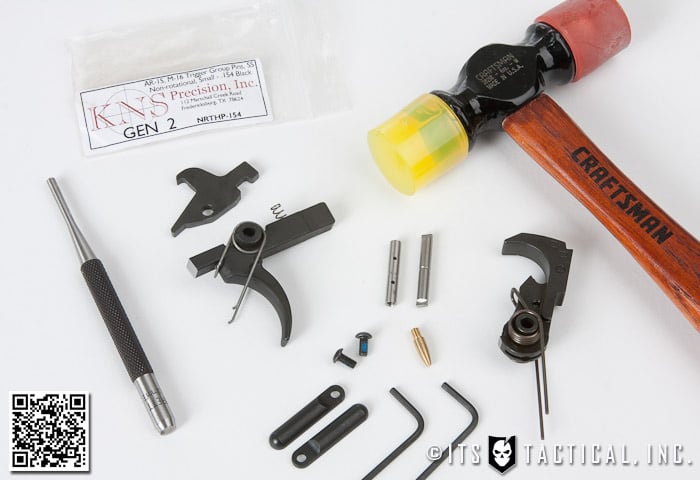
As mentioned, always use quality parts when building your Trigger Group, like the components found in the Stag Arms Lower Parts Kit. We’d also strongly recommend using a KNS Non-Rotational Roll Pin Set. The last thing you want is to lose a Hammer or Trigger Pin at an inopportune time. Namely anytime…
Replacing a Hammer/Trigger pin is certainly not a standard field repair, even though we recommend carrying extra Hammer/Trigger springs in your spare parts kit. The time it will take you to replace a pin under stress is really a no-go. You can offset this likelihood of Trigger Group problems by installing a KNS Pin Set.
There’s a few different kinds of KNS Pin Sets, so get the one that you feel will work best for you and will fit your AR. There’s two different styles and two different sizes, we’ve linked to the standard set above.
Provided the covers stay on from the KNS Pin Set, that mostly leaves your springs to contend with if you have Trigger Group trouble in the field. Not that you want to be plagued by that issue either, but the point of using good parts is to offset the infamous Mr. Murphy. The KNS Hex bolts of set also come pre-dipped in blue Loctite to help ensure they don’t back out. Witness marks help too.
Parts Needed:
- Hammer
- Trigger
- Disconnector
- Disconnector Spring
- Hammer Spring
- Trigger Spring
- KNS Non-Rotational Pin Set (Optional but encouraged)
Tools Needed:
- Bench Vise
- Lower Receiver Vise Block
- 1/8″ Punch and/or #4 Roll Pin Punch (Two punches required)
- Nylon/Brass Hammer
Assembly Instructions

- Place the lower onto the Lower Receiver Vise Block and angle it so you can see down into the lower.
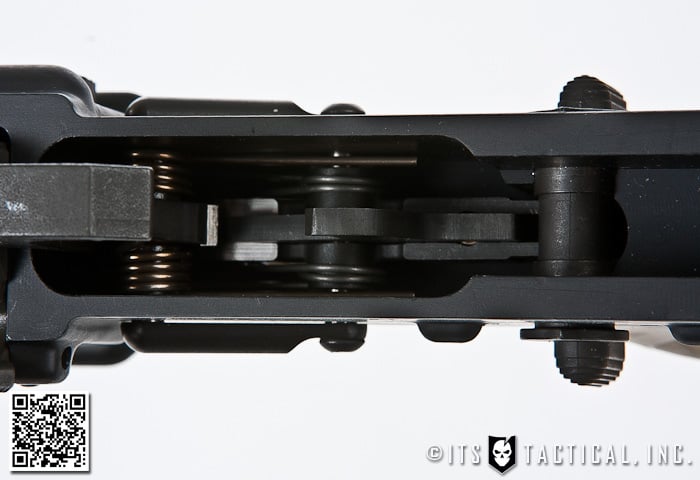
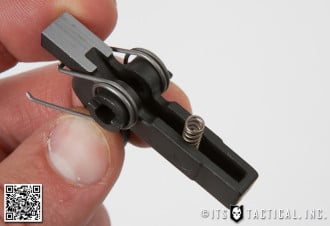
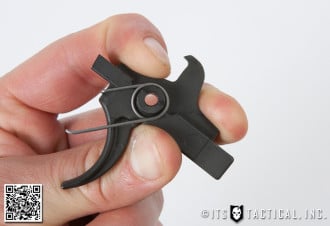
- If you’re using the Stag Arms Lower Parts Kit we’ve recommended, the Trigger, Disconnector Spring and Hammer Spring already come installed. If yours aren’t pre-attached, please refer to our photos notating the position of these springs. It’s important to note on the Disconnector Spring, that it gets inserted with the flared side down.
- Drop the Trigger, with proper springs attached, down into the trigger cutout of the Lower Receiver. Ensure the spring legs rest on top of the Lower Receiver interior and don’t get caught in the cutout for the trigger.
- Place the Disconnector in it’s proper orientation on top of the trigger and ensure the Disconnector cutout is placed over the Disconnector Spring.
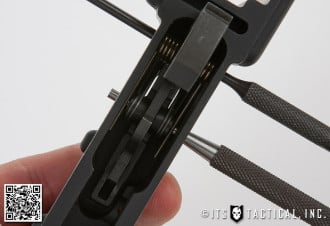
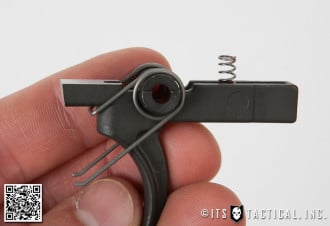
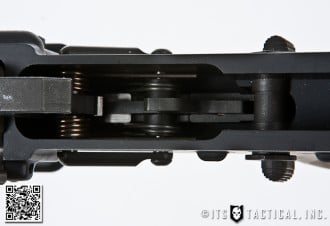
- Insert the 1/8″ punch through the Trigger Pin hole in the Lower Receiver, passing through the Disconnector as well. This will lock the Trigger and Disconnector in place.
- Using the KNS Non-Rotating Hammer/Trigger Pin Set, select the internally threaded Trigger Pin and attach the pointed tool to push out the 1/8″ punch and push in the new KNS Trigger Pin.
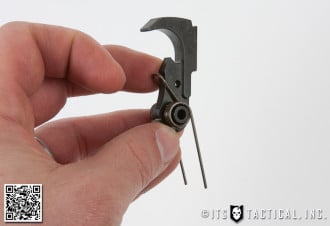
- With the Trigger installed, Place the Hammer Spring legs across the top of the Trigger Pin and bend the Hammer into place, securing it with an 1/8″ punch or #4 Roll Pin Punch.
- As with the Trigger Pin, push the punch out while simultaneously pushing the Hammer Pin in.
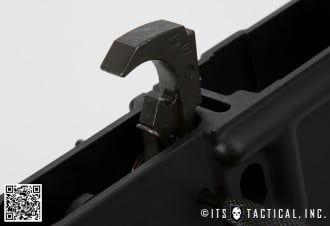
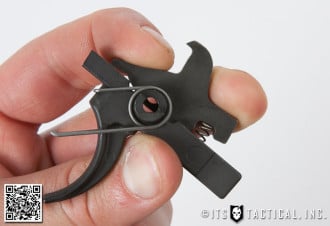
- Install the Pin Connector Covers over the flared ends of the Hammer Pin and align the threaded holes over the Trigger Pin.
- Finger tighten the Blue Locktite dipped screws and insert both included hex wrenches, turning each in opposite directions to tighten.
- A suggestion at this point is to place a witness mark on each screw to give yourself a visual indicator if these screws move.
Join us back here soon for our 6th installment in the DIY AR-15 Build where we’ll be assembling the Safety Selector and Pistol Grip!


Discussion