


ITS HQ Project: DIY AR-15 Rifle Builds
ITS HQ Project: DIY AR-15 Rifle Builds
At ITS HQ, we like to keep busy both writing articles and developing new products, but we also work on a lot of fun stuff in our personal time. To give you an inside look at what’s been going on around the ITS Office, we thought we’d show you a few of the latest projects we’ve been working on.
Bryan and Mike had plans to build a couple AR-15 rifles and just as the mail truck dropped off the last of the required parts, they got to work. While they were building two completely different rifles, most of the build process remained the same and now is the perfect time to remind you of some past articles you may find useful in building your own AR-15.
This was Mike’s first full rifle build and while Bryan has done this a few times before, both of them followed the step-by-step guide outlined in the previous article series on ITS. If you’re not familiar with the series, some time ago we put together the instructional information, complete with videos documenting each step along the way.
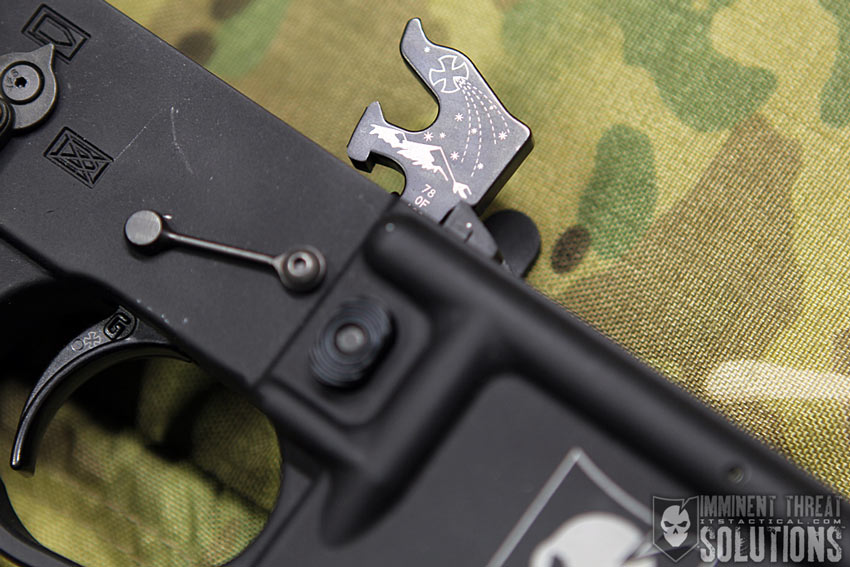
Note: You may see the ITS engraved lowers and wonder where you can pick one up. While we are working on a way of running another batch of these for our members, those particular lower receivers aren’t available anymore and were offered as a special offer to ITS Plank Owners and Crew Leaders back in 2011.
Bryan’s Rifle and Parts List
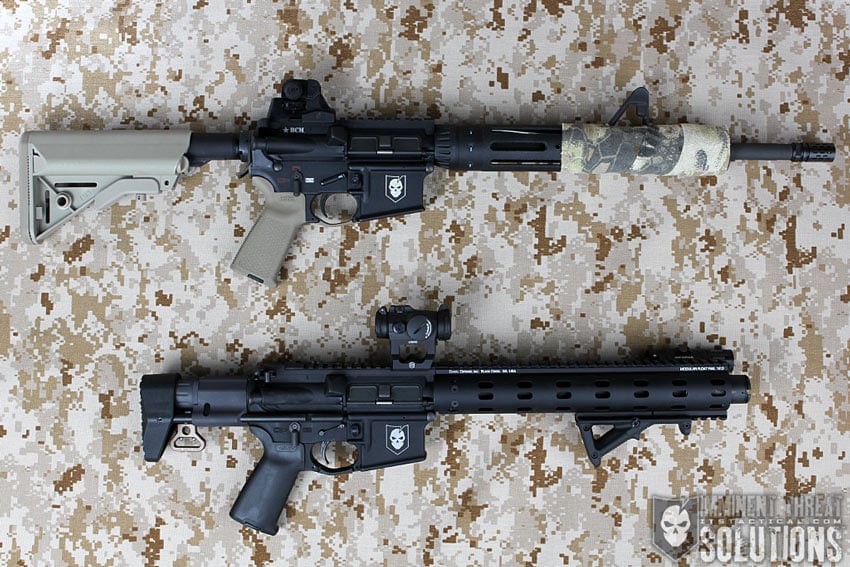
I’ve been wanting to assemble a .300 Blackout rifle for some time now and have been slowly gathering the parts necessary. The .300 platform has always interested me, but it’s only been in the last few years that more companies have built dedicated barrels and parts specifically for the platform. I’m not saying that it wasn’t possible before, but it’s certainly easier than ever right now. I first shot a .300 rifle many years back that my friend Gary had put together.
Using sub-sonic ammunition that he hand loaded, I was amazed at how quiet it was combined with the SilencerCo Osprey 9mm. As many of you might know, a 9mm suppressor can accept the .300 blackout round if the manufacturer specifies the compatibility. While my purpose was to utilize the SilencerCo Osprey 9 I have for this build, I wanted to “tuck” the suppressor into the rail system for a streamlined look. Due to the polygonal shape of the Osprey, this presented a challenge and I’ve since decided to save up for a SilencerCo Saker 7.62 or their newly released Omega.
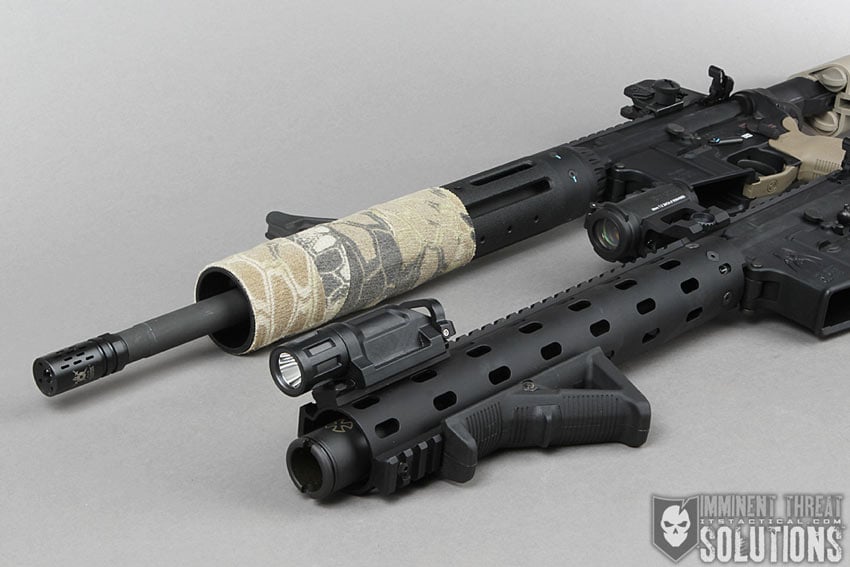
Not wanting to hold up my build, I went with the Noveske KX5 Flash Suppressor inside of a Daniel Defense Modular Float Rail 12.0 to take advantage of the Noveske system on the short 10.3″ Daniel Defense 300BLK barrel. The KX5 is based on the KX3, often called the Pig, which can help direct muzzle blast, gas, flash and even noise down range. Being that this build is a SBR (short barreled rifle) it did require at Form 1 filed with the ATF and a $200 tax stamp. Here’s a past article on considerations for building an SBR if you’re interested in learning more. I’ll add that for those interested in trusts, you might want to take a look at the new NFA EasyTrust that SilencerCo has started offering.
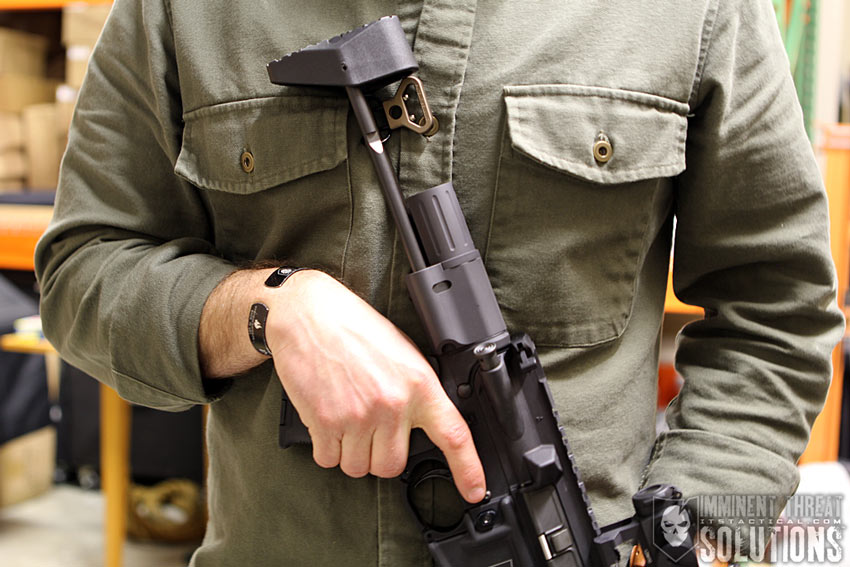
I’d also been itching to try out a build with the NEA CCS (North Eastern Arms Compact Carbine Stock) to make a PDW (personal defense weapon) and although pricey, I really liked the compactness. Not being available at the time from anywhere else than Canada, I experienced the agony of dealing with a Form 6 to import an Implement of War into the US. I’ll save that story for another article, but they’re now available for purchase through Brownells in the US, but you might want to hold off on that purchase though until you read my lessons learned below.
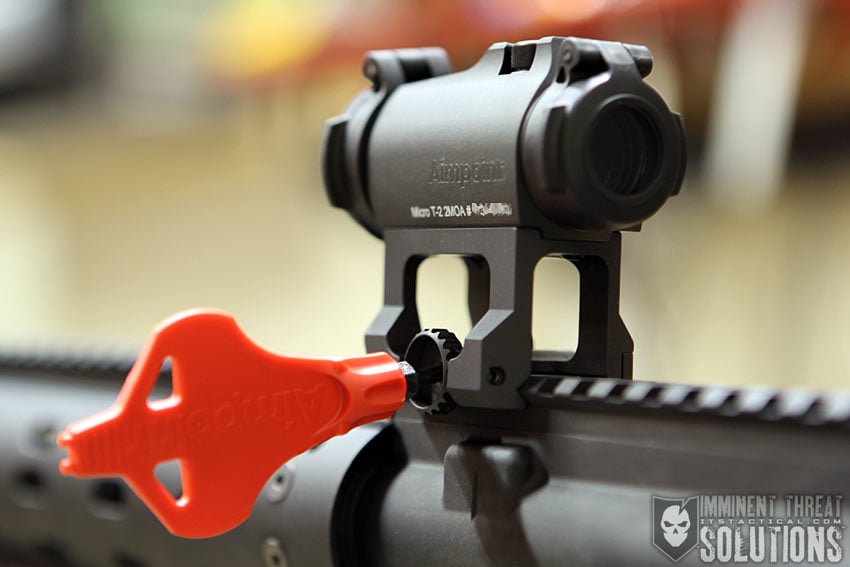
For optics, I recently purchased the new Aimpoint Micro T-2, which as an owner of the T-1, I’m very excited about the improvements made to the system. I’m also very fond of the Scalarworks LDM/Micro Mount for the T-2, it’s a bare-bones, lightweight option that uses a quick-detach thumbscrew for easy removal and return to zero. You can also use the Aimpoint tool to tighten it down even further. Scalarworks is owned by one of our ITS Plank Owners and I’m proud to support his company. I’ve considered getting some back up iron sights too, but haven’t made up my mind on what I want to use yet. For light mounting, I appreciate the offset position option of rail pieces on the Daniel Defense Modular Float Rail. They’ve enabled me to mount an Inforce WML weapon light at just the right location I prefer.
- Spikes Tactical Forged Lower
- Stag Arms Lower Parts Kit – Right Hand Selector
- Stag Arms Ambi Safety Selector
- Geissele SSF Noveske Memorial Trigger (limited to 100 and no longer available)
- KNS Non-Rotating Pin Set (Gen 2 Mod 2)
- BCM Upper Receiver Assembly
- Daniel Defense 300 BLK Barrel
- Daniel Defense Modular Float Rail 12.0
- BCM Low-Profile Gas Block (.750)
- Pistol Length Gas Tube
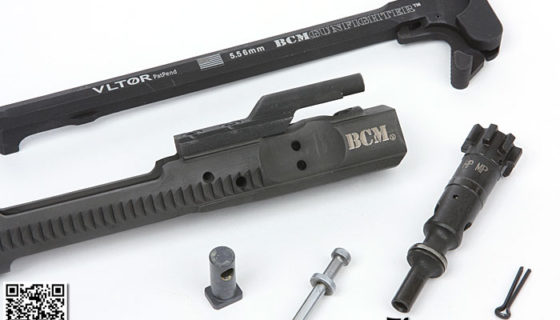
- BCM Ambidextrous Charging Handle Mod A44
- NEA CCS (stock)
- BCM Bolt Assembly (bolt required for NEA Bolt Carrier Group)
- Magpul MOE+ Grip
- Magpul AFG 2
- Magpul Enhanced Trigger Guard
- Aimpoint Micro T-2
- Scalarworks LDM/Micro Mount (for Aimpoint T2)
- Inforce WML Weapon Light
- Blue Force Gear Universal Wire Loop Sling Mount w/ RED Swivel
- Blue Force Gear VCAS Sling
- Impact Weapons Components Mount-N-Slot Offset QD Mount
Lessons Learned in the Build
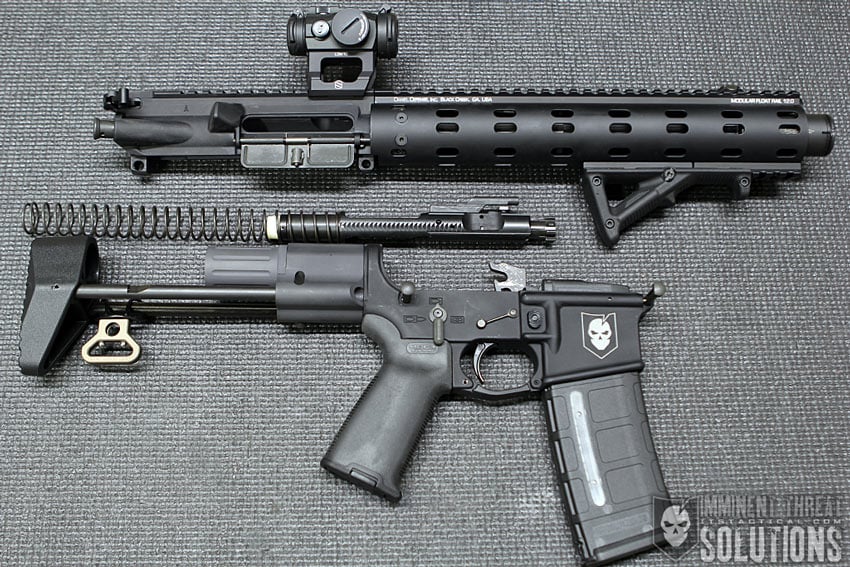
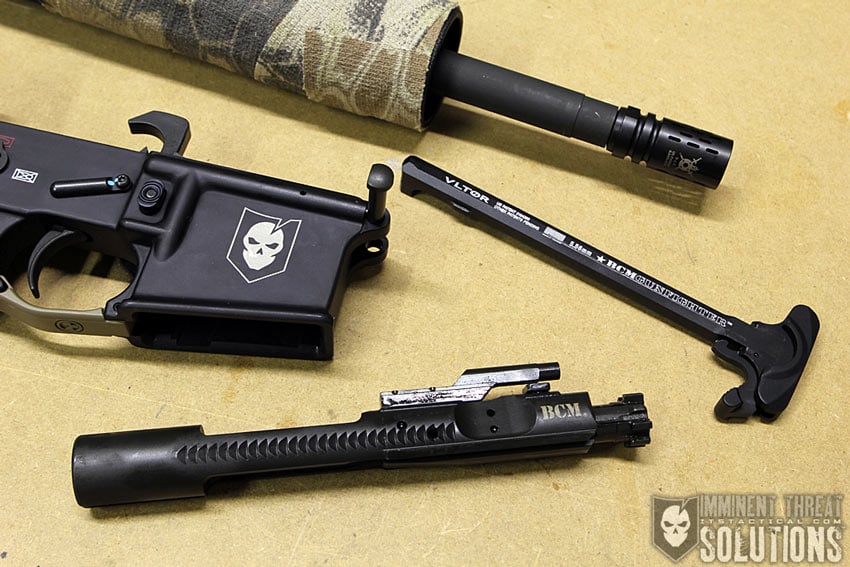
I’ll address the elephant in the room first, the NEA Stock. I have quite a few things to say thus far about the NEA and my experience with it during installation. First and foremost, most of my Magpul PMAGs won’t insert on a closed bolt due to what I assume is potentially an out-of-spec bolt carrier group. If I lock the bolt to the rear, insert a PMAG (which does insert if the bolt is to the rear) and drop the bolt release, the carrier gets stuck on the feed lips of my PMAGs. I’ve never had that issue with any other gun I’ve assembled. On inspection, it’s hard to tell exactly what might be out of spec with the carrier, but I have confirmed it works correctly with the USGI Aluminum Mags I have.

Brownells does carry the NEA Stock and as I mentioned earlier, mine was imported from Canada, where it was manufactured and NEA is based. My hope is that Brownells has addressed this issue and the bolt carriers on the stocks they’re selling have been modified or at least tested. This is what I sincerely appreciate about buying a Bolt Carrier from Bravo Company, each one is tested and you can see that they’re tested upon opening them. My wish is that NEA would have taken this QC step before shipping. Needless to say I’m left with bolt carrier that only functions with a few of my magazines and has caused me look elsewhere. Troy carries a similar option called the M7A1 PDW stock, but it’s more expensive and still utilizes the same one-piece bolt carrier/buffer design of the NEA CCS that I don’t particularly care for. It, like the NEA, requires the complete takedown of the upper receiver to service, versus the traditional method of just dropping the rear takedown pin to access the AR internals.
My searching brought me to the MVB ARC Stock, which is similar to the NEA Stock but features the ability to lock the stock in both the closed and extended positions. It also uses a superior buffer system (in my opinion) and features a more user friendly push button release location. The main selling point is that it allows the end-user to use their own bolt carrier group of choice. I have a MVB ARC on backorder currently, so my information is based on what I’ve researched thus far, but I’m optimistic this is going to work out perfectly.
Other than the issue with the NEA Stock, the rest of my build has been pretty straightforward. There was, however, my mixup in thinking I needed a carbine-length gas tube, only to find out I needed a pistol-length gas tube instead. That was my mistake for not reading the additional information on the BCM product page under the part that said “Gas System: Pistol Length.” Lesson learned!
Mike’s Rifle and Parts List
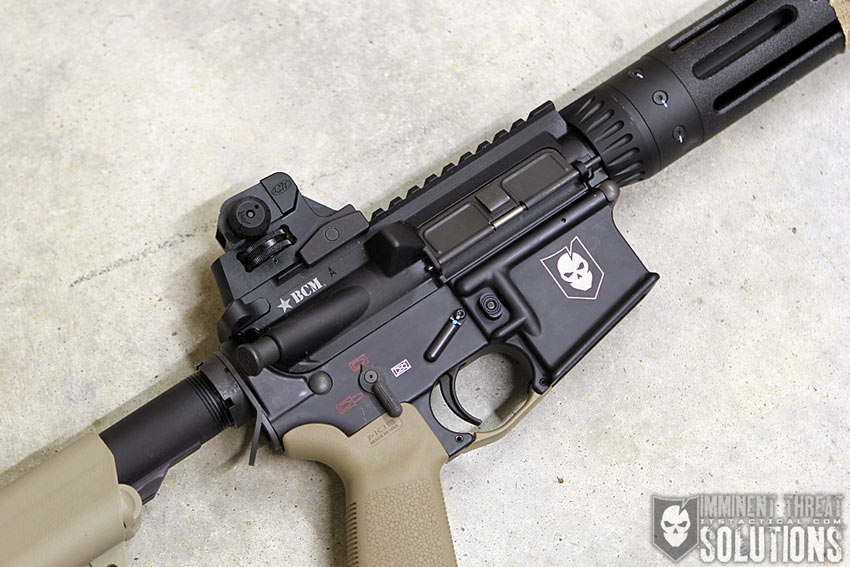
While wanting to build something fairly simple in appearance yet fully functional, I started to look around at the options available. The biggest difference between my rifle and others is that instead of the common quad rail or even the new KeyMod setup, I went for a hand guard a little more unusual than the rest. I actually got the overall inspiration from friend and ITS contributor, Eric and his duty rifle.
Through the quality components I selected, I was able to walk the line of building on a budget and still assembling a rifle that will last a long time. There’s nothing unique or proprietary about this build, yet as my first one, I’m thrilled with how things turned out.
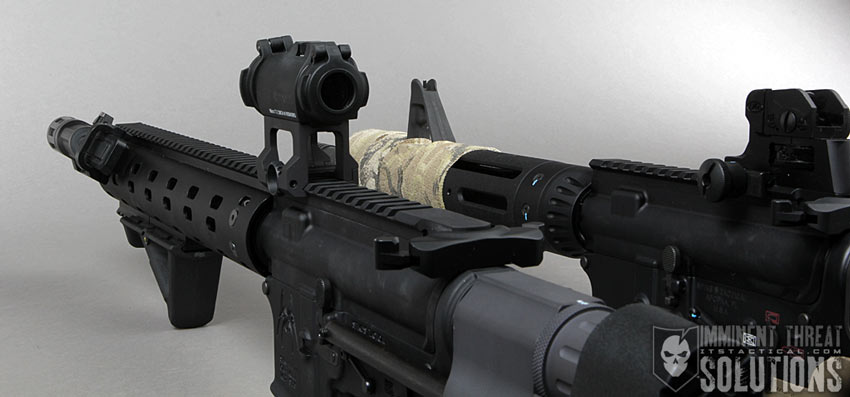
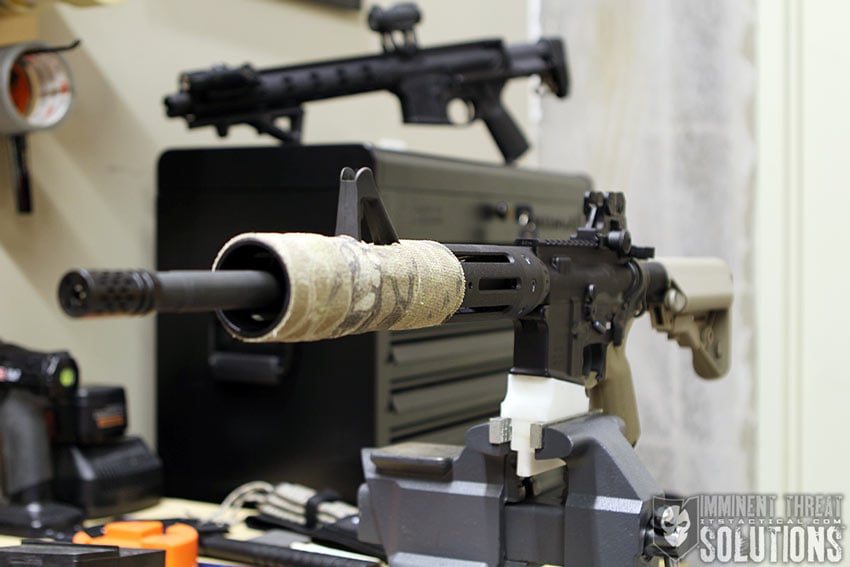
For now I have a few wraps of Camo Form on the hand guard as an inexpensive way to aid in grip and heat reduction. The JP Modular Hand Guard System allows me to attach picatinny rail sections in a multitude of positions around the barrel. When I decide to add accessories (aka when my wallet allows), I’ll remove the Camo Form, drop in the rail sections where necessary and then re-wrap.
Some may call me crazy but one of my favorite things on this rifle is the fact that it’s a 16″ barrel with a carbine-length gas system, utilizing a standard A2 front sight. I really love the look of the front sight “poking up” through the hand guard. I also decided to get a rock solid rear iron sight because I plan on running this without an optic for awhile and want the chance of these sights moving to be pretty slim.
- Spikes Tactical Blank Stripped Lower
- Stag Arms Lower Parts Kit – Right Hand Selector
- Stag Arms Ambi Safety Selector
- KNS Non-Rotating Pin Set
- BCM Standard 16″ M4 (SOCOM) Upper Receiver Group (Included BCM Bolt Carrier Group and Mod 0 compensator)
- BattleComp 1.0 Black Oxide (used ITS Member 15% off discount code)
- BCM Charging Handle Mod 4
- JP Modular Hand Guard System (JPHG-4M and JPHG-EXT)
- Kryptek Highlander Camo Form Wrap
- LMT Tactical Rear Sight
- B5 Enhanced SOPMOD Stock
- BCM Stock Hardware Mounting Kit (with H1 buffer)
- IKICKHIPPIES SLAP [Sling Loop Ambidextrous Plate]
Lessons Learned in the Build
It seems that on every project, there’s always something that sneaks up unnoticed. Sometimes it’s big and sometimes it’s small, but what I was most shocked about in this case is the interesting method of mounting the hand guard. Basically, you have to Red Loctite the outer receiver nut to the upper receiver so it’s secure enough to properly torque the inner barrel retainer nut. If you know anything about Loctite, the red version is darn near permanent. Luckily, JP Enterprises mentions that you can heat up the area with a torch and the Loctite will turn into a powder if you need to make future changes. Even with that knowledge, it threw us off during the install process and the Loctite curing time meant that the build was a two day affair minimum.
Want More AR-15 Awesomeness?
- How To Keep Your AR Running, Part 1: AR History
- How to Keep Your AR Running, Part 2: Nomenclature and Cycle of Operation
- How to Keep Your AR Running, Part 3: Limited Technical Inspection
- AR-15 Spare Parts Organization Schematic for the Obsessive Compulsive
Are you building a rifle? We want to see it! Be sure to share a comment and photo of what you’re currently working on.

Discussion