


How I Survived the 2017 Mammoth Sniper Challenge
How I Survived the 2017 Mammoth Sniper Challenge
As I sit here thawing, mere hours after successfully completing the Tough Man Division of the 2017 Mammoth Sniper Challenge, I slowly realize just what it means to have survived.
With around 54 hours of exposure in freak Kentucky weather that went from a forecasted low of 14˚F, to an actual low of -2˚F on our last morning, survival was definitely what it turned into.
The true challenge for me personally during the event was balancing the mental obstacles of the shooting stages while shivering, trying to practice marksmanship fundamentals while not being able to feel my hands, staying warm enough during periods of non-activity by adding layers and then stripping those layers with a few minutes notice to ruck under a 19 minute-per-mile pace to the next shooting stage.
Mammoth Sniper Challenge Explained
The 2017 Mammoth Sniper Challenge is a 3-day precision rifle shooting competition designed to test your shooting capabilities, physical capabilities and in turn, your mental capabilities.
This year’s event took place at the Rock Castle Shooting Center in glorious Park City, KY. It’s a beautiful area located within close proximity to Mammoth Cave National Park and coincidentally, a short drive from the Bourbon capital of the world, Bardstown. I may or may not have had a flask of Willett Reserve Bourbon in my ruck during the event.
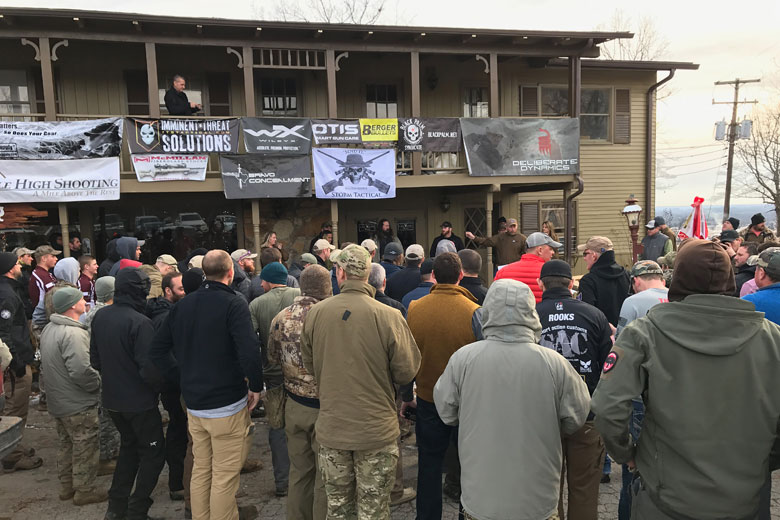
The website description of just what you’ll encounter at the Mammoth Sniper Challenge is vague, which I gather is by design in the same way that Joe Harris, Match Director and Course Designer, continues to refine and challenge participants in new and sinister ways year after year.
According to Joe, this was the coldest it’s ever been in the 7 years and 8th running of the event and it obviously wasn’t expected. During the wrap-up presentation at the event’s conclusion, Joe said that he purposely made the legs of the rucks (which ranged from a little over a mile and up to just over 4 miles) harder by ensuring each had plenty of uphills and downhills. Our squad covered a total of 31.4 miles in distance during the multiple rucks throughout the event.
Divisions
The Mammoth Sniper Challenge featured 11 stages that each presented unique physical challenges, in addition to the challenges of shooting the actual course of fire. While the Tough Man Division that I competed in is what I’ll be outlining moving forward, I do want to quickly address the other divisions and the differences.
This year, a Regular Division was added to nearly replace the Open Division of last year. The Regular Division was for everyone that didn’t want the challenge of camping out and the decreased time limit of 19 minutes-per-mile during the rucks. They were still required to ruck to each stage like the Tough Man Division was, but they had 22 minutes-per-mile to cover the same distance, didn’t have to carry a tent, only needed to take the ammo and food they’d need for the day and could head back to a warm bed each night.
The Open Division was limited this year to those that had a legitimate medical reason for not being able to walk the course with the Regular Division. Last year it was just the Tough Man Division and Open Division, leaving the open guys to drive their vehicles to each stage. This was pretty much eliminated this year, as there were only 6 open teams vs. 25 regular teams and 43 tough man teams. 148 total competitors including the RO teams.
While Joe and his trusted advisors design each stage at Mammoth, they do a good job ensuring that their expectations are still realistic by running their ROs (Range Officers who run each stage during the event) through the entire course earlier in the week leading up to the event kick-off.
The ROs compete in whichever division they want to, whether it be Tough Man or Regular and then get put through the exact same rucks and stages that we do during the event. The ROs are obviously needed to run the stages and can’t compete at the same time, thus are run through the event prior. Their scores are then ranked amongst us in the final score sheet to determine team standing at the conclusion.
Within the Tough Man Division, the differences other than the decreased time limit and camping out, were that once the event began on Friday morning, you were required to take everything you’d need with you in your pack for the duration of the event. Gun, ammunition, clothing, tent, food, etc.
However, there was one exception to this. There was a trailer that would pull into camp each night and the tough man teams got to choose whether we wanted the trailer to hold their tent or a small cooler (limited to 14” x 10” x 12”) of food. We opted for the tent, as we determined that our food would get lighter as we ate it and the tent would stay the same weight for the entire event. Yay logic!
One last thing I’ll mention here is that if a tough man team didn’t make the time hack for a ruck, they dropped down in ranking despite their final score. I’ll explain how teams were scored in the next section, but what this meant was that if a team successfully came in under the 19 minute-per-mile hack for the entire event, yet scored lower overall than a team that didn’t make the time, they would come in above them in the overall ranking. The order of finish determined when you visited the prize table at the end as well.
Team Rules
During the Mammoth Sniper Challenge, each team is limited to two people, a primary shooter and a secondary shooter. The primary was allowed to shoot something as small as a .223 or up to a .300 Win Mag. There was also a maximum allowed projectile of 200 grains and a max velocity of 3200 fps. The secondary shooter was only allowed the option of shooting a .223 or a .308 caliber.
Target sizes in the event were 1/2 MOA to 3 MOA and engagement distance was described as very close and out to 1100 yards. We did see a stage with a target out to 1030 yards and as close as 178 yards.
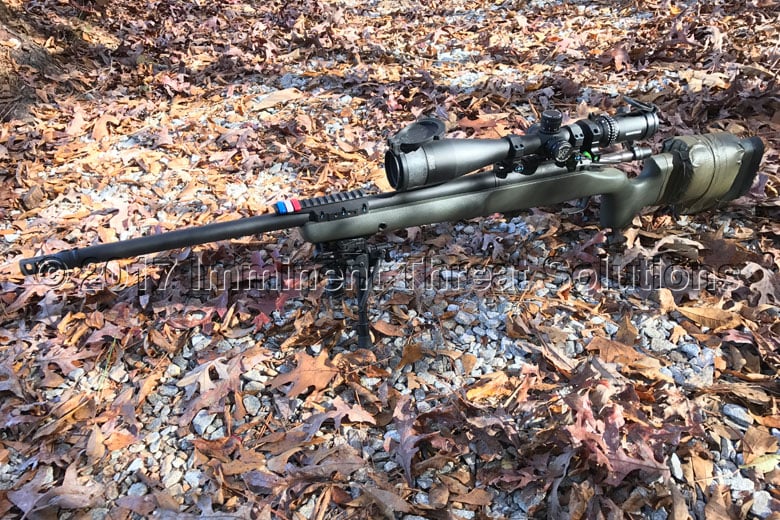
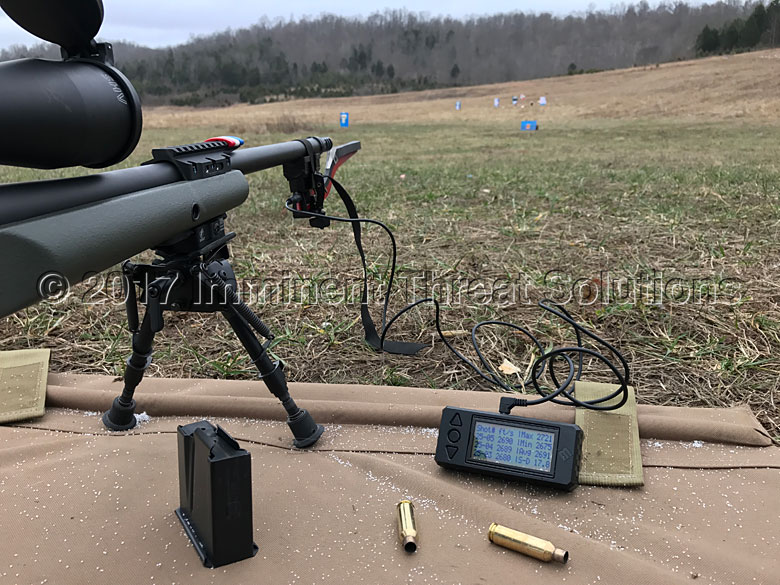
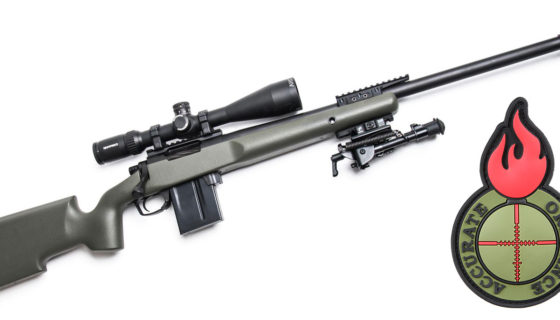
My shooting partner, JB, utilized a Knights Armament SR-15 LPR (lightweight precision rifle) MOD 2 with a U.S. Optics MR-10 MIL, shooting Black Hills 77 grain 5.56mm as his secondary shooting platform. As primary shooter, I ran a custom built Accurate Ordnance 6.5 Creedmoor with a Rock Creek 24″ 1:8 Twist Barrel, custom Accurate Ordnance Stiller Action w/ 20 MOA base, Timney Thin Shoe Trigger, Grayboe Renegade Stock, Badger M5 Enhanced Bottom Metal, Badger EFR and Nightforce SHV 4-14×50 F1 with Badger .885 Scope Rings. I was shooting Hornady 140g ELD (extreme long distance) Match ammo.
My build from AO performed phenomenally at Mammoth and I couldn’t be happier with the quality and precision that Mark and the crew from Accurate Ordnance put into it. If you’ve been following along with our Gear Tasting series, you’ve seen the gun’s progress during the build. I recently had the chance to visit AO and look forward to putting the finishing touches on an article I’m working on that will go through the entire build. Look for that soon!
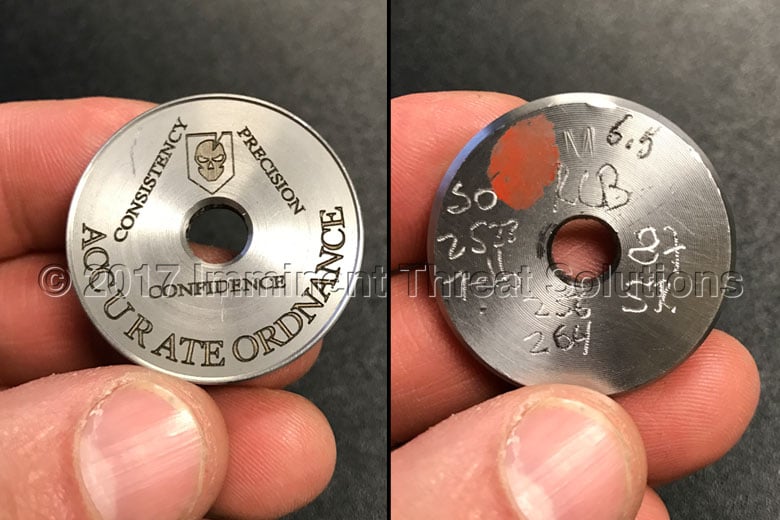
On a side note, when I was at AO, Mark presented me with the coolest Challenge Coin I’ve ever received. It was the end of the barrel blank from my rifle that they’d turned into a coin and added the ITS logo to. I carried it in my pocket at Mammoth for good luck and it definitely did its job.
The ammunition we carried was a conscious decision that was based on prior experience at Mammoth, weight constraints and the match specifics. These match specs dictated that the primary shooter would engage 50-60 targets with no more than 4 rounds per target and the secondary shooter would engage 40-50 targets with the same round count per target. Quick math on that equals up to 240 rounds for primary and 200 for secondary. Last year during the event, I didn’t get off more than 70 rounds, so the 90 I elected to carry seemed like a good mark. I’ve only been shooting precision rifle for around two years now and I know my own personal limitations based on experience and how challenging the stages are at Mammoth. JB carried 140 rounds of 5.56 mm.
As you see from weight notes along the way in this article, 90 rounds of the Hornady 6.5C ammo I carried was already 4.42 lbs. and that was the repackaged weight when removed from the boxes and holders. Just to put that in perspective, each round weighed .787 ounces, putting the max of 240 rounds at 11.8 lbs. No thank you. Spoiler alert, I only wound up shooting 73 rounds the entire event. Just like food getting lighter as you eat it, ammo does get lighter as you fire it and leave your brass. We had no time at all to pick up brass, which may shock reloaders.
 One last thing about the teams at Mammoth. Each two-man team was put into a squad and squads consisted of around 10 teams. Each squad moved to a separate shooting stage, meaning there was never a squad waiting on another to shoot before they could start a stage.
However, often a squad would have to wait to begin their movement to the next stage until another squad from a different stage finished their course of fire. This was for safety reasons, as courses of fire often crossed the roads we rucked on.
The entire squad would start each ruck movement together and the winning squad of each ruck movement would determine the shooting order that the rest of the squad would shoot in. This was very advantageous for myself and JB, as we came in first in all but one of the rucks. This meant we could position ourselves in 4th or 5th place out of ten teams to not be rushed to start shooting and not be last to have to change out to ruck shortly after the last team finished shooting. More on this later in the article.
Stages and Courses of Fire
The stages were broken down into 6 long stages and 4 short stages, with one of the longer stages actually being two stages. This is a bit confusing, but in all there were 11 total stages a team earned points in. Points were awarded based on difficulty of a target, some were 1 point to engage and some were up to 3 points. One stage even had a 2x multiplier if a certain shooting position was used. To earn points meant you hit a target and all targets were steel. Now, I say a point value was awarded if you hit a target, but if you weren’t following the previously described directions for the stage, it might not count.
To elaborate, each stage had a stage brief as soon as our squad arrived. This was typically a hurry up and grab your notepad, pencil (FYI: pens froze) and spotting scope to get ready for the stage brief. Other times we sat around getting cold waiting for our stage brief, more of the latter though.
The RO for the stage would explain the rules for the stage and give us the location and distances to the targets. At least three stages (that I remember) were unknown distance stages, which meant we had to also use a laser range finder during our turn shooting, to range the targets. One stage was blind, meaning we didn’t even see what we were shooting at before our time started.
After the stage brief, which was very quick and as a match rule, never repeated during the initial brief, we started a five-minute period for questions. You could then ask for the RO to repeat something you missed during the stage brief or for clarification on where a target was, etc. In all the stage brief and question period was a total of around 10 minutes. Immediately at the conclusion of this, the first team up had to approach and prepare to start. You can now see how picking the shooting order and not putting yourself first to shoot is advantageous. It gives you time to discuss the plan of attack with your shooting partner and fill out any range cards needed, etc.
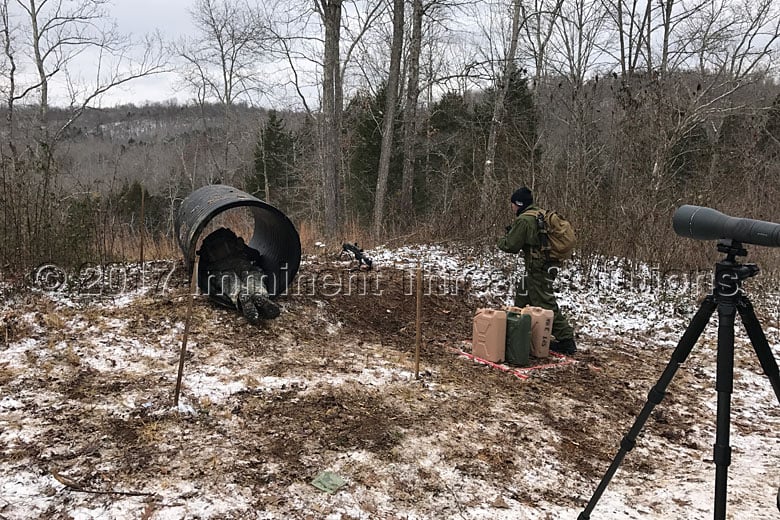
Each long stage, from what I remember, had a time limit of 8 minutes. The shorter stages were 4 minutes. If you think you’ve got a handle on non-standard shooting positions, you’ve never been to Mammoth. The stages are crazy and there were times we were shooting while sitting on a pipe, laying down inside a pipe, pushing a pipe, pushing a huge spool, climbing up and over a tree, shooting on top of an A-frame structure, shooting from a swing, shooting out of the back of an SUV like a trunk monkey, carrying full 5-gallon water cans and everything in between, short of standing on our heads while shooting.
While the primary shooter most often shot first, occasionally (when give the choice) it was better for the secondary to engage his targets first, depending on the course of fire. This was a delicate balance, as the time limit still needed to be split with the primary and secondary shooters and it was up to the team to track this time and split it.
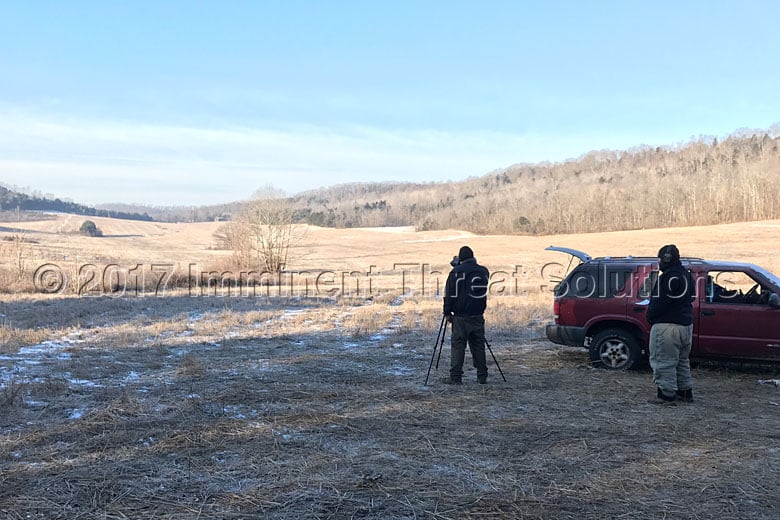
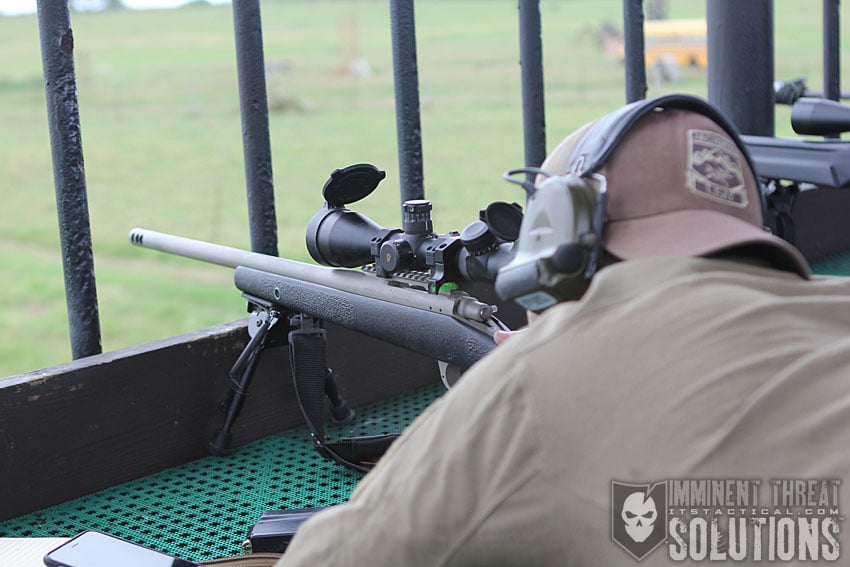
During the stage briefs were some of the coldest moments of the event, outside the stationary waiting. My hands nearly froze to the point of being unable to function while writing notes and holding up the spotting scope to acquire the targets we’d shoot. We had a tripod, but elected not to mess with it for sake of time during the stage briefs and opted to spot for each other through our scopes while shooting the stages. This worked well for us, but the alternative worked for many teams as well.
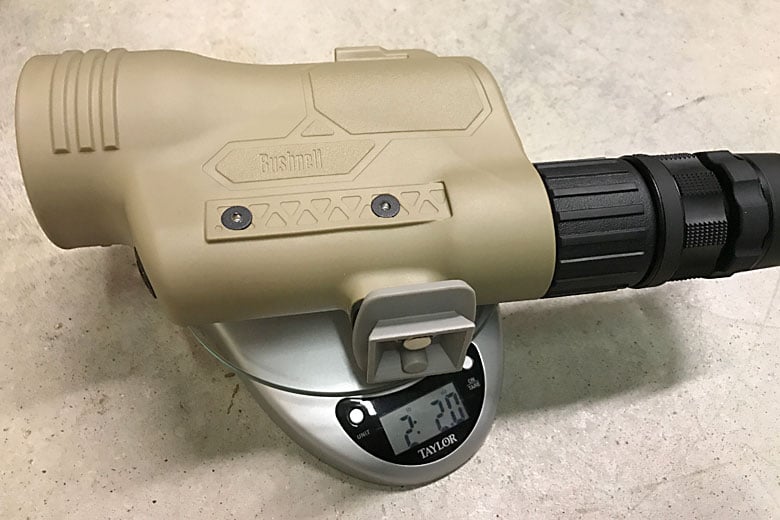
In hindsight, we felt it might have been better to have left the tripod at home and only taken a spotting scope and a good pair of lightweight binoculars. It would have been advantageous for both primary and secondary to identify targets simultaneously during the stage brief and not have had to take turns looking through the spotting scope. We brought a Bushnell Legend T-Series Spotting Scope that I removed all the rails from to make it lighter. I also modified the lens caps with dummy cord so we wouldn’t risk losing them.
We opted to only take one of the Rifles Only Slap Data Card holders, which we used to store the DOPE (data on previous engagements) for both primary and secondary shooters on each stage. We’d take turns calling the range for targets, each other’s DOPE for the targets engaged, or some combination of those. We worked well as a team on each stage and typically had a good idea of our elapsed time and when to stop and allow the secondary to shoot. This was an area we wanted to improve upon this year and we were successful in that.
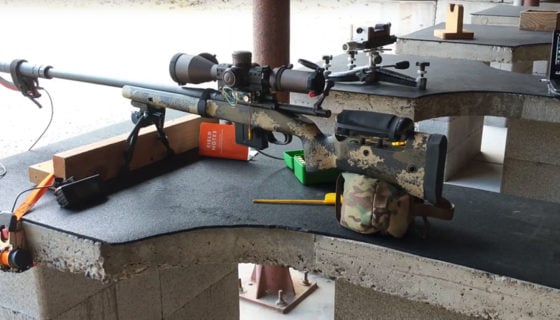
To speak a little more to DOPE, the day before Mammoth begins is the check-in day, where you’re given your squad assignments and are then able to visit the zero range to zero your gun. I wound up using a Magnetospeed Chronograph there to recheck my muzzle velocity, as well as my zero. I also updated the environmentals and took a reading with my Kestrel Elite Weather Meter with Applied Ballistics software, which I’d use to build a DOPE Card just in case my Kestrel went down during the event. It never had any issues during the event and worked like a charm.
One last point I’d like to make about these stages is that they’re not perfect. The shooting positions aren’t perfect, it can be hard to identify targets, downright impossible to remember order at some stages, the timelines suck and adding the freezing temps on top of those variables while maintaining shooting fundamentals is incredibly challenging. It’s a great time though, seriously!
Rucking
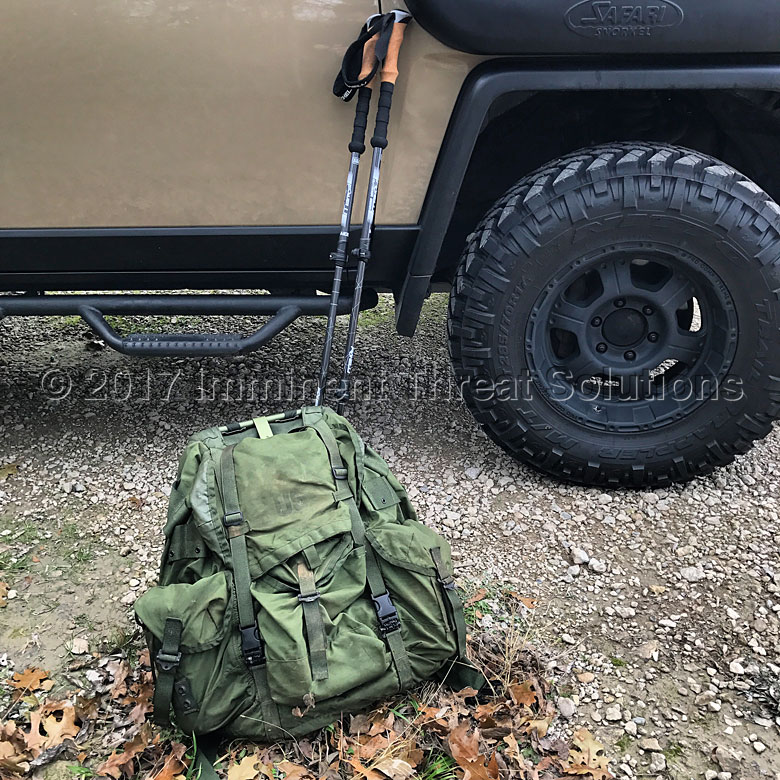
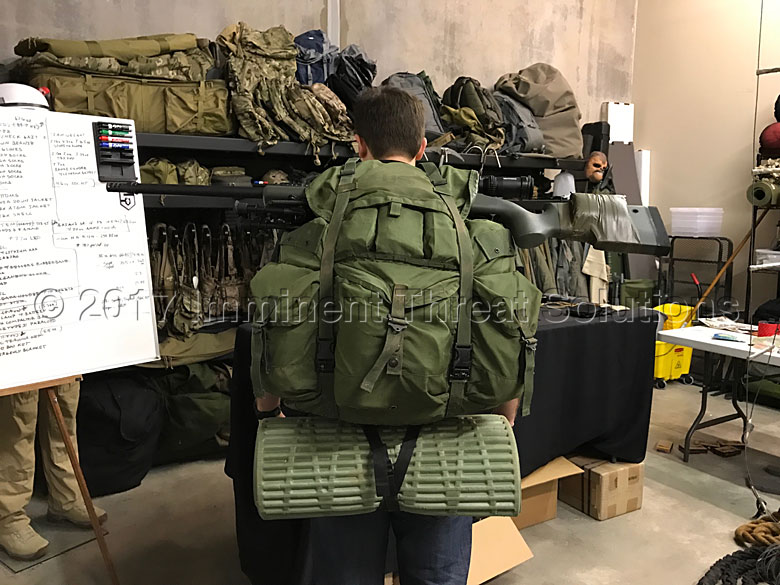
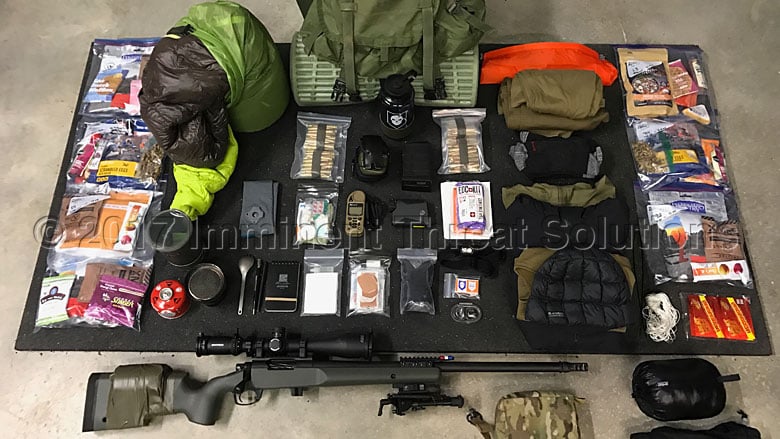
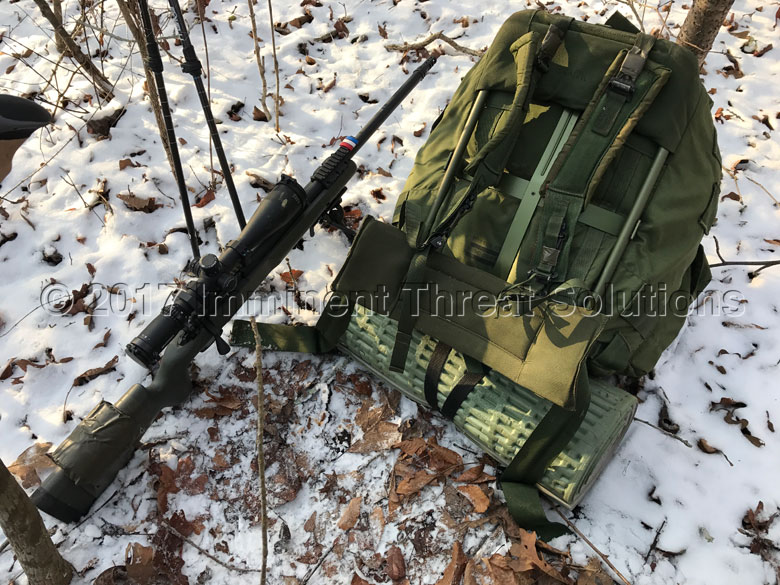
One of the most interesting aspects of the Mammoth Sniper Challenge for me was my performance in the physical challenges the match presented. This means the rucking, or walking at a pre-determined pace with a weighted backpack on your back. I used an old school ALICE (All-Purpose Lightweight Individual Carrying Equipment) Pack I was issued in the Navy and it’s anything but lightweight, as the acronym states.
It weighs 6.2 lbs. empty and it’s always a real conundrum on whether to use it or not when I’m counting ounces. However, it’s comfort that keeps me coming back and the fact that I know how I’m going to perform with it on. That to me is worth the extra weight.
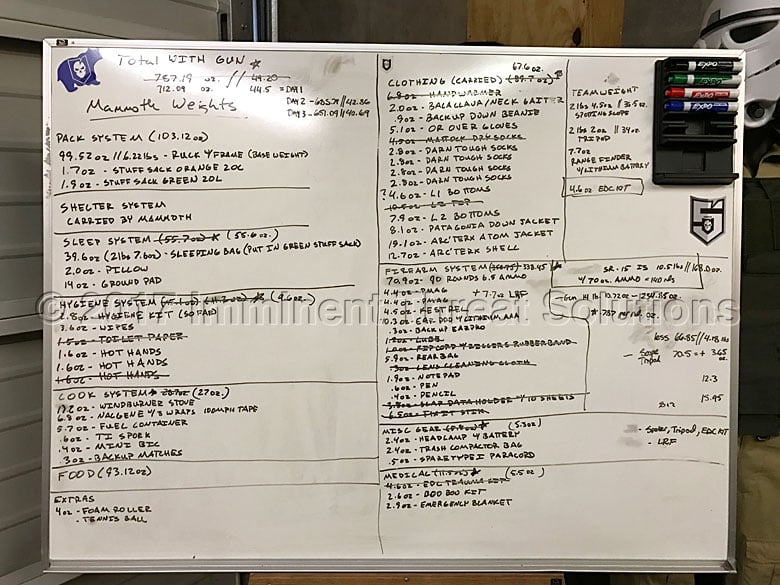
Total starting weight carried for me was 44.5 lbs., this is down from the 53.4 lbs. I carried last year, which was way too heavy. Last year the option for a team to have their tent carried wasn’t available and it was just a cooler, meaning my weight didn’t decrease as quickly over the week like it did this year. As mentioned, eating meals and firing ammo made my pack super light. By my calculation, I would be down to 40.6 lbs. by day 3 just by eating and that didn’t even count all the rounds I shot. Calculating that in, I was well under 40 lbs. by the last day. JB’s pack started out weighing 40 lbs. with the spotting scope and tripod.
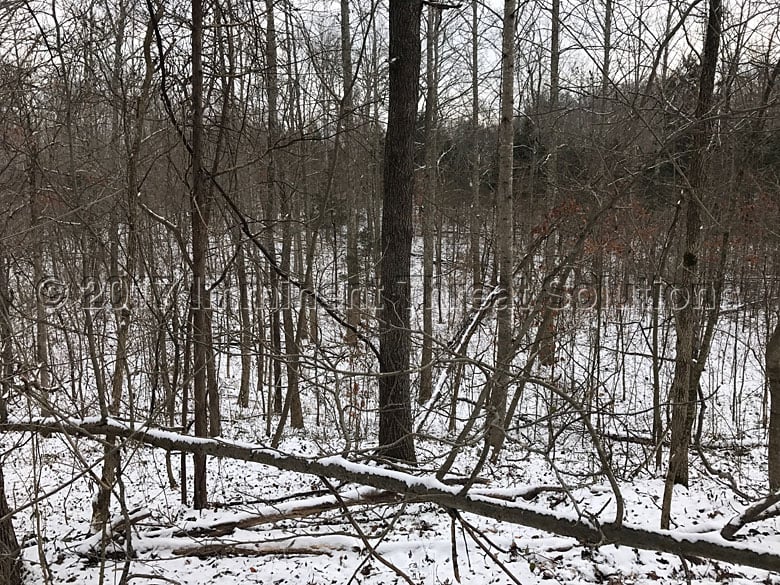
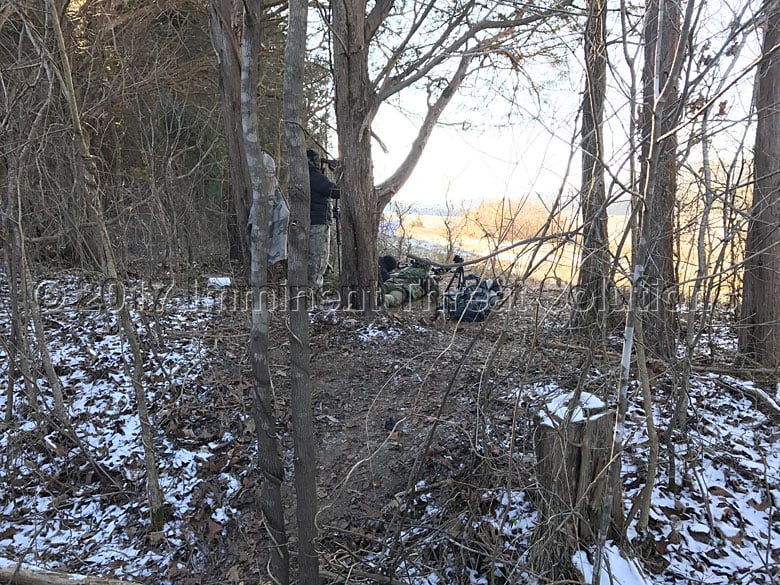
My long gun was placed horizontally across the pack under the top lid, which was then used to secure it. This was how I moved with the gun and how more than half of the participants moved. It’s certainly not the best method and moving through dense areas like this is even more challenging.
There’s also the bigger issue to address, which is sweeping everyone with your muzzle as you go by. Because of the fact so many people carry their guns this way, we joked that if you have issues with getting swept, Mammoth isn’t for you. There’s none of that on the stages, but I really do want to find a better option to carry my gun vertically rather than horizontally.
JB used an Eberlestock Gunslinger pack, which worked well for him and kept his gun in a vertical orientation, but he had issues with how much he was able to fit inside the pack. I discounted using a Gunslinger, because the empty weight starts off at 8.2 lbs. There’s a lot I’d rather carry for that 2 lb. penalty over the ALICE.
In itself, rucking is challenging on a normal day with good weather and some elevation changes. Let me tell you, Mammoth certainly has some aggressive elevation changes. We wound up going up and coming down every hill multiple times in some spots and as mentioned earlier, each leg we rucked was designed to feature aggressive uphills and downhills.
Luckily, because of our preparation, we were ready. I live close to a nature preserve with relatively similar elevation challenges and I trained there during the lead up to Mammoth. I hiked the 6-mile route multiple times along with strength training and PT to prepare myself. JB is also around some gnarly inclines he practiced on, which led us to crush teams on the rucks. I’m not just inflating this fact, we were one of the strongest teams out there because we trained well and paid attention to every ounce we carried. Below is the whiteboard insanity behind weighing every ounce that was carried.
Weight was definitely a factor in us passing teams with packs that looked to easily weigh 30 lbs. more than ours did. I had more time to daydream on those rucks than anything and I pondered the question of why guys were carrying as much as they were. The most likely reason in my mind was to chalk it up to the hard charging Military mindset of not caring how bad it sucks and plowing through.
 There’s hard and there’s stupid, not counting ounces in an event like this and allowing your pack to creep into the 60-70 lb. range is unnecessary. If you’re interested, we have a whole article series on Lightweight Backpacking that can help with that.
Another aspect of the hard charging mindset that made me cringe, was watching teams running the steep downhills. It never failed, they’d run right by us, risking falling on the ice, mud, etc. and we’d catch up to them later, passing them on the uphills.
It was a constant back and forth like that and our strategy was that of saving our knees and keeping a consistent pace, even on the uphills. Without running, we were rucking between a 14 min. and 15 min. per mile pace and just as an example, my training rucks weren’t any faster than 16 to 17 minutes per mile.
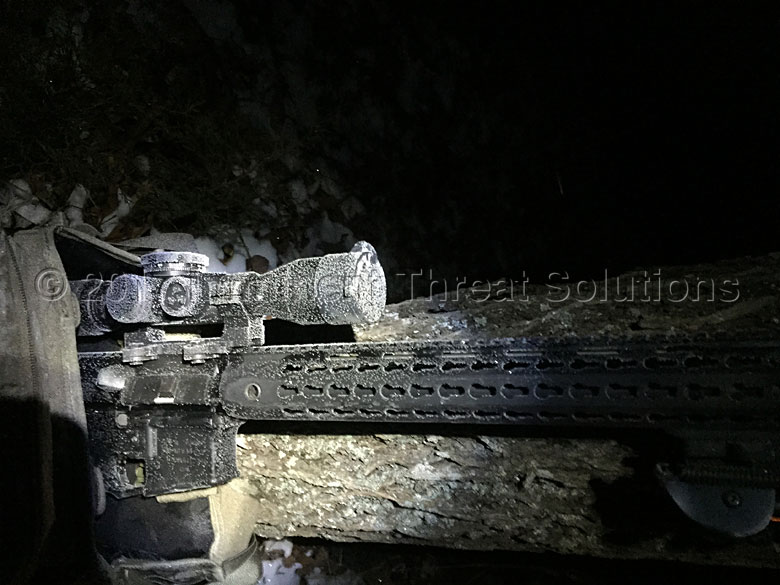
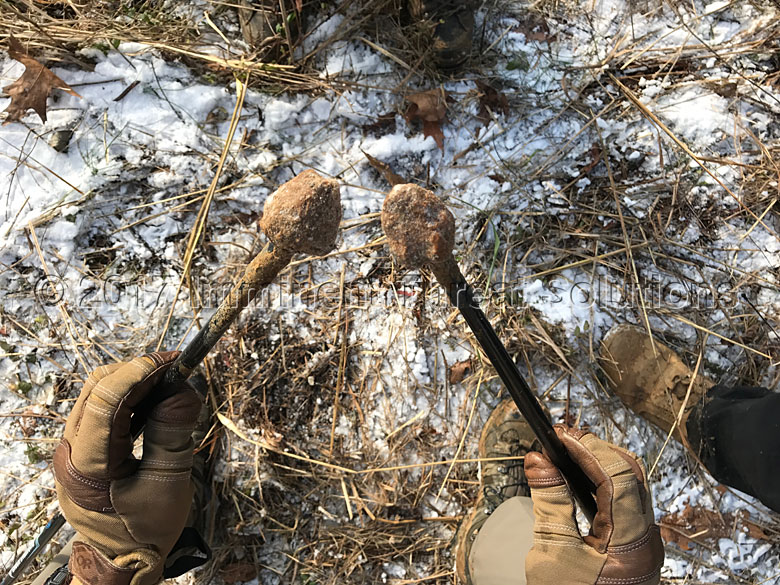
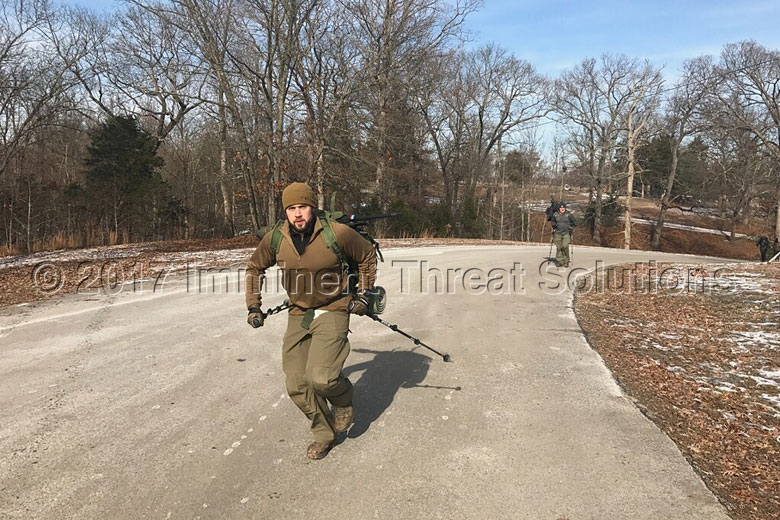
Speaking of saving knees, trekking poles were a huge advantage for us too, but I also don’t want to understate the training we did leading up to Mammoth.
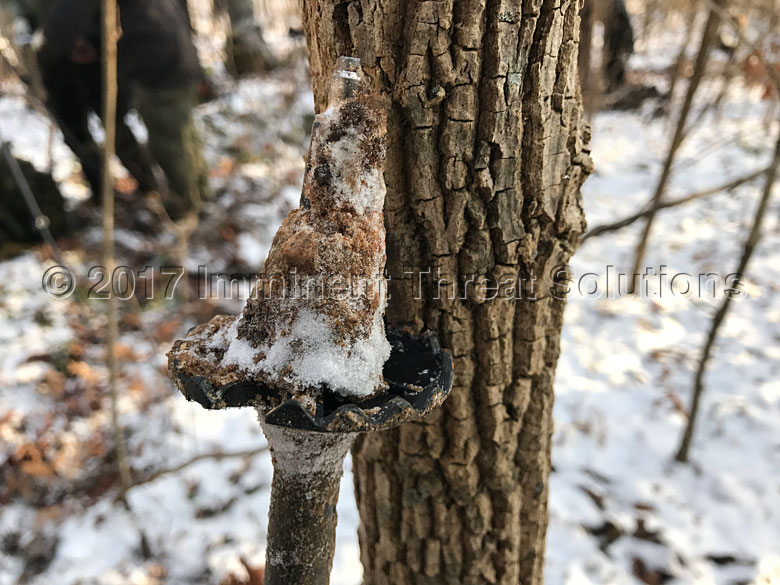
Trekking poles are great and do help save knees on downhills, give you added stability when negotiating terrain and provide four points of contact to drive you, but they won’t make you “faster” per se. Mud and freezing temperatures can also turn your trekking poles into lead weights, as the photo below illustrates.
Cold Weather Clothing
A good lead in to the cold weather clothing we carried, is to talk about how the rucks challenged our pre-conceived notion of the layers we’d need to wear during our rucking. As conditions grew colder, we had to pre-adjust our clothing based on how hot we felt we’d get on each ruck leg.
I’ve slightly mentioned this already, but what a change of conditions we had. We’d go from wearing every single layer we had while stationary, to stripping off our mid-layers and shivering waiting to start the ruck. After we started, we’d start sweating about a 1/2 mile into each ruck.
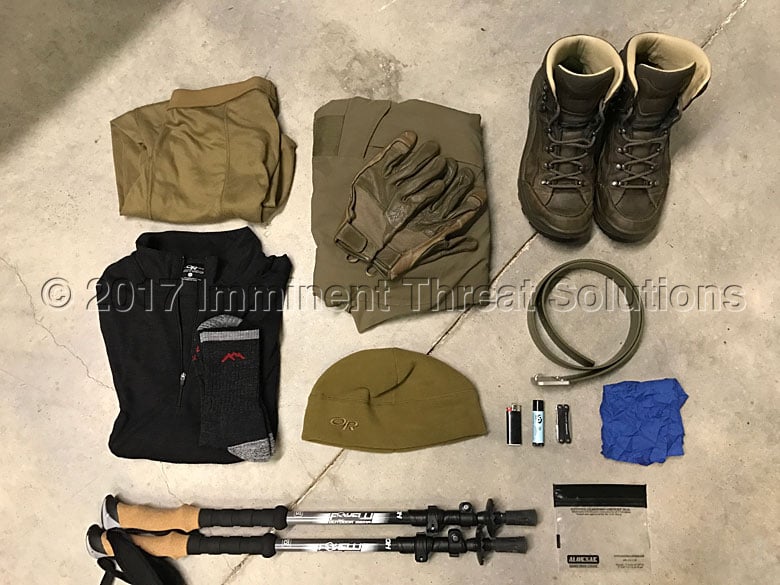
For me, I started rucks in an Outdoor Research Windstopper Beanie, OR Heavyweight Gloves, ExOfficio Boxer Briefs, OR Level 1 base layer shirt, PCU Level 1 base layer pants, Arc’teryx LEAF Sphinx Pants, PCU Level 2 top and Arc’teryx LEAF Alpha Jacket. The Alpha was a hard shell jacket that acted as my outer layer the entire time.
I had the hood up when starting rucks and it was the first thing I removed as I heated up. The hood came down and unzipped slightly, followed by one occasion where I removed my beanie and gloves for a brief period of time. My hands stayed so cold though that I normally didn’t remove gloves or my beanie. I also like the Alpha Jacket because it could vent by opening the pit zips.
FYI, there’s an art to opening pit zips while moving at a consistent pace and carrying trekking poles. It’s something I’d urge you to practice before you need to do it.

This list didn’t count the Darn Tough Vermont Socks, or Lowa Renegade LL (leather lined) Boots I had on the whole time. I’d coated my boots with Nikwax before leaving, which is a waterproofing wax for leather. It worked well initially, but wore off my boots on every area other than the upper by the time Mammoth was finished.
I actually got lucky on the boot situation and the snow wasn’t deep enough to cause my boots to get wet, most of the mud froze and any rain we had turned to snow. Water and leather lined boots don’t mix and once they’re wet, they’re nearly worthless.
However, I’m not a fan of Gore-Tex on boots. I feel it traps too much moisture in and contributes negatively to blisters. You need heat and friction to develop blisters and if heat can’t escape… well, blisters. I know that cold can also be a factor in blisters, but in my opinion, the cold helped by not allowing our feet the hot breeding ground for blisters. I also religiously changed socks once each day and used a small vial of Gold Bond to sprinkle on my feet before putting on new socks.
Socks were my luxury item and I carried 5 total pairs, including the one I started out in. I wore a fresh pair to sleep in and would start the next day out in those. It worked out well for me and I never had to use the pre-cut Leukotape I brought to treat hot spots and blisters. Taking care of your feet is always a primary concern for me.
When I completed a ruck, I was burning up. I usually wound up taking off my shell, gloves and my beanie, turning the beanie inside out to dry a bit, while subsequently adding an Arc’teryx LEAF Atom Jacket as a mid layer to wick moisture out of my Level 1 & 2 base layers. As I got colder, I’d add back the gloves, beanie and shell. If being stationary was for longer periods, I’d add on a waffle grid balaclava as a neck gaiter and a Patagonia Down Jacket over my Atom Jacket and under my Alpha Jacket.
Down layers are tricky and you need to add them for insulation and warmth, but you can’t allow them into your clothing system while it’s wicking. Meaning if I were to have added a down layer while I was cooling down from a ruck with the sweat still escaping, I would be blocking the layers from doing their job to wick moisture out of the system. My down layer was only added after moisture had left my layering system.
I also had a BlackRock Gear Down Beanie I brought for sleeping, which I tossed on as well on occasion (again, when I wasn’t sweating.) That was pretty much the extent of my clothing, not counting PCU Level 2 Bottoms for sleeping and a pair of Arc’teryx LEAF Leather Assault Gloves I had to layer the OR Heavyweight Gloves on top of. This didn’t work out well and I really needed a liner glove of some kind that wasn’t leather.
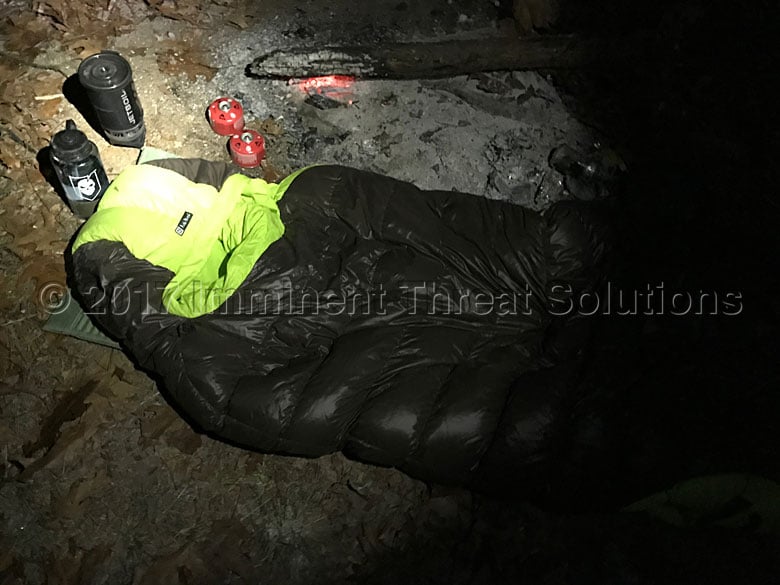
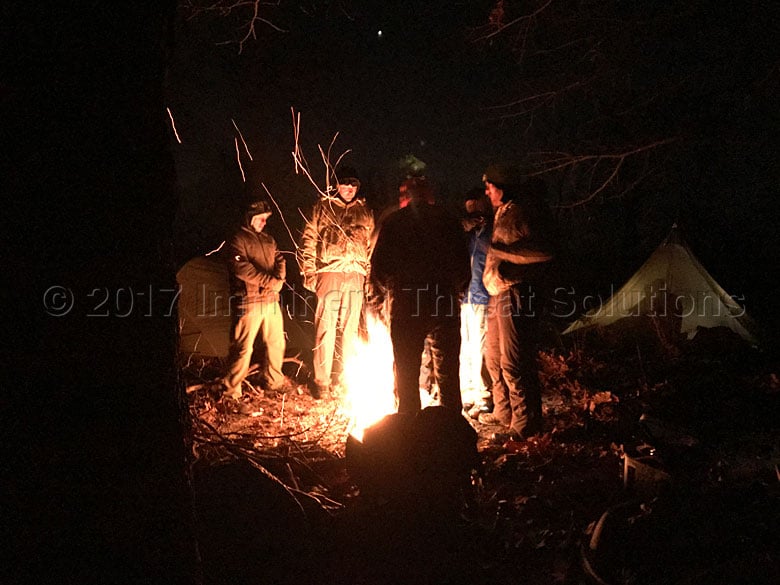
Speaking of sleeping, I used a NEMO Salsa 15 Down Sleeping Bag, rated at 15˚F. It’s a spoon-shaped bag that I really enjoyed using and despite temps surpassing its rating, it performed very well. The last night when temps dropped even lower, I spent half the night sleeping by the fire with my ground pad and sleeping bag. While I did torch one of my gloves a bit, I didn’t wind up with flying embers on my sleeping bag like I thought I would.
I did have quite a bit of clothing on while I slept to help keep me warm. I had on Darn Tough Vermont Socks, Level 1 PCU Bottoms, added PCU Level 2 Bottoms, I shoved my Patagonia Down Jacket at my feet to keep them warmer, boiled water both nights and dumped it into my Nalgene and put that at my feet.
If you haven’t yet realized, my feet get cold when I sleep. I also had my OR Level 1 top and PCU Level 2 top on. On the second night, I also added my Arc’teryx LEAF Atom Jacket. Also on both nights I had my BlackRock Gear Down Beanie on and my Waffle Balaclava.
To touch briefly on ground pads, I’ll start off by saying that it’s not an option to leave it off your packing list. Especially in cold weather. All good ground pads have an “R Value” rating, which is how well they insulate. The higher the value the warmer you’ll stay on top of it. The ground sucks the heat right out of you and putting a sleeping back directly on the floor of a tent or worse, the ground, is a horrible way to stay warm. Many backpackers get sucked in with ground pads, trying out the latest and greatest lightweight pads. I’m certainly guilty of it and have a whole ground pad graveyard on my gear shelf.
Cutting your foam ground pad is also popular, I’ve tried it and it sucks. It’s not worth it in my opinion, because my feet are notoriously the coldest part of my body while sleeping and it makes no sense to take away bottom 1/3 the insulation on my ground pad that’s underneath that area. I’ve tried the skeletonized ground pads out there to save weight and keep leaving them behind because they’re uncomfortable and guess what? If you remove large sections of your insulation, you get no R-Value whatsoever. Those are best for times when you don’t need insulation, if you’re going to use them.
My go-to for Mammoth was a Therm-A-Rest RidgeRest Classic, it weighs 14 ounces for the regular size and has an R-Value of 2.6. If I would have thought about it sooner, I’ve been wanting to upgrade my RidgeRest to one with the solar backing that bumps the R-Value up to 2.8. FYI, the Therm-A-Rest Z-Rest is also a great ground pad with a similar R-Value. I used a super lightweight webbing strap to hang my ground pad off the bottom of my pack and next time I’m faced with brutal cold temps, I’ll have a strap with a side release buckle on it. Routing the webbing through the strap buckle was terrible in the cold and I had to take my gloves off to do it.
Cooking & Hydration
One variable I worked hard to change this year was my overall caloric intake, when I added up what I consumed last year per day, it was hardly 1800-1900 calories. This year, I increased that to 2800-2900 calories per day and boy did I eat it all. The calories came from a mix a a few of my favorite backpacking meal companies like Paleo Meals to Go, Backpacker’s Pantry, Mountain House and Good to Go. I’m a sucker for Pad Thai and I had both the Backpacker’s Pantry Pad Thai and the Good to Go Pad Thai.
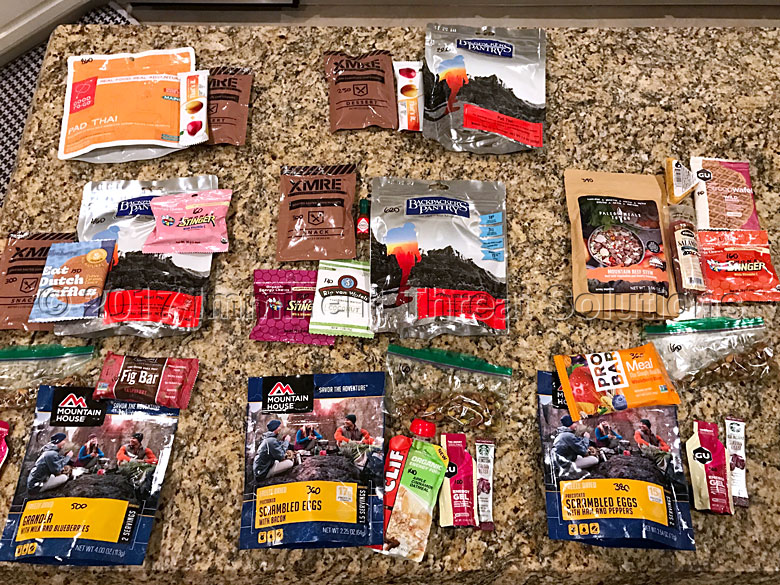
These main course meals were supplemented by snacks from The Feed like waffles, energy bars and energy gel, which I’d eat before the rucks. I also had few MRE snacks and a bag of Wonderful Shelled Pistachios each day (the name works because they really are wonderful.) I’d planned to drink a pack of Starbucks Via Coffee each morning, but I quickly gave up on that after my MSR Windburner Stove started acting up on the first night.
The gist of what happened lies in the cold weather decreasing the pressure inside the fuel canister and that pressure inside has to be greater than its outside pressure. When the internal pressure drops, causing the stove to sputter, it’s due to the fuel mixture vaporizing (burning off) at a disproportionate rate.
The Iso-Butane mix that canister stoves run on has 80% Butane and 20% Propane. Propane is more cold tolerant and will continue to vaporize in extreme cold conditions, Butane won’t. It’s limit is around 10˚F and Propane can vaporize down to -40˚F or so. As temperature decreases lower than 10˚F, the Butane stops vaporizing, but the Propane continues until it runs out, hence a low flame or sputtering stove and the reason it still sounds like you have fuel in your canister.

We did overcome this issue somewhat by holding the stove canister in our hands while it was running and putting the stoves next to the fire we had on the second night. I also slept with my fuel canister in my sleeping bag to keep it warmer and that seemed to help as well. If you’re interested in the science behind the fuel issues we experienced, this article provides a good explanation.
I had to keep my snacks in my front pocket to warm them up for the day as well. I had to cram them in, as I also had my wipes (which were my toilet paper) in that pocket to prevent them from freezing. Luckily I noticed they had froze before I needed them. As soon as I opened my breakfast each morning, I’d pull all my snacks for the day and put them in my pocket to warm them up. Frozen waffles are no bueno.
Water is something that became a real issue at Mammoth. I elected to trust the match description that said there would be water at every stage, though it didn’t state what molecular state it would be in. Instead of running a hydration bladder, which wound up freezing on me last year, I took a single Nalgene.
I ensured that I didn’t keep water in though, for fear of it freezing solid. I had to force myself to drink water many times and it was a struggle to stay hydrated. What typically happened is that when I came in from a ruck, I’d fill my nalgene and unless I had to cook lunch, I drank it all. I left my Nalgene Insulated Carrier behind and that was a mistake. I could have used that to keep my Nalgene from freezing when it had water in it.
JB had a Nalgene he left outside full of water on the first night and because of the water freezing and expanding, it cracked, rendering it useless. Luckily he had an empty Gatorade bottle that became his only option for a water container. Needless to say, he didn’t leave it full of water overnight again. I also heard horror stories of plastic sporks cracking because of the temperatures and I was glad I had a Titanium Spork.
Gear Performance and the Unplanned
While I’ve highlighted some of what I took to the Mammoth Sniper Challenge throughout this article, I’d like to hit a few other things that are worth mentioning. First are the two Magpul PMAGs I ran. These were the AICS patterned mags and as much as I love PMAGs, these performed horribly.
I wasn’t the only one with the feeding problem I ran into. As the 10-round capacity dropped to the last few rounds, they didn’t want to feed as I charged the bolt forward to strip off a fresh round. On one stage I pulled the mag out in frustration and stripped off rounds to single load.
This very much affected my shooting and I have no one to blame but myself for the issue. I knew it existed before I left, but instead of trying to fix it or take proven mags, I let the lightweight nature of the mags (4.4 ounces each) push me into taking them. That was a huge mistake. I’m confident I can tweak the mags in some way to increase their performance, perhaps stretching the spring, etc., so I’m not discounting future use.
As I said, I love PMAGs and they work flawlessly on other platforms. What also did work well for me was putting my two mags in my left cargo pocket before the stage began, as you couldn’t have a mag in your gun until you got into your shooting position.
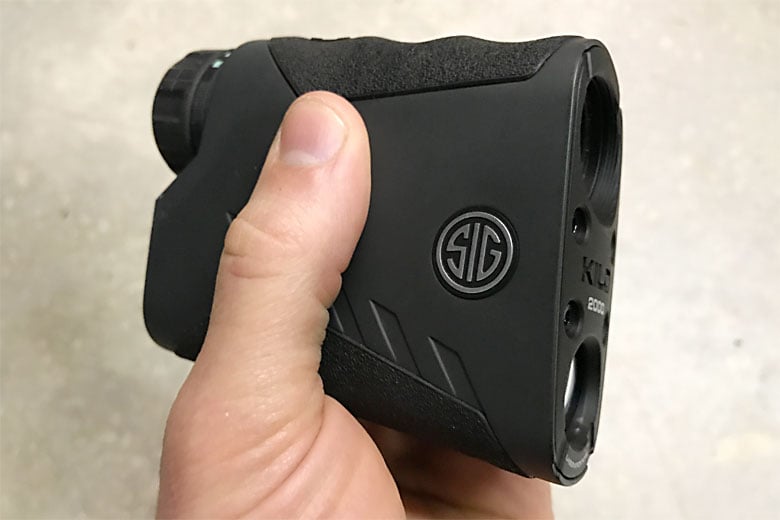
Another issue that came up was our Sig Sauer Kilo2000 Laser Range Finder getting so cold it stopped registering the range. When we first noticed the issue was occurring, we were engaged in a stage where it was crucial and we were unable to determine the range to shoot at. What happened was that when the button was depressed to range, we’d see hashed lines as though it couldn’t read anything. There was still a display, mind you, just no range.
We determined after the match that this probably had more to do with the lithium battery than with the range finder itself. If I would have come to that realization I would have kept the spare battery or the primary battery in my pocket, etc. to warm it up. What did wind up happening, not knowing if a stage was a unknown distance stage or not, was that I started putting the LRF down my pants as soon as we got into the stage from the ruck. Don’t worry sicko, I had plenty of layers on.
The Howard Leight Impact Sport Ear Pro I had this year worked better than I hoped and I didn’t have any issues with the two lithium AAA batteries I’d freshly installed the night before the match began. I carried a replacement set, but never had to use them. Last year I’d run Surefire Sonic Defenders and couldn’t hear JB’s calls for correction, it was a terrible experience. I knew I needed amplification and despite the 10.4 ounces the Howard Leight’s weight, I took them and was glad to have them. I am looking into in-ear hearing protection with amplification and have something in the works I’ll report on soon.
Lastly in this section, I’d like to mention the Arc’teryx LEAF clothing I’ve been using and abusing for the past 5 years. I’ll first provide the caveat that while I have a great relationship with the guys over at Arc’teryx, I don’t have some agreement or obligation to say anything other than my honest thoughts about their products. Spoiler alert, they’re worth every penny. I’ve climbed multiple 14’ers, completed two Mammoth Sniper Challenges and a whole host of other adventures with the same pair of Sphinx Pants and Alpha Jacket that I received from them right before the GORUCK Ascent in 2011. There’s hardly any signs of wear on each piece of clothing and each continues to perform to the same rugged standard over and over again, year after year.
If you read over the Gear List on the Mammoth Sniper Challenge website, it’s again fairly vague on what gear to pack. Lucky for you, I’m all about sharing every bit of information on what I took and how it performed. Coupled with what I’ve already talked about in this article, check out the following two episodes of our Gear Tasting show on YouTube for a more in-depth look into my Mammoth loadout.
Final Experience Notes
On Sunday, we heard that there were only 18 teams remaining out of the 43 Tough Man teams that started the event. Many dropped out for one reason or another. Whether that was due to being unprepared to survive in the freak weather we had, not making the times for the rucks, or just being mentally done with the conditions, our team prevailed. Not only did we prevail, we crushed it.
Our shooting wasn’t the best and it wasn’t the worst, but that honestly doesn’t matter to me. We did what we needed to do and that was finish. When the final results were tallied, we wound up coming in 21st out of 43. Even though there were only 18 teams that finished, there were four RO teams that had competed earlier in the week that were ranked amongst us in the final numbers. I don’t quite agree with that, as their conditions were different, but it is what it is. Our rank doesn’t matter to me as much as the experience we had along the way.
I say all the time that adversity introduces you to yourself. This past week, I found a new kind of adversity that I hadn’t encountered before; extreme cold weather. When a forecasted low of 14˚F turns into -2˚F, it’s a huge difference. I’m fortunate to have made good clothing selections to have been able to survive in it. Will those choices change next time I see 14˚F in the forecast? You bet they will.
The combination in the adversity of having to shoot precisely, ruck all-out, keep hydrated, well fed and warm when stationary, was extremely challenging and rewarding at the same time. I couldn’t have hoped for a better experience to find out just how well my gear can perform. Often times we get hung up on buying the latest and greatest piece of gear without knowing how it will perform and simply believing the hype from the marketing.
I try my best with articles on ITS and our Gear Tasting series to provide proven advice based on my performance with specific gear, but in the end, they’re my experiences. I encourage each and every one of you reading this to get out there, enjoy nature and put your own gear through nature’s ringer. It’s truly the only way you can be 110% confident that what you choose to take won’t let you down when it matters the most.
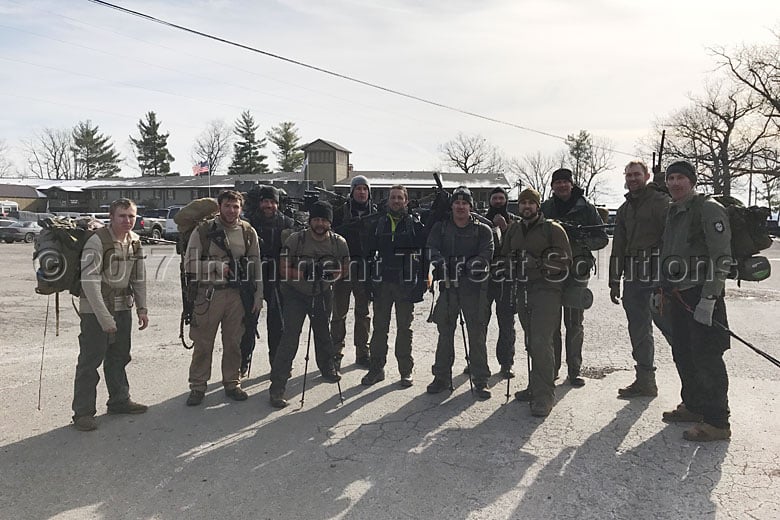
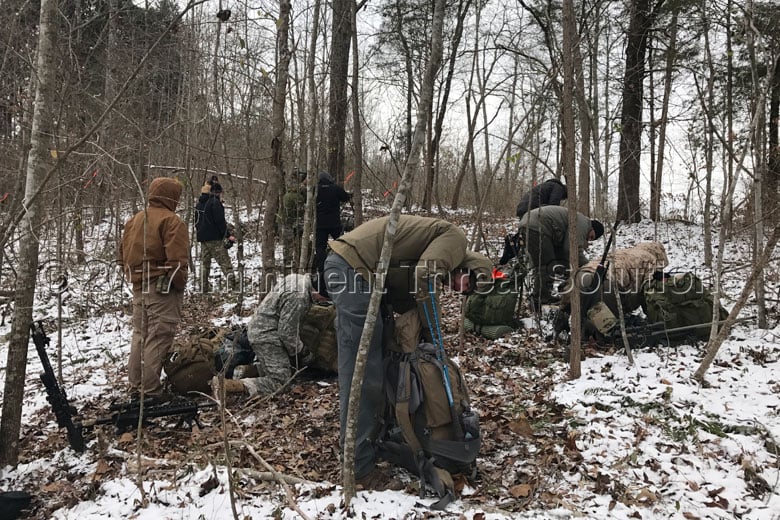
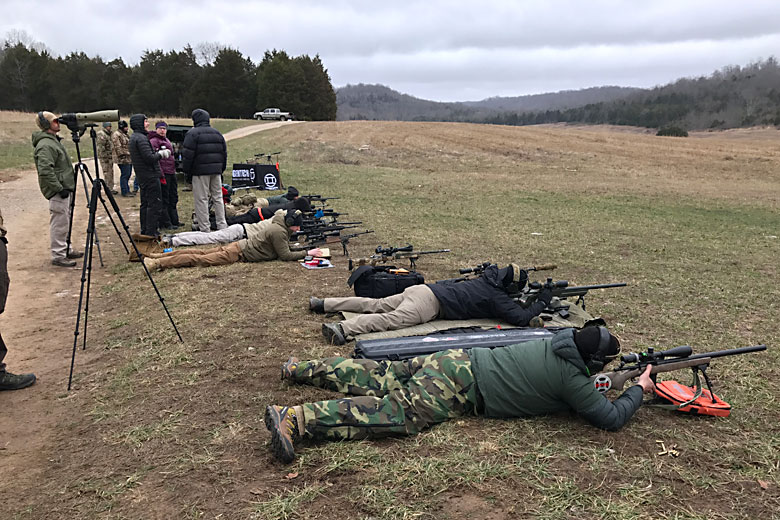
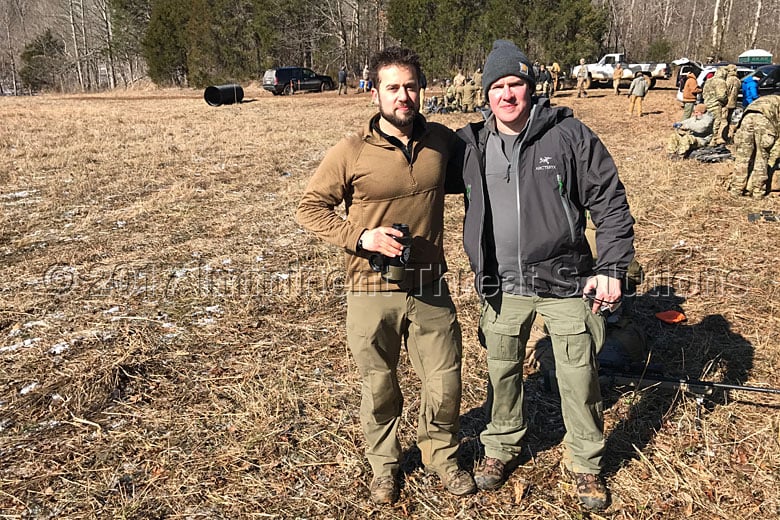
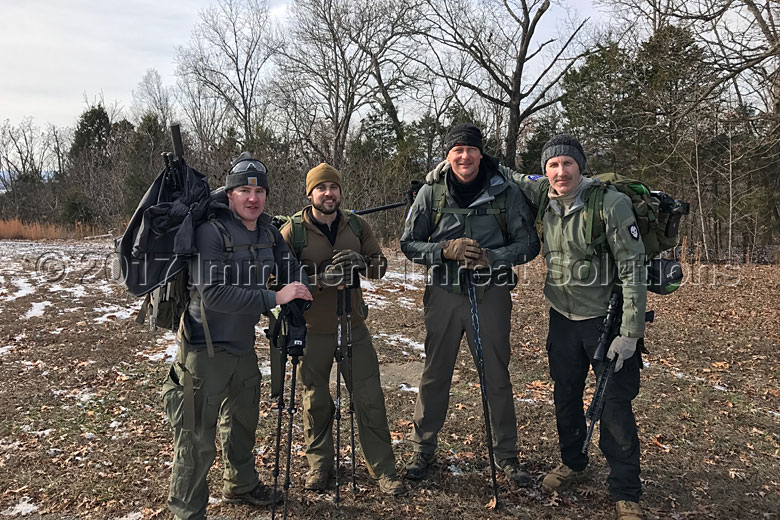
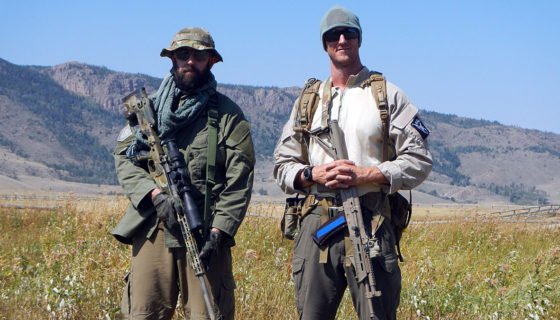
A huge thank you to my shooting partner, JB Knopp, for his commitment to crushing the obstacles that we faced at Mammoth. I’d also like to thank Jason Crist for dragging me, kicking and screaming, into the world of Precision Rifle. Jason and his shooting partner, Brian Sneed, are good friends and were a blast to have in our squad. Speaking of our squad, I met some great guys, pictured above, that made our adventure into the suck that much better. I also can’t forget squad 3’s RO, Chris, who I’m convinced was the coolest RO at Mammoth. I promise it had nothing to do with him wearing the Lord’s Lowa’s.
Competing at Mammoth wouldn’t have been possible without the tremendous support I received from Mark Kuczka at Accurate Ordnance, Tyler Wilkins at Badger Ordnance and Wayne Dayberry at Nightforce Optics, thanks guys! A big thanks to Jacob at Rifles Only for the phenomenal Precision Rifle training that got me ready for Mammoth, Grayboe Stocks, Kestrel Meters, NEMO, The Feed, Good To-Go Meals and Paleo Meals to Go.
I appreciate Joe, Marcus, the Mammoth ROs and the entire Rock Castle staff for all their hard work in continuing to put on one of the best competitions around.
Discussion