Note: The model shown here is a prototype made from 3D printed plastic. The final version will be milled out of aluminum.
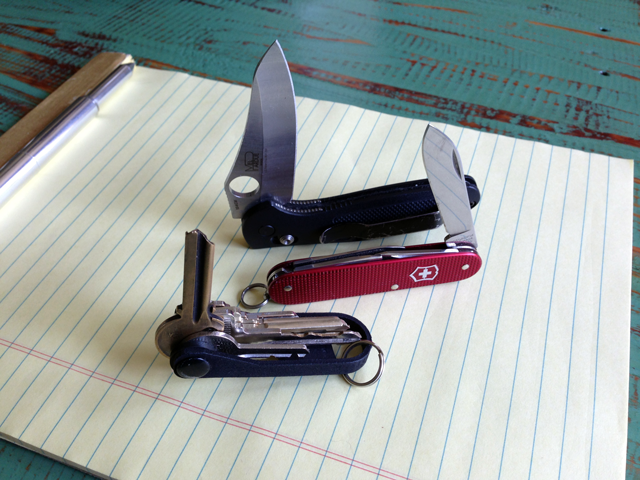
The BladeKey Bolt is a simple but well thought out device. Actually, you can probably guess how it operates just by looking at it. In a nutshell, it transforms your keychain into a pocket knife style key organizer.
No jingling. No poking. Just organized keys.
A Simple Design
The functional design of the BladeKey Bolt is something most will be familiar with. Anyone who has used a pocket knife will understand how it works because like I mentioned, it’s basically a Swiss Army knife for your keys.
Three different configurations of the BladeKey are offered and in two colors. You can order a raw aluminum finish color or black anodized aluminum model that holds three, six or nine keys. Let’s say you find yourself using the nine key model with only six keys, just add a few rubber washers and the sizing will be as snug as it’s supposed to be.
Build Quality
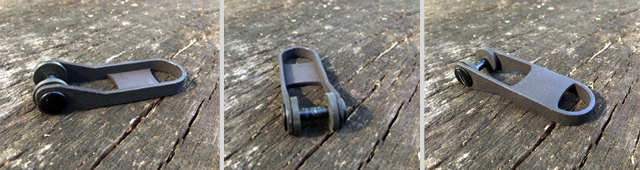
The initial BladeKey prototypes were made from ABS and Nylon Plastics and while strong, they eventually lost out to the look, feel and durability of aluminum. I’ve dropped and twisted this 3D printed version a few times and it’s withstood the abuse. I’m certain the aluminum version will only be better.
I know that the black anodized aluminum model will wear over time but I like having gear that shows signs of use.
Real World Use
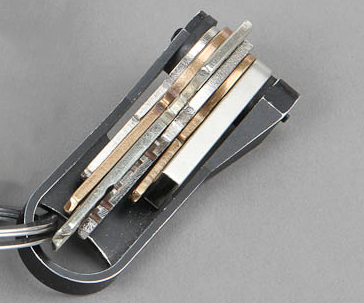
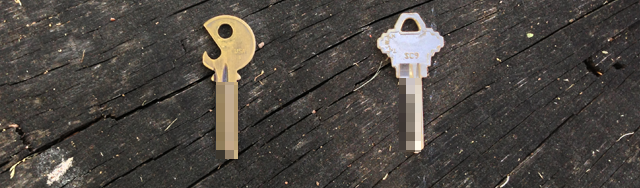
The first thing I wanted to do when I got my BladeKey prototype was dump my keys from my normal keychain and start organizing. I quickly found out that only a couple of my keys would fit unmodified. The binding post barrel diameter is 13/64 in (approximately 5.15 mm), so make sure your keys have a big enough hole to accommodate the binding post.
Depending on what keys you have, you may be ready to rock and roll right out of the box but if you have keys like mine, you better start charging your power drill. The actual drilling was a fairly simple process and I made sure to do it with the most basic equipment. I didn’t use a vise and just held the key up against the drill bit and hit the go switch. Make sure to wear gloves in case your hands slip but it only took a minute on most of my keys.
These were the keys I wanted to add to the BladeKey:
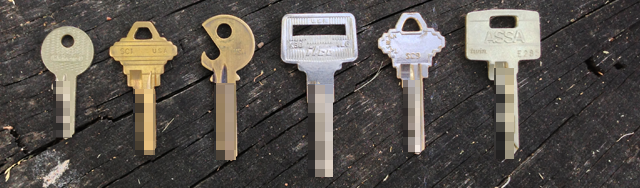
These are the the keys that fit without modification:
Adding and Removing Keys

Once you get your keys prepped (or maybe you don’t need to), just unscrew the Chicago bolt, slide your keys on, screw closed the bolt and you’re all set. That’s really it. In just a few minutes, I was good to go. I tested it out on my door locks, mailbox and my car and it worked just as expected. No more noisy jingling keychain!
It’s simple to add or remove keys and I found that finger tightening seems to provide the best tension. Obviously the tighter you screw down the bolt, the tighter the keys will be but if you go too tight, the keys towards the outside will be extremely hard to open.
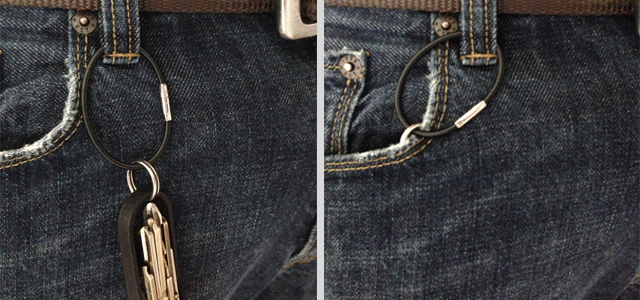
I’ve found that I like adding a small keyring to the BladeKey and attaching the entire setup to a front belt loop. This allows the BladeKey to be in my front pocket but not pulling heavily from the bottom of my pocket.
Notes and Critiques
- By removing the rubber washers, I was able to insert six keys and a USB flash drive in the
6 key modelBladeKey [edit: This prototype is actually the 9 key model]. After trying that for a week, I noticed it wasn’t ideal though because the rubber washers help to keep the keys evenly secure.
- The obvious issue is that the BladeKey Bolt doesn’t fit all key types and some drilling/filing may be required. You can check the Kickstarter page for a sizing chart and key information. James, the creator of the BladeKey, also made a note in an email mentioning that he wanted to design and build the BladeKey from common off the shelf hardware. This was done for simplicity and to keep costs down.
- With a single side hinge, pressure on the keys can be a bit uneven making the middle keys more loose than the ones on the end. This really isn’t a big deal but I wonder if a dual-sided option may work better.
- In addition to using the larger rubber washer that was included, I toyed around with adding a smaller one to the middle of the keys. They were easy to find at my local hardware store and acted as a nice buffer/spacer.
Conclusion
I like it. I think it’s a fun and interesting way to organize my keys. A lot of people I showed it to also thought it was cool and are looking at getting one.
So, if you want to stop sounding like a janitor when you walk around, get yourself a BladeKey. Unless you are a janitor, in which case you should probably pick up a few.
Where To Get It
- $25 Pre-Order: BladeKey.com
- Source code for 3D printing: Thingiverse
Have some questions? Leave them in the comments and I’ll do my best to answer them.