

Ascending is arguably another one of the most dangerous procedures in climbing, so pay attention to your setup because an improper one can get you killed.
The reason it’s one of the most dangerous procedures is the fact that much like rappelling, it forces you to rely on your equipment and anchors 100%.
Let’s recap, ascending FORCES YOU TO RELY ON YOUR EQUIPMENT AND ANCHORS 100%!
This is why learning knots and getting proper training is so important, because it could cost you your life.
OK, now that we have the warnings out of the way, let’s learn how to set up our ascent!
Inspection
In mechanical ascending inspecting your gear is paramount, and you’re relying on your equipment and anchors 100%.
At this point of the game there’s not much you can do to check your anchors, which are however many feet above you, but you can inspect your ascending equipment.
Inspect everything that will be used in the ascent for fraying, wear, damage and anything else that might prevent its correct working operation.
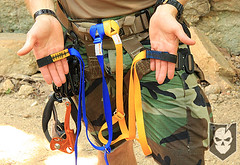
Climbing Harness
When donning your climbing harness be sure to remember to lock in any loose ends with an overhand knot and have a buddy check you over to make sure everything looks right.
Here’s a video we made in our “Learn How to Rappel” series on locking the loose ends of the harness.
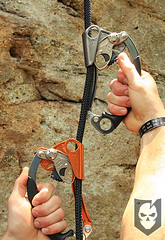
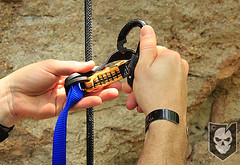
Black Diamond nForce Ascenders
The nForce ascender cam opens two ways, you can squeeze the trigger to snake the ascender through a z-shaped pattern, or maneuver the black thumb release through the same movement.
To close the cam around the rope either depress the trigger or hit the black thumb release.
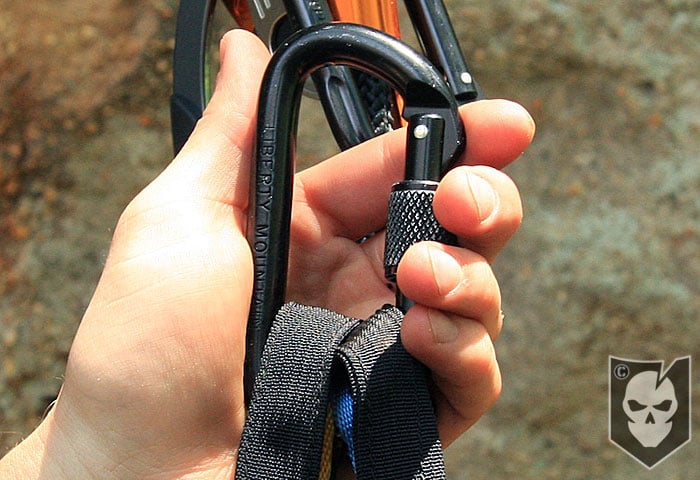
If the ascender were to suddenly open during ascent, the carabiner would prevent the ascender from detaching from the rope.
The purpose of using a locking carabiner here is that if the ascenders meet up on the rope, as they often do, the two top-most carabiners can lock into each other, preventing you from going anywhere.
Metolius Easy Daisies

To connect the Easy Daisies, girth hitch the sewn loop end through the main attachment point of your harness.
After girth hitching both Easy Daisies, let them hang as you move on to the next step.
Metolius Easy Aiders
Aiders must be attached through the locking carabiner first, followed by the daisies. This ensures that the daisies are mounted to the inside of each carabiner, or closer to you.
Take the aider attachment loop in one hand (ensuring the buckles face outboard) and a locking carabiner in the other. Come over the top of the outer non-structural release loop and insert the carabiner into the structural sling loop.
Rotate the carabiner all the way around the aider attachment loop to make room for the daisy the will be attached next.
Repeat the process with the other Easy Aider.
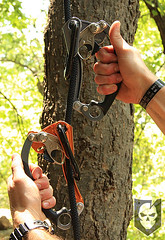
Putting it all together
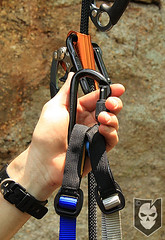

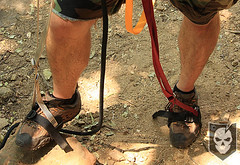
When you rotate the carabiner around the daisy attachment loop you should have the aider forward of the daisy (see photo, which shows the right hand aider/daisy setup)
Hook in
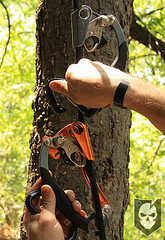
The great thing about the Black Diamond nForce Ascenders is that they make this attachment much easier.
Simply connect each carabiner to the 360 degree attachment points at the bottom of each ascender, and while holding the aider/daisy loops rotate the carabiner so that you “screw down, so you don’t screw up.”
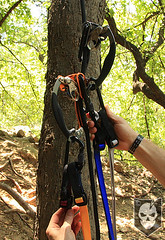
Step in and adjust
In our YouTube video we show some adjustments being made of the Easy Aiders and Easy Daisies right before ascending. We’ll cover this in more detail in our final article.
Check out our video below for a walkthrough of the setup.
Stay tuned for the conclusion of our “Learn How to Ascend” series next week!
For further information on the Black Diamond nForce Ascenders visit Black Diamond’s Web site at www.blackdiamondequipment.com
For further information on Metolius Easy Daisies and Easy Aiders visit Metolius’ Web site at www.metoliusclimbing.com
This information is provided solely as reference to supplement proper ascending training from an experienced guide, not replace it. Ascending is one of the most dangerous things you can do in climbing because you have to rely on your equipment and anchors 100%.