
For the next few weeks, we’ll depart from our usual “Knot of the Week” to bring you a series on the knots taught to Navy SEAL candidates at BUD/s (Basic Underwater Demolition/SEAL Training).
During the first phase of BUD/s, students are taught five knots which they’re required to tie one at a time underwater, each on a single breath hold.
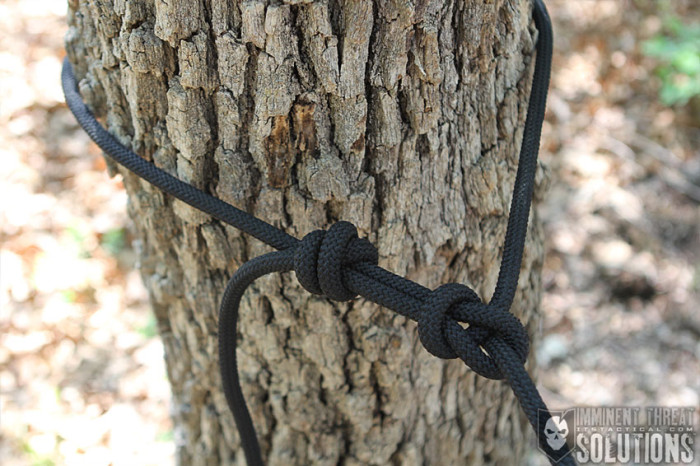
Each knot is tied on a trunk line, or stationary rope, secured to the bottom of a 15 foot pool. We’ll have a special video presentation during the last week of the series, combining all the knots and showing them tied underwater. The first of these knots, which we’ll teach today, is the Bowline.
Bowline » Loops
(Strength: 2/Secure: 2/Stability: 4/Difficulty: 3)
Please refer to our Knot of the Week introduction post for a description of what these ratings mean.
Before we continue any further we’d like to clear the air on how to properly pronounce the Bowline. This knot comes from the need for attaching sails to the bow of a ship for stabilization, and is pronounced “bow” like a ship’s bow, not “bow” like bow and arrow.
The Bowline was originally used for the purpose intended above, but has progressed to include a host of other uses. Today, you’d most likely see a Bowline used for mooring a small boat to a pier or in rescue applications when a fixed loop is needed that won’t close around a waist or foot.
In rescue applications we highly suggest, due the somewhat unstable nature of the bowline, that a half hitch is added to the knot at the very end to further secure it. If the bowline is not kept under load, it can easily come untied which is why we recommend the extra half hitch (We’ll explain below).
Uses:
- Mooring a small boat to a pier
- Emergency applications where a fixed loop is needed
- Joining two ropes bowline to bowline (there are better ways to join ropes though)
Tying Instructions:
- Create a bight in the rope, forming a “q” shape
- Ensure that the “q” is made overlapping the standing part of the line
- Your working end will be wrapped around whatever you’re tying on to
- Create a loop and feed the working end through the underside of the “q”
- Bring the working end around the back of the standing line
- Continue passing the working end back through the “q” running parallel with the loop
- To tighten, pull the loop and working end with one hand, and the standing line with the other
- For increased security, create a overhand knot in the loop with the working end
- Pull the working end to tighten and finish the Bowline
View the gallery or YouTube video below and follow along with the steps above!
Video
