


Knot of the Week: How to Tie an Ocean Plait Mat
Knot of the Week: How to Tie an Ocean Plait Mat
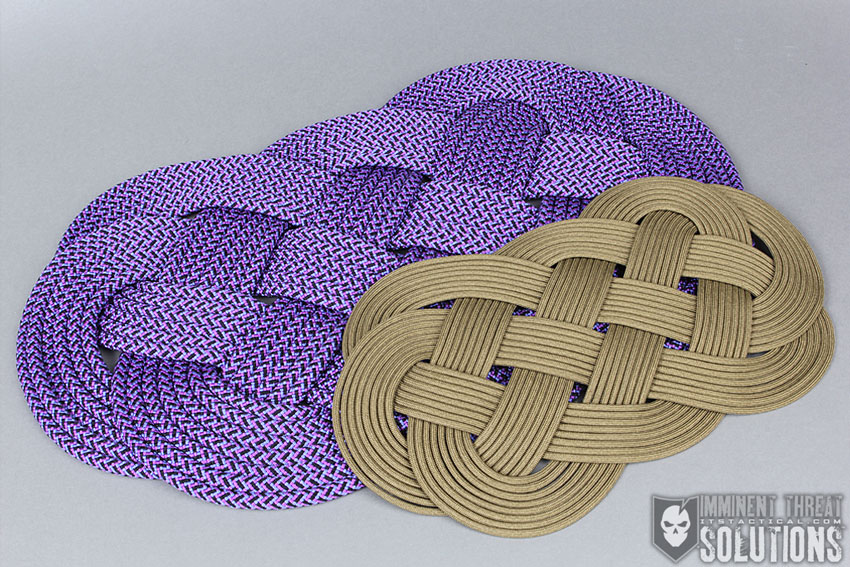
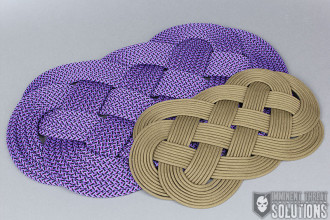
The Ocean Plait Mat, or Thump Mat was originally woven by sailors and hung at various locations around a ship to take the “thump” of a jib sheet (line), movement of traveler blocks or even to protect a bulkhead (door) opening. During high winds or normal movement, these locations needed to be protected. However, many other uses were found for mats like this on board a ship.
Ocean Plait Mats make excellent hot pads, cushion covers, door mats, you name it. The possibilities for these are endless. What we’ll be demonstrating today is the method described in the Ashley Book of Knots, (page 362, #2243) which as many of you may know is the bible of Knot Tying and a book that’s definitely worth adding to your library.
How to Tie an Ocean Plait Mat » Decorative
(Strength: –/Secure: –/Stability: –/Difficulty: 4)
Please refer to our Knot of the Week introduction post for a description of what these ratings mean.
Uses:
- Hot Pads
- Cushion Covers
- Door Mats
- Protection
Tying Instructions:
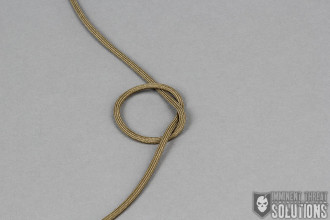
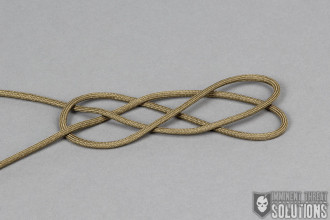
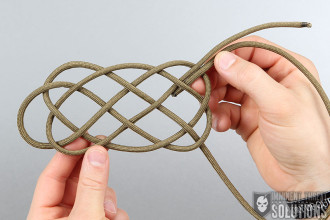
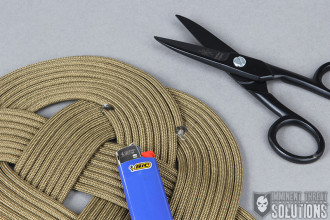
- Starting with an overhand knot, enlarge both bights of the knot.
- You’ll want one of the standing ends of this pattern to contain the overall length of your line.
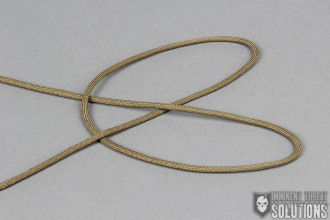
- Twist each bight and cross them over each other.
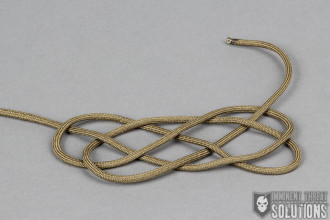
- Find the working end of the side that contains the short length of line.
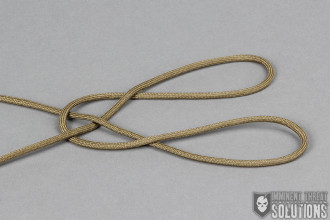
- *Refer to the photos for the sequence that shows the over/under pattern and thread it though.*
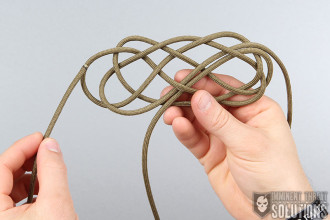
- Repeat this step with the longer working end of your line, referring to the photos.
- This will now lock in the pattern you’ve created.
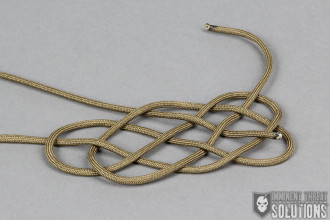
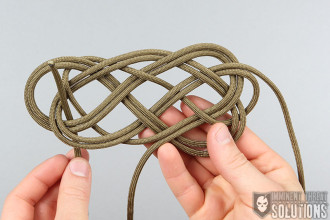
- Using the working end of the longer line, start tracing the pattern along the outside of the shorter strand you just finished with.
- Once you get a complete trace and are back parallel with your starting point, continue successive traces staying to the outside of the inner strands.
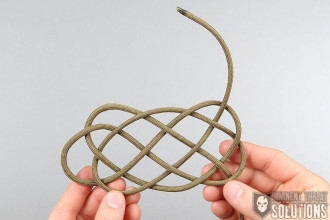
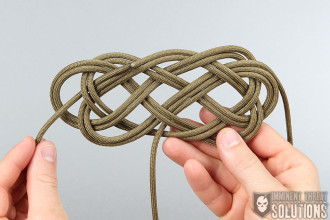
- Optimally you’ll want at least four complete turns through the mat, before tightening everything up, but there’s no set number of turns.
- *This all depends on how much line you have to work with.*
- Cut the ends and fuse them under the mat after you get the desired tightness.
- When everything is complete, you should have the same number of turns at each stage.


Discussion