


Knot of the Week: Modern Samurai Armor Knot Work with the Dragonfly Knot
Knot of the Week: Modern Samurai Armor Knot Work with the Dragonfly Knot

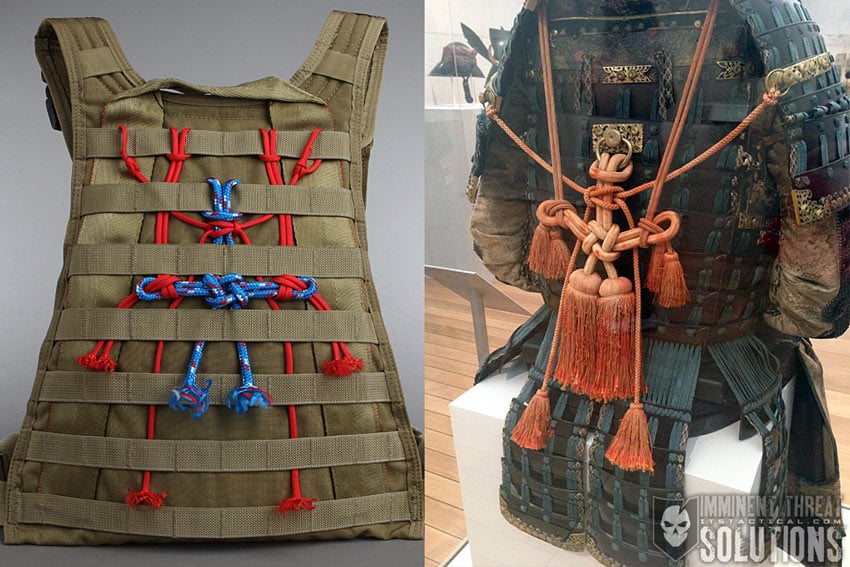
While recently visiting the Japanese Samurai Armor Exhibit at the Kimbell Museum in Fort Worth, the intricate cordage and knot work really caught my eye. Being that we have a Knot of the Week series here on ITS, I wanted to see if I could reverse-engineer these ancient knots and not only demonstrate how to tie them, but adapt this style to modern day armor.
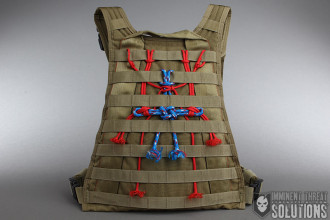
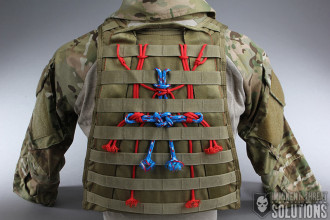
Gone are the days of metal and chain, now replaced with the nylon and plastic found in traditional body armor and plate carriers. I wondered while looking through the exhibit, how all the braided cordage they had tied on their armor didn’t get caught up in things. I then had an idea to weave these same kind of knots through PALS Webbing on the back of a MOLLE Plate Carrier. Using the Agemaki or Dragonfly Knot as the main element, I’ll be walking you through how to tie this knot (there’s actually two different versions) and how I created the back piece you see in the main image above.
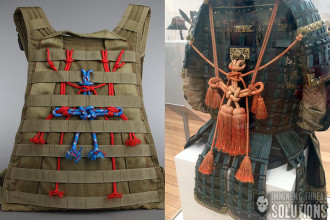
The Dragonfly Knot gets its naming convention from the finished product looking like a dragonfly with spread wings. My inspiration for this decorative knot project came from the photo below and the stunning art that the Japanese created on the back of their battle dress. As you’ll notice, the cordage used in my representation is a mix of paracord and 3/8″ diameter polypropylene cordage. The poly rope is an inexpensive cordage that really has no purpose other than decoration in my book. The material used in the “guts,” or inner strand(s), make me question its strength rating.
Samurai Armor Knot Work – Agemaki/Dragonfly Knot » Decorative
(Strength: –/Secure: –/Stability: –/Difficulty: 3)
Please refer to our Knot of the Week introduction post for a description of what these ratings mean.
Something to note with the Agemaki or Dragonfly Knot is that there’s two different ways to tie it, with two different results. I saw it tied both ways at the Samurai exhibit. At first I though it was merely the backside of the way I learned to tie it, but soon found out the “mirror image” of the knot required a different method for tying. The photo below shows the result of both methods of tying and the gallery includes the step-by-step instructional photos. The embedded video is the best resource though, as it demonstrates both methods in great detail.

Uses:
- Decorative Knot Work for Display
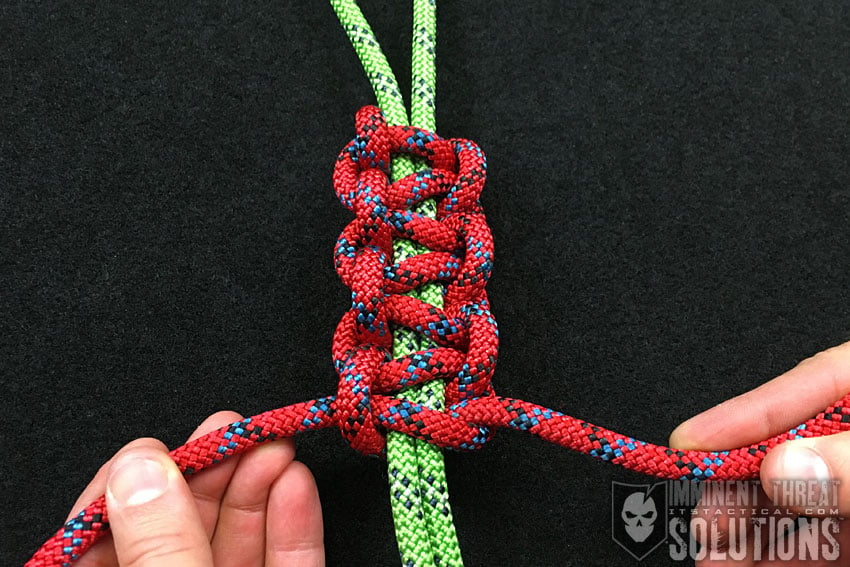
Tying Instructions:
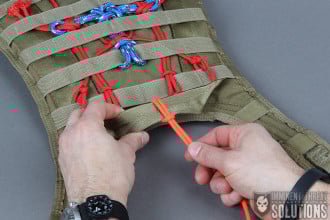
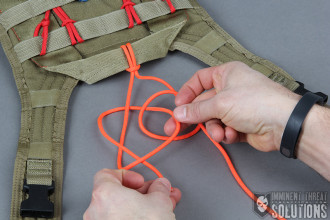
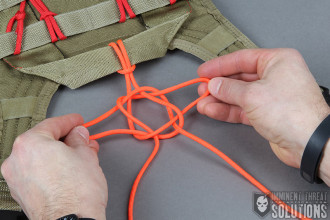
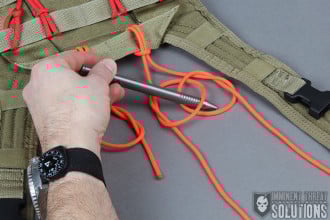
- The first step in tying the Dragonfly Knot is to girth hitch a section of cordage around an object, this will help when tightening the knot during the last step.
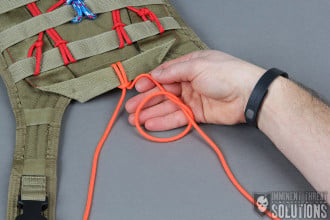
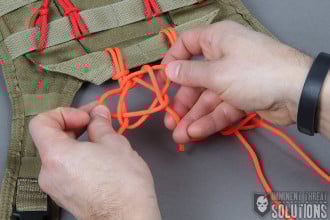
- Starting with the right side of the two strands, tie an overhand knot.
- Pay special attention to the orientation of the loop and the working end tail by observing this in the photos or video.
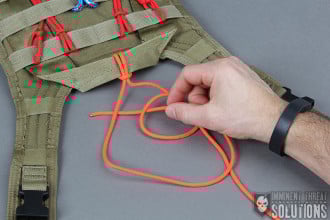
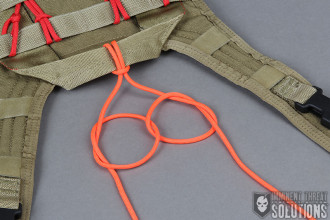
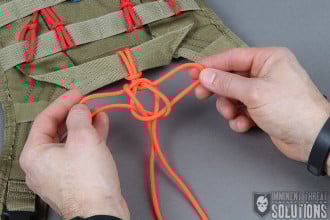
- Take the left side working end and pass it through the loop created on the right side.
- Ensure this is passed through the top of the loop. See photo.
- After the working end is passed through the loop, pass is behind the standing part of the left side cordage.
- Now continue with the remainder of an overhand knot, ensuring the working end is in the position shown in the photos.
- *The orientation of these lines is very important and creates the difference in the two versions of this knot that can be tied.*
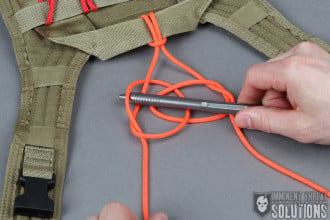
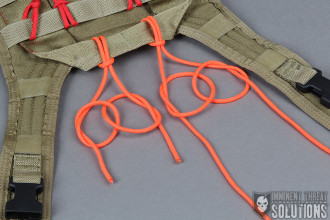
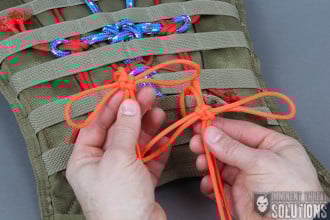
- Taking the loops that meet in the middle, pass the right side loop through the upper wrapping in the left side overhand knot.
- Reverse this and now take the left side loop and pass it through the bottom wrapping in the right side overhand knot.
- *This can be a confusing step, so please refer to the photos or video.*
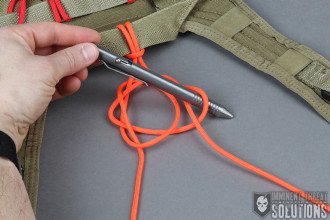
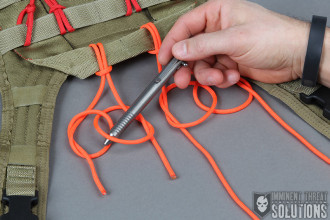
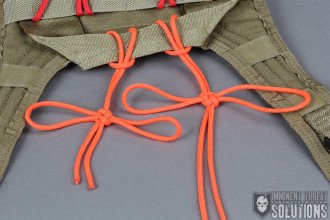
- Pull on each loop and the standing parts of each section to tighten the knot.
- *The mirror image of this knot can be tied by noting the difference in the loops in further photos from the gallery below.*


Discussion