
- How to Make a Fast Rope for Climbing
- Whipping and Fusing Your Fast Rope Into Shape
- How to Make a Fast Rope Eye Splice
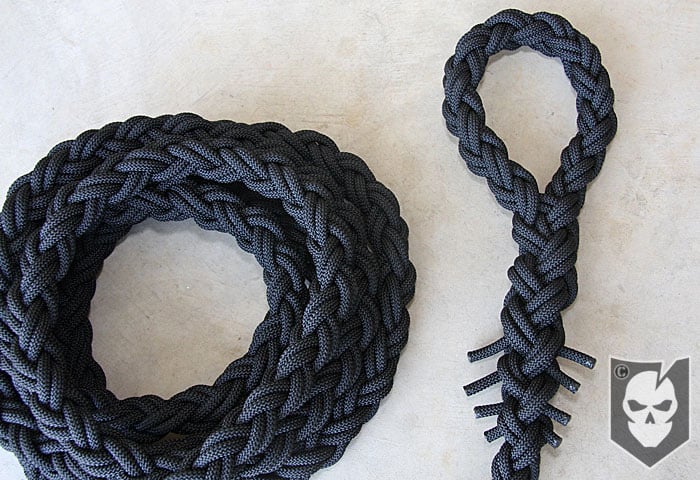
Today on our Knot of the Week, we’re going to continue our Fast Rope construction with a demonstration of a 4-Strand Eye Splice.
On a previous KOTW we’ve shown how to create a 3-Strand Eye Splice, and while this may appear similar these are two very different techniques.
The Eye Splice is the strongest and safest method of terminating a Fast Rope (4-Strand Round Braid). It develops approximately 85% of the breaking strength of the line, which as we’ve mentioned is right around 28,000+ lbf (pound force) or 129 Kn (kilonewtons) with the 4 pairs of 7/16″ Blue Water Assaultline Static Rope used in construction.
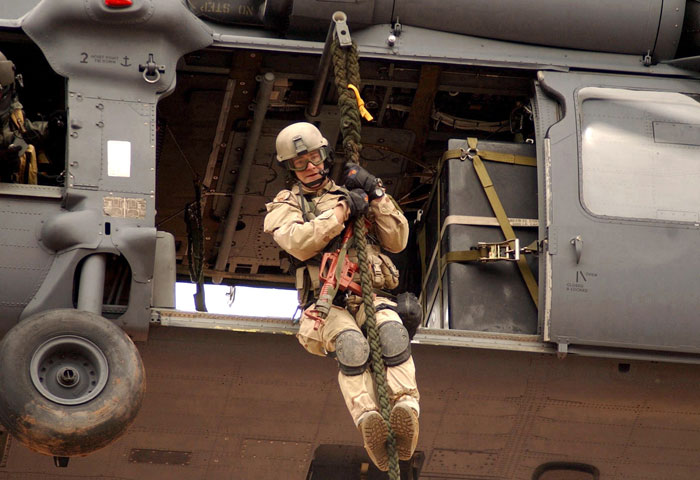
An Eye Splice also enables the rope to be girth hitched onto a beam to climb. Traditionally in Military Fast Ropes, the eye splice is used to attach to the davits found on some helicopters.
Eye Splice Guidelines

According to MIL-F-44422, Mil-Spec construction for fast ropes, “The main rope shall have an eye splice on one end with a minimum of 4 inches and a maximum of 6 inches inside length. The eye splice shall be made using a minimum of three full tucks and two half tucks.”
Let’s break this down and tie it into our discussion on how to create the Eye Splice on a Fast Rope. First off, what they mean by inside length is the distance spanned across the inside of the eye. Ours actually sits right at 4″ relaxed and 6″ pulled open.
Tucks refer to the amount of times each strand pair tucks under the pair to its right or left. We state in the video below that the optimal amount of tucks is 4 full tucks and 2 half tucks, but we actually ran out of room on our Fast Rope and did the 3/2 minimum that the Mil-Spec construction requires.
Construction
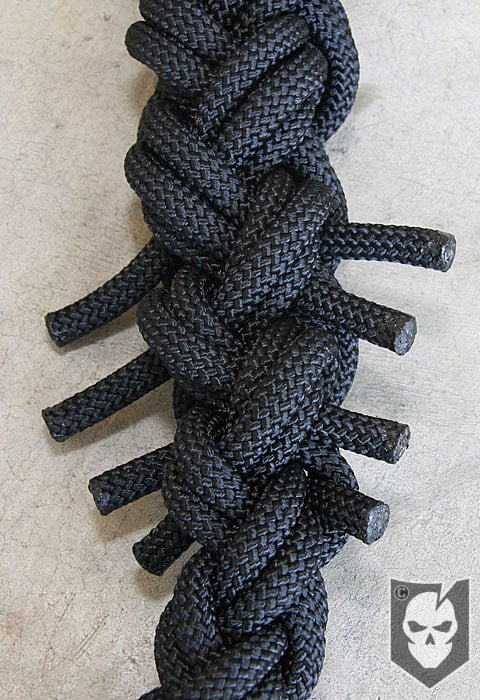

The first thing you’ll need to understand when creating a 4-Strand Eye Splice, is the difference between right-laid strands and left-laid strands. While we go into this in the video, a quick glance at the image to the right should clear up the difference for you. The strands coming from the right down to the left are right-laid strands and the strands coming from the left down to the right are left-laid strands.
Understanding this difference is important when you bend the rope around to create the eye. Your working end should be to the right of your standing part and the same-laid strands should match up before securing your created eye with a string or whatever method you choose.
Again we’ll defer to the video, because it’s a lot easier to comprehend the instruction while watching than it is reading about it. The video is one of our ones, but an important one, especially considering you could potentially be trusting this Eye Splice to support your weight many feet up in the air.
One tip that we didn’t enforce enough in the video is to securely wrap your paired working ends, all four of them, tightly with tape. The tape should also come to a point as much as possible so it can be worked into the tucks better. This can be a somewhat frustrating experience, but stick with because the end result gives you a great feeling of accomplishment.

Next KOTW
In our next KOTW we’ll be showing you how to terminate the free end of the Fast Rope by searing and whipping to properly secure it, be sure to check back for the completion of how to make your own Fast Rope for Climbing!
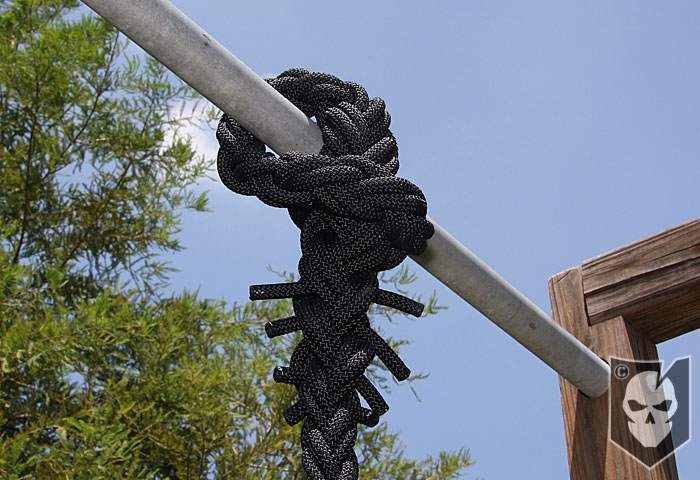
Remember that when hanging your Fast Rope for climbing to ensure you have a proper girth hitch around a secure object like in the photo to the right.
Building a Fast Rope for Climbing: Part 1, 4-Strand Round Braid
Building a Fast Rope for Climbing: Part 3, Whipping and Fusing