


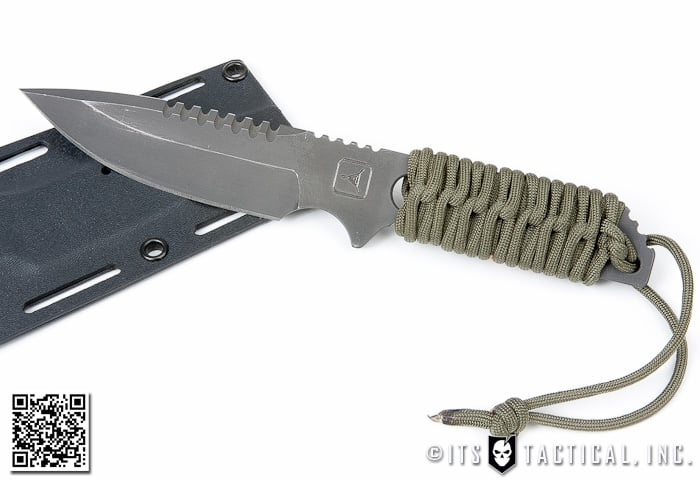
Knot of the Week: Strider Knife Paracord Wrap
Knot of the Week: Strider Knife Paracord Wrap

Ever wonder how to achieve the cool technique that Strider uses to wrap their knife handles with paracord?
On this week’s Knot of the Week we’ll show you exactly how to wrap a handle with this method, using a County Comm EOD Breacher Bar, a breaching tool for prying, cutting and pounding.
You can apply this wrapping principle to just about anything you want to. As you’ll see in our demonstration, we’ll take advantage of the four holes that the Breacher Bar offers to aid in securing the wrapping.
These holes are not mandatory though, and you can adapt this to any knife / handle you’d like. It is, however, handy to have a vise to hold your knife while you wrap the outer layer of the pattern. In fact, its almost mandatory, as without a tight wrap on this section it may loosen up with use.
This paracord wrapping will require two separate lengths of 550. One being 120″ and another right around 70″. So another cool thing about this wrapping is that you’ll have nearly 16 feet of paracord at your disposal should you need it. The inner wrapping (the 70″ piece of 550) can also be gutted to give your grip a thinner profile.
If you’re wrapping a knife with this method, do yourself a favor and tape the blade up so you don’t get cut. It will also prevent your knife from getting scratched up in the vise if you don’t have rubber jaws.
Strider Knife Paracord Wrapping » Decorative
(Strength: 3/Secure: 3/Stability: 3/Difficulty: 3)
Please refer to our Knot of the Week introduction post for a description of what these ratings mean.Uses:
- Increase the grip of an object
- Storing Paracord
- Decorating an object
Tying Instructions:
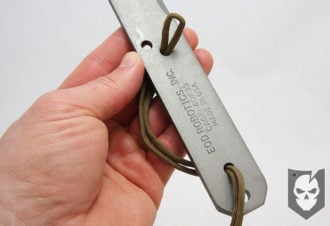
- To follow along with these instructions, your object will need to have at least two holes for paracord (breacher bar has four)
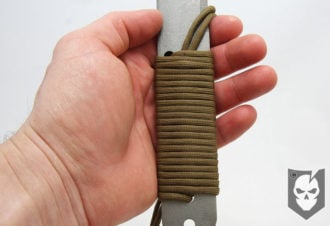
- *Have your two sections of paracord ready (120″ section and 70″ section)*
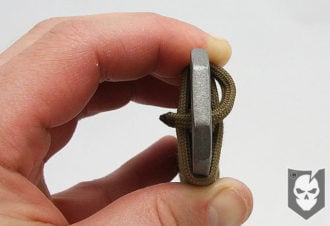
- Starting with the longer of the two sections, find the midpoint of the paracord and double
- Insert the doubled end in and through the second hole up from the bottom
- Pull the doubled end out through the second hole down from the top
- Insert the remaining paracord ends through the loop, creating a girth hitch
- Tighten up the girth hitch and pull the paracord ends out of the way
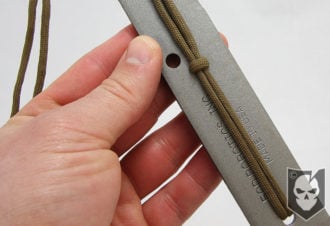
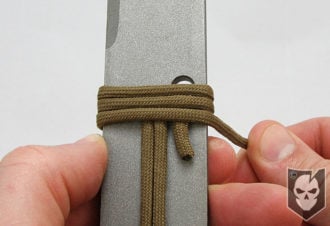
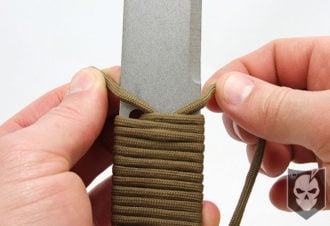
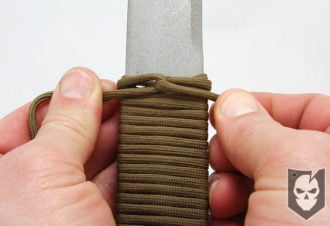
- Take the small 70″ section of paracord and insert around an inch through the remaining topmost hole
- Hold this working end down with your finger while you symmetrically wrap the remaining paracord all the way down
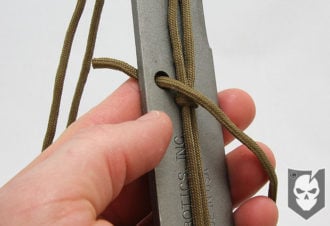
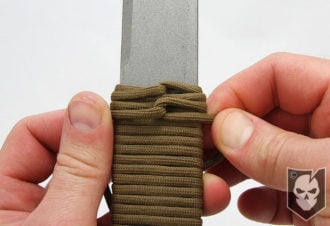
- At the bottom of the wrap, make one more loose turn and insert this working end through the second hole up from the bottom
- Tuck and tighten the remaining working end to hide it in the wrap
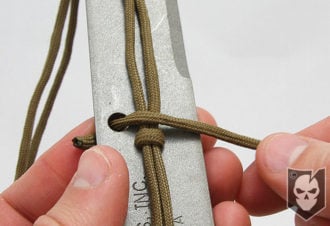
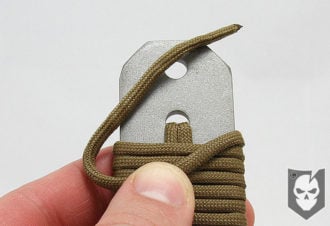
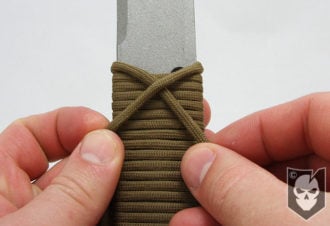
- *Now return to your new working ends on the longer paracord*
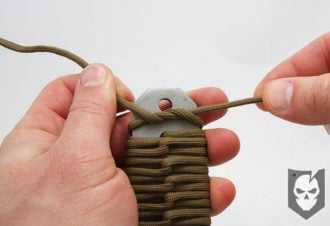
- Where these ends now exit the wrapping, pull them behind to the backside
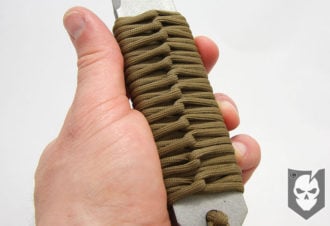
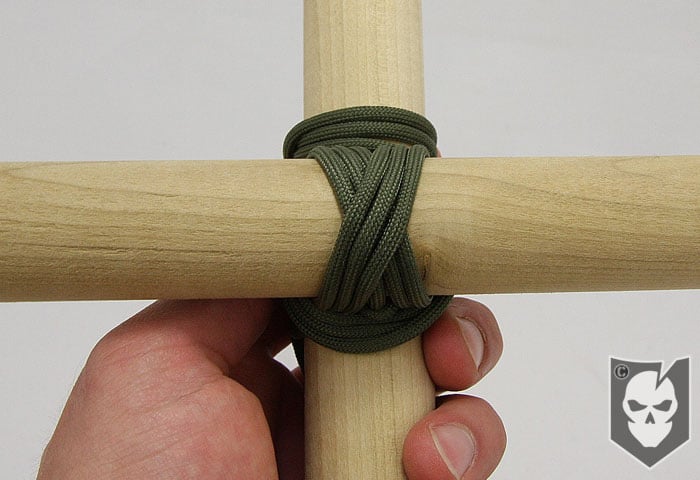
- To make the weave/hook pattern, remember right over left then left over right
- Create the pattern on this side of the handle, ensuring its tightness
- Bring the paracord to the opposite side and repeat the same pattern *right over left, left over right, tighten*
- Continue this pattern, alternating from one side of the handle to the other, until you’ve reached the bottom
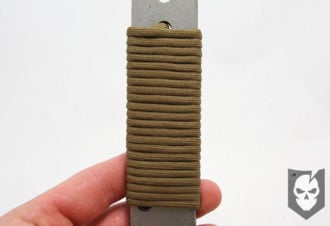
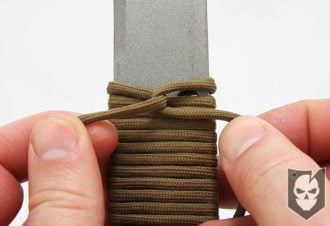
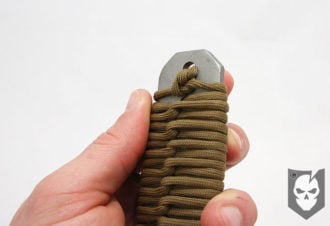
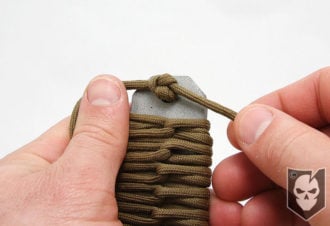
- Once at the bottom, tie a tight square knot to hold your wrapping in place
- Feed the ends through the remaining lanyard hole in the handle, flip the handle over and tie a second square knot
- This effectively locks the wrapping completely and allows you to know work with the remaining paracord
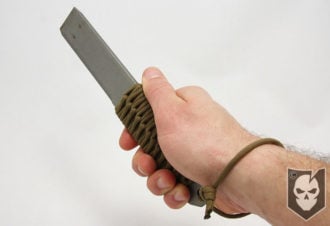
- You can tie any kind of lanyard knot with the remaining paracord, or if desired, trim the paracord and forgo the lanyard
- Enjoy!
View the gallery or YouTube video below and follow along with the steps above!


Discussion