
In recent years, there’s been a huge rise in homebuilt AR-15 rifles and one of the most popular series here on ITS is our DIY AR-15 Build. As the AR-15 lower receiver is the only part legally considered a “firearm,” it’s the only part that requires a trip down to your local licensed dealer. It’s easy and completely legal to have the other necessary parts shipped to your door to build your own rifle.
What if you didn’t need to visit an FFL to get your lower receiver though? What if there was a way you could have a receiver shipped directly to your door and using only a few simple tools, be ready to assemble the full gun? Today on ITS, we’re beginning our DIY 80% Lower Build to show you how to complete a lower receiver in your garage.
What’s An 80% Lower?
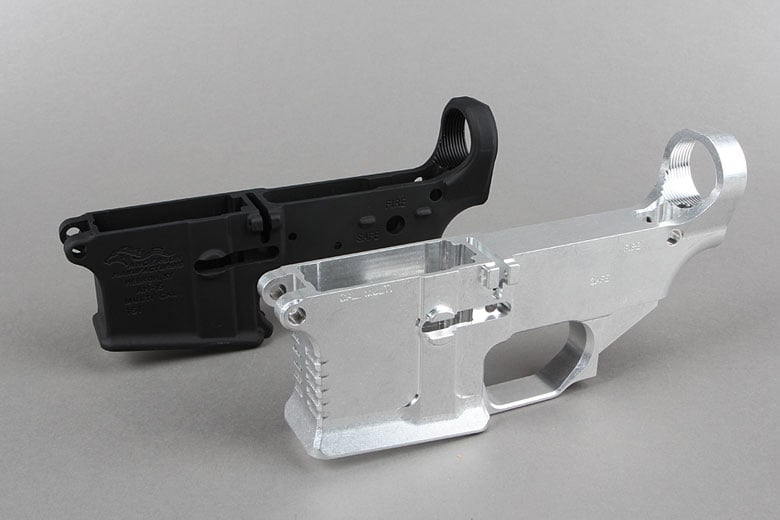

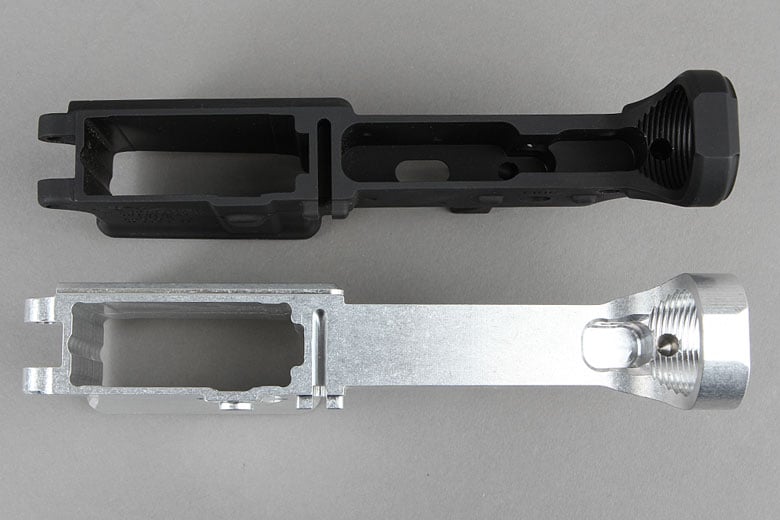
Receiver blanks, otherwise known as 80% lowers, are AR-15 receivers with a completely solid and un-machined fire-control cavity area. Because of this, these receivers don’t meet the BATFE’s definition of “firearm” and aren’t regulated like completed receivers are.
As Federal law allows individuals to make their own firearms, these unfinished receivers can be completed by a private citizen without a manufacturer’s license, provided the firearm complies with both 922r and the National Firearms Act. So if you’re building an AR-15 rifle or pistol, completing the manufacturing of a receiver blank from home is completely legal. However, it’s always a good idea to check your local laws to ensure you’re in compliance.
The machining to complete these lowers isn’t a particularly difficult process, but it does require some tools.
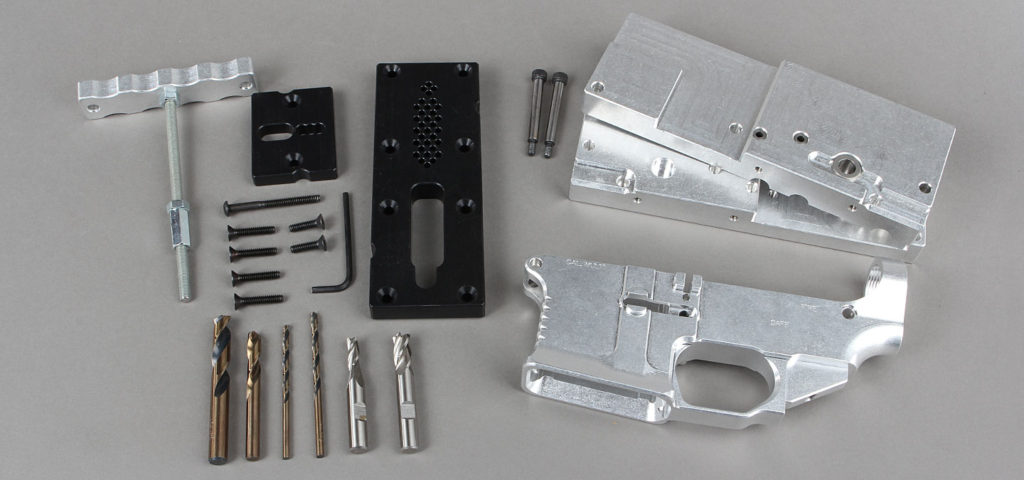
Parts and Tools For the Build
For this series, we’ll be using an 80% lower and some tools from Optimus Defense. Some of these may not be completely necessary to build your own lower out, but we believe they’ll make the process much easier when it comes to machining out the material necessary to create the fire control cavity area.
In addition to the tools from Optimus Defense, we’ll be using a few larger tools available from your local Harbor Freight or other tool store.
The Lower


Optimus Defense’s 80% lower is precision machined out of 7075-T651 aluminum plate and offers a flared and slightly oversized magwell. It’s also vibro finished to remove sharp edges and any machining marks.
We’ll be looking at different options for finishing it once it’s complete and to assist with finishing, we’ll be trying out the Painting T-Handle from Optimus Defense.
Drill Jig
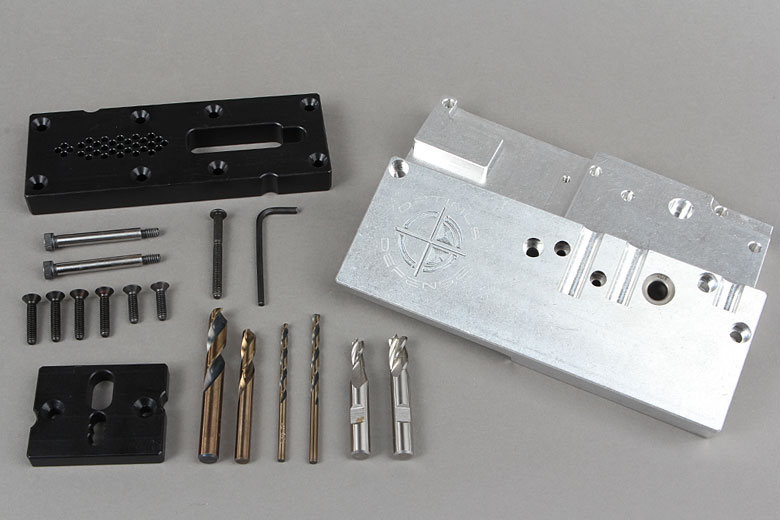
Specifically designed for their 80% lowers but compatible with any mil-spec lower, the Optimus Defense AR-15 Lower Drill Jig is capable of completing a lower to mil-spec tolerances. The jig includes plates for the different steps of machining out the lower, as well as a tool kit including drill bits and endmills.
Tool depth guides are built into the jig and all screw heads are below the surface, allowing for multiple work holding options. In addition, the self-centering top plates ensure everything is correctly aligned.
Drill Press
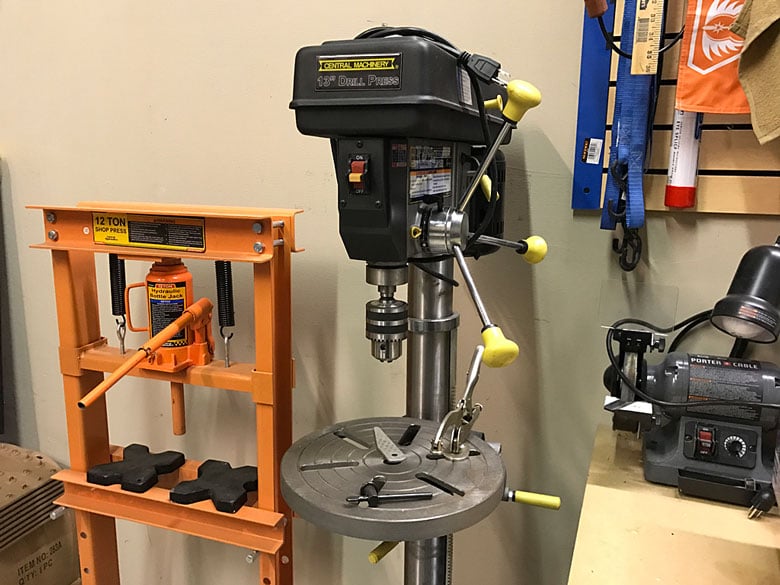

The main section of the machining process for this lower involves drilling out material from the receiver. One of the best tools you can invest in for precision drilling is a drill press. Our shop uses a 13″ Drill Press from Central Machinery and you can find this exact model at your local Harbor Freight store.
Vice
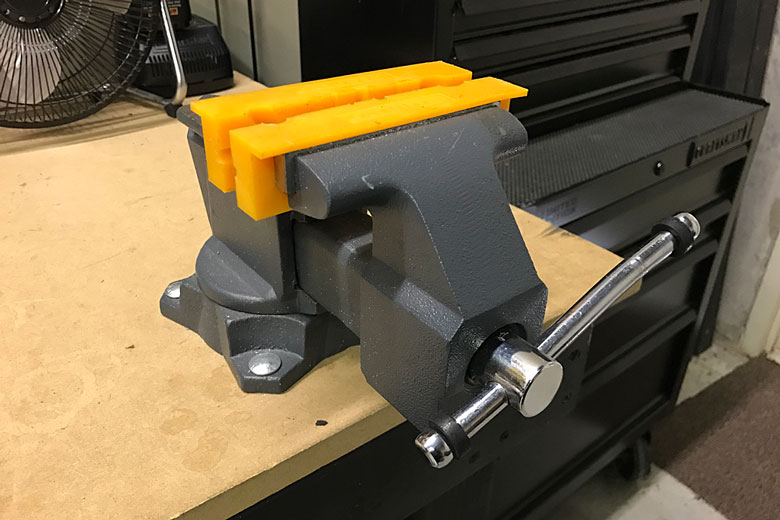
When installing parts into a lower receiver, having a good vice makes all the difference. The brand doesn’t really matter but we’d highly recommend picking up some Vice Jaws to ensure you don’t damage the finish of your receiver when working on it.
Notes
As with all things gun related, you’ll need to check your local and state laws to ensure building an 80% lower is something you can legally do. Stay tuned for our next article in the series for the DIY 80% Lower Build!
Have you completed an 80% lower before? Let us know how it went in the comments below!