


Which Camouflage is Right for You? ITS Tactical Camouflage Comparison II Results
Which Camouflage is Right for You? ITS Tactical Camouflage Comparison II Results
We know you guys have been eagerly awaiting our Camo Comparision II results, and today we’ll be releasing our preliminary comparison images.
We’re asking for your help to cast your vote on which four patterns you find to be the most effective in the terrain locations below.
As there are close to 200 images contained below, we need to narrow them down into the four most visually effective patterns before we release the further analysis on each of those respective patterns. If you remember from our previous article on Target Detection and Identification, there are many other ways to analyze a pattern other than what the naked eye sees.
Without further adieu, we present our preliminary Camo Comparison II images and look forward to your feedback. Please cast your votes in the polls at the end of each location.
Comparison Specifics
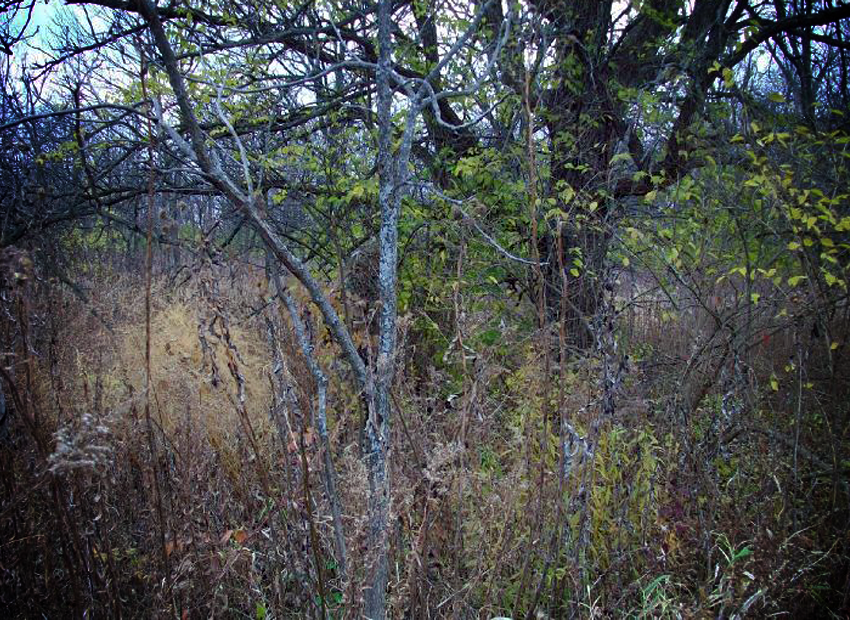
We were able to wrap up our 2nd Camo Comparison in a matter of one day (19 Jul 10) at Big Bend National Park in Texas, which was the closest location to us that we felt simulated Afghanistan terrain. While the entire trip took three days, we started our 10-hour drive early enough to use the first day to scout locations and make things easier on the day we shot the images. If you haven’t read the adventures we encountered along the way click here!
The comparison took place in four locations (Alpha, Bravo, Charlie, Delta) and four distances made possible by optical camera zoom. All photos were shot on a tripod with a Canon EOS 40d using a Canon EF-S 17-85mm f4-5.6 IS USM. We tried to shoot as close to f16 as possible, which we’ve found to be the sweet spot for focus and depth of field on this particular lens.
50mm is closest to what the eye sees naturally and is represented by Distance 3 in each location. Distance 1 was an extreme wide angle at 17mm, Distance 2 was a wide angle at 30mm, and Distance 4 was a medium telephoto at 85mm. While we kept the optical zoom levels consistent, the distance we were shooting from varied in each location as described below. Details on each location such as time, date and GPS coordinates are also shown below.
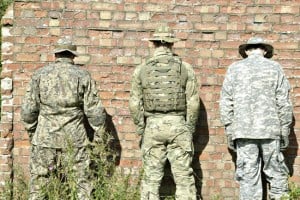
Camouflage Patterns Used
- Crye MultiCam
- Bulldog Tactical Mirage Camo
- Digital Concealment Systems A-TACS
- Hyde Definition PenCott GreenZone
- Desert MARPAT (Desert Digital)
- Woodland MARPAT
- SAF Digital (Singapore)
- UCP (ACU)
- 3-Color Desert Camo (DCU)
- Chocolate Chip Desert Camo
- Desert Tiger Stripe
- Japanese Flecktarn
In each set you’ll first see our control image, which is a shot of the white mannequin we used sans camouflage.
Each of the 12 camouflage patterns was placed on a torso mannequin and each location was completed in a matter of just 20-30 minutes. This was to ensure that the lighting was realitively the same for each image. Full sun was the best description of the shooting conditions.
The white balance for the photos was custom set using an 18% Grey Card in each location. The photos have not been altered in any way by Photoshop or any other editing program and do not include our watermark. They have been resized to 1024 x 1024 though.
Larger images are available on our Flickr Account but are copyrighted and not free to use without permission. For more specifics on our images you can view the properties on each individual image on Flickr. Please contact if you need high-resolution use of our images.
What’s also great about Flickr is that you can view our sets as a slideshow. If you click the first image in the sets below, it will bring up a viewer that will allow you to easily move to the next picture by clicking on the arrow that will be visible when hovering on the right side of the image. This should be just as easy as the Flickr slideshow.
Location Alpha
 In Location Alpha we tried to find a mountainous terrain that closely resembled the mountains of Afghanistan. The camera baseline distance was set at approx. 100 yards away, thus distance three would be the closest to what the eye would truly see. Location Alpha was shot on 19 July from 0800 to 0830. GPS Coordinates: 29 25.523 -103 08.551
Please cast your vote on which four patterns you find to be the most effective at the end of each terrain location. The polls will allow four (4) multiple choice selections.
Distance 1
[flickrset id=”72157624655326292″ thumbnail=”square” overlay=”true” size=”original”]
Click here to view Distance 1 Set on Flickr
Distance 2
[flickrset id=”72157624530622143″ thumbnail=”square” overlay=”true” size=”original”]
Click here to view Distance 2 Set on Flickr
Distance 3
[flickrset id=”72157624655307570″ thumbnail=”square” overlay=”true” size=”original”]
Click here to view Distance 3 Set on Flickr
Distance 4
[flickrset id=”72157624655297314″ thumbnail=”square” overlay=”true” size=”original”]
Click here to view Distance 4 Set on Flickr
Poll
Location Bravo
 In Location Bravo we attempted to simulate a plains area with a mountainous background. The camera baseline distance was set at approx. 50 yards away, thus distance three would be the closest to what the eye would truly see. Location Bravo was shot on 19 July from 0945 to 1015. GPS Coordinates: 29 25.145 -103 08.255
Please cast your vote on which four patterns you find to be the most effective at the end of each terrain location. The polls will allow four (4) multiple choice selections.
Distance 1
[flickrset id=”72157624655290266″ thumbnail=”square” overlay=”true” size=”original”]
Click here to view Distance 1 Set on Flickr
Distance 2
[flickrset id=”72157624655282204″ thumbnail=”square” overlay=”true” size=”original”]
Click here to view Distance 2 Set on Flickr
Distance 3
[flickrset id=”72157624655274950″ thumbnail=”square” overlay=”true” size=”original”]
Click here to view Distance 3 Set on Flickr
Distance 4
[flickrset id=”72157624530562311″ thumbnail=”square” overlay=”true” size=”original”]
Click here to view Distance 4 Set on Flickr
Poll
Location Charlie
 In Location Charlie we tried to find a terrain that resembled a wash. The camera baseline distance was set at approx. 25 yards away, thus distance three would be the closest to what the eye would truly see. Location Charlie was shot on 19 July from 1115 to 1145. GPS Coordinates: 29 25.059 -103 08.464
Please cast your vote on which four patterns you find to be the most effective at the end of each terrain location. The polls will allow four (4) multiple choice selections.
Distance 1
[flickrset id=”72157624530554229″ thumbnail=”square” overlay=”true” size=”original”]
Click here to view Distance 1 Set on Flickr
Distance 2
[flickrset id=”72157624655250712″ thumbnail=”square” overlay=”true” size=”original”]
Click here to view Distance 2 Set on Flickr
Distance 3
[flickrset id=”72157624530538005″ thumbnail=”square” overlay=”true” size=”original”]
Click here to view Distance 3 Set on Flickr
Distance 4
[flickrset id=”72157624655235344″ thumbnail=”square” overlay=”true” size=”original”]
Click here to view Distance 4 Set on Flickr
Poll
Location Delta
 In Location Delta we tried to find an area that resembled a valley or grazing area. We fell this location is very important to the overall comparison, as it specifically shows what strong shadows from directly overhead sun do to camouflage. The camera baseline distance was set at approx. 75 yards away, thus distance three would be the closest to what the eye would truly see. Location Delta was shot on 19 July from 1300 to 1330. GPS Coordinates: 29 24.329 -103 08.501
Please cast your vote on which four patterns you find to be the most effective at the end of each terrain location. The polls will allow four (4) multiple choice selections.
Distance 1
[flickrset id=”72157624530511155″ thumbnail=”square” overlay=”true” size=”original”]
Click here to view Distance 1 Set on Flickr
Distance 2
[flickrset id=”72157624655208670″ thumbnail=”square” overlay=”true” size=”original”]
Click here to view Distance 2 Set on Flickr
Distance 3
[flickrset id=”72157624655198418″ thumbnail=”square” overlay=”true” size=”original”]
Click here to view Distance 3 Set on Flickr
Distance 4
[flickrset id=”72157624530455929″ thumbnail=”square” overlay=”true” size=”original”]
Click here to view Distance 4 Set on Flickr
Poll
Plans for the future?
We hope to continue to develop and refine our technique for comparing camouflage patterns and bring our readers the results. While this comparison was completed in just one day, there was a lot of coordinating, planning and driving that went into bringing you these results.
This wouldn’t of been possible if not for the support of our members and the camouflage companies like Bulldog Tactical, Digital Concealment Systems, and PenCott that graciously sent us uniforms to use in the comparison. The SAF Digital and Japanese Flecktarn were also donated by one of our Plank Owners, Eric Chevalier.
We’d like to thank our friend Jack from The Survival Podcast for his hard work and input on this project, as this wouldn’t have happened without him (and his truck). Also, a huge thank you to Riaan Rossouw for his continued support and advice in all things camouflage.
Stay tuned for further comparison using the four patterns that our readers choose!
Discussion