


See the Invisible with a FLIR ONE Thermal Camera
See the Invisible with a FLIR ONE Thermal Camera
Over the past couple of decades, we’ve seen great leaps in innovation of enhanced vision technologies, partially, if not predominantly, driven by military need and a private sector’s desire to provide for that need. Night vision is certainly one of those technologies, but the more interesting one, at least for me, has been infrared imaging.
Infrared imaging allows an individual to see not light, but heat. This has a variety of uses, from the industrial examination of equipment or construction, security, surveillance and recreational/tactical hunting (probably better named “reconnaissance”). As the technologies develop, the equipment and its manufacturing becomes more cost efficient. As a result, the prices drop for the end user. As of a couple of months ago, FLIR Systems has released a hand-held iPhone accessory, the FLIR ONE, that puts the power of infrared imaging in the palm of your hand for around $350. As a gadget consuming beast, I found this impossible to resist.
So impossible in fact, that I finally decided to upgrade my iPhone 4s to an iPhone 5s shortly after the announcement of the iPhone 6/6+. I was asked a number of times “why didn’t you upgrade to the 6?”, to which my standard reply has been to launch the FLIR ONE application, turn the camera on, and show the one posing the question exactly why I upgraded at all.
At the time of writing this, the FLIR ONE exists only for the iPhone 5/5s and to be honest, I just didn’t want to wait for them to build a new form-factor version of the FLIR ONE for the 6. That and the fact that I’m increasingly becoming a smartphone Luddite as I look around in any given US city (and a number of foreign cities, as well) and watch what can only be described as the “zombification of the populace.” But that’s a separate subject and so, as an old Irish phrase goes, “agus fagaimid siud mar ata se.”
Thermal Imaging
What does an infrared camera actually do? How does infrared imaging actually work? What does it look like? From FLIR Systems Inc.’s description, we find this:
“An infrared camera is a non-contact device that detects infrared energy (heat) and converts it into an electronic signal, which is then processed to produce a thermal image on a video monitor and perform temperature calculations. Heat sensed by an infrared camera can be very precisely quantified, or measured, allowing you to not only monitor thermal performance, but also identify and evaluate the relative severity of heat-related problems.” – FLIR Systems, Inc.
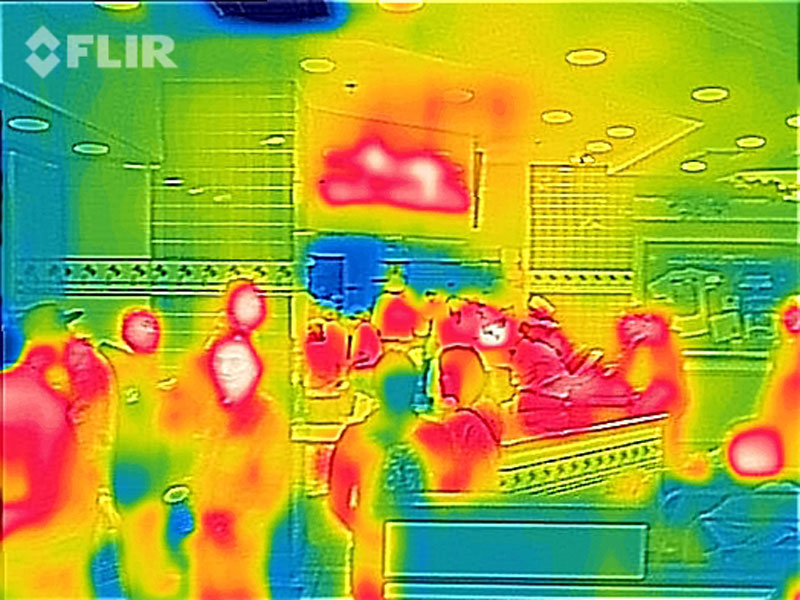
The image itself, can be viewed on a monitor with the heat values moved into a human-visible spectrum. An example of a typical thermal image may look something like this:
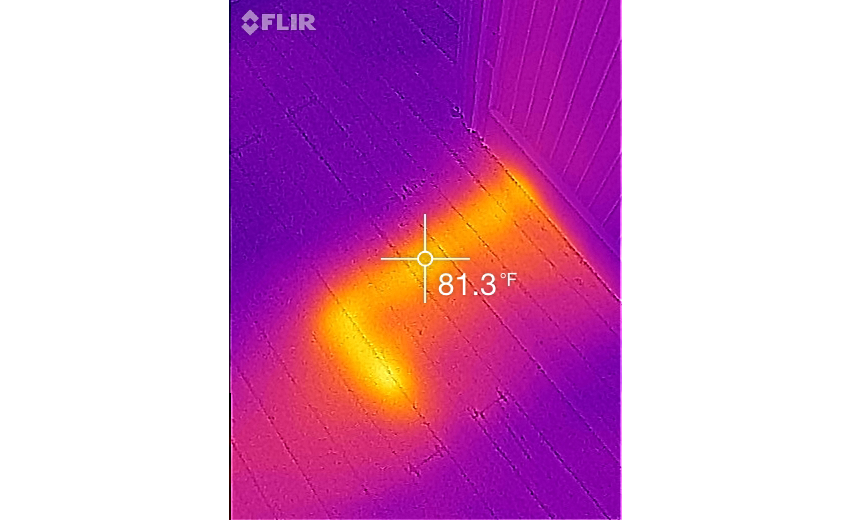
What’s shown in the image above is a picture of the floor in my apartment, right above where the water heater in the basement has its hot water line running up and then across to the side of the building to supply hot water to the apartments above mine. When you look at the floor with the naked eye, you see a normal softwood floor. If you place your hand on the floor, you can feel that a specific strip is warmer than the surrounding floor, but you can’t see the heat discrepancy. Only when pointing the thermal camera at it do you see the rather large difference and the specific shape of the warmer area.
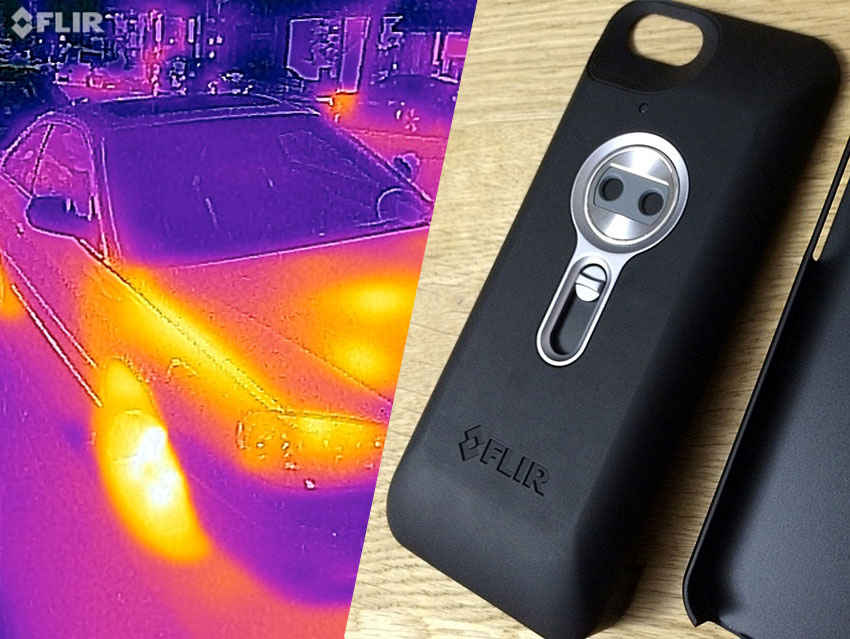
The FLIR ONE
The FLIR ONE is a fairly compact device and much smaller than FLIR’s previous entries to the consumer market. I’d previously purchased the FLIR Scout PS24, which cost about $2,200 at that time and has subsequently dropped to $1,800 or so; the price of early adoption is sometimes steep. The FLIR ONE setup consists of a slim iPhone 5/5s case, the FLIR ONE, a charging cable, a headphone extender cable and some rudimentary documentation.
When attached to the iPhone, the FLIR ONE resembles a battery pack. It’s separately powered though and the only interaction between the iPhone and the FLIR is the transmission of data through the iPhone’s USB port. The iPhone will not power the FLIR ONE and the FLIR ONE provides no power to the iPhone. This means that you’ll be charging two devices when they run low on power, though I’ve found that the FLIR ONE does not require the nightly charge-up that the iPhone 5s does. This obviously will vary with use; if you keep the FLIR ONE on all the time, you’ll be charging it more often. I left the FLIR ONE camera on to see how long it stays charged and got about 4.5 hours out of it, slightly better than the company estimate of 4 hours of use.
To use the camera, the process is fairly straightforward. First, you’ll need at least the FLIR ONE App, available through the iTunes Store. It’s free, as all of the other FLIR Systems Apps are, due to making their money through selling the device. Without the device, the FLIR Systems apps don’t do much, as you have to have the FLIR ONE installed and turned on to pull thermal images into the phone.
Features
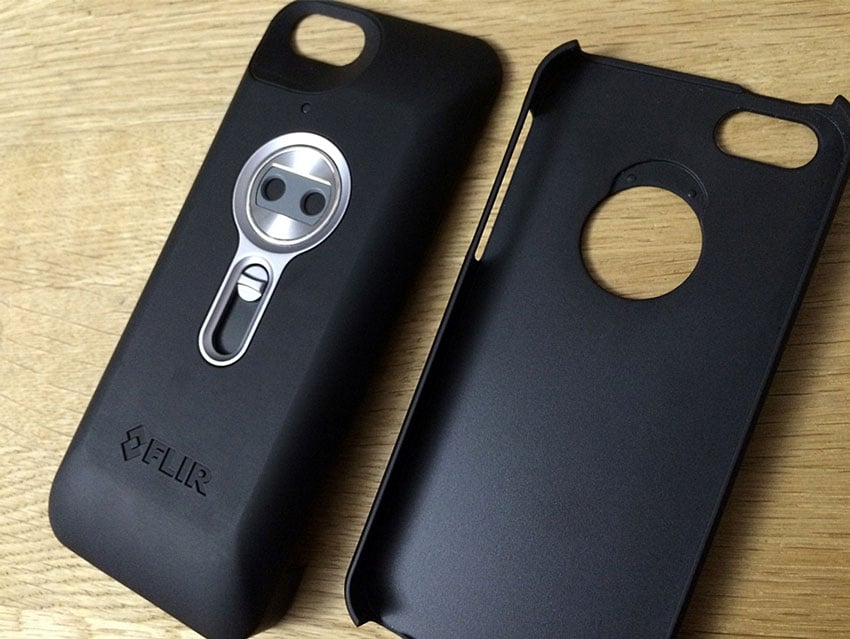
Once in the FLIR ONE application, you’ll need to power the camera on by pulling the shutter switch open. The switch is a three-position switch; fully up, the camera is off. Pull it down to the mid-position and the camera is on. To adjust the image (calibrate the heat it sees), you pull the switch the rest of the way down to the bottom position and you have to hold it there until the “adjustment” of the image is finished to the application’s liking. This is all described by the in-app instructions and is reasonably intuitive.
If you examine the camera’s back, you’ll find that right above the 3-position switch are the two lenses. One is the thermal lens and the other is a regular-light lens, as the device seems to use both images to create a composite image for viewing. The FLIR ONE does not use the iPhone’s built-in camera at all, they’re entirely separate and the fixed distance between the two lenses allows for the calibration of the two images to be meshed for the final image. As a result of this design, you’ll find that close-up shots are better handled by another FLIR App: FLIR ONE Close Up.
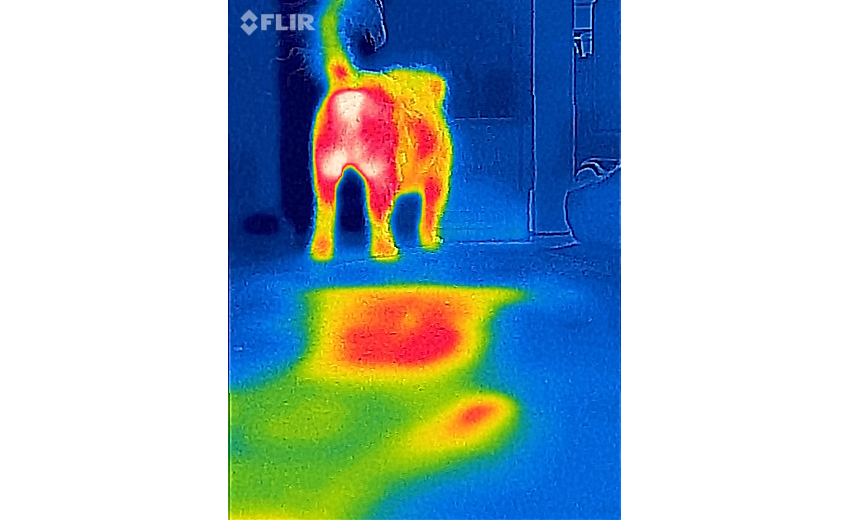
After you’ve got the camera on and the image adjusted, you’ll be seeing the default “filter” image of whatever you’re pointing the camera at.
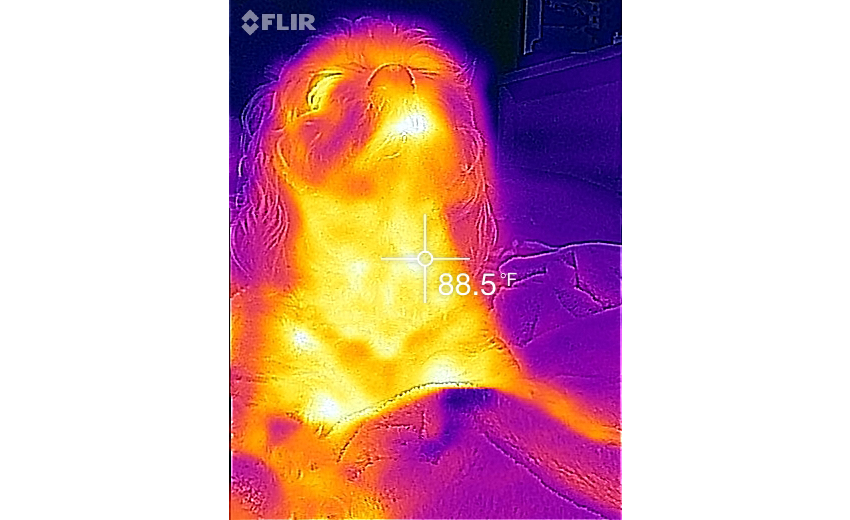
Shown above is an image of my dog, Stanley, with the spot temperature reading setting turned on. The temperature reading can be turned off and leaving it on while moving the camera around will require you to adjust the image more often than if you leave it off. If you want the temperature reading, you’ll need it on. Each image shows the heat signature of everything in the viewfinder, relative only to everything in the viewfinder. In other words, if you point the camera at a field of view with a bunch of things in the range of 45 – 50 degrees, it will distribute the color field it shows with the 50 degree things looking pretty hot and the 45 degree things looking pretty cold. If you move your hand into the view, which is easy to do since the two lenses are right in the middle, suddenly the image is going to show your hand as red-hot and everything else in the view as roughly the same.
There are also various color-filter modes to choose from, which are accessed by swiping the image left or right. You can look at just the gray data, gray data with hottest shown as red, gray data with coldest shown in blue and a few other color spectrums which may be to your liking in any given situation. Actually taking the photograph is done with the camera button on screen, and you can switch between taking stills or video with the slider switch on the screen to the right of that.
Footage is a little less smooth than video taken by the normal iPhone camera, which is understandable considering that it’s creating a composite image of thermal and normal light for each frame. Still photos are of lower resolution than the iPhone’s built-in camera and if what you want are high-resolution images for printing or some other purpose, you’re probably still going to have to buy a more expensive dedicated thermal camera. The FLIR ONE is an entry level device, for entry-level users and the cost reflects this.
Practical uses for the FLIR ONE are plentiful, ranging from counter-surveillance, spotting wildlife, locating energy efficiencies in the home and even determining overheating electronic components. Want to know if a car has recently been driven? Point the FLIR ONE at a row of parked cars and the recent arrival will immediately stand out among the other cars. Hear rustling in the back yard? Point the FLIR ONE out there and any mammal rooting around in the bushes will immediately be visible. Want to know why you’re feeling a cool draft in the living room? Take a look with the FLIR ONE and see where the cold is coming from. Wondering if you’ve got a wi-fi router prone to overheating? Take a reading with the FLIR ONE and check the spot temperature against the normal operating temperature of that device.
There are, of course, some shortcomings of the device and of thermal imaging in general. Specific to the FLIR ONE, I found that a complete absence of light reduces the utility of the device. This is due to the fact that it’s using a normal camera and a thermal camera meshed together to provide a fairly high resolution image. If visible light is not plentiful (for example, at night without a secondary light source), you’ll find the resolution and detail of the image you see is largely reduced. Compared to the Scout device mentioned earlier, the images I examined at night in unlit areas were less useful than those provided by the Scout. At the same time, the Scout’s pixel resolution is still lower and provides no simple means to save those images, nor easily transport them to another device via network connectivity. The FLIR ONE will allow you to save that image as a file on your iPhone and you can copy, text, email, or otherwise send it to another device where you can examine it more closely.
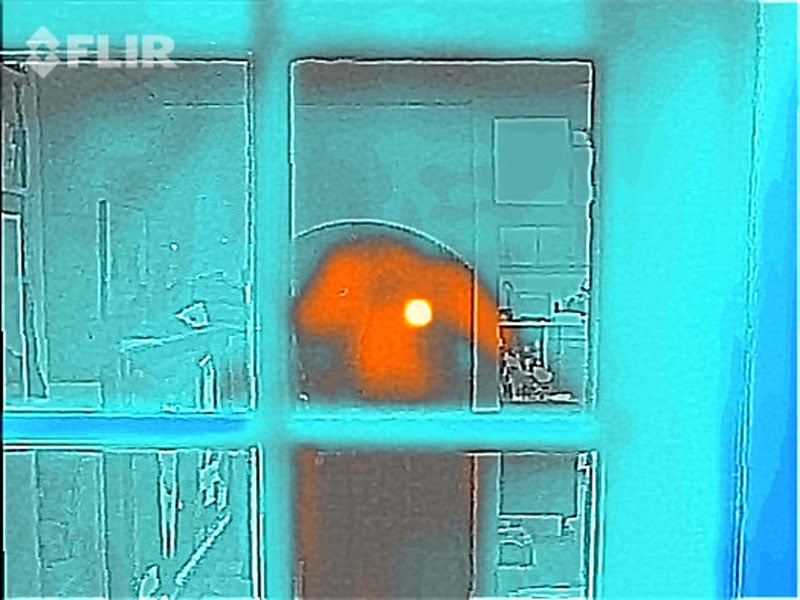
Another shortcoming, which seems to be more an issue for thermal imaging in general, is that unlike visible light spectrum cameras, thermal devices have difficulty seeing past glass. If you point the FLIR ONE (or any other thermal camera) at a window, hoping to see whether a human is in the room you’re looking into, you’ll find that the FLIR ONE displays your reflection. The way thermal imaging works means that when it sees glass, what’s returned is the thermal property of the glass itself. Again, this effect is reduced when there’s enough visible light to provide data to the visible light camera, but it’s still a factor to consider.
When the FLIR ONE was first released, there was a video making the rounds purporting to show how easy it was to gather someone’s PIN number by pointing the FLIR ONE at the keypad that was just used by the previous keypad visitor. I attempted to replicate this on a few different keypad devices; an ATM, an external garage door control keypad, a security system keypad and a standard telephone. Determining a four-digit code was pretty easy on the standard telephone, but I found that the security system, the ATM and the garage door control keypad were much more difficult to distinguish. All were illuminated constantly and as a result, were already mildly warm, particularly when juxtaposed with the surrounding non-electronic areas. It could theoretically be possible to determine a sequence of digits, but you would likely have to do some serious examination of the image; more than what you would be able to do by viewing the image on an iPhone screen. As the video in question points out, this method of attack is easily defeated by simply resting your fingers on a couple of extra keys while entering your multiple-digit code.
One other oddity I found in using the FLIR ONE is that it seems to be calibrated to only read spot temperatures as high as 212 degrees Fahrenheit. I took spot readings of the Sun, which read as 212 degrees and of a campfire, which again showed a temperature of 212 degrees. Obviously, both of those items are significantly warmer than 212 degrees, but I can’t say if this oddity is the result of hardware limitations or software limitations.
Overall, I found the FLIR ONE to be well-worth the low entry price and fascinating to use, even when you have no particular purpose to be using it. Whether you’re trying to find out if someone is sneaking around your backyard, or where your dog might have gone to, the FLIR ONE is useful for a variety of purposes. Perhaps no one specific use will justify the cost, but the collective usability just might. Combine that with it being a fully-functioning thermal camera that’s only the size of a cell phone battery pack, for half the cost of a smartphone and you may have just talked yourself into buying one.
Editor-in-Chief’s Note: Matthew Sharp is a Plank Owner and Life Member at ITS and goes by the username “viator.” He lives in The People’s Republic of Northern California and enjoys long range shooting, carrying heavy objects great distances and fuzzy little puppies.

Discussion