


How to Build a Tactical Gear Stand
How to Build a Tactical Gear Stand
 Today we’d like to show you how to build a cool way to store and display your gear.
This idea originally came to us after viewing the Marc Lee and Michael Monsoor memorial a few years ago on the SEAL Team Three Quarterdeck.
Under glass cases, they have Lee and Monsoor’s gear prominentley displayed for all to see.
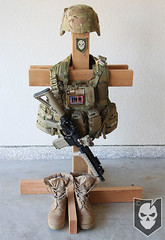
We thought this kind of wooden stand would be the perfect way to hang up heavy body armor that typically breaks normal hangers, and also easily access your gear.
We’ve been wanting to write this article for awhile now, showing you how to build your own.
Materials
For our gear stand we chose to go with Cedar for the wood. Why? Well, Cedar smells great, it resists the natural tendency of wood to crack, and naturally resists moisture and pests. Plus, it looks great!
The project requires the following:
- 1 – 48″ 4×4 Post
- 2 – 24″ 2×4’s
- 4 – 18″ 2×4’s
- 16 – 2.5″ Deck Screws
- Small Drill Bit for Pilot Holes
- Counter Sink
- Saw
- Measuring Tape / Yard Stick
- Level
- Pencil
- 2 – Sawhorses (optional, but will help)
We went to Lowe’s and Bought a 4x4x8 Cedar Post, which was the smallest length they sold in a Cedar 4×4, but you’ll have enough to make two of these if you go in with a buddy.
Also, when we bought two 2x4x8 we were able to save some time by having Lowe’s cut our 2×4’s down into 18″ and 24″ pieces.
Preparation
 Since we already had the 2×4’s cut, we were able to just throw the 4×4 on the Sawhorses, mark off 48″ and get the last of the cutting done. The Lowe’s we visited didn’t cut 4×4’s because their saw wasn’t big enough to handle that dimension.
We really wished they would have, because our 4×4 cut was less than stellar. We attempted to use a mitre box and a regular Backsaw, and quickly ditched the mitre box idea. The 4×4 wouldn’t fit very well inside of it.
Our suggestion is to cut slowly and try to be precise. It doesn’t matter too much though, because your cut will become the top where your helmet rests.
Once all the wood is cut, give it a light sanding and drill your pilot holes. We put two pilot holes in each of the 18″ pieces that make up the base, and four holes in each of the mid-section pieces.
After the pilot holes are drilled, use the counter sink to enlarge the holes so the deck screws fit flush.
Assembly
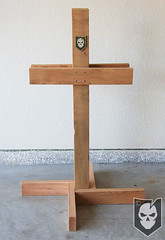
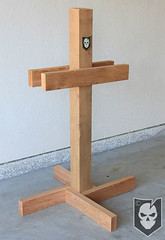 Start by taking one 18″ base piece at a time and screwing the two screws into the 4×4 base. You’ll be able to see in the photos how we staggered the base pieces.
Once the base is together, it’s time to assemble the mid-section.
We measured down approximately 13″ from the top of the 4×4, to the top of the horizontally placed 2×4 of the mid-section.
Use a level as you screw in the four screws in the first mid-section 2×4.
Turn the stand around and place the last 2×4 at the same 13″ distance from the top, double checking yourself by placing the level across the two mid-section 2×4’s. Ensuring the last 2×4 is level, screw in the last four screws.
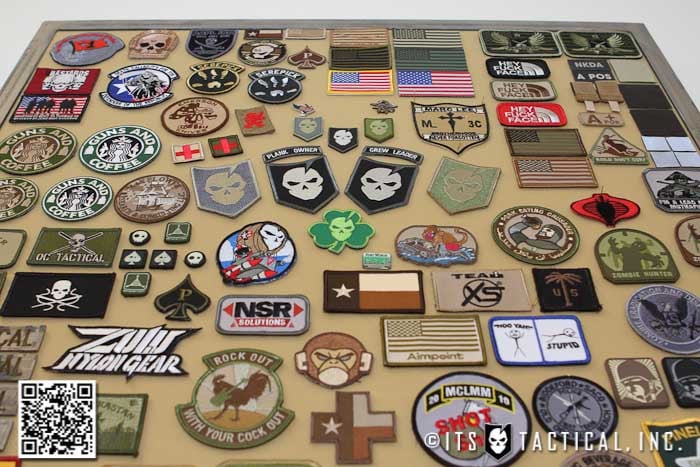
Your Tactical Gear Stand is now complete and ready to hold all your gear! You can purchase adhesive-backed loop velcro to stick on your stand, and store all your patches on it too.
Endnotes
 Provided you have all the necessary tools for the job, the stand should only run you around $30 for the wood and deck screws. It will be much less if you use regular wood instead of Cedar.
Please feel free to ask any questions if there’s a step you don’t understand, or would like us to elaborate on.
Hope you enjoyed the article!


Discussion