Are Mini Red Dot Sights a Viable Option for Pistols? Jeff Gonzales Joins us for a Q&A
I’m excited to announce a new partnership here on ITS Tactical, with Jeff Gonzales of Trident Concepts as a contributor.... View Article
View ArticleWe’ll be taking a different approach to our Knot of the Week Series for the next three weeks, as we bring you a few articles on creating your own Fast Rope for Climbing.
Fast Rope Insertion & Extraction Systems (FRIES) provide safe and efficient methods for inserting and evacuating personnel to and from specific targets. Fast Ropes come a few different ways, which is with an eye splice or a metal ring for hook up to the davits found on some helicopters.
They’re also available with and without the loops for extraction. As this KOTW is for creating a climbing rope, we’ll be creating a Fast Rope with an eye splice and without extraction loops.
Today we’ll be getting into how you create the 4-Strand Round Braid that’s used to braid a Fast Rope, followed by instructions in the coming two weeks on eye splicing the Fast Rope, and either back splicing or whipping the bottom end.
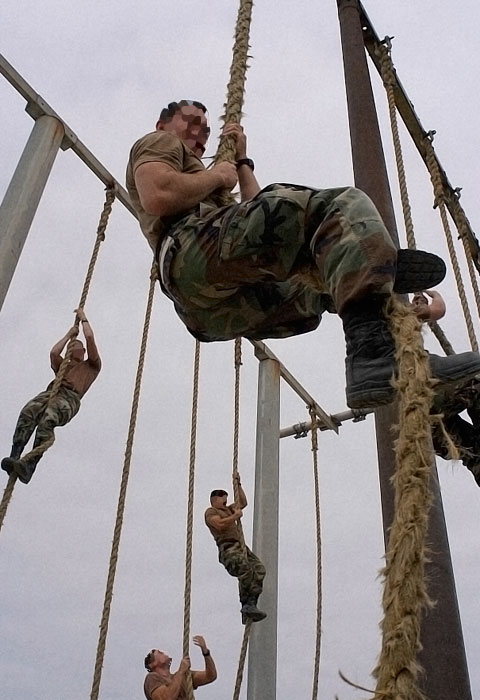
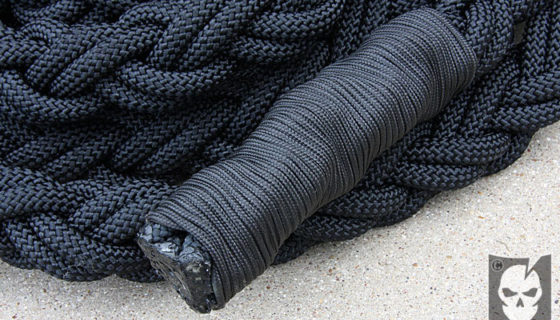
First of all if you’re not climbing a rope, you’re missing out on one of the best forearm and grip workouts around. Climbing a rope is at the core of the Functional Strength discussions we’ve had here on ITS. While we’ll save the reasons and methods for climbing a rope for a later article, let’s just say it’s an important thing to train and could save your life.
The reason that a Fast Rope is braided with a 4-Strand Round Braid, is to reduce overall kinking and create an outer pattern that’s easier to grip versus a smooth rope. This also aids in controlling the descent on insertion. That outer braided pattern also makes a great grip when ascending a Fast Rope. If you haven’t had the pleasure of climbing an old Fast Rope that’s been converted into a climbing rope, it’s so much nicer to climb.
Climbing a Fast Rope is not a military technique, and not commonly practiced. Climbing in the military is typically done with a Caving Ladder, or in PT scenarios with Manilla Ropes. While Manilla Ropes are great to climb, they become frayed, slick and can leave splinters in your hands and other parts of your body if you’re not careful when descending.
Purchasing a Fast Rope is out of most budgets, as one of these can run anywhere from $750 to $2000, depending on the length. Professional Fast Ropes for the Military are also made with machines, braided very tightly and almost impossible to identically create. What we’ll show today is not a professional Fast Rope, and isn’t a substitute for one. However, it is a great climbing rope and is equally as strong as a professional Fast Rope provided you use the rope and braiding technique we recommend.
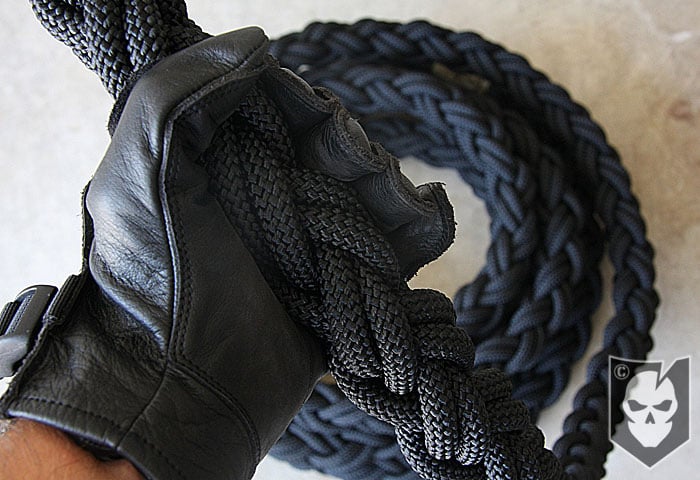
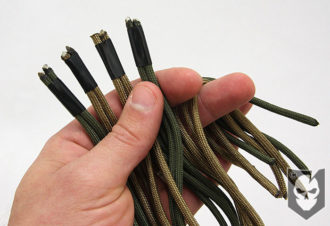
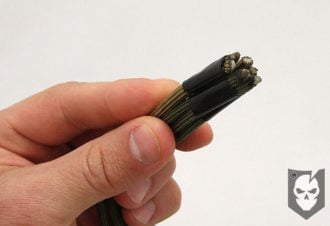
As mentioned above we’ll be demonstrating the 4-Strand Round Braid today, which is the first step in creating a Fast Rope. The rope we built was created out of 8 – 35ft. strands of 7/16″ Bluewater Assaultline Static Rope. This is where you’re asking yourself “Why did they use 8 strands when it’s a 4-Strand Round Braid?” The answer is because each of the four strands in the braid is doubled.
We used Bluewater Assaultline Static Rope because we wanted something that was equally as strong as Military Fast Rope. With the four doubled strands used in construction, our Fast Rope has a 28,000+ lbf (pound force) or 129 Kn (kilonewtons) rating, and using an authentic eye splice was the strongest and safest method of terminating the line. An eye splice develops approximately 85% of the break strength of the line, and enables the rope to be girth hitched onto a beam to climb.
You don’t have to use assaultline for your climbing rope, as it was around $200 for the length we purchased. We do recommend that you use static rope though, dynamic rope has too much flex to be used for climbing. If you need to use Nylon rope for cost considerations, use a Solid-Braid Nylon. We don’t recommend Nylon for climbing rope though, as it’s fairly slick when it comes to your grip.
Why 7/16″ rope? Because four strands of 7/16″ equals the standard Fast Rope diameter of 1 3/4″. We actually came up with the calculation by using paracord, which is how we’ll demonstrate the 4-Strand Round Braid today. Paracord is 1/16″ in diameter and our completed 4-Strand round braid with paracord came out to be a 1/4″ in diameter, so we knew that using a 7/16″ rope would give us the required 1 3/4″ diameter we were looking for (7/16″ x 4 = 1 3/4″). 7/16″ rope is fairly close to 11mm if you need that conversion.
If you’re interested in the Mil-Spec construction for Fast Ropes, they follow MIL-F-44422, which talks about everything from material to length (standard lengths are 60, 90 and 120 feet). Here’s something straight from the specification: “Construction: 1.75 inch (44mm) diameter made from Low stretch nylon fibers with a 8 braid construction to reduce rope kinking and afford fast, fully controlled, and safe descents.”
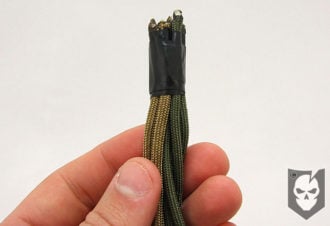
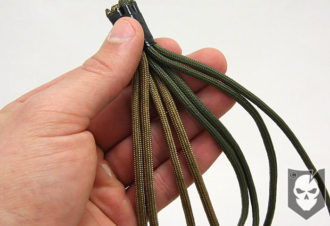
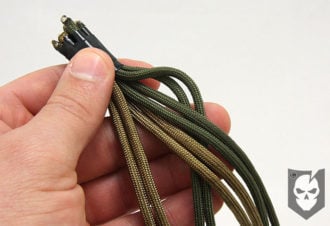
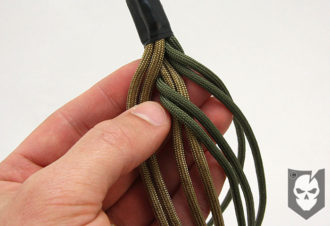
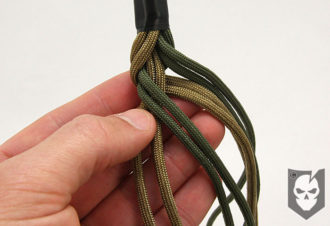
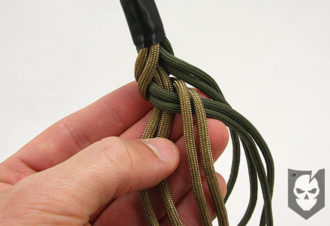
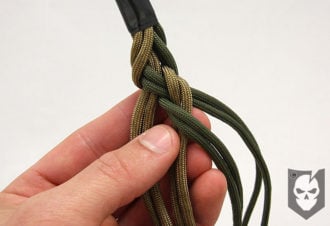
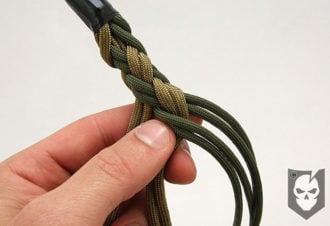
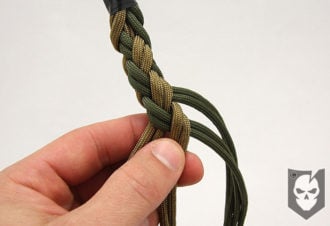
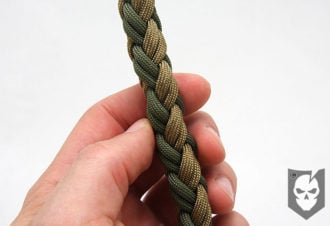
We highly recommend that when starting this project, you practice the 4-Strand Round Braid with Paracord or other small line to get your technique down. It’s a bit different that a traditional braid and nearly impossible to explain in words, which is why we created the video below.
A great mnemonic device for learning the braiding pattern is “back two, over one.” What you’re doing is alternating from the right to left outside pairs while taking the respective working end around the back side of two strands and over the last one it’s brought behind. This of course won’t make sense until you watch the video, but reciting this pattern will help you stay focused, because you’re in for a long braiding session.
It took two of us around an hour and a half to braid our Fast Rope. We started with 35 ft. strands and wound up with a 25 ft. long Fast Rope that weighs approx. 16 lbs. You can estimate needing around 1.5 feet for every foot in length you want your Fast Rope to be. That’s also not including the length required for the eye splice and whatever method you use for terminating the end (future article).
You’re also going to definitely need a buddy to help you braid, as creating this pattern plays havoc with the standing ends of the rope. They’ll develop twists that your buddy will have to fix, because you’ll be braiding and won’t be able to let go of the rope. You could do this by yourself by taping the braiding every foot or so to go back and untwist the lines, but you’re in for a long day if not many days.
Braiding this Fast Rope is also a tremendous grip workout in itself. You’ll have to be tightening the braid while keeping it together and is not for the weak-fingered individual. If you are, find a friend with a good grip and be the one that untwists the lines and buys the beer.
We’ve not only included a YouTube video on how to tie the 4-Strand Round Braid, but tried to accurately describe the process with photos as well. Remember that we’ll be back to show you how to complete your Fast Rope with and eye splice and terminating method in the following two weeks! We’ll be demonstrating rope climbing techniques in a future article that will help you learn this skill-set.
Building a Fast Rope for Climbing: Part 2, 4-Strand Eye Splice
Building a Fast Rope for Climbing: Part 3, Whipping and Fusing
A special thank you to CENTCOMSurvivor from our Forum for initiating the conversation that brought you this article. Creating a Fast Rope for Climbing is something we’ve wanted to do for a long time, but was pushed to the side until recently suggested.
Please consider joining our Crew Leader Membership and our growing community of supporters.
At ITS Tactical we’re working hard every day to provide different methods, ideas and knowledge that could one day save your life. Instead of simply asking for your support with donations, we’ve developed a membership to allow our readers to support what we do and allow us to give you back something in return.
For less than 14¢ a day you can help contribute directly to our content, and join our growing community of supporters who have directly influenced what we’ve been able to accomplish and where we’re headed.
I’m excited to announce a new partnership here on ITS Tactical, with Jeff Gonzales of Trident Concepts as a contributor.... View Article
View Article
Rigging to rappel is an often undervalued skill. It is certainly a necessary part of rappelling, but most people I... View Article
View Article
Go ahead and poke around, kick the tires, see what’s different. We’re very proud of the newly redesigned ITS and... View Article
View Article
We’ve got a pretty big announcement to share with you today and one that’s been hard to keep quiet about.... View Article
View Article
Peephole security is a real thing, especially when it comes to situations out of your control, like hotel rooms. It’s... View Article
View Article
Odds are you’ve seen a lot of Velcro hook and loop on a variety of things from garments, bags, hats,... View Article
View Article
I recently had the unique opportunity to visit Cooper, TX and interview Mike Ritland, a former Navy SEAL and founder... View Article
View Article
2 of 2 in the series U.S. SpiesU.S. SpiesU.S. Spies: Understanding the World’s Second Oldest ProfessionU.S. Spies: The Intelligence Cycle... View Article
View ArticleRigging to rappel is an often undervalued skill. It is certainly a necessary part of rappelling, but most people I know rig q...
In light of recent events, I'd like to go over my suggestions for the medical response to an improvised explosive device expl...
Go ahead and poke around, kick the tires, see what's different. We're very proud of the newly redesigned ITS and have worked ...
I am a sovereign man, responsible for my own actions and their consequences. I am the supreme authority of my life, and I may...
4/2/13 Update: As most of you have figured out, this was an April Fools goof that we thought you'd enjoy. It also looks like ...
First off, this isn't a post about what the cause of the explosions were yesterday that rocked Boston, or a "here's what shou...
We've got a pretty big announcement to share with you today and one that's been hard to keep quiet about. For the past few mo...
Peephole security is a real thing, especially when it comes to situations out of your control, like hotel rooms. It's often n...
Ask any accomplished runner, hiker, backpacker, or outdoorsman how they prevent blisters and you'll more than likely get diff...
Odds are you've seen a lot of Velcro hook and loop on a variety of things from garments, bags, hats, morale patches and even ...
See below for winner announcement. While Bryan and Kelly are out having a blast at the Overland Expo, the rest of us back...
Editor-in-Chief's Note: Please join us in welcoming back former Navy SEAL and current Director of Training at Center Mass Gr...
I'm excited to announce a new partnership here on ITS Tactical, with Jeff Gonzales of Trident Concepts as a contributor. I co...
Image via http://infothread.org - Click Image to Enlarge to View Sources
Disclaimer: All names have been changed as to protect the identity of those involved. Sounds. There are many each of us ha...
I recently had the unique opportunity to visit Cooper, TX and interview Mike Ritland, a former Navy SEAL and founder of the W...
When I first considered entering the intelligence community (“IC”), the notion of classic Cold War-style cloak and dagger esp...
In our How To Escape and Evade in an Urban Environment article, we briefly discussed escaping from zip ties. There are qui...
Sugru is an interesting product that I've known about for a few years now, but it wasn't until recently that I picked some up...
Editor-in-Chief's note: This post was written by Brett and Kate McKay and originally ran on The Art of Manliness. The ide...
We're proud to support our good friend and ITS Plank Owner, Karl, from OscarDelta by carrying their Go-Tubes in the ITS Store...
Lock Bumping is quickly becoming a popular way of bypassing a lock without the need for picking. The method uses a key blank ...
Close your eyes for a minute and join me on a little adventure... You're walking down the sidewalk and pass two shady figures...
One of the things that's sometimes hard to understand in Lock Picking is which pick to use. Many picks look similar and can...
If you've read our review of OnPoint Tactical's Urban Escape & Evasion Class and wanted to attend, now is your chance. ...
We've often talked about certain aspects of disappearing here at ITS, such as an untraceable cell phone and how to escape and...
I'll admit I'm a bit of an organizational freak, but my wife and those that know me would probably say that's an understateme...
I'm often asked what I do and I feel obligated to respond, “I could tell you, but then I'd have to kill you.” When people men...
Today we'll be looking at the 2nd part of our Inside Red Team Operations series, which takes us through the process of planni...
It's with disappointment that I write this post today, but with a strong stance on what ITS Tactical will tolerate from who w...
We wound up with some extra Carry The Load Morale Patches that we had made up for this year's event and we're giving you one ...
We just completed adding some awesomeness to the ITS Tactical Store a few minutes ago and are super excited to be offering ou...
There's just five more days to get your video response in on YouTube to win one of the three tremendous prize packages from R...
We'd like for all our readers to check out the new additions we've made to the ITS Forum, especially the newly created sponso...
There's a couple of things you should be doing today if you haven't already... Sending in your YouTube Video Response for ...
Today marks the start of a new series on ITS Tactical where we'll be walking you through the COMPLETE assembly of a Direct Ga...
We'd like to announce a special Crew Leader Membership sale good for only the first 15 people to sign up! Our yearly Crew ...
Today in part four of our DIY AR-15 Build you'll learn how to install the Pivot Pin on your Lower Receiver and hopefully take...
Today in part five of our DIY AR-15 Build you'll learn how to install the Trigger Group in your Lower Receiver. The trigge...
We have some very exciting news to share with you guys today! To mark our recent milestone of 2,500 YouTube subscribers, we'v...
Continuing our DIY AR-15 Build, today we'll be installing our Bravo Company 14.5" Barrel and Daniel Defense 9" Lite Rail onto...
If you haven't yet seen our newest advertiser, let us take a second and introduce you to Pimps n' Mercs before we get into th...
Welcome back to our DIY AR-15 Build and the start of our tutorials on assembling your Upper Receiver and finishing the build!...
One of my personal goals for 2012 was to learn tubular lock picking and become proficient enough to share my knowledge with e...
Today in part eight of our DIY AR-15 Build we'll be showing you how to install the final part onto your Lower Receiver, the B...
Today in our fifth installment of the DIY AR-15 Build Upper, we'll be installing the Flash Hider. We won't technically be ins...
An unfortunate turn of events has occurred surrounding the latest issue of RECOIL Magazine. Everyone at ITS HQ was ecstatic w...
Today we'll be showing how to pick your way out of Handcuffs using only a bobby pin. We realize this may be a sensitive issu...
Today in part three of our DIY AR-15 Build you'll learn how to install the Bolt Catch on your Lower Receiver. This step is...
Whether you consider yourself a novice or pro when it comes to lock picking, there's no denying that everyone needs to keep u...
I am a sovereign man, responsible for my own actions and their consequences. I am the supreme authority of my... View Article
4/2/13 Update: As most of you have figured out, this was an April Fools goof that we thought you’d enjoy.... View Article
First off, this isn’t a post about what the cause of the explosions were yesterday that rocked Boston, or a... View Article
See below for winner announcement. While Bryan and Kelly are out having a blast at the Overland Expo, the rest... View Article
In light of recent events, I’d like to go over my suggestions for the medical response to an improvised explosive... View Article
Editor-in-Chief’s Note: Please join us in welcoming back former Navy SEAL and current Director of Training at Center Mass Group,... View Article
Ask any accomplished runner, hiker, backpacker, or outdoorsman how they prevent blisters and you’ll more than likely get different answers... View Article
Disclaimer: All names have been changed as to protect the identity of those involved. Sounds. There are many each of... View Article
Editor-in-Chief’s note: This post was written by Brett and Kate McKay and originally ran on The Art of Manliness. The... View Article
[1957] Ryan X-13 Vertijet test flight in Washington DC
A-10 Warthog.
Montana road trip essentials. via hrsupplyco
45 Comments
Great article. $200 for 8 35 foot strands of this rope is a lot cheaper than actually buying a 30 foot rope. Ive seen them for as cheap at 1500 bucks. $200 is a great price!
after finding this site while looking for knot tying videos I have really come to appreciate this site’s content and purpose. But after watching this extremely cool video and future projects concerning this knot, I just had to write and say keep up the awesome work man! Your site rocks!
William,
Thanks for the kind words, we sincerely appreciate your support and we don’t know how to do anything else but awesomeness!
would this rope be good enough, i dont know if its solid braid or not but it is in accordance with the military manual; http://www.uscav.com/Productinfo.aspx?productid=9492&TabID=548
Bryan,
Much thanks for putting this together! Its great to see you take a forum question and answer it in awesomeness.
This is just what I needed to help me figure out how to make a climbing rope for my backyard gym.
Keep up the great work!
Eric S.
I don’t know how ITS Tactical does it. Me and my bud were talking about this not too long ago and we both wanted to buy some fast rope but the price was crazy. This helps alot! I hope to try this in the near future!!!
Great instructions! Would you consider a series on how to fast rope, much like your ones on rappelling?
Abso-fucking-lutely AWESOME. Crossfitters in Berlin Germany will thank you for this!
Thank you!
Bryan, I took a mile high look at this yesterday and retweeted it for you. Today I actually dug into it and I have to say one of your coolest projects to date!
This pattern gives me some pretty interesting ideas even just using it with paracord.
Thanks Jack, glad you liked it. Of course the 4-Strand Round Braid is nothing new, but I’ve never seen a “How To” on Fast Rope construction.
There’s a 4-Strand Flat Braid that would be good for Paracord as well.
I figured I’d buy some of the cheap rope mentioned to make a practice rope for our kids last night.
My awesome wife watched the video and went right to work. Since this was for the kids we made four 50′ ropes and looped them at the top making each 25′ (not the correct method I know). I taped them together and my wife did all the braiding.
Being the “rope untangler” was lots of fun and I had to be quick to keep up.
One thing we found that helped was having my wife sit on the floor (indian style) and keep one of the rope strands (two ropes) on her right side and the other on her left. The other two strands I kept out to the sides and kind of angled to the front.
This helped her keep track of where she was at and once you get a rhythm going it went pretty quick.
We did have to stop once and we both forgot where we were and had to start over. What ever you do DON’T STOP!
Anyway I hope that might help and I cant wait to get some nice rope and make another one.
Eric S.
We aren’t allowed to erect structures without a permit in my neighborhood, but I think my kids will be climbing some home made fast rope on grand daddys oak tree.
Thanks for a great DIY. I have been considering buying a 1.5″ climbing rope, but now I may have to make my own.
I was searching on ebay for a good deal on static rope and ran across a couple of postings for used fast rope. What do you think about buying a used fast rope… at 80′ it is probably a little long?
Can’t wait to see the rest of this series.
Daniel
Daniel, that’s definitely too long if you’re just using it as a climbing rope. You should build your own and you’ll be able to make it the exact length you need.
Thanks for the kind words,
~ Bryan
I made a 12″ paracord rope and it sure is nice. However is it normal to have it a bit ‘lumpy’ here and there? Overall pretty decent looking but some weaves are a bit tighter or looser – should I not worry about that?
As a side note, one of these out of paracord will make a nice dog leash or bracelet. I’ll have to show the kids in my Cub Scout pack.
Thanks again ITS.
j
Bryan, I read that you said nylon rope can be used to help lower the cost, but you don’t recomend it for climbing? Not sure I understand this, are you kinda saying if you have to use nylon, due so at your own risk? I was thinking of giving it a try just to keep the cost down. Static line is a bit pricey for me right now. Great article.
I just read the article on how to climb a rope like a Navy Seal.
for those of us without a vehicle or a place to hang a fast rope at home, how much does the fast rope that you made weigh Brain, a rough guest is all I am looking for.
Bryan mentions the weight in the video – about 16 pounds for his rope.
Thanks Terry!
Great segment!
Thanks Greg!
Just curious, but first amazing article!
Going out today to purchase supplies to make one.
I dont understand the 8 strand thing, as 8 x 7/16 would be a 3.5 in diameter rope….?
Also an idea, use 2 strands, find the middle of both, throw a carabiner through it, fold over and tie the 4 strand braid, no need to make an eye splice.
Thank you again for such a great website and article
Tim, glad to hear you are going to make one. Let us know how it turns out.
This is fantastic. Thanks. I did find these instructions on the internet which made it slightly easier. Take a look.
-Count the strings from one to four, from left to right.
-Begin by crossing the second string over the first and the third string over the fourth. You should see two “X” patterns formed with the four strings.
-Cross the new second strand over the new third strand to create an “X” in the middle of the four strings and then begin the pattern again.
feel free to delete my above comment from june 2. i began to make the rope with those instructions and, although it works very fast, it creates a flatter braid more suited for girls hair, not a fast rope. it’s generally helpful for me because I have two daughters with long hair, but won’t work to create the rounder rope we are shooting for based on your instructions. sorry!
Awesome kick-ass directions, as usual!
Made a ~6 foot test version out of black/olive paracord to get the hang of making the braid. My 8 year old daughter thought it was cool and has since commandeered it as her new jump rope with her friends…
When I get the $$$ to afford ~400 feet of static line I will build my fast rope! W00t!!!
Cheers,
-Julian
How essential is it that the braid is super tight? I had a 3 person team braid 8 50′ strands of rope. It took us two hours, but as I’m sitting here making the eye splice, I feel like it’s just a little too easy to double up the braid. I do NOT want to unbraid and re–braid the whole thing again. How big of an issue is it? Is it a safety issue? The rope is loose enough that I can fairly easily pinch off any strand of the braid and fit a finger through the hole… help!
The four-strand round braid is a great idea, and I realize my suggestion is a little more complicated, but would a six-strand braid allow me slightly more texture for grip, when I use the line (rope) for ascending and descending?
I’m going to have to build myself a 20 ft length out of paracord, first your way, then extrapolate to 6-strand, just to see.
Excellent item!
I am excited to make a Fast-Rope, but wanted to use the 1000 feet of paracord I have lying around.
What do you reccommend I do as so that I can get it up to a more reasonable diameter? Should I double up twice? Should I add more strands for weaving (or can you only use four)?