Check out the ITS Online Store for awesome new products!

email
share

Knot of the Week: Lanyard Knot

by The ITS Crew on January 4, 2010

email
share
Post image for Knot of the Week: Lanyard Knot

We’re kicking off our 2010 Knot of the Week series today with the Lanyard Knot.

The Lanyard Knot, also known as a Diamond Knot, is an excellent decorative knot that can be used for a multitude of applications.

Primarily we like this knot for its ability to create a fixed loop in a single strand of rope. This comes in very handy when making a Solomon Bar keychain like we’ve demonstrated in the past.

It can also be used for key rings, knife lanyards and anything that needs some kind of a pull. In fact, sailors used this knot to hold a knife around their necks, which is why you may see this knot referred to as a knife lanyard knot.

Lanyard Knot » Bends

(Strength: 3/Secure: 3/Stability: 3/Difficulty: 4)

Please refer to our Knot of the Week introduction post for a description of what these ratings mean.

Uses:

  • Decorative knot used for lanyards
  • Can also be used to join two strands of rope

Tying Instructions:

  1. Hold the rope in your hand using your pinky to stabilize
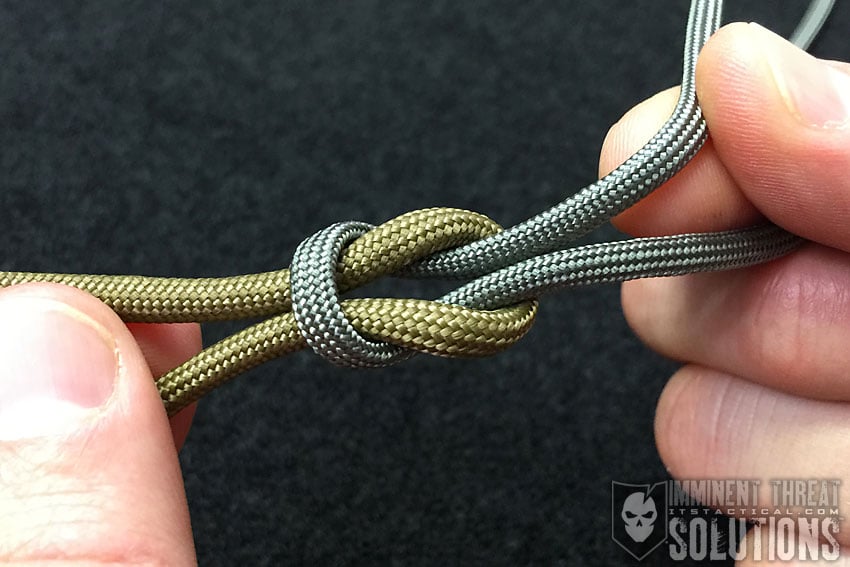
  2. With the working end, form an underhand loop
  3. The standing end becomes your new working end and wraps around the old working end and under the itself in the center of the loop.
  4. As you’re bringing the last coil past the top, form a bight in the working part
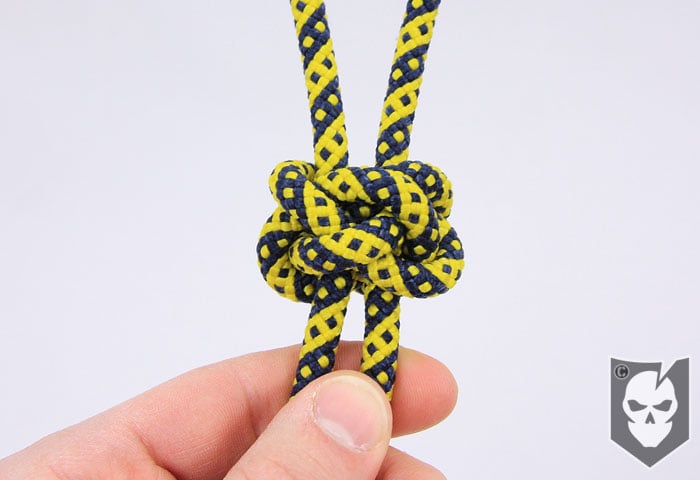
  5. Leave the knot loose and pull your pinky out from the knot, leaving a diamond pattern in the center of your knot
  6. Thread the standing end counter clockwise through the underside of the created diamond pattern
  7. Repeat this step for the working end as well
  8. *Now both ends should have been fed though the underside of the diamond*
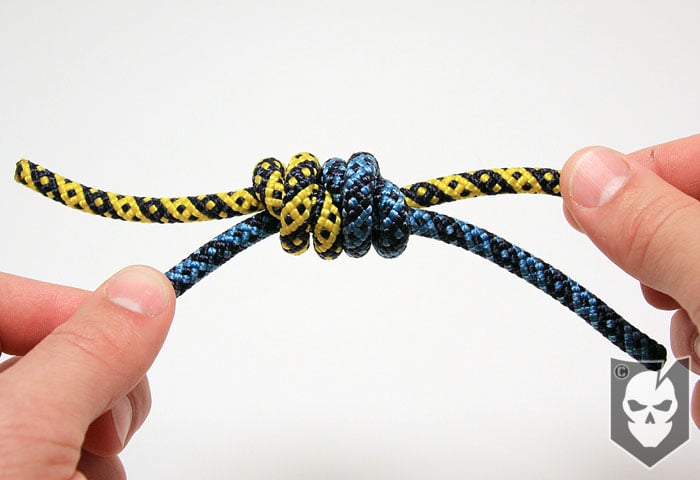
  9. Grasp the working and standing ends and pull (you should still have a bight around your fingers)
  10. Slide the knot off of your fingers and continue pulling on the bight and the ends to tighten
  11. Clean up the knot by pulling individual strands as we demonstrated in our Monkey’s Fist video

View the gallery or YouTube video below and follow along with the steps above!

Lanyard Knot 01Lanyard Knot 02Lanyard Knot 03Lanyard Knot 04Lanyard Knot 05Lanyard Knot 06Lanyard Knot 07Lanyard Knot 08Lanyard Knot 09Lanyard Knot 10Lanyard Knot 11

email
share

Are you getting more than 14¢ of value per day from ITS Tactical?

Become a Crew Leader!

Please consider joining our Crew Leader Membership and our growing community of supporters.

At ITS Tactical we’re working hard every day to provide different methods, ideas and knowledge that could one day save your life. Instead of simply asking for your support with donations, we’ve developed a membership to allow our readers to support what we do and allow us to give you back something in return.

For less than 14¢ a day you can help contribute directly to our content, and join our growing community of supporters who have directly influenced what we’ve been able to accomplish and where we’re headed.

Click here to learn about all the benefits and Join!

{ 13 comments… read them below or add oneDiscuss in our Forum }

Cervantes January 4, 2010 at 1:40 pm
Thumb up Thumb down -1

Once I learned this knot, all my EDC zippers received the diamond knot treatment. I think it gives the finished look, where as the simple knotted lanyard through the zipper looks hap-hazard and last minute-y.

Reply

Cervantes,

I agree with how nice zipper pulls with 550 look with this knot.

Thanks for the comment,
Bryan

Reply

Thanks for showing this and I appreciate you showing it with the thicker diameter rope, but WHY in gods green earth did you use the most nausea-inducing painful-to-look-at-rope imaginable???

Reply

what an awesome job well demonstrated thanks so much in the process of redoing pack zippers and also knife lanyards thanks again

Reply

Thanks Jim, glad you found the information useful!

~ Bryan

Reply

Gordon Pace July 6, 2010 at 7:22 am
Thumb up Thumb down 0

Hey great site, i work @ a diffusion plant in the switchyards and have to use lines to tie alot of knots for heavy insulators and such, this site is a big help on new and better knots so thanks again and a job well done for your effort.

Reply

Thanks for the kind words!

Reply

Very nice! I am no bosuns mate but even I could handle this knot.

Reply

This is the easiest video to follow for making this knot. Thank you!

Reply

Marty Black March 18, 2011 at 8:01 pm
Thumb up Thumb down 0

Just a thought here, JD at T.I.A.T. has awesome tutorials on youtube. He does a lot of fusion knots that look cool in paracord. Not to discount knot of the week, mind you, he has more advanced knots for the skilled to the beginner.

Reply

Do you have sketch of paracord cross? Also I noticed another cross with tighter weaving. Would you have directions to that one?

Reply

Michael Patrick February 13, 2012 at 12:50 pm
Thumb up Thumb down 0

Great video. Going to try my hand at this knot for my zipper pulls as well. Thanks for the info.

Reply

Awesome… love it! Thanks.

Reply

« Previous post

Next post »