Check out the ITS Online Store for awesome new products!

email
share

Never Leave the House Again Without Paracord

by The ITS Crew on April 20, 2010

email
share
Post image for Never Leave the House Again Without Paracord

After today’s Knot of the Week, you’ll officially have no excuse not to always have paracord on you.

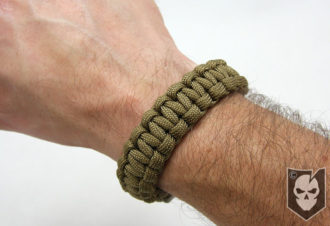
Yes, everyone and their mother has a paracord bracelet nowadays, but seriously. Either carry some instead of shoelaces, stuff some in a pocket, or keep reading to find out how to make a bracelet using a continuous 8-10 ft. section of 550.

Most tutorials you may have seen for these go through the process of using two different strands of paracord in order to facilitate the closure method. Do yourself a favor and pick up some of these small 5/8″ Weinerlock contoured buckles (yes, you read that right), made by National Molding and get yourself a real way to secure your bracelet.

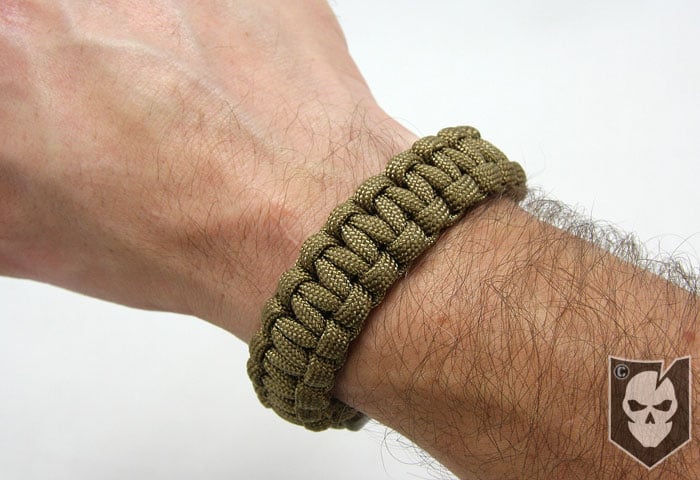
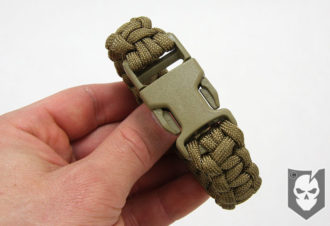
We’ll show you how to weave the Soloman Bar, aka the Cobra Knot, through these buckles to create a bracelet that’s both easy to make and easy to take apart in an emergency situation. You never know when and where you may need 550!

Paracord Bracelet » Decorative

(Strength: 4/Secure: 4/Stability: 3/Difficulty: 4) **Ratings shown are for Solomon Bar Knot, not the Paracord Bracelet**

Please refer to our Knot of the Week introduction post for a description of what these ratings mean.

Uses:

  • Decorative Bracelet
  • Carrying Paracord for Emergency Purposes

Tying Instructions:

Note: The buckle we show in the demonstration is a 3/4″ ITW Nexus buckle that lacks the contour of the Weinerlock buckles. While these work fine, the contoured buckle is definitely nice to have when you’re wearing your bracelet all day.

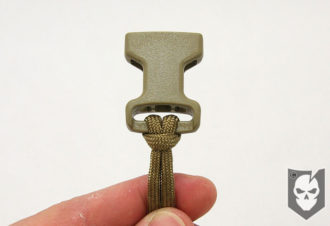
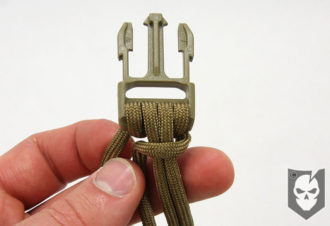
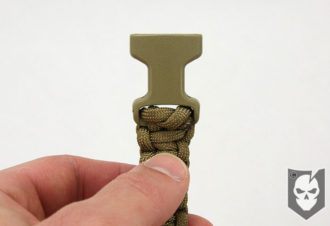
  1. Find the middle of a 10 ft. section of Paracord and halve it
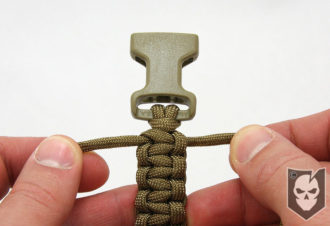
  2. Take the middle and girth hitch it into the female portion of the buckle
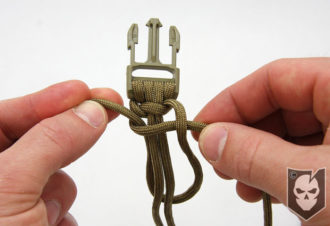
  3. Thread the two working ends through the bottom bar of the buckle
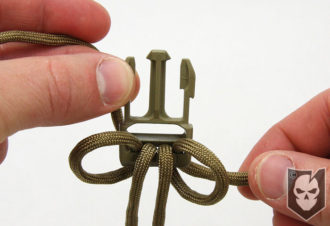
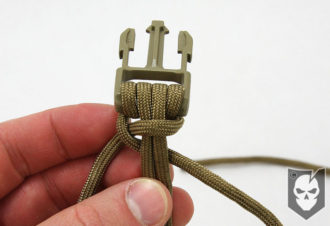
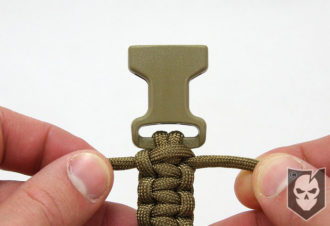
  4. Create a wrap (loop) with both working ends to the respective right and left of the initial working end entry
  5. Now place what you’ve created around your wrist and tighten the working ends until you have the desired size
  6. *You’ll want it snug, but not tight, as the pattern we’ll be creating will add some girth to the bracelet
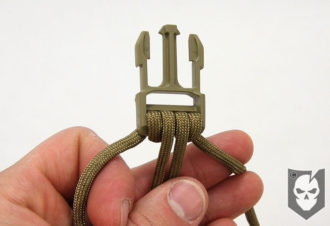
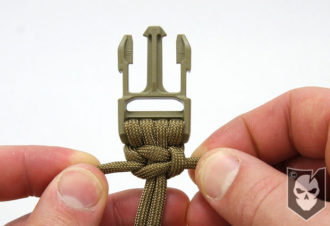
  7. Once the size is determined, you’re ready to start the pattern.
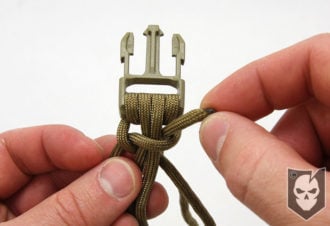
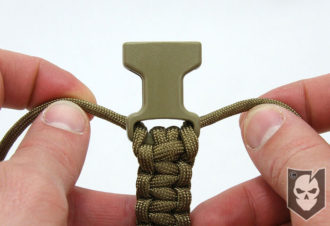
  8. Take the right side working end and bring it over the standing center part
  9. Take the left side working end and ensure it runs on top of the right side working end you just brought over
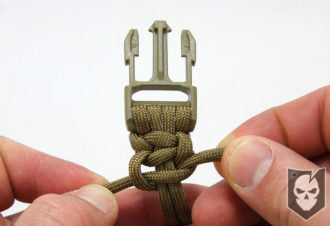
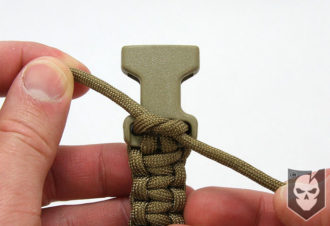
  10. Take the left side working end and bring it around the back of the standing center part and up through the space left near the right side working end (see photos)
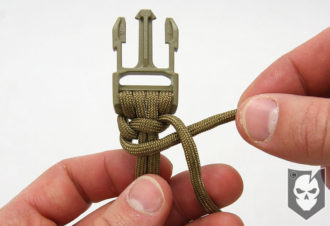
  11. Now you’re just repeating those steps, but the opposite starting with the left side working end instead of the right
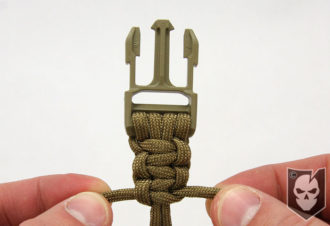
  12. And after that, you’re just alternating which side you start with, much like weaving or braiding
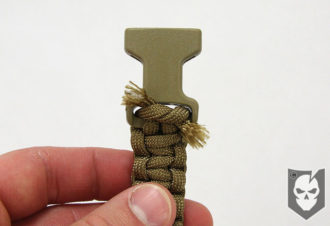
  13. As you make your last wrap near the female buckle, you’ll take your working ends through the buckle and tie a simple overhand knot
  14. Cut the working ends close to the overhand knot and fuse them as you desire
  15. Too much fusing will keep the overhand knot tight, but make it difficult to unravel the paracord in an emergency

View the gallery or YouTube video below and follow along with the steps above, be sure to let us know in the comments if you have any questions!

Paracord Bracelet 01Paracord Bracelet 02Paracord Bracelet 03Paracord Bracelet 04Paracord Bracelet 05Paracord Bracelet 06Paracord Bracelet 07Paracord Bracelet 08Paracord Bracelet 09Paracord Bracelet 10Paracord Bracelet 11Paracord Bracelet 12Paracord Bracelet 13Paracord Bracelet 14Paracord Bracelet 15Paracord Bracelet 16Paracord Bracelet 17Paracord Bracelet 18Paracord Bracelet 19

email
share

Are you getting more than 14¢ of value per day from ITS Tactical?

Become a Crew Leader!

Please consider joining our Crew Leader Membership and our growing community of supporters.

At ITS Tactical we’re working hard every day to provide different methods, ideas and knowledge that could one day save your life. Instead of simply asking for your support with donations, we’ve developed a membership to allow our readers to support what we do and allow us to give you back something in return.

For less than 14¢ a day you can help contribute directly to our content, and join our growing community of supporters who have directly influenced what we’ve been able to accomplish and where we’re headed.

Click here to learn about all the benefits and Join!

{ 2 trackbacks }

DoubleTap Radio Episode 8 « DoubleTap Radio!
September 7, 2011 at 6:16 am
Solutions for the Every Day Carry of Duct Tape
September 15, 2011 at 9:59 am

{ 36 comments… read them below or add oneDiscuss in our Forum }

I have a design that doesnt require a buckle and will still allow for a continuous piece of cordage. Id happily share the method if anyone is interested.

Reply

I’d be interested the design that doesn’t require a buckle.

Reply

I second that.

Reply

same here

Reply

Yeah, me too!

Reply

sixof1or2 April 21, 2010 at 3:34 pm
Thumb up Thumb down 0

I would like to see that design that doesn’t require a buckle.

George

Reply

Buckle could be useful if the chord were turned into a garrote.

Reply

I like the quick release option. However, I’ve found that using a button (i.e. BDU button) works well as a toggle to finish a survival bracelet. Leave the beginning as a loop, tie the Soloman bar to length and melt in the ends, then thread the button onto the tail end of the center piece and then tie a double stranded overhand to hold it on (I find drilling/boring out the center of the button makes it easier to pass the cordage through). The button goes through the initial loop to hold the bracelet on.
Love this new method though!
-Keydet

Reply

I must not be “everyone and their mother” because I don’t have one yet! :) But I definitely do want one, thanks for the how-to, now I can just make one.

Reply

Personally, I use these;

http://www.tadgear.com/shop.php?id=186

The smallest clip, and the smallest split ring. Those plastic buckles aren’t comfortable, even with the contour.

Reply

I have one myself with a stainless steel shackle. Not because it looks cool but because if I need something to anchor to a plastic bucket wouldn’t hold my fat ass!

Reply

i made mine with a small steel shackle too. let’s you put more cord in the bracelet because it is smaller. i also could not find these plastic clips in stores, but the shackle i used was simply by the chain at any home depot.

Reply

I have made and sold a few in the past that used a cord lock, and were either one or 2 pieces of continuous cordage dependent on how many colors i used. I Really like the buckle’s though.

http://i135.photobucket.com/albums/q159/ltmyers_photos/IMG_1183.jpg

Reply

I need a paracord holster/koozie that will fit the Tri-Tronics G3 Pro 500 and atttach to a duty-belt. Only requirement is that it allows for access to the buttons on the transmitter. Anyone up for the challenge?

Reply

ill take some shots this weekend, and maybe a quick video and post them up.

Reply

I was under the impression that wearing a paracord bracelet was significant of military service, or a loved one in the service/deployed. Is this really for everyone? or, would a civilian be considered a “poser”?

Reply

its for everyone that decides to prepare for the unlikely….most service/EMS personel would appreciated that a civvie was wearing one, as long as they are aware of its many uses. m2c….

Reply

shadow4golf April 22, 2010 at 10:38 am
Thumb up Thumb down 0

If you really want to be unique, use a coin instead of a button. It’ll still have to have a hole drilled like Keydet mentioned.

Reply

Here is a quick video intro on how to get started without a buckle.

http://www.youtube.com/watch?v=gyWrP2BRLuE

Reply

Awesome, thanks!

Reply

Another great tutorial guys… just want to add that if you have more 550, you can go back up the bracelet again to store even more. the most I managed was three times before it starts to geet too big but I managed to get about 25ft+. It will end up about 3cm wide x 1cm thick, just remember to allow for the extra thickness when working on step 5…

Reply

Thanks for a great site guys! I came across another source for contoured buckles that looks like it’s slightly cheaper than the site linked in your post:
http://cdwplus.com/singleSRB.html

If you are looking for more projects like this, there are quite a few on http://www.instructables.com (I found cdwplus.com linked from an instructable article.)

Thanks, and keep the articles coming!

Reply

Thanks Rocco! Great link!

Reply

I have found a website with numerous options for buckles and catches. http://www.usalanyards.com/

Reply

I found a set of instructions for a buckle-less method of making a paracord bracelet. But the instructions are not very clear for a beginner like me. Can somebody translate it into an easier set of instructions?

Reply

JackKetch July 6, 2010 at 4:03 pm
Thumb up Thumb down 0

maybe not if your in the military, since there is a dress code. however if your camping why not make a belt that way you can carry more length, in case your really in trouble.

Reply

Jasper Pettit August 8, 2010 at 1:14 am
Thumb up Thumb down 0

Thanks for this one! My practice run below. I was able to use a pencil to close it, which made me think that one might be able to incorporate a small self defense spike into one of these. (Probably best with long sleeves)

http://rooterror.files.wordpress.com/2010/08/p1020639.jpg

Reply

I know where you can find the way to make these one continues piece. I have made several ranging from solid OD to black with a free floating piece of blue for police. http://www.paracordbraiding.com/ I learned here, easy Chinese button knot a few clover hitches and then your cobra knot, and tuck the excess in so its not visible, easy to take apart, just take it off pull the button while holding the bracelet it comes apart smoothly.

Reply

stephanie March 9, 2011 at 12:41 am
Thumb up Thumb down 0

the best tutorial i’ve seen on these bracelets! thanks so much. i will be making some for all the guys in my family!

Reply

Austin Kopp May 20, 2011 at 4:44 pm
Thumb up Thumb down 0

How about a belt?

Reply

Richard July 13, 2011 at 1:27 pm
Thumb up Thumb down +2

I personally prefer this method of making a paracord bracelet: http://www.canadianwildernesssurvival.com/articles/Chain%20Sinnet%20Paracord%20Bracelet%20How-To%20By%20JK.html
It may not look as cool, but you can literally undo the bracelet in seconds if you need a length of cord in a hurry.

Reply

thinbluelion October 5, 2011 at 3:02 pm
Thumb up Thumb down 0

For buckles just buy a cheap small dog / cat collar. I found mine in the dollar store.

Reply

TripWire March 7, 2012 at 6:54 pm
Thumb up Thumb down 0

I don’t know exactly how he did it, but a buddy of mine used a buckle from a lanyard…. just fyi. I bought a few buckles at a local craft shop for .89 cents.

Reply

Softballplayer02 June 21, 2012 at 4:45 pm
Thumb up Thumb down 0

I really like these brcelets!

Reply

rancher1school June 24, 2012 at 9:06 pm
Thumb up Thumb down 0

It was an adventure making them at the T.A.D. store in San Fransisco today. I meet a lot a awesome people there.

Reply

« Previous post

Next post »