


Pocket Dump: Could Your EDC Photo Allow Criminals to Break Into Your Home?
Pocket Dump: Could Your EDC Photo Allow Criminals to Break Into Your Home?
If you’re anything like me, you love Every Day Carry photos, forums and discussions. Whether I’m posting a photo or just browsing other people’s, I enjoy seeing what’s being carried since I’m always on the lookout for better gear. However, I never thought that from one simple online photo, someone could gain access to my home, relative’s homes or even my vehicle.
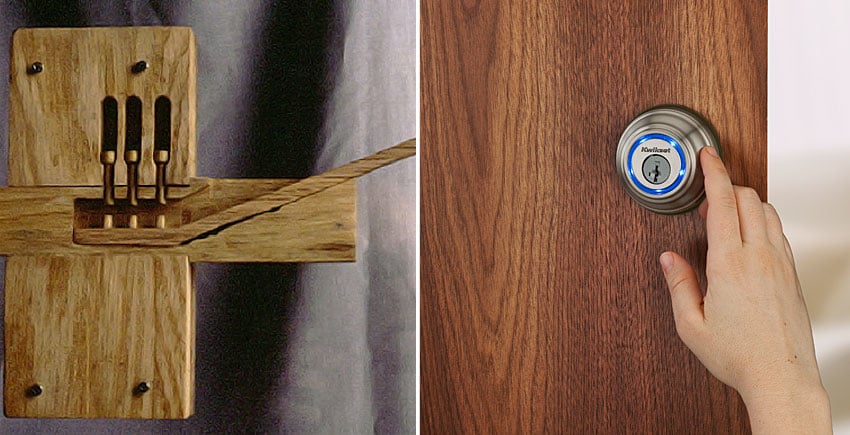
Technology is getting better every day. Cameras, computers, phones and even vehicles are getting smarter and faster. While we’re not too far from a future of self-driving cars and robot butlers, there’s one technology that’s painfully behind the times; key technology. Take a look at your key ring, how many keys do you have with only cuts for traditional one sided pin and tumbler locks? For me, it was four out of seven.
New Technology vs. Old Technology
One of the first things people will tell you after posting an EDC photo is to blur out your keys. Their claim is that someone could take the key image from the photo and make a functional copy. Intrigued, I wanted to find out if I was able to do exactly that. I chose to use an old Schlage deadbolt I had laying around after changing my front door lock a few months back. This is a single sided lock with standard (not security) pins and I knew this would be the most simple key to attempt this with.
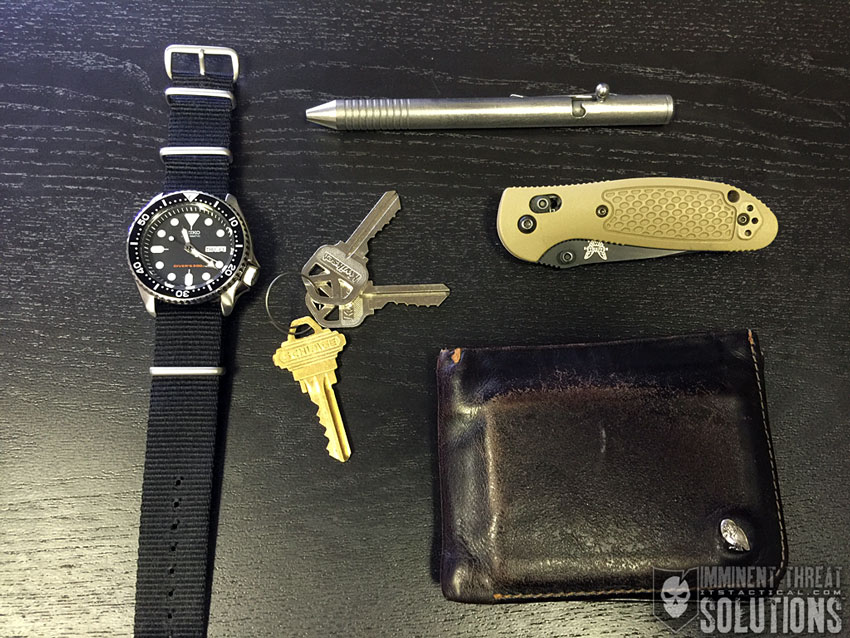
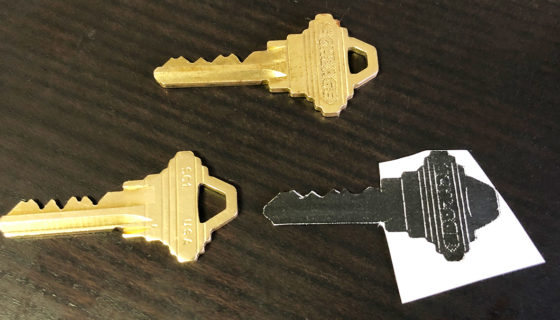
I staged an EDC photo containing a few items including a small ring of keys made up of some training lock keys and my Schlage deadbolt key, then set out to copy my own key using only a computer, printer and common tools.
Making a Key from a Photo
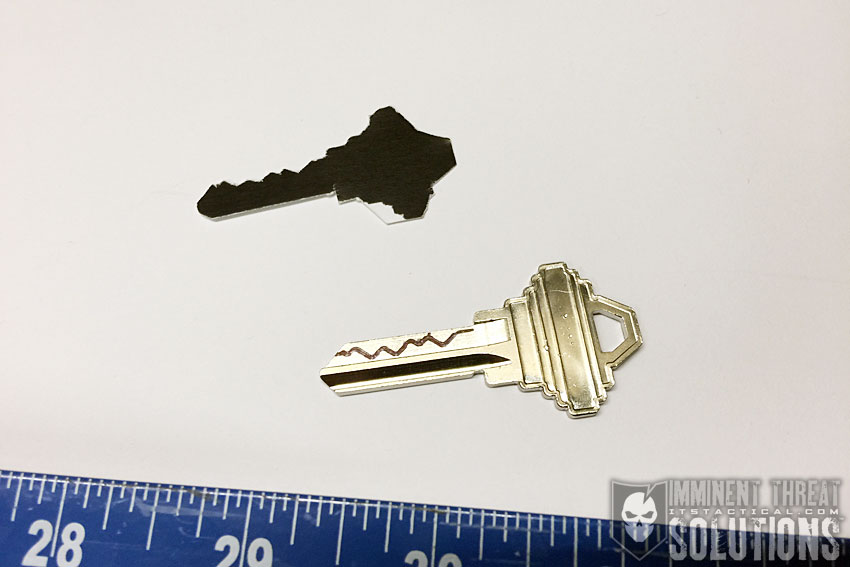
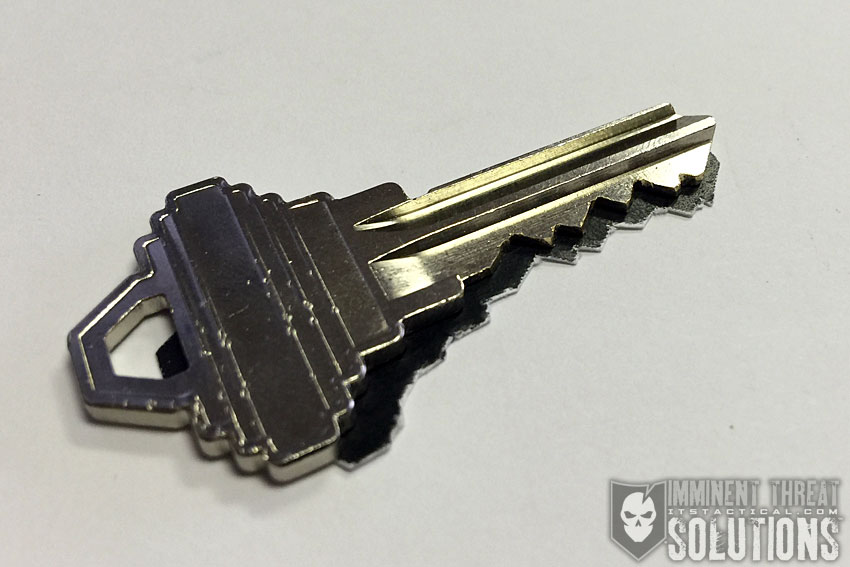
Using the photo above, (taken with my iPhone 6 Plus) I isolated the Schlage key with Photoshop and singled it out. After using the blank key to measure scale in the photo, I was able to print a blacked out version of the key that I could use to trace around for my blank. I printed the key photo out on a thicker card stock, as I thought that printer paper might not be durable enough to withstand the tracing and matching I would need to do.
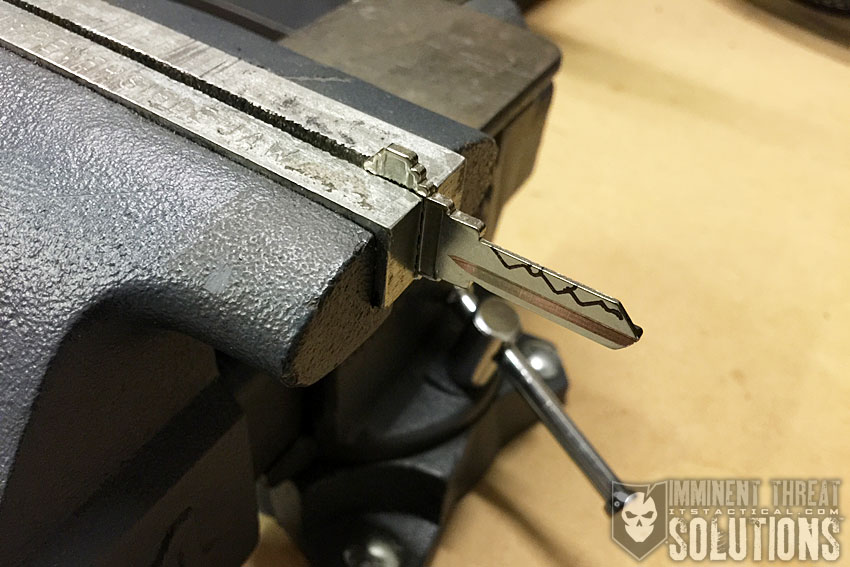
After printing the key out, I carefully cut around the image with scissors and used that outline to trace the pattern onto the blank key with a small sharpie. I was relying on the fact that the Schlage lock would have a fairly loose tolerance to accommodate worn keys or slight imperfections in manufacturing.
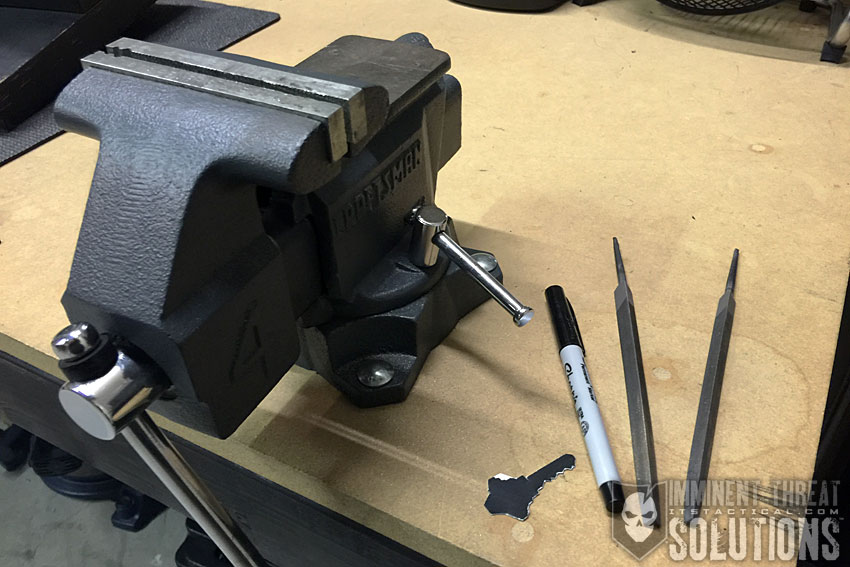
Once I had a rough outline of the pin heights on the key, I secured the key into the vice and started to file the grooves using a triangular file. The triangular file was extremely useful as it made the much needed “V” shape for the key. I paid careful attention and moved slowly like a barber, I could take more off, but couldn’t add more back.
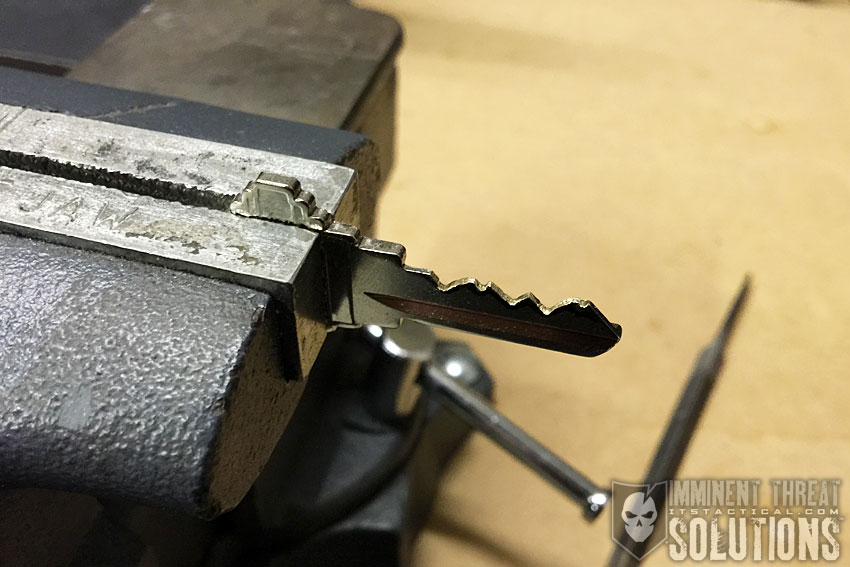
With the rough outline finished, I began making filing very lightly in an attempt to round out the sharp edges. The most difficult sections of the key to file were the smaller grooves at the front and middle of the key. The file I was using was almost too large to make the precise shapes that were required.
Throughout the process, I continued to match my cutout and key blank together to see where I needed to remove more material. After about ten minutes, I had a finished key that I compared to the original.
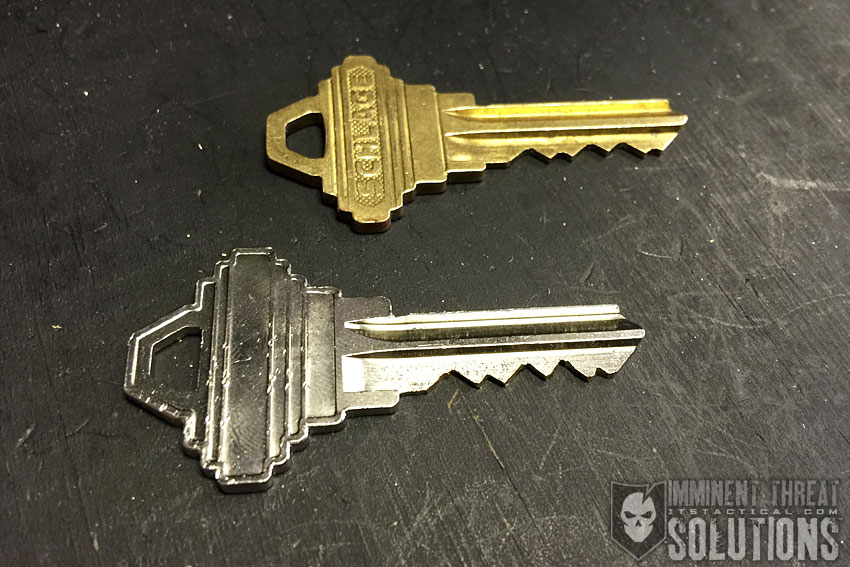
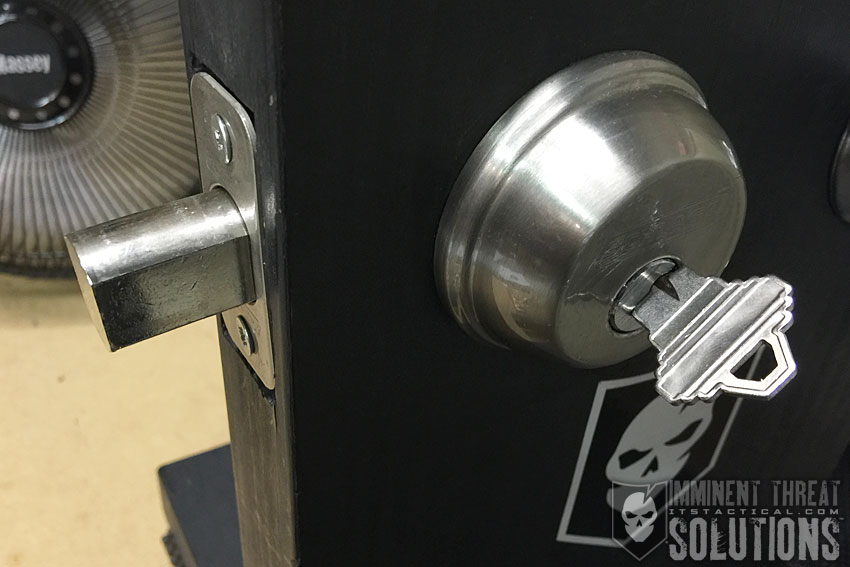
The two keys looked very similar but my filed key obviously had rougher edges. To my surprise, when I inserted the filed key into the deadbolt, it opened right up. There was a little bit of catch when turning the cylinder initially, but it did open the lock up. After a few more times inserting it and turning, the burs wore down and the hang up disappeared. It now functions exactly like the original key.
Real World Application
This scenario was set up as a “best possible condition” scenario. The key in the photo above is flat on a contrasting color table, allowing for a mostly perfect outline to be isolated. While that might be the case, I have definitely seen photos similar to this in the past and the isolation process I used took about five minutes. With more time, someone could attempt to use an angled photo of a key to create a copy. The purpose of this was to see if it would even be possible and after attempting it, the answer is a definite yes.
So what can you do to combat this technique? Rather than using a high-tech photo editing program, consider the low-tech option of just excluding your keys from photos. Especially considering the software that’s available to remove blurring and masking from photos.
For those that voice the argument, “Someone is welcome to try and copy my key, they still don’t know where I live,” consider the amount of information that is available online today. EXIF Data from photos, as well as social media profiles like Facebook and Instagram may give would-be robbers more information that you’d think. The safest bet is keeping your keys under lock and key.
Discussion