


Take a Step Back in Time with the Japanese Square Lashing
Take a Step Back in Time with the Japanese Square Lashing
You may be saying to yourself, “You guys have already covered Square Lashing before!” That we have, but today we’d like to introduce you to an alternate way to tie lashings called the Japanese Square Lashing.
This method we’ll show is tremendously faster to tie and yields the same secure results that a traditional Square Lashing does. In addition to being faster, we feel that it’s also an easier way to lash together two spars/poles.
If you’ve ever looked at traditional Japanese architecture, you’ll have no doubt seen a Japanese Square Lashing. The traditional Japanese culture has always favored using natural fiber rope to secure bamboo structures and many other architectural wonders.
We’re so certain that you’ll appreciate the simplicity of this lashing, you may never go back to using a Clove Hitch to start a lashing again!
Japanese Square Lashing » Lashings
As we’ve mentioned in previous articles on lashings, it’s always best to lash with natural fiber rope like Manilla. Japanese are also fond of using Hemp rope as well. This version of the Japanese Square Lashing is commonly known as the Japanese Mark I (Mark 1). There are a few other versions of this lashing that we’ll be covering soon.
(Strength: 5/Secure: 4/Stability: 3/Difficulty: 2)
Please refer to our Knot of the Week introduction post for a description of what these ratings mean.
Uses:
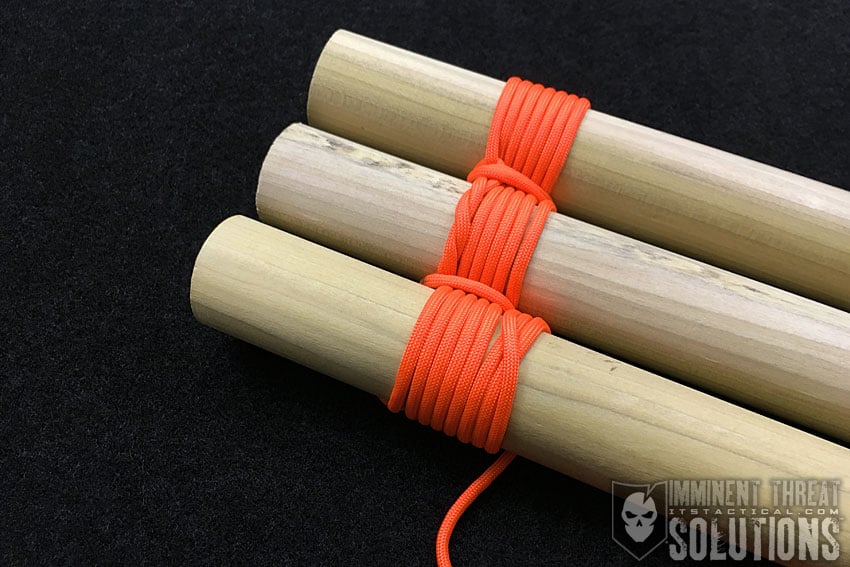
- Binding two timber poles together
- Weight bearing joint in structure building
Tying Instructions:
- Start by using a 6 ft. section of natural fiber rope that you’ve whipped the ends on (dental floss works great!).
- Double the strand and find the midpoint.
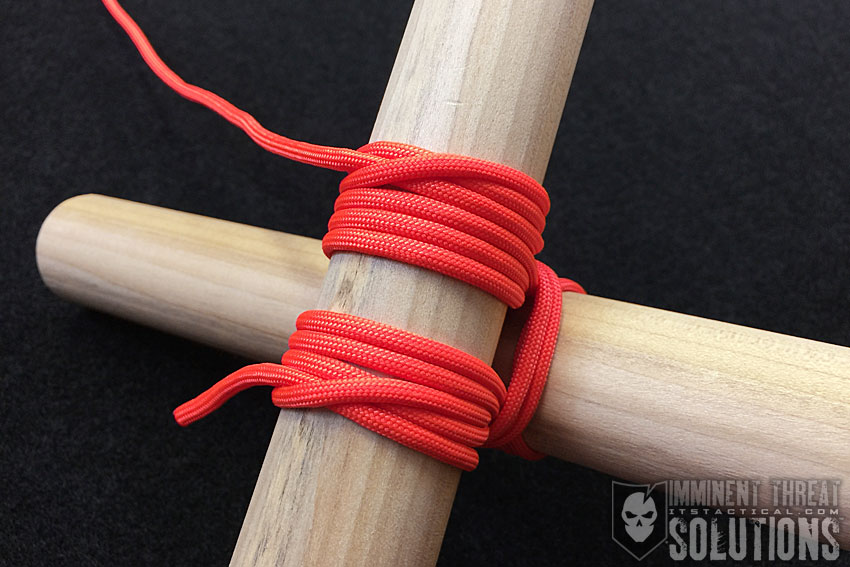
- Ensure your two spars have the topmost spar crossing horizontally over the bottom spar.
- Take the midpoint bight and loop it over the lower portion of the bottom-most vertical spar.
- Taking both strands together, wrap to the upper right and around the backside of the vertical spar.
- Taking the working end and cross on top of the horizontal spar and down/around the backside of the vertical spar.
- Wrap back on top of the horizontal spar and around the back of the vertical spar again.
- At this point your next wrapping is going to split and the strands will split as you wrap towards the right side of the horizontal spar (see photos and video).
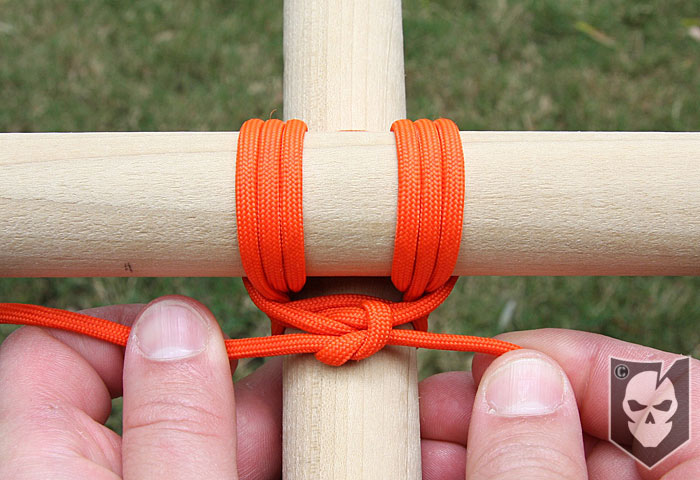
- The bottom strand completes the X pattern in the middle of the horizontal spar and the upper most strand meets it, starting your first frapping turn.
- Cross the working ends between the spars creating the frapping turn and heading in the opposite direction.
- A second frapping turn is then created opposite to the first and the working ends wind up on top of the vertical spar at the bottom.
- A square knot is now tied to secure the lashing.
- Security hitches can be now placed by creating a single half hitch with each working end on the respective side of the horizontal spar (see photos).
[flickrset id=”72157625187005668″ thumbnail=”square” overlay=”true” size=”medium”]

Discussion