Lock it Down Part II: How to Secure Your Firmware and Access Computers Remotely
Lock it Down Part II: How to Secure Your Firmware and Access Computers Remotely
Let’s say the worst has happened and someone has stolen your laptop; you’ve basically got two major concerns here. First, you’re now missing the hardware you use, which can mean having to spend some hard-earned money to replace it (unless you were smart enough to have insurance to cover this potential event).
The second concern is the thief now has your data. This means access to tax documents, banking account details, login credentials for any number of websites, pictures of your dog or almost anything of value you have in digital form. However, there are two things you can do to protect your data and render your computer useless to anyone but you.
Lock Your Hardware

One crucial change you can make to your Mac OSX machine is locking down the firmware. Firmware is software embedded into the hardware of your Macintosh, which executes before your operating system even starts booting. Locking down your firmware with a password renders the computer useless to anyone who manages to steal it. Even if they open it up, swap the main drive with a new drive and install their own OS on the computer.
In the past, enabling a firmware password was a bit of a pain and involved booting into “Recovery mode,” launching the GUI app (cleverly named “Firmware Password Utility”), enabling a firmware password, entering it twice to verify you got it right and finally rebooting.
Now with OSX, as long as you have Administrative access to your own computer (and if you don’t, it probably isn’t really your computer now, is it?), you can set your firmware password by issuing the following command within Terminal:
computer:~ somebody$ sudo firmwarepasswd -setpasswd

Password: [this is somebody’s user password]

Setting Firmware Password

Enter new password: [this better not be the same password as somebody’s username password]

Re-enter new password: [same password, typed to verify you got it right the first time]

Password changed

NOTE: Must restart before changes will take effect

computer:~ somebody$ sudo shutdown –r now
The system will prompt you for the password you want to use to lock the firmware and ask you to confirm it. After that’s done, your firmware password will go into effect the next time the machine reboots.
There are two caveats to mention here, do not use the same password to lock your firmware as you use for your user account and pick a password you’ll be able to remember. Adding a firmware password is very serious business; if you manage to pick something you’re going to forget, you’ll have a long road ahead of you to recover it.
While yes, it’s possible to reset the system in order to unlock it, it’s going to involve a trip to the Apple retail store nearest you. In addition to your Apple store trip, it can involve a wait of a few days while they determine whether or not you’re the legitimate owner of the computer, before they generate a one-time-use unlock code.
The reason for not using the same password as your user account is best described in a household weapons-storage metaphor. If you have a house and a safe inside that house in which you keep your firearms, how smart would it be to have one key to unlock both your front door and your safe? Not very, so don’t do that.
Personally, I change my user password once a week. I’ve got my own little formula for devising a password. It may be a little paranoid for me to change it that often, but it works for me. I never change my firmware password, though.
One final note: since removing a firmware password is a serious pain, you should remember to keep your receipts when you buy a computer and/or register the computer with Apple when you buy it. If you do forget your firmware password, you’ll need one or the other to prove ownership to them in order to get their assistance.
If you’re buying a used Mac from someone, it’s in your best interest to check whether or not there’s a firmware password before you exchange money for the machine. One quick way to do that is to boot the machine into either “Recovery mode” (hold down Command + R at startup) or attempt to boot from a drive other than the internal hard drive (hold down the Option key while starting up). If the Firmware Password dialog window comes up, the machine has a Firmware Password set. Don’t buy that computer unless the person removes that password first.
Lock Your Data
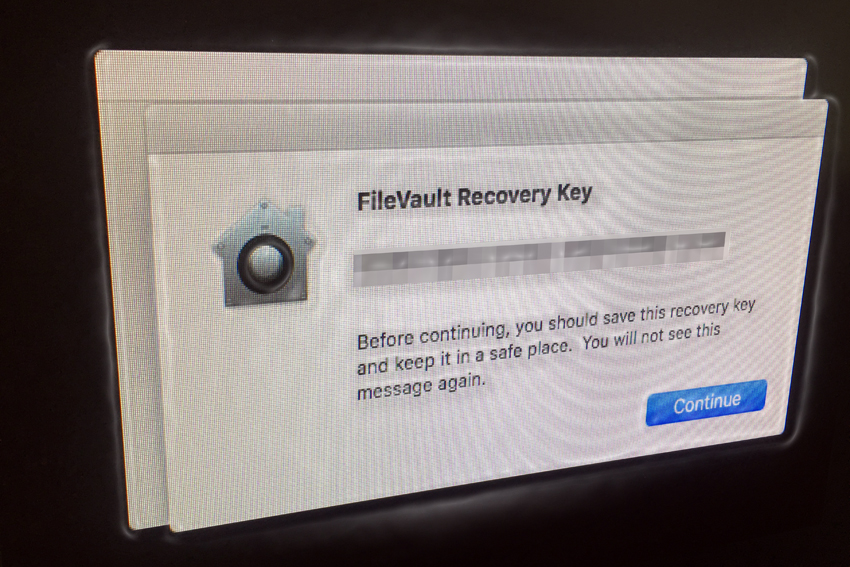
In our previous article about encryption and security for OS X, we discussed some tools at your disposal for encrypting data, such that prying eyes can’t steal it. One tool built into OS X is “FileVault.” Let’s say the worst has happened and your computer has been stolen. You already enabled your Firmware Password, so they can’t just wipe your drive and install a new operating system. However, they could pull that drive out and steal whatever data you may store on the computer.
You may have encrypted some crucial files so they can’t use those, but you may have missed something. That’s where FileVault comes in; you can use it to encrypt the entire hard drive, or just your User Directory. Personally, I don’t encrypt the entire drive. I’m fine with them being able to copy my applications; they can probably find all of them online anyway.
What I’m more concerned with is protecting my personal files, which are generally stored somewhere in the user directory. Whether they’re on the “Desktop” in a heap of tiny documents spread all over the place, or you’ve categorized every type of document into an appropriate directory structure in your Documents directory, all that stuff lives in /Users/yourusername/.
While it’s entirely possible to turn FileVault on by going to System Preferences:Security & Privacy:FileVault and simply turning it on, let’s do this old-school UNIX style, with the handily included fdesetup tool from the command line. First, let’s check the current status:
$ fdesetup status

FileVault is Off.
Now that we know it’s off, we enable it, using ‘sudo’ (provided your account has administrator privileges on the system):
 $ sudo fdesetup enable

[The system will first ask for your account password in order to use sudo]

Enter the password for user 'somebody':

......................

Recovery key = 'VWXZ-LMG6-P2FN-U3WS-UTR5-XNNZ'
Please reboot to complete the process.
Now before you reboot the machine, make a note of that Recovery Key; you may need it someday. Don’t write it on a Post-It note and put it in your desk drawer or Sharpie it on your arm, either.
I would suggest ssh-ing to another computer and stashing it in a text file on that machine. If you turn on FileVault on that machine, put its Recovery Key on the machine you just turned FileVault on. Now those keys are distributed and secured by the fact that your User Directory is encrypted on both machines.
If you don’t have another computer, print out the Recovery Code and put it someplace a thief or other miscreant isn’t going to look. They’re definitely going to look around and under your desk, so be creative. Not so creative, though, that you don’t know where to find it. Own a gun safe? Stash the printout in there. Or fold it up and stuff it in a book in another room where you live. Pick a book no one is going to pick up and look through. Once you’ve done this, you’re ready to reboot and because you still have that terminal window open, do it from there.
$ sudo shutdown -r now
Upon issuing the shutdown command, your computer will reboot and prompt you to enter your account password a little earlier in the boot-up cycle than it used to. Once it’s up, login to your account, go to System Preferences:Security & Privacy:FileVault and take a look at the status. FileVault should now be turned on.
It should also show a status bar labeled “Encrypting…”, along with an estimated time remaining. Depending on how much data you have in your home directory, this could be a really long time. Fear not; you can put the machine to sleep or even power cycle it again and it will pick up where it left off the next time the computer is powered on.
SSH: Copying, Keys and Tunnels
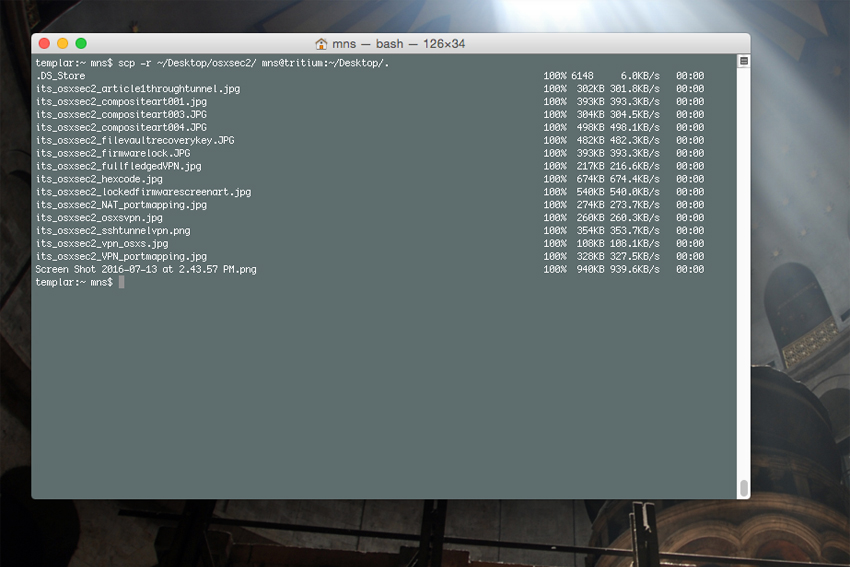
If you have more than one computer on a home network, chances are good you’ve had to transfer files between machines. There’s an almost endless array of options to do this; many of them dead simple, like “AirDrop” or going to your “Sharing” System Preference and clicking on that little “File Sharing” button.
There are third party pieces of software you could install to allow the transfers, like uploading a file to Dropbox and downloading it to the other machine. You could also plop a USB drive into the slot, copy the files, eject it and plop it into the other machine to copy them that way. However, only a barbarian does things like that.
So long as you’ve got SSH running on any two given Macintosh computers (colloquially referred to as “Remote Login” in the Sharing panel of System Preferences), copying that file you need is simple from the command line with the “scp” binary. Let’s say I’ve got a file on my Desktop on a laptop named “tritium” and I want to put a copy of it in the Documents directory on an iMac named “radium”. From terminal, I issue this simple command:
scp ~/Desktop/FileIWantToCopy.txt [email protected]:~/Documents/.
Basically, the syntax is ‘scp /path/to/original username@remotehost:/path/to/copy’. So let’s say you want to clone an entire directory from one machine to another; the fundamental syntax is the same, but we throw an “-r” flag in there to indicate we want it to copy recursively:
scp -r ~/Documents/* [email protected]:~/Documents/.
There are plenty of places on the web to learn more about scp and SSH, so if you don’t already know this stuff, you can find out a lot more about it elsewhere. What we want to touch on instead is the use of keys, then use of tunnels. In the last article on this subject, we went over how to generate a key and install it on a host computer, such that when you use SSH to get from one machine to another, you can do it without a password, while still keeping the connection secure.
In my last piece on this subject, we talked about generating SSH public/private key pairs. Probably the best selling point for public and private key pairs is the ability to use them to provide yourself access to computers you own (as long as they’re running an SSH server) without requiring you enter a password for each access.
So let’s assume you’ve already got that set up and you’ve got a computer at home that’s on all the time. Let’s also assume you’ve got a laptop you take with you to work, a coffee shop or some other place you don’t control the network. Maybe your work has some sort of content filtering and you can’t look at anything weapons related without the infosec guy finding out about it. Life’s rough, eh? Well, with a little trick called “tunneling”, this will no longer be an issue for you.
Port Forwarding and Security Through Obscurity
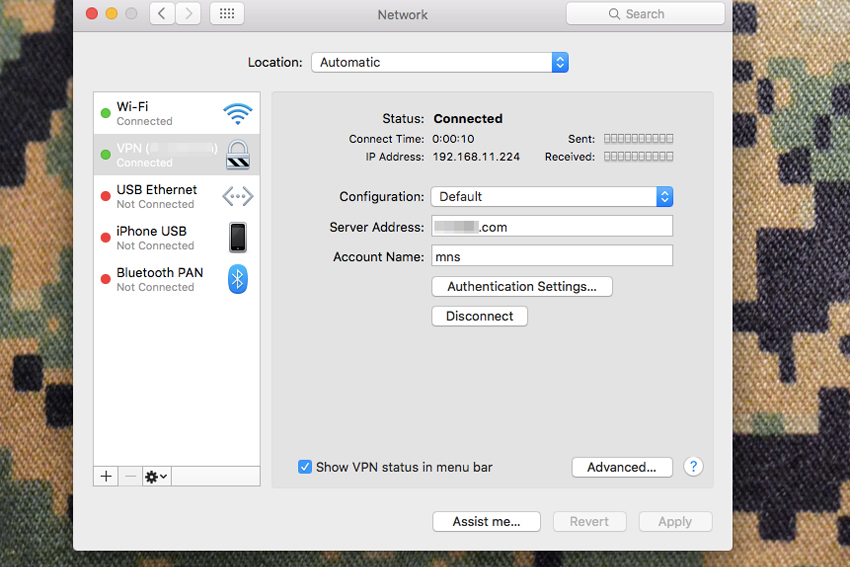
First, what you’ll need is a method to access that computer at home, remotely. Generally speaking, most people’s default network setups at home disallow outside access, via a firewall or a router that doesn’t allow incoming connections. If your network runs a NAT setup, or “Network Address Translation” to give computers on your home network addresses like “192.168.1.20” or “10.1.3.5”, you’ll want to set up port forwarding.
The setup of this varies from device to device, but it’s straightforward enough and you can check your manual for specific instructions if you don’t already know how to do this. As a general policy, I would advise against opening more ports than you have to. The internet is full of people looking for holes in networks and worse yet, it’s full of scripts making the search for those holes brain-dead simple for babies with too much free time and under-developed senses of honor.
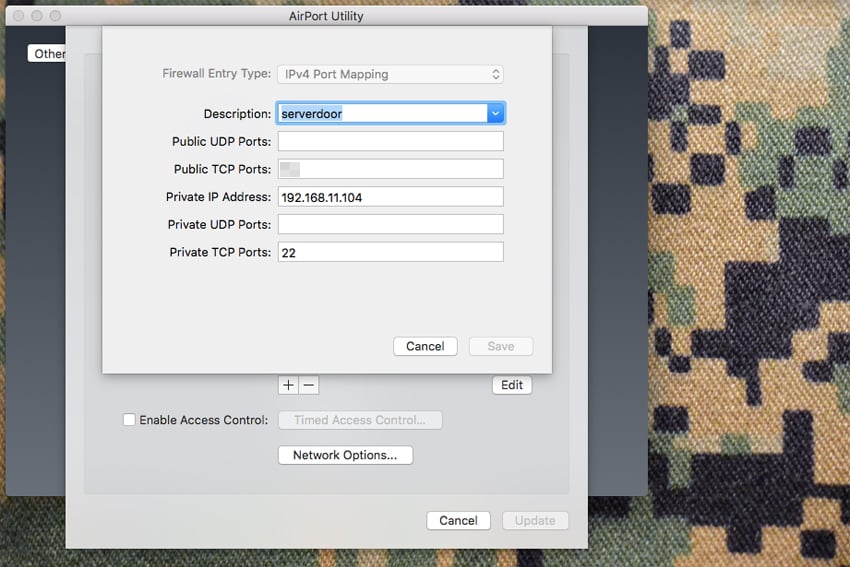
So for this, you only need one port open and that’s the port for SSH; usually, port 22. However, I generally configure the port forwarding to take (and send) traffic from port 22 on the NAT address of the server I want to access, to some other port like 172 or 3939. Choose a port that doesn’t normally have a service associated with it or a port that isn’t a commonly scanned port.
Port 80 and 443 are the most commonly scanned ports; someone who becomes aware of your home external IP address is probably going to point a web browser at that IP address before they even bother running nmap or some other port scanning tool. However, it really doesn’t matter what port you choose, just choose one and remember what you mapped.
Dig Your Tunnel
Now that you’ve got that set up and you know what port you’ve got SSH access on externally, you’re going to create an SSH tunnel and push all of your web traffic in a browser over that encrypted connection. You’ll also need to know the external IP address of your home network in order to craft the syntax for your SSH tunnel command. On OS X, the basic syntax is this:
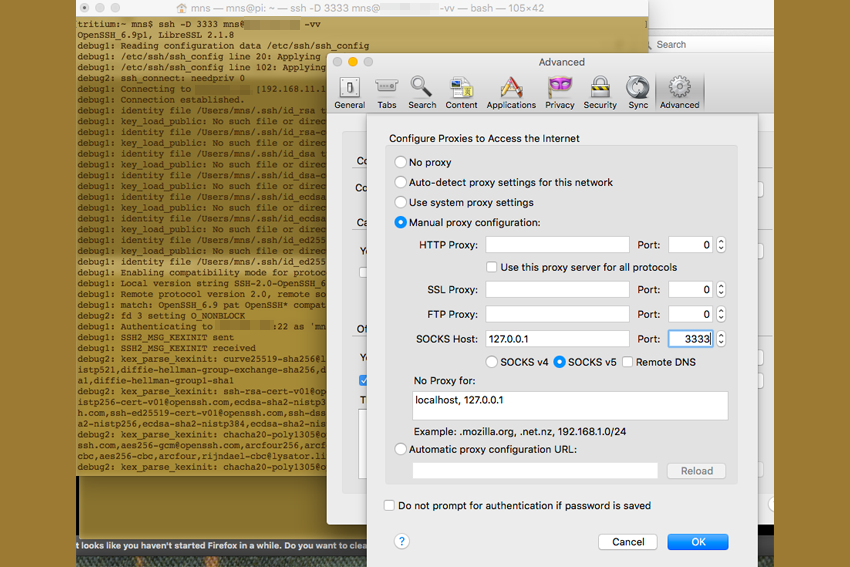
ssh -D 3333 username@your_external_ip_address -vv
The “-D” tells ssh to dynamically allocate ports as used to port 3333 on your local machine (eg: the laptop from which you issue this command). The username@your_external_ip_address specifies what user you’re logging in as on the home machine, where the external IP address tells SSH where that machine is.
The –vv flag tells ssh to do this in ‘verbose’ mode. While it isn’t crucial to the operation, it’s helpful to see details on what the ssh connection is actually doing. If you’ve set up your ssh keys, issuing this command will let you in without a password (unless you created a key pair with a passphrase). If you haven’t, it’ll still work, but it will want you to enter the password for the account you’re logging into. Once you see a prompt on the machine you’ve logged into, you’re ready to setup a web browser to use the proxy you just created by building the tunnel.
Set-Up Your Improvised Proxy
For purposes of an example, I used Firefox to set this up. Generally, I use Firefox as my proxy browser and just leave it configured to use the proxy setup. When I’m on a trusted network, I’ll use whatever other browsers I need, but if I’m on an untrusted network, I issue the tunnel login and launch Firefox.
To set it up, launch Firefox, go to “Preferences”, select the “Advanced” sidebar button, select the “Network” tab and click on the “Settings” option for Connections. From there, select “Manual Proxy Configuration”, then add “127.0.0.1” or “localhost” in the “SOCKS Host” field and enter your port 3333 in the port field, or whatever you told ssh to use to dynamically direct traffic over. Select the SOCKS v5 option, hit OK and browse away. Now every website you browse in Firefox is pulling the information, encrypted, from your home server, over SSH, then delivering it to your browser.
Now You’re Cooking With Gas
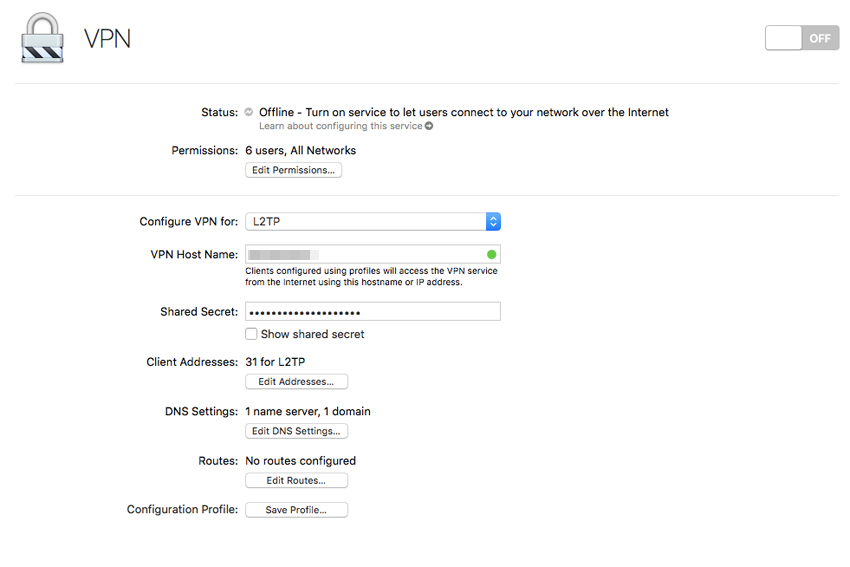
This is, in effect, a low-rent VPN, but it works for the bulk of what you might need it for. You can get a lot fancier with this stuff; like registering a domain name and making a DNS entry pointing to your home IP address. Reverse lookup won’t work, but in a way that’s a security feature, since it means someone can’t use it to see the domain name you’ve set up and then use WHOIS to look up the contact details you used when you registered the domain.
You could build a fully-fledged dedicated home server and create an LDAP directory, using a variety of other services for the home network. You could even build a fairly robust VPN service to encrypt all your traffic and not just web-based traffic. However, those options are a little beyond the scope of this article; though we’ll try to write that process up in the future.
Hopefully we’ve given you a little additional knowledge to help you protect your digital assets and keep your data safe from prying eyes; there’s plenty of them out there.
Editor-in-Chief’s Note: Matthew Sharp is a Plank Owner and Life Member at ITS and goes by the username “viator.” He lives in The People’s Republic of Northern California and enjoys long range shooting, carrying heavy objects great distances and fuzzy little puppies.





Discussion