


Backcountry Emergencies: Managing Sprains, Strains and Breaks
Backcountry Emergencies: Managing Sprains, Strains and Breaks
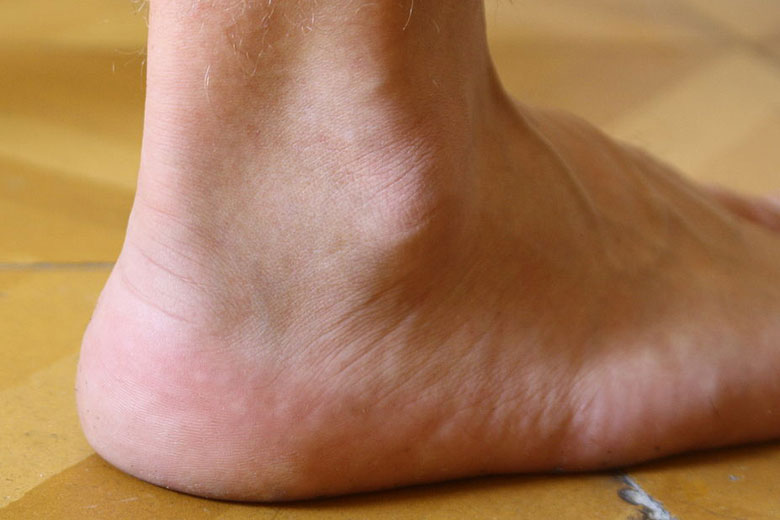
The weather has finally warmed up and you’re out enjoying a hike in the mountains. The trail is mostly clear with a few little patches of snow and ice in the shade. You go off trail to “relieve” yourself in the majesty of the wilderness and as you make your way back to the trail, you plant your foot on a little patch of ice.
You slip on the ice and in the process of trying to regain your balance, stumble and land on the outside of your right foot; “rolling” your ankle. After going to the ground and cursing colorfully, your hiking partner makes their way over to you to survey the damage.
While you plead that you’re sure you can walk it off and just need a minute, your partner has fortunately attended a seminar discussing musculoskeletal injuries and cautions you to stay in place while she does a quick function exam.
Sprains, Strains? What’s the Difference?
I’m sure most of us have experienced a strain or a sprain at some point in our lives. If we want to get “technical,” we can say that a “sprain” is stretching or tearing of a ligament and a “strain” is stretching or tearing of a tendon.
Does your treatment plan in the backcountry care which one it is? Nope, that’s for the orthopedic docs to debate and discuss. What we’re concerned with is a much more useful concept, figuring out if the injury is stable or unstable.
Managing an Injury
Musculoskeletal injuries are pretty simple to manage, conceptually. While we won’t be going into much outside the scope of these injuries, the principles are relatively the same.
As far as we’re concerned, there are two main classes of musculoskeletal injuries in the backcountry; “stable” and “unstable.” The two classes are differentiated in the following way:
Stable injuries still allow for normal operation of the affected part. If it’s your ankle, you can still walk on it. If it’s your elbow, you can still “get all swole up” doing curls. It may hurt and you may experience pain, but the structure still performs its function.
An unstable injury is just the opposite. The affected structure no longer works. If you put weight on an unstable ankle, it simply collapses. If you have an unstable wrist injury, you may be unable to hold something as simple as a water bottle. You can extrapolate that out for whatever body part is injured.
Unstable injuries need protection from further harm and we need to ensure that proper healing can take place. We also need to ensure that your body can still send nutrients and oxygen to the affected part and remove waste materials (a little term we medical nerds like to call perfusion).
If you’ve ever taken a First Aid class, you’ve probably learned how to splint and that’s what we need to do for an unstable injury (and in some cases for stable injuries). Additionally, we may need to assist our patient, up to and including carrying them out of the area, depending on the nature of the injury.
The Two Stabilizations You Need To Know
There are somewhere north of a million ways to stabilize a musculoskeletal injury. In the wilderness medical classes I teach, we normally do a “fashion show” and let students demonstrate their skills at improvising protection for a the injuries. In all this time, I’ve never seen two done the same way.
At the root of all stabilizations, we’re concerned with the “Three C’s” of protecting a limb. A stabilization needs to be Complete, Comfortable and Compact. Our concern with an injury is that it can not only impart a lack of function, but can also cause lasting damage in the form of ischemia (lack of perfusion; starvation) and infarction (death) to tissues.
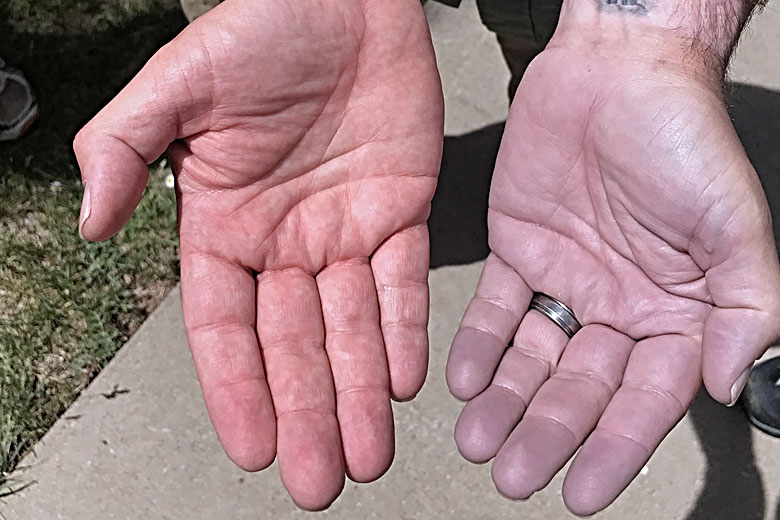
Depending on the nature of the injury, especially in the case of a deformity (like a second elbow in your arm, for instance), blood vessels could be pinched or impacted, reducing blood flow further down from the site of the injury. Since your circulatory system brings nutrients and removes waste, its functionality can be impaired. Tissues that are no longer perfusing (getting nutrients and oxygen) began to starve and/or become toxic (ischemia) and ultimately die (infarct). The beginning visible stages of this include cyanosis, or bluing of the tissues.
Complete
A stabilization is complete when it successfully supports and enhances perfusion to an injured extremity and/or allows the limb to maintain good perfusion. If the injury is associated with a long bone, you need to support the joint above and below. If the injury is associated with a joint, you need to support the long bone above and below.
Comfortable
A stabilization is going to be on for a while, so we need to make sure it’s not creating any friction points where it makes contact with the body, which can cause soft tissue damage. We also need to anticipate swelling, which can increase for a relatively short time after the injury, by not putting the splint on too tight.
Compact
No gypsy camps. We need to make sure the stabilization materials use as little material as possible (e.g. not having an extra two feet of rigid material projecting from the body). We also want to ensure that any loose ends (e.g. from a cravat) are safely tucked away so that they don’t become snag hazards.
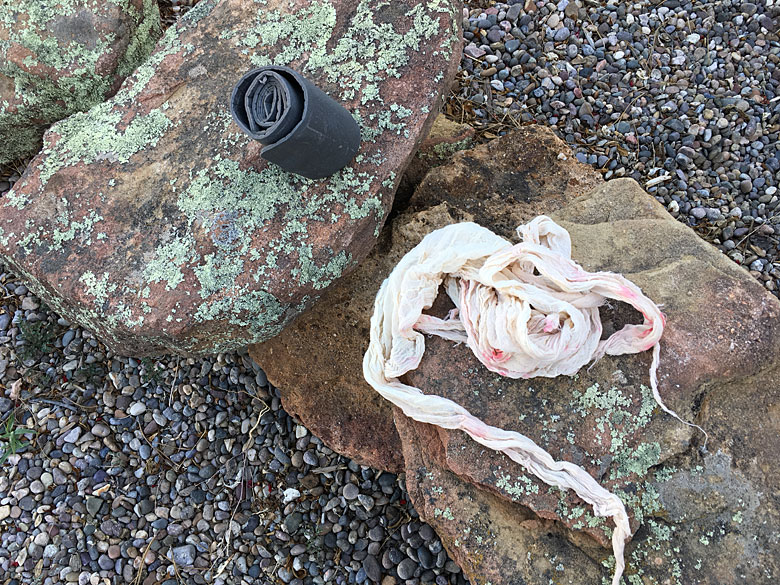
In my opinion, the two most important stabilizations require a couple of pieces of gear I recommend in any First Aid Kit (not including trauma kits): (1) SAM Splint, (1) roll of Kerlix (gauze) and (2) cravats (triangular bandages). You can order SAM Splints here. Cravats are also easy to manufacture yourself. Go to your local Walmart (or fabric store) and get one square yard of muslin cloth. Then cut it on the diagonal.
Important Stabilization #1: Ankle Splinting
If you were to study musculoskeletal injury patterns in the backcountry, what would you guess the most common injury on the lower body would be? If you guessed rolling the ankle, you’d be correct. Even though the ankle is a highly mobile joint, we really only need to protect it from eversion and inversion (which are just fancy terms for rolling inward or outward).
With all stabilizations, it’s important to understand that you’re not trying to engineer a foolproof solution. Patients could certainly defeat your efforts to protect the injury, but they won’t want to; a well constructed splint will alleviate pain by allowing the limb to relax. The simplest ankle splint requires a SAM Splint and a cravat (or two).
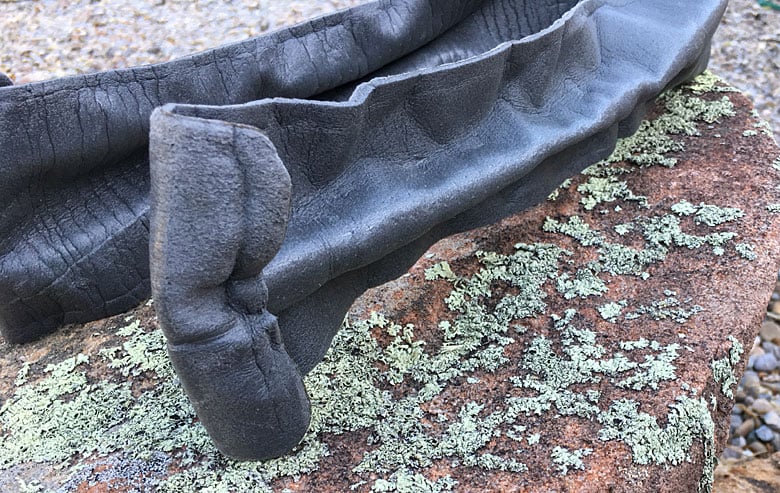
1. Form several inches from the ends of the SAM splint into an I-Beam, leaving the middle section flat (this will go on the underside of the patient’s foot). The I-Beam is one of the strongest and most structurally sound forms you can make with a SAM Splint.
2. Form the SAM Splint around the patient’s foot like a stirrup, with the flat part on the bottom of their foot and the I-Beams on the sides of their ankle.
3. Pad any areas of the patient that may come into direct contact with the SAM Splint (it is after all, a sheet of thick aluminum covered with not nearly enough foam).
4. Roll your cravat into a form about 2 inches wide, starting from the corner. This prevents you from having a weird little triangle poking out and looking like the aforementioned gypsy camp.
5. Find the middle of the rolled cravat and put it on the ball of the patient’s foot.
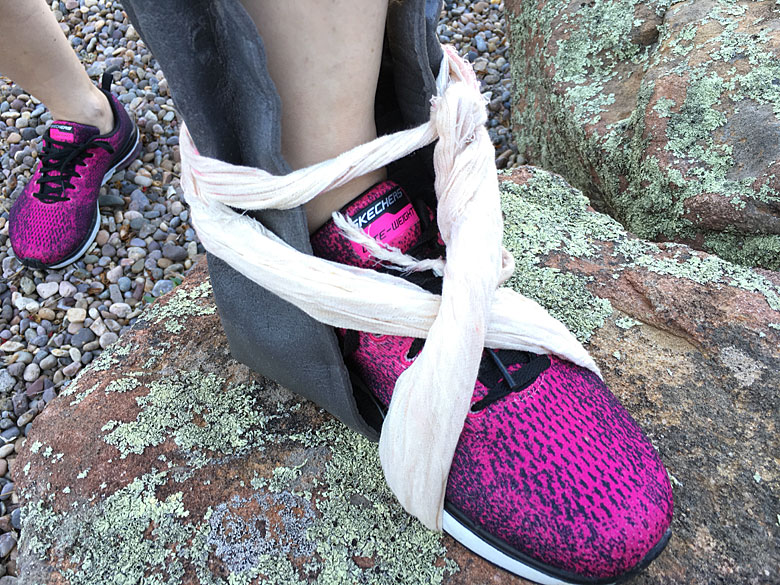
6. Bring the tails up over the top of the foot and cross them around the back of the patient’s ankle, making sure to capture the SAM splint.
7. Cinch the tails up, making them snug and tie the ends off on the front of the foot.
8. If you have a long SAM Splint, use a second cravat higher on the leg.
8. Unfold an inch or so of the I-Beam at the top on each side and fold it to the outside of the splint (to form a catch to stop the cravat from riding up off the SAM during movement).
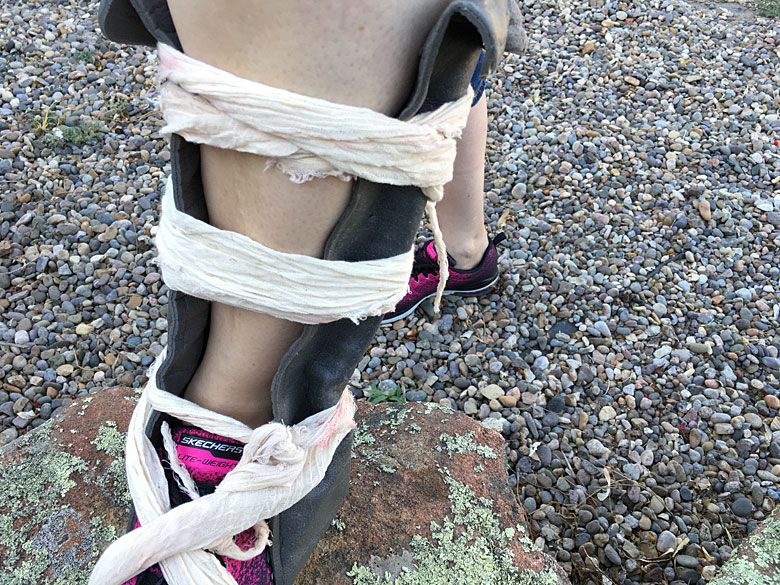
Once the patient’s injury is stabilized, they’ll need some form of assistance to ambulate out. This can be anything from a cane, trekking pole or even leaning on you. Also, they should move very slowly and controlled, taking extra care with foot placement if they can bear a little bit of weight.
Just keep in mind, the effort to stabilize and balance one’s body weight with an injury is particularly fatiguing and can lead to further injuries as the other leg, knee, etc. all work to compensate for the injury.
Important Stabilization #2: Sling and Swathe
The upper body is the easiest part of the body to protect. All we need to do is create a simple sling and swathe (and optionally build a simple platform for the arm using the SAM splint and Kerlix).
Our goal is to try and allow the arm to relax comfortably, so the patient isn’t having to use muscle tension to protect the injury. Slinging the arm is simple and it’s a great technique for any injury to the arm, from shoulder dislocations to broken wrists. It also only requires two cravats.
1. If you need to and can build a platform for the patient’s arm, do so now.
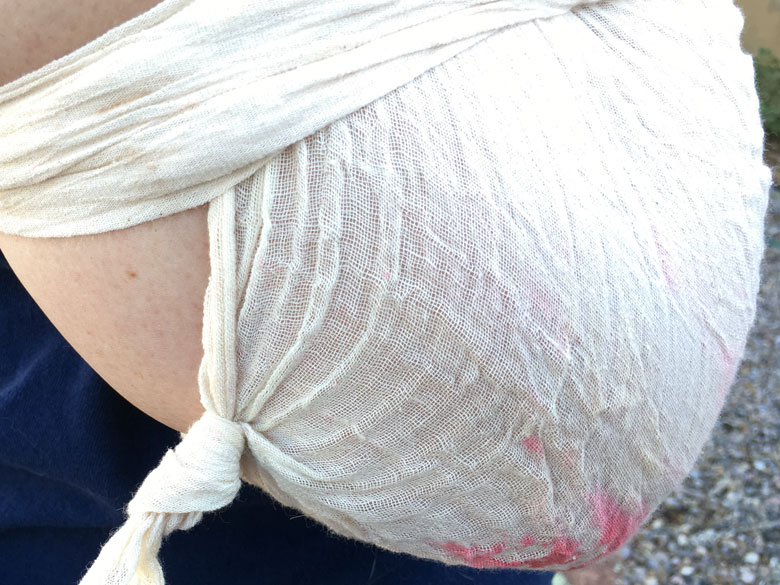
2. Take your cravat and tie a quick overhand knot in the 90-degree corner, forming a pocket for the elbow.
2. Take the tails up on either side of the patient’s neck, on their front, ensuring that the wrist is slightly elevated above the elbow.
3. Tie the tail ends together, keeping the knot off of the patient’s spine (technically their seventh cervical vertebrae; the bump you feel coming down from the neck). Off-centering the knot prevents a friction point from forming and becoming uncomfortable. If you like the person, you can pad the area underneath the knot with some fleece, or gauze, if you have it.
4. Take your other cravat and roll it to about 2 inches wide, starting with the 90-degree corner (which prevents you from having a weird flap at the end).
5. Run the folded cravat over the patient’s upper arm and UNDER their wrist and tie the ends together. It should be snug, but not constricting.

Basically, we’re creating a hammock for the arm to rest in and then anchoring that hammock to their body, so the arm doesn’t bounce when walking; all while giving a comfortable place to rest the wrist.
Ottawa Ankle Rules
Now I want to highlight a special case, which has similar causation as a sprain/strain, but has a drastically different outcome. If you’re a particularly unlucky person, when you roll your ankle, you may create an avulsive tear of the bone.
The fibrous tissue that makes up your ligaments is very strong and the point at which ligaments adhere to the bone is also very strong.
If the tissue wasn’t strong, you’d just be walking along and falling apart as your connective tissues randomly detached. This point is also generally on a “protrusion” from the bone. An avulsive tear is something that occurs more frequently when you have a ligament in a high-use area attached to a small bone like in the hands and feet.
The problem is that when this tear occurs, unless the force is significant, the tear isn’t complete. So you have a little section of bone with the ligament anchored to it and that piece is pulling away from the main piece of bone. Further movement of the affected area can complete that tear.
The exam related to these rules is pretty simple. You’re going to examine four particular points on the foot and ankle, checking for point tenderness (very sharp pain at the point you’re touching).
1. Can the patient bear weight? If not, the injury is technically unstable anyway, so splint and carry on.
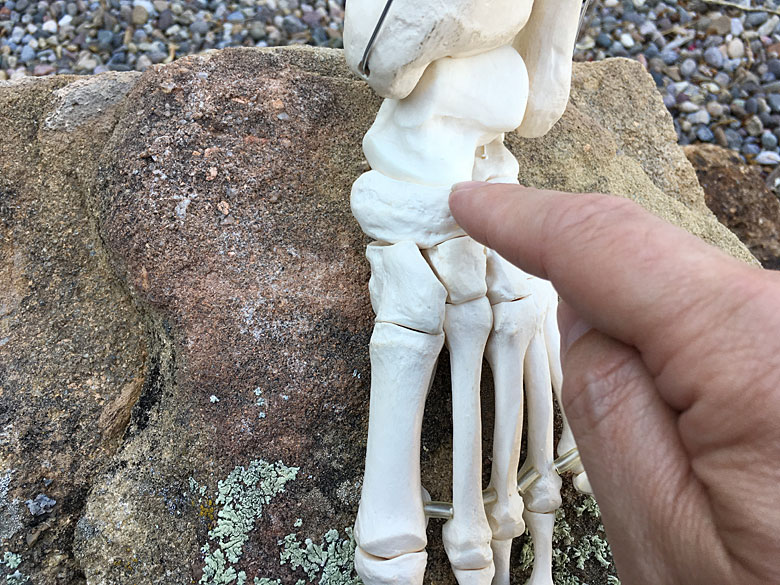

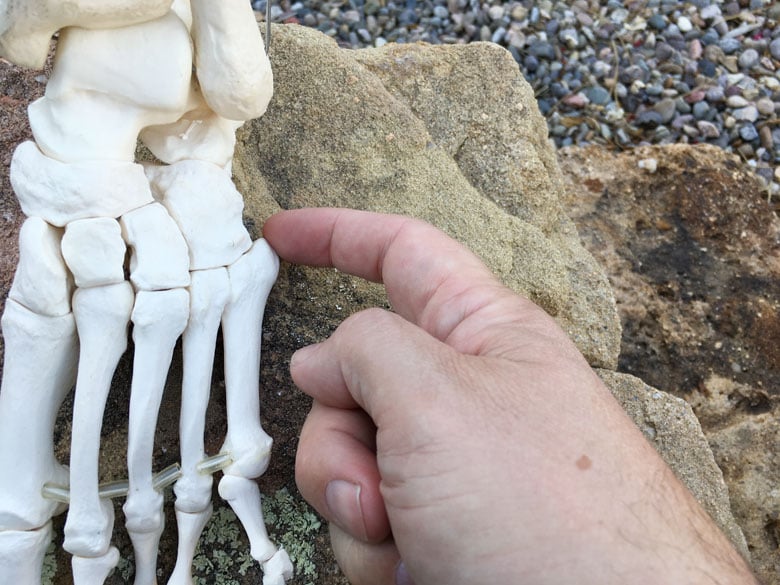
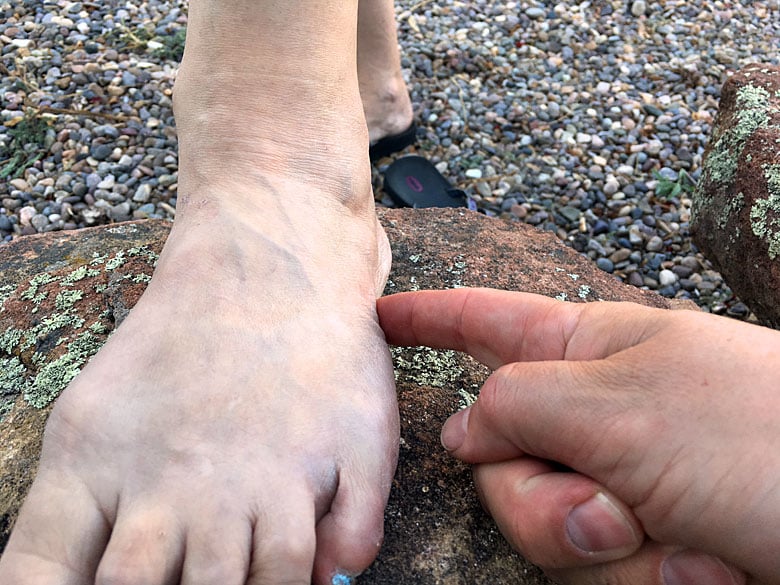
2. Press directly down on the Navicular bone (top ridge of the foot).
3. Press on the proximal tip of the 5th metatarsal (bony nub on the knife edge of foot).
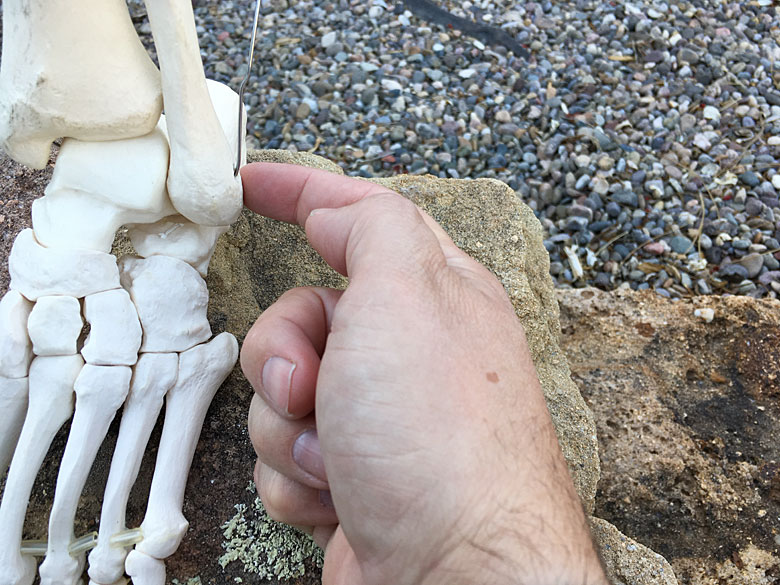
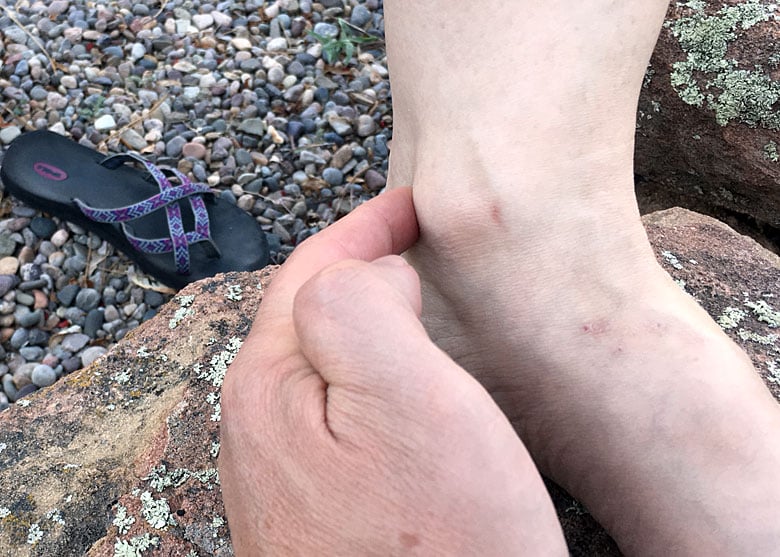
4. Press forward and upward on the tip of the lateral malleolus (outside of the ankle bone).
5. Press forward and upward on the tip of the medial malleolus (inside of the ankle bone).
If any of the Ottawa Ankle Rules are failed (by the patient exhibiting point tenderness), you should consider the injury to be “unstable” and should prevent the patient from utilizing the joint. Any further movement could cause that avulsive tear to complete and turn a cast/boot/immobilization into a potential surgical event.
Conclusion
As sprains and strains are relatively common, especially in the ankle, it’s worth knowing a quick assessment to determine if that “ankle roll” you endured is something a little more serious. It’s also good to know a couple of good stabilizations that you can whip up in a hurry with minimal, multi-functional equipment.
If you can remember the three concepts of a good stabilization, (Complete, Comfortable and Compact) you’ll go a long way to being able to engineer a safe and effective method for managing a musculoskeletal injury when you’re in the backcountry.
Editor-in-Chief’s Note: Tom Rader is a former Navy Corpsman that spent some time bumbling around the deserts of Iraq with a Marine Recon unit, kicking in tent flaps and harassing sheep. Prior to that he was a paramedic somewhere in DFW, also doing some Executive Protection work between shifts. Now that those exciting days are behind him, he has embraced his inner “Warrior Hippie” and assaults 14er in his sandals and beard, or engages in rucking adventure challenges while consuming craft beer. To fund these adventures, he writes medical software and builds websites and mobile apps. He hopes that his posts will help you find solid gear that will survive whatever you can throw at it–he is known (in certain circles) for his curse…ahem, ability…to find the breaking point of anything.


Discussion