


Urban Rappelling Equipment and Considerations
Urban Rappelling Equipment and Considerations
Rappelling is an often under-appreciated skill for use in an emergency situation and one that could potentially save your life one day. A common misconception of rappelling is that it’s only for fun and thrill seekers of all kinds. While it’s that and much more, my hope is that after this article you’ll start to think more outside of the box about applications for Rappelling.
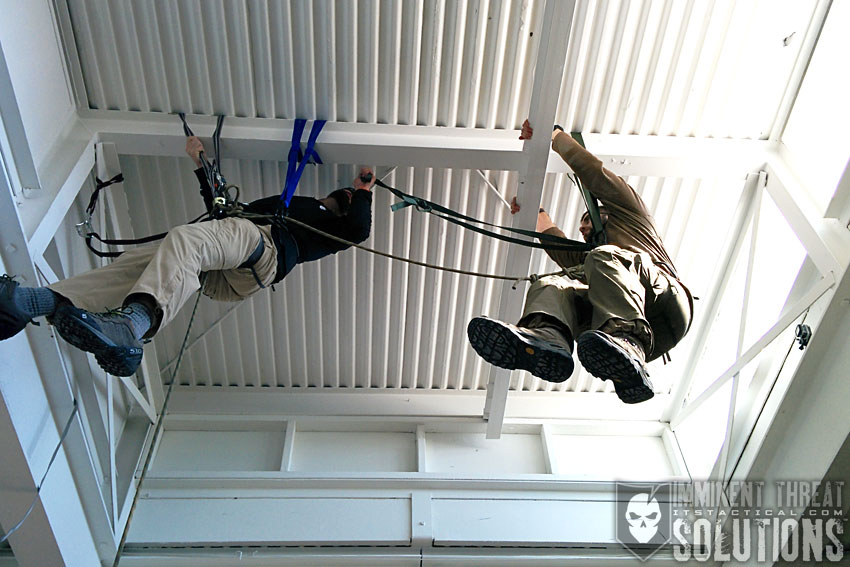
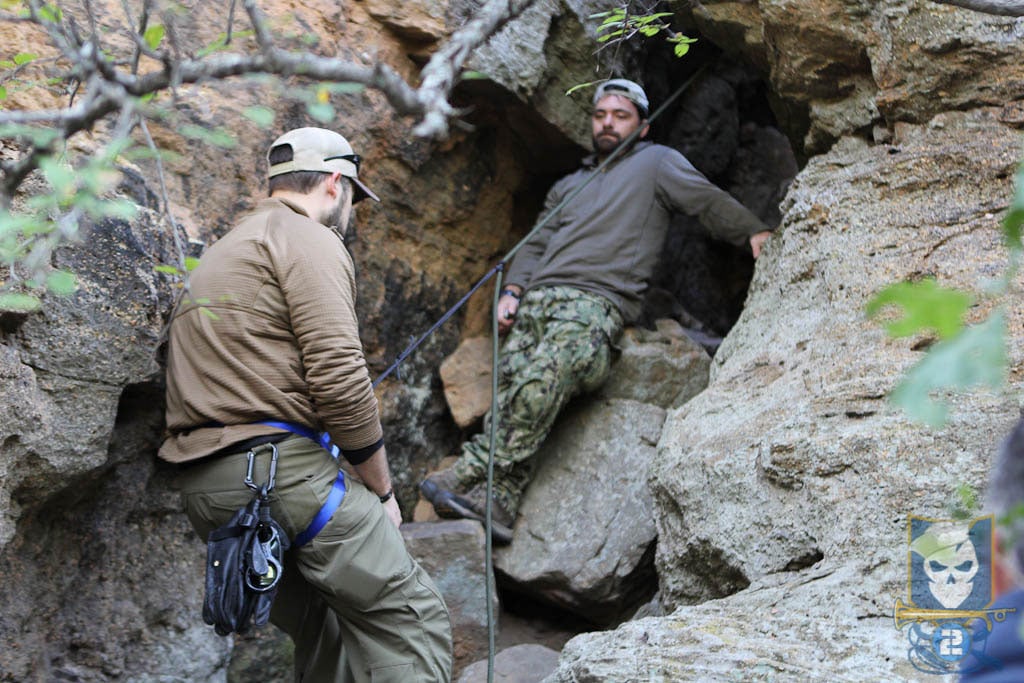
I recently had an opportunity to join Kyle McCleery, the head of Trident Response’s Search and Rescue department, to film an overview of some things to keep in mind when setting up an urban rappel and the equipment you’ll need to make it happen. This article isn’t going to cover exact rappelling technique, but more the setup of anchors within urban environments. We’ve previously shared the video Kyle and I filmed on ITS, but if you haven’t had the chance to check it out yet, I’ve embedded it below:
As you’ll see in the video above, Kyle and I go over options for anchors, knots, rope, webbing and more to try and cover all the bases in regards to what you’ll need to know. However, no article or video is a replacement for real hands-on training when it comes to something like Rappelling. While the techniques we discussed aren’t much different than setting up an outdoor rappel, there’s a few things you’ll want to keep in mind when it comes to setting anchors.
That being said, below I’ve expanded on the video with some written information that reviews the principles discussed in the video and also goes a bit more in-depth in some areas. The reason we’ve taken the time to go over an urban setup with rappelling in the first place, is because it’s a different animal. Not so much with the equipment or techniques, but more with the anchor attachment points. Don’t worry, I’ll go over equipment selection here too.
Urban Anchor Systems
While everything is important to rig properly in rappelling, the foundation is setting proper anchor points. Redundancy is the key here so that in the event of a failure with an anchor or piece of hardware in your system, you have built in redundancy. Some consider three anchor points paramount, but a minimum of two is what we recommend. As we went over in the video, when searching for urban anchor points, you want bombproof looking steel beams or piping that’s solid. You’re not going to find big trees or large boulders to sling here. Look to see where the beam or pipe is coming from and where it’s going. Yank on it like you’re going to have to depend on it with your life, because technically you are.
That being said, do your own due diligence and don’t just trust someone else’s system, check it yourself and put your own trust in it. In an emergency this might not be feasible, but I’ve seen so many instances of climbers at the local outdoor climbing park I go to just jumping from one setup to another. This is also with just having met the people that rigged it and not checking out their rigging for themselves first. Don’t be that person.
If you’re lucky, you’ll find window washer anchor points on the roof of a building to anchor to, these are commonly installed to rig window washing scaffolding to, but they also exist as anchors for building inspection clip in. Here’s a link to a company that I found during my research that carries different building anchors if you’re interested in learning more about them. There’s even residential roof anchors that are perfect for security during roof work. I’ll admit to wanting to install one on my roof for making putting up Christmas lights more enjoyable. I’ve often though about slinging my chimney for that, but always quickly dismiss that idea because I don’t trust that it would support my weight in a fall.

Image via Safety Equipment Solutions
Keep in mind that anchors need to be placed on the sturdiest part of a building available. What follows are extreme examples of what you might have available in an emergency and aren’t recommend for anything other than an emergency situation where you have the equipment necessary for a hasty evacuation. That being said, in a pinch you could sling a piece of a building like a skylight or even an air conditioner, do your due diligence here too though and ensure it’s sturdy. Something important that Kyle mentioned in the video is to be cognizant of the height of the ledge you’ll be rappelling over. If the height of the ledge is greater than the height of the object you anchor around with a sling, it could slip off.
One last thing to mention applies to a hotel room or the interior of a building in an emergency evacuation. If you can get the glass out of the window, you can bust through the drywall to find studs to sling for anchor points. In an emergency situation like this, where your primary and even secondary exits are blocked, the objective is to remain calm and think outside the box. Where there’s a will there’s a way.
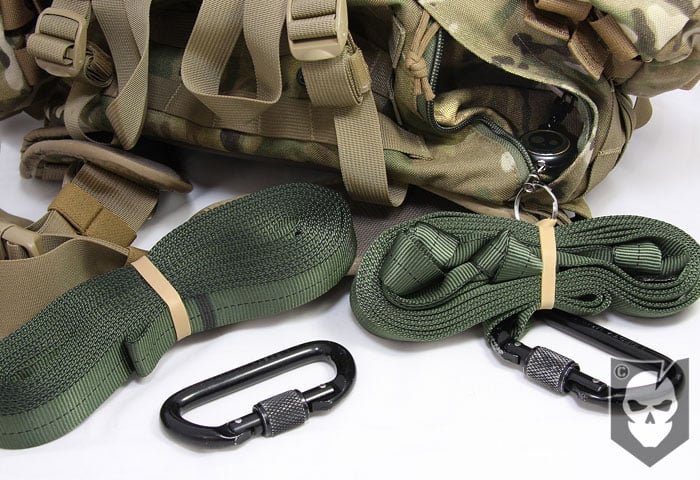
Webbing Slings for Anchors
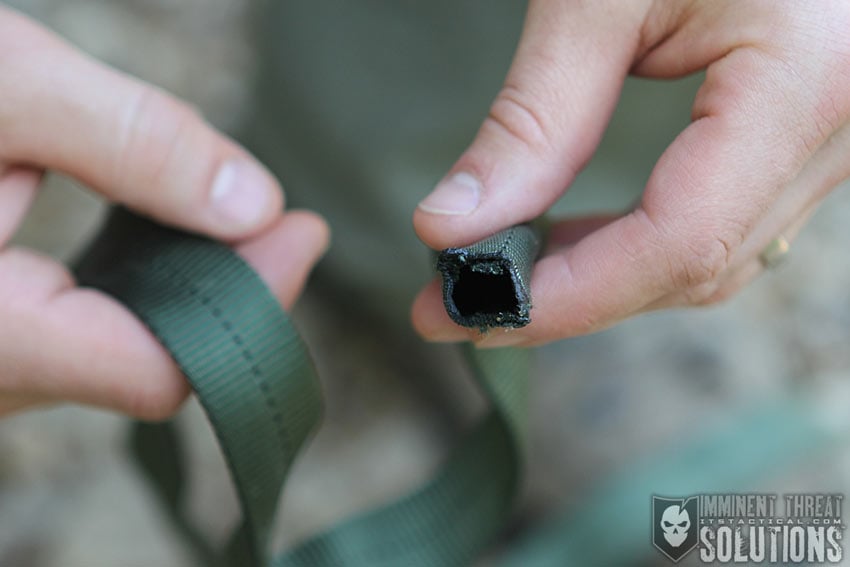
I’ve thrown the word “sling” around a lot and I’d like to take a minute to go over just what that is and how to create and use a webbing sling. Climbing has popularized tubular webbing and its strength, surface area and ability to lie flat has solidified it as a great option for building anchors. The context we’ll be discussing it here is turning a single length of webbing into a fixed loop using a Tape Knot. A tape knot is a simple knot that only differs slightly from an overhand or water knot. The Tape Knot is also great for joining two equal diameter ropes together.
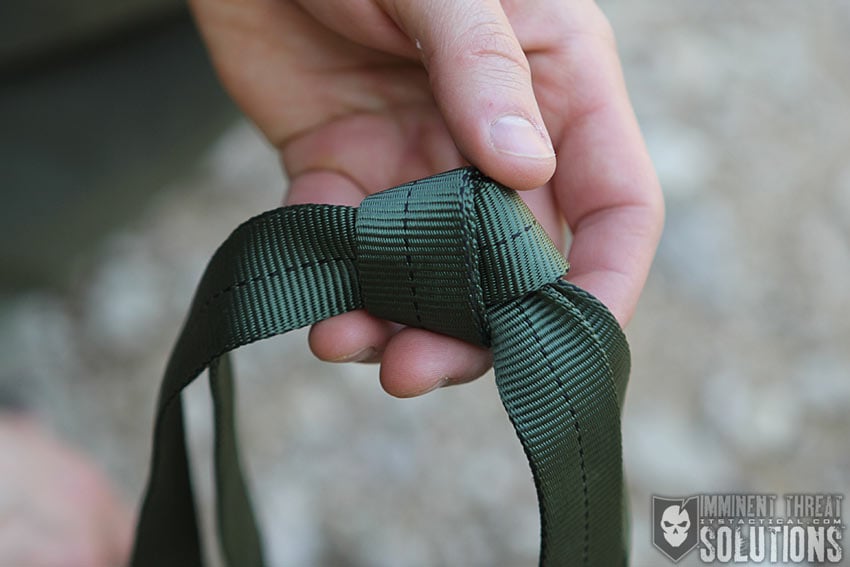
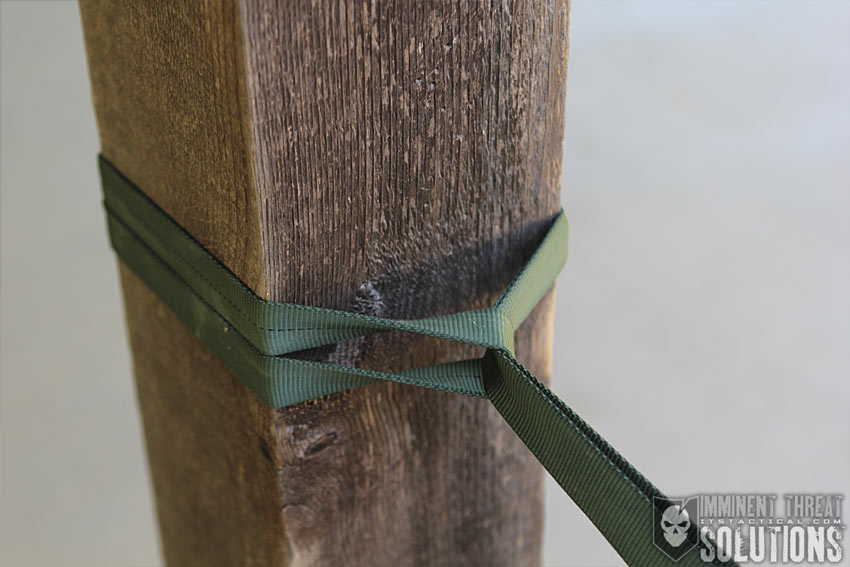
The Tape Knot has been covered in our Knot of the Week series here on ITS and we also go over it in the video above, but if you need a refresher, click here. Utilizing the Tape Knot and remembering to leave a 6-8 inch tail at the end of each side of the knot, you’ve now created a sling. By using a simple girth hitch you can now attach this to your anchor point and remember the redundancy I talked about earlier and use at least two slings for anchors.
Angles matter and I’ll go over some basics you’ll need to keep in mind when building anchors. Using the redundancy model and building at least two anchors, the load is going to vary on each anchor depending on the angle of pull between them. Another thing to keep in mind is that you also want the anchors as equalized as possible correlating to the direction of pull. This will reduce the strain on any one point and reduce the chance for failure.
For instance, if you had a 100 lb. load and your anchors were each at a 0˚ angle, meaning they each ran straight down to the load, it would be balanced and each anchor would effectively carry a 50 lb. load. The more you spread this angle, the greater the load is placed on each anchor. For instance, at 90˚ you’re now forcing each anchor to carry 70% of the load, or 70 lbs. At 120˚ which isn’t recommended, each anchor is now carrying 100% of the load or 100 lbs. each. Another thing to drive angles home is that once you exceed 120˚, you’re now forcing each anchor to carry a load greater than you weigh. Stick with an angle of less than 90˚ and the “less” is stressed here.
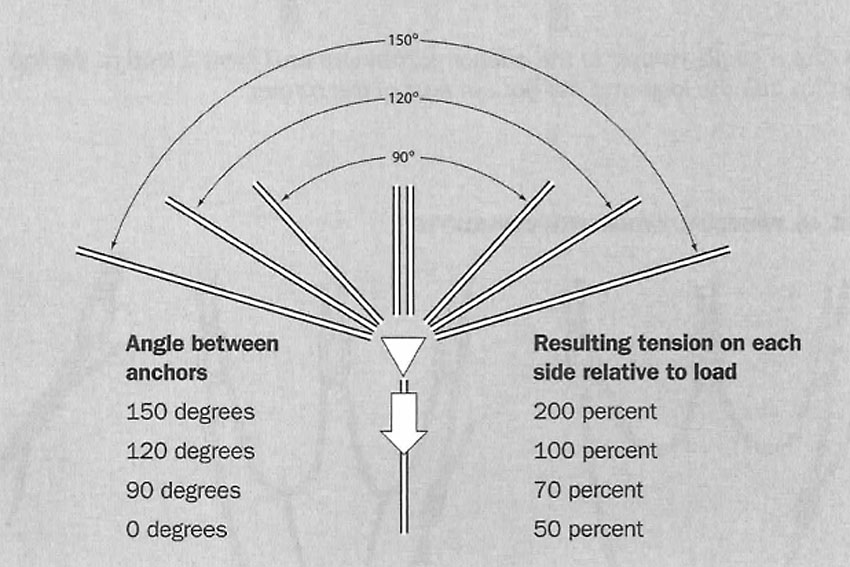
Image © 2010 BSA Topping Out Climbing/Rappelling Manual
Once you have your slings built you can either loop them around the object you’re anchoring to, or girth hitch them, which will self-tighten the anchor around the object as it’s loaded. As mentioned you want to the length of these anchors to be equalized to the direction of pull, meaning you want them to come together in a V shape with the point of the V being where the rope will be attached you’ll be rappelling from. This might be accomplished with two equal length anchors or depending on where your second anchor point is located, it might require a longer length of webbing. Just keep your angle in mind. This is also called a pre-equalized anchor and it’s only designed to work with one direction of pull.
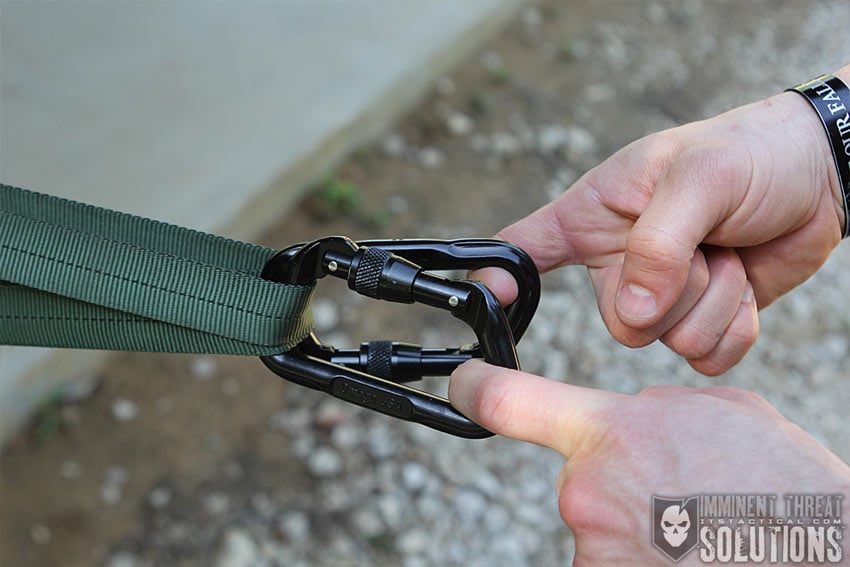
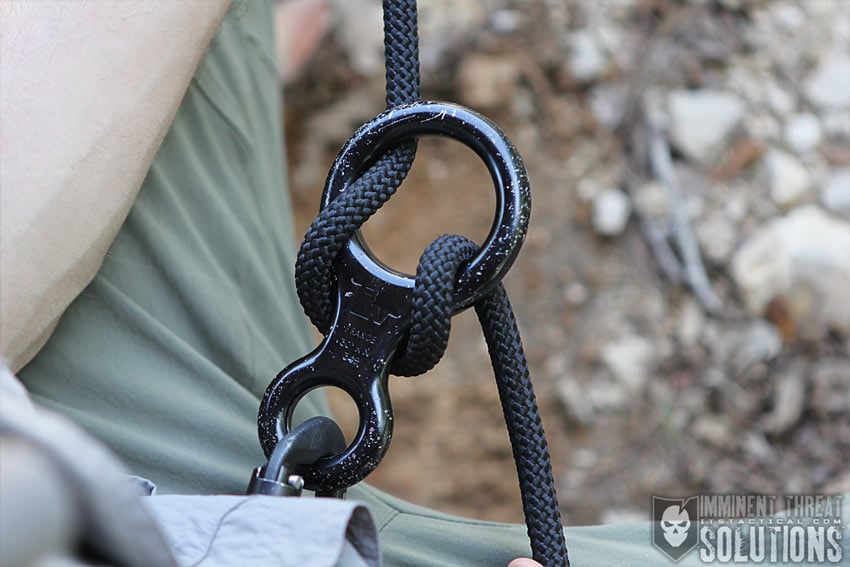
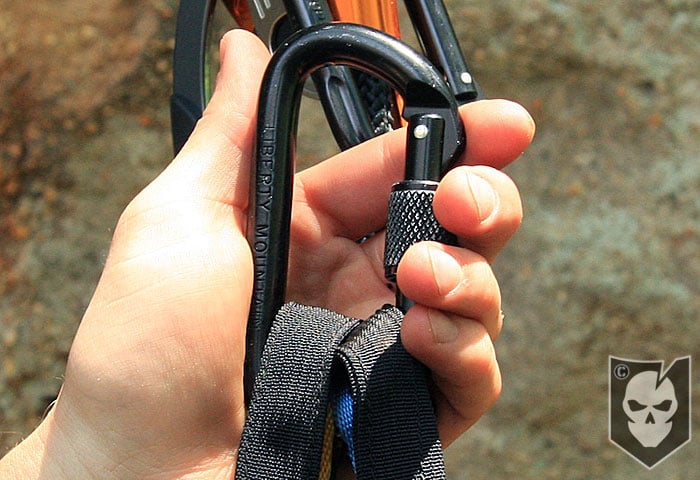
Once you have the two slings girth hitched you’ll need to join them together and create the point your rope will feed through and this is done with two carabiners. Two are used for redundancy and Screw Gate Carabiners are preferred here. This can be done with two opposing gates using non-locking carabiners. Opposing gates mean that if you were to open each carabiner, their gates would form an X shape. This prevents the rope from coming out if the gates were to open for some reason. Just another reason to use locking carabiners.
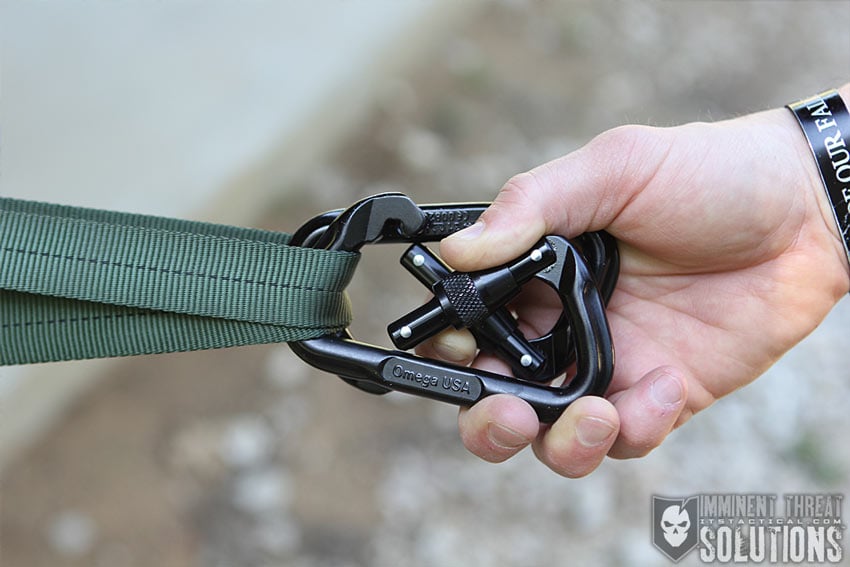
On locking carabiners, I’m also a big proponent of “screwing down, so you don’t screw up,” this was taught to me a long time ago and the idea here is that if gravity somehow carries that locking gate down it will get carried down to tighten rather than loosen the gate if it’s flipped upside down.
Another tip is that when you have the carabiner’s locking gate screwed all the way down, give it just a slight 1/8 of a turn back so that it doesn’t bind up and become impossible to unscrew.
Double Line Rappel vs. Single Line Rappel
With a double line rappel, the mid-point of your rope is clipped into the carabiners that connect your anchor system. This is the method I’ve just described setting up. Using this mid-point, you’ll now have two lines of rope running down to use to rappel with.
The benefit of a double-line rappel is a slower, more secure descent utilizing a friction belay device like a Figure 8 or an ATC (Air Traffic Control,) but you’re only utilizing half the overall length of your rope. This is where knowing your rope length is extremely important. You’ll need to visually watch that both ends of the rope hit the ground or have the mid-point on your rope marked for easy identification.
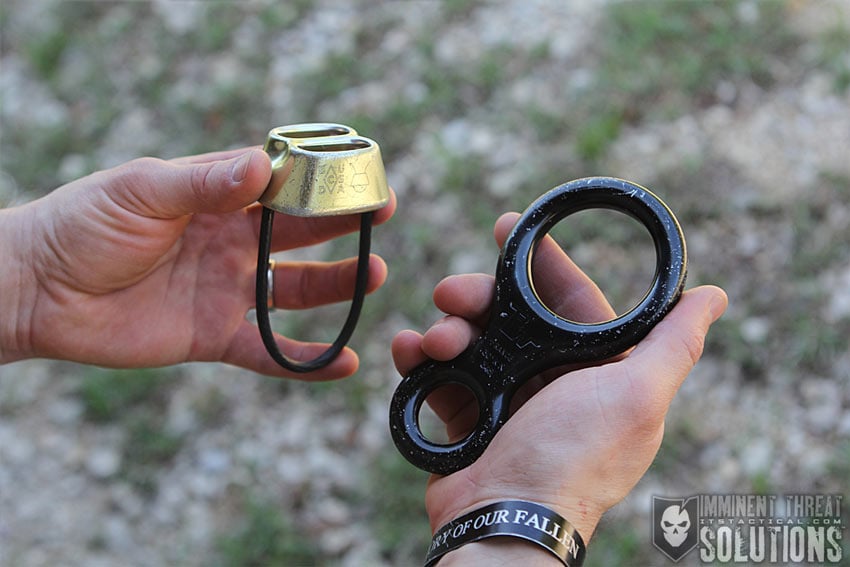
Also, a good point that was brought up in the comments of the video article we originally posted is to tie stopper knots in end of each side of your rope. This is a redundancy just in case your rope decides to pull through before you’re attached to it or ensuring you don’t rappel off the end of your rope in the event one side winds up not being as long as the other. Going back to the ATC, Figure 8, or belay device, ensure that the bight of both strands of your rope are being fed into the device.
If you don’t have the time and opportunity to build a proper anchor system with webbing slings, there are a few methods we recommend for attaching your rope directly to your anchor points, or those bombproof pieces of urban anchor like steel beams and piping. This is where a single line rappel comes in.
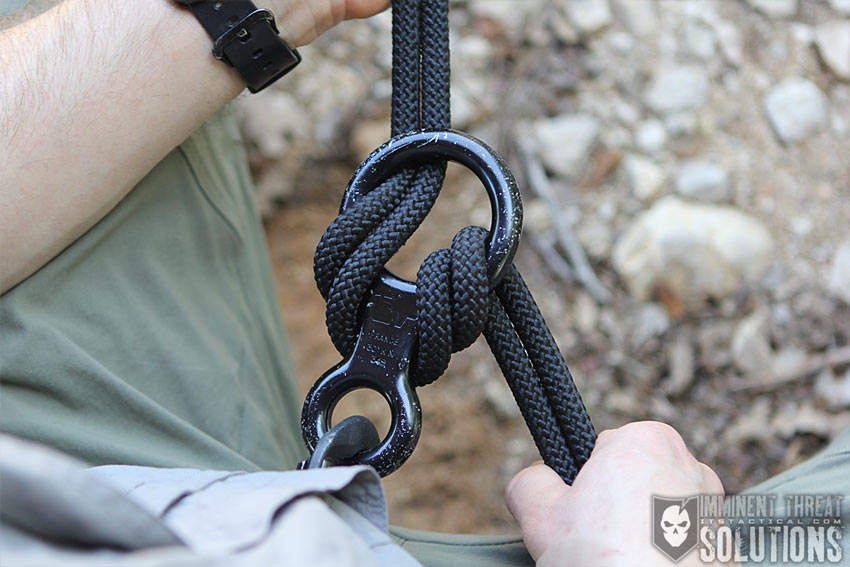
Bowline vs. Barrel Knot
Tying a Bowline around an anchor point isn’t as preferred as a Barrel Knot, as a Bowline creates a fixed loop that doesn’t self-tighten onto your anchor point like a Barrel Knot will. As you can see in the photos below, a Bowline allows your rope to “walk” vs. the Barrel Knot that’s at least providing some friction on your anchor point.

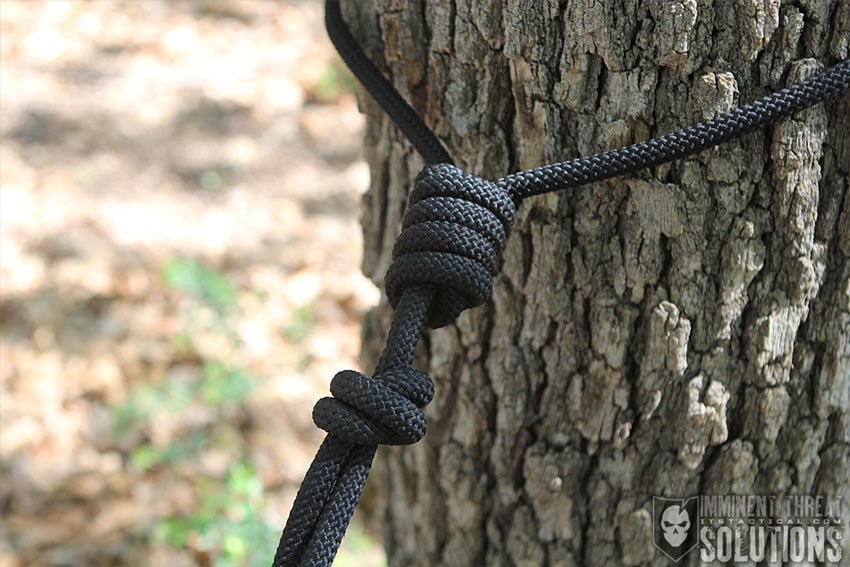
Our tutorial on tying the Barrel Knot is coming soon to our Knot of the Week Series, but the video embedded at the top of this article shows tying both the Barrel Knot and the Bowline. For a more detailed description of tying a Bowline, check out this KOTW article.
Static vs. Dynamic Rope
The best way to easily sum up the difference here in static and dynamic ropes is by saying that dynamic rope has give and static does not. Meaning that in climbing, where you’re depending on your rope to catch you in the event you fall, you want the 5-10% give that dynamic rope offers. In rappelling, you don’t want that give, so a static rope is preferred. You also don’t need to worry about water with static ropes, which are often used in water rescue and other situations around water environments.
Dynamic rope also has a dry and non-dry rating, but it’s best to stick with static rope in rappelling situations. I mentioned earlier that you need to know your rope and its length, particularly in a situation where you’re trying to determine the height of the building you’re on vs. the mid-point of a rope. A common rope length bundle like the BlueWater Assaultline I have is 46 meters / 150 feet, but lengths can range anywhere from 30 meters to 60 meters.
Static ropes are best for rappelling, ascending and for use in rescue situations where you’re raising or lowering a person or load.
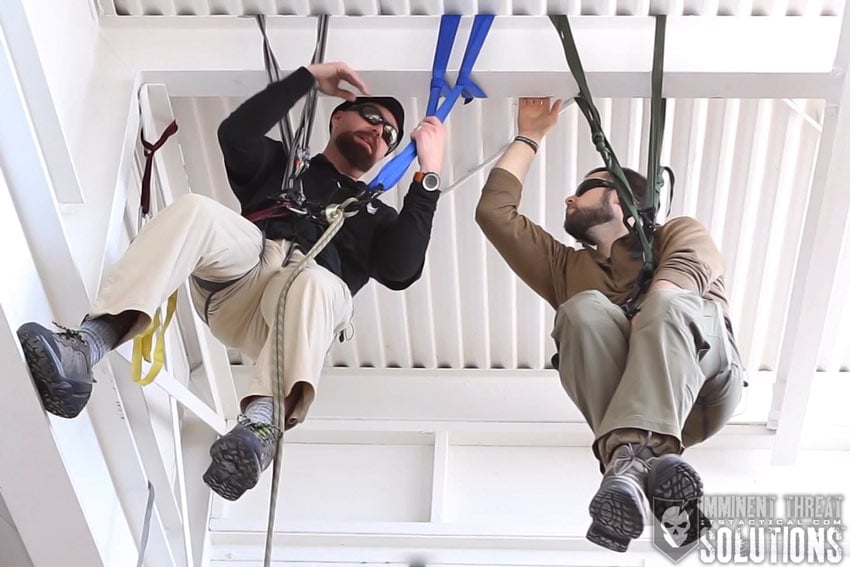
Harnesses
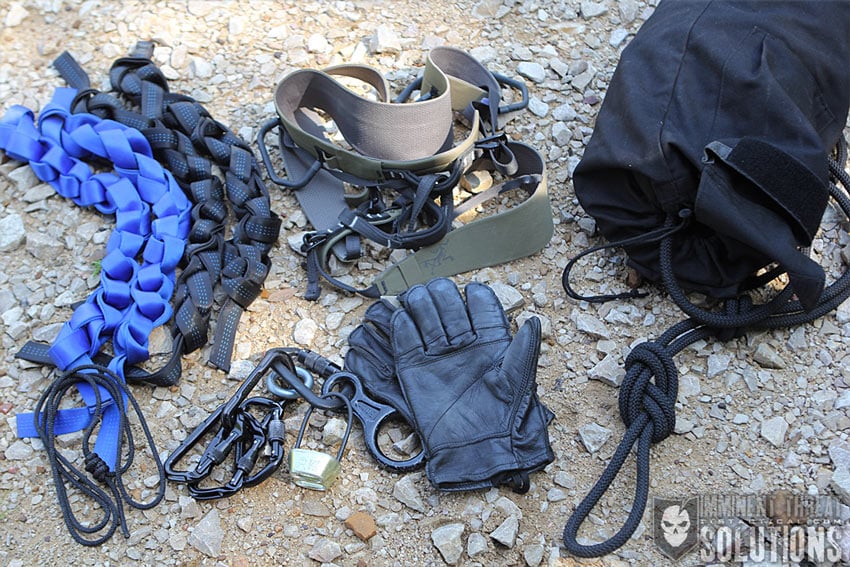
There are quite a few options when it comes to harnesses and I’ve really been impressed with an Arc’teryx X-350a harness I’ve been putting through its paces. It’s the harness I wore in the video above and Kyle also had an Arc’teryx harness on. I don’t say this to try and convince you to buy one, only that we both like them as options. As we’re talking primarily here about emergency rappelling and an urban environment, you might not even have a harness at your disposal, or might just have a rigger’s belt on. While companies aren’t in the business of advocating rigger’s belts for emergency rappelling much anymore, it can be done, albeit at your own risk. Here’s an older article I wrote about rappelling with a 215 Gear Ultimate Rigger’s Belt.
There’s also the option of tying a Swiss Seat from webbing or rope. I’ll tell you up front that tubular webbing makes for a more comfortable Swiss Seat. Technically though, with nothing more than rope and a carabiner you could potentially cut a 12-15’ section off your rope, tie a swiss seat, hook up a carabiner and evacuate a building. This is obviously a worst case scenario and also in the situation where you’d have a rope and a carabiner at your disposal. If you’re already carrying these items, a proper harness doesn’t take up that much more room and neither do gloves, webbing and a few more carabiners for rigging anchors, but I digress.
I’d also like to mention that an auto-block like a Prusik is advisable for a back up during descent if available. Again, emergencies are emergencies and the goal might just be to get down as quickly and safely as possible. Situation will always dictate. Click here for our KOTW on tying a Prusik.
Notes
This article is far from comprehensive when in comes to rappelling technique and I’m always going to recommend you don’t try anything here without in-person training from a professional first. Take the time to properly learn techniques and spend time building anchors, even if you’re not rappelling. Repetition is important here and knots can potentially save your life, so practice those too. Start looking at your surroundings differently when you’re multiple floors up and ask yourself “what around me would make a bombproof anchor right now if I needed one?”
Rappelling is inherently dangerous, neither ITS Tactical or Trident Response assumes any responsibility or liability for injury incurred by the viewer. The information presented here is for educational purposes only. Always seek the instruction of a certified climbing or mountaineering guide.
Discussion