


Off the Road Again: Recovery Equipment, Methods and Techniques
Off the Road Again: Recovery Equipment, Methods and Techniques
I have to admit, this is the second “first draft” of this article. I’ve seen so many awful attempts at recovering stuck vehicles that it was blindly infuriating. Any of you SCUBA divers here know that I have an affinity for hobbies that require extreme variances in opinions and at least a little product bias leading to regular disagreements. This will be no different, but I wanted to take a more helpful approach than just complaining.
So what makes my input worth anything? Well, I grew up with it. I was even so smooth and confident in off-road driving that I was given a job leading Hummer and ATV tours in Moab, Utah. I drove some of the most difficult trails in the country, literally on a daily basis. I was given a small first aid kit and some bottled water. If something broke, I had to fix it, because no one was coming to help.
The best possible situation is to avoid breakages altogether and teach clients a few things in the process. I led some small workshops on four-wheeling and I had the opportunity to meet a lot of really cool people with great advice. It’s my hope that now, this advice can be helpful to you as well. Bear in mind as you read that I’m not addressing every individual off-road motorsport. Rather, I want to direct this flow into the Overland community. Overlanding is essentially bug-out driving once you leave the pavement. In this piece, we’ll cover some basics of recovery equipment and techniques. In a future piece, we’ll progress into more complicated topics and I’ll share some interesting suggestions on selecting your bug-out route.
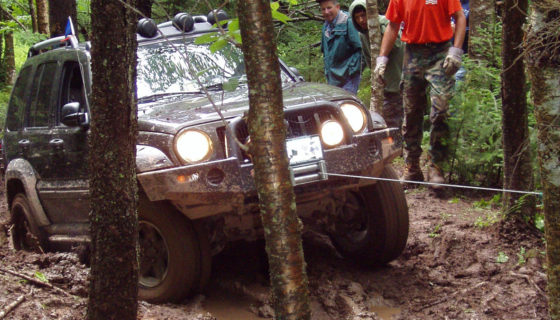
The Winch
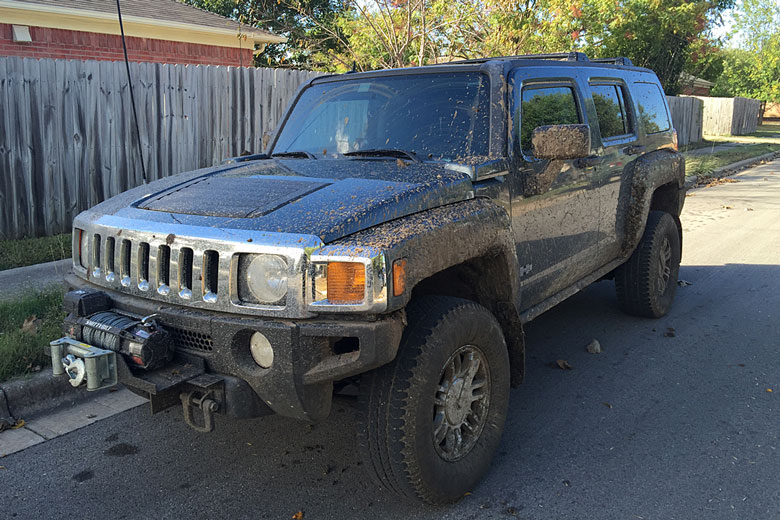
I’ve owned many different brands of winches and I can say that they’re all going to do one particular thing; pull a cable at whatever the specified torque rating is. The money you spend on a winch isn’t necessarily going to dictate how long it lasts. I’ve seen Smittybilt and Harbor Freight winches out-perform Warn. A Warn winch will have a better finish, stronger components and more accessories, but that doesn’t guarantee function under fire. There’s no winch I’ve seen that can take endless abuse and continue to function normally for more than about two years.
The best way to ensure your winch functions well for many years is to simply keep it clean and well maintained. Ensure the cables are properly installed and that they don’t interfere with any other components on the vehicle.
Maintenance and Pre-Tension
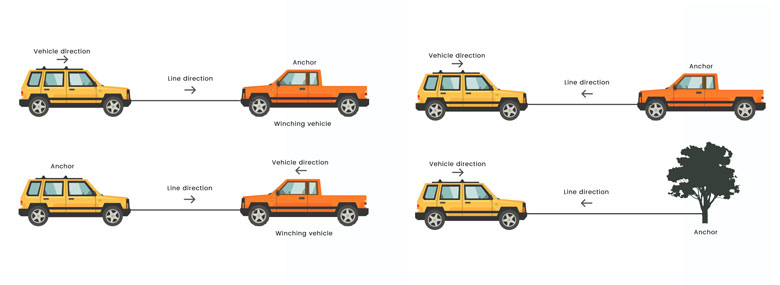
Cable Maintenance is vital to the operation of your winch. I’m surprised how many people I’ve talked to that don’t know a winch cable needs to have “pre-tension” applied before the first operation. To do this, get two friends and another truck, or one friend and a good tree. Position the vehicle about 100 ft away from the other truck (or tree) and pull the cable out using the clutch disconnect lever on the winch. You should be pulling the vehicle slightly uphill to ensure the cable maintains tension and doesn’t skip or hop under load. This also applies to synthetic lines.
The winching vehicle needs to be running with the transmission in neutral. Have someone man the winch controller and the brakes from inside the winching vehicle. If you’re using another truck as an anchor, ensure that vehicle is in neutral with the parking brake applied and solid brake pressure on the pedal. That truck will not move once the proper distance is set, but it’s important to keep the transmission out of the “park” position. More on this later.
You need thick leather gloves for this next part, as stray cable wires can pierce right through your fingers. Once the cable is pulled completely down to the cable mounting bolt, have the driver bring the cable back in for about 10 seconds. You want to have 8-9 turns of the winch cable before you apply tension from another vehicle. At this point, you can walk along the cable, applying constant tension until you reach your stationary mounting point. Adjust the vehicles as necessary to achieve this tension without operating the winch itself.
You should now have a truck hooked to a stationary point with an almost fully extended winch cable. Now one person needs to control the direction of the winch and the other (normally the owner of the winch) needs to stand about 2-3 feet away from the winch fairlead and guide the cable by hand as the driver winches toward the stationary point you’ve connected to. The idea is to feed the cable onto the winch spool as tight and clean as possible. This will ensure proper tension and it will dramatically increase the life of the cable. In other words, it needs to look like you never use it.
The last 10 feet (3 meters) should be fed in by hand since you’re normally getting no benefit from that first bit of line anyway. Remember to maintain constant tension on the cable. If you release tension at any time during this process, the cable will immediately unspool inside the winch and you’ll have to start all over again. If you’re terminating the cable with a shackle or a block, you can likely pull the terminating end directly onto the fairlead. If you’re using a hook, most drivers use a recovery point to hook onto and maintain tension until the winch is ready to be used. Only tap the controller until the cable is tight enough to release your grip. Feeding the winch with full power at this stage will almost certainly break something. Additionally, don’t release the clutch lever until you’re ready to use the winch.
After using it, you’ll then unspool everything into a big “rat’s nest.” You’ll want to do this after every use of the winch. It’s not always fun, but remember that cables are expensive and you have to wind the new ones anyway. As an added bonus, you’ll feel better about winching when the time comes, because the cable is much less likely to break and ruin someone’s day. I know this isn’t always practical, so I recommend trying to wind them after a good weekend of wheeling. You’ll probably have to use the winch several times in a rough weekend anyway.
Cleaning and Care
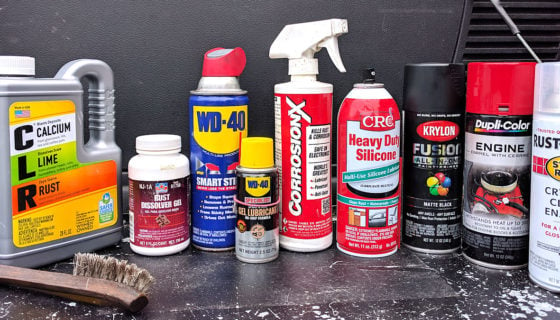
I spray my cable, power lines and mounting bolts with Corrosion X about every month if I’m in salty environments (like extreme snow or sandy beaches) or 3-6 months depending on the amount of rain and sun. Never spray any kind of oily lubricant like WD-40 or Corrosion X into any lines around the spool. This oil can get into the spool housing and cause the clutch packs or gears to slip. This renders the winch useless or can cause the gears to skip teeth. Under load, this can break a cable or strip gears. Never pull the cable out using the winch controller. This creates unnecessary heat which will wear the winch over time. Instead, use the clutch lever to pull the winch line.
This should apply as technique, but I’m certain this is more of a “care” issue with winches. Winches are designed to function in exactly one way. With almost no exception, winches cannot handle the abuse from shock loading. If someone needs to be towed, it’s advisable to use a tow strap or tow chains. I haven’t been able to find a single manufacturer that will tell you it’s acceptable to apply the cable tension to a winch with the vehicle’s engine and drivetrain. Always use the controller, not the vehicle, to apply tension to the cable.
Technique
Warning, winches produce a massive amount of power and this power does not discriminate. A winch spool will pull cable, synthetic rope, hair, gloves, shoes, etc. Cables can and do break under load. People can be injured by flying debris and vehicles driving on the road/trail may not see the extended winch cable and vehicle fires are possible when using these tools. Please consider all risks before operating your winch.
The anchor vehicle, regardless of which vehicle is winching, should be running (if possible) with the transmission in a neutral position. Fully apply the emergency brake and place a foot on the brake pedal to hold the vehicle in place. Using the brakes keeps the tension from the winch off of your clutch or parking pawl. The pin that holds your transmission in the “park” position is only a small bit of metal and can break under extreme force. While this may not ruin the transmission, it will put a noticeable dent in your bank account and will make operating your vehicle considerably more dangerous.
Select a mounting point. This can be another vehicle, a tree, huge boulders, an actual ship anchor, one of countless other ingenious products for winching in sand and mud, or even a frozen chocolate bar (I saw Bear Grylls do it once). What you pull on is really whatever is close by and strong enough to handle your vehicle without causing damage to the environment.
Be sure to use tree savers or other thick straps to create a mounting point when utilizing Mother Nature as your anchor. As a general rule, you won’t want to use the tow ball on another vehicle for any kind of recovery. This creates a violent and dangerous scenario where the ball shears off and someone dies because the human body isn’t designed for that kind of impact.
Connecting the winch is quite simple. You’ll want to grab the winch cable and turn the clutch lever to the “free spool” setting. Walk with your cable until you reach your mounting point. Hook that bad boy up and make your way back to the winch. Turn the clutch lever back from the free spool position to the engaged position. This next bit isn’t required, but I often wind the cable back in by hand until the cable begins to lift off the ground. This keeps the pull much cleaner and will keep the cable from grinding unnecessarily against the spool frame.
The use of two-way radios is an excellent way to perform a line pull, but if they’re not available you can agree on hand signals with the other driver. Keep everyone well away from the winching operation to ensure no one is hurt or killed by a snapping cable or rolling vehicle. Once the line becomes slack again, STOP! Do not drive over the winch cable and do not allow the cable to make its way under your vehicle. I’m confident that nothing under your vehicle will win the battle against a 10,000 lb. rated cable or rope, but if you try it please send us the photos.
If you’re hopelessly stuck and you do have to pull the winch line out, it’s a good idea to assess the mounting point as it relates to the vehicle position. When a vehicle is buried to its frame rails or is up against a vertical obstacle, pulling forward against the obstacle isn’t the best idea. You’ll increase shear force on suspension components that aren’t designed for it and will almost certainly break something.
Some of the best groups on YouTube do it and you can get away with it too, but with age and stress, everything will break. Consider purchasing recovery boards or an additional winch recovery kit to have on board for these tricky situations. Recovery kits often contain large pulleys called snatch blocks, to change the angle and force of a line pull.
Synthetic Blends
It’s important to understand the differences in Snatch Straps, Tow Straps, Line Extenders and Tree Savers. We don’t need to spend a lot of time here, but we do need to briefly discuss the intended uses and the consequences of misuse for each component.
Snatch Straps
Snatch Straps (or ropes) come in varying lengths, but I normally see them around 25-30 ft. (10M). Simply put, these straps are designed to be shock loaded. One end is hooked to the stuck vehicle and the other to a vehicle with full mobility. Both vehicles need to be in a tandem configuration so they may travel in the same direction during the recovery. The snatching vehicle should be positioned about 10 ft. from the stuck vehicle. Place an “S” bend in the strap on the ground so the drivers can anticipate the pull. The snatching vehicle’s driver will launch from this position until the strap is completely off the ground. The strap will stretch, transferring the momentum from the moving vehicle to the stuck vehicle. Several attempts may be needed before the vehicle is freed.
As mentioned previously, ensure none of these straps find their way underneath the vehicle to prevent damage to any of the vital moving parts or the straps. Never use the tow ball of a vehicle for a recovery point and don’t use a snatch strap as a tree saver. This may cause more damage or may damage the strap.
Tow Straps
Unlike snatch straps, tow straps don’t stretch when they’re placed under load. They’re normally 10-15 ft. (3-4 M) long and 2-3 inches wide. These straps can handle only very minor shock loading so it’s important to move carefully and slowly while towing another vehicle. These straps aren’t designed for recovery from a stuck position, but rather to tow a vehicle the minimum possible distance to safety. Attempting a recovery with a tow strap isn’t recommended, unless you have no other option, as it may well break something on your vehicle.
One of the more common trends on the internet is seeing very large trucks trying to snatch a stuck vehicle with a tow strap. The straps can break, but the worst part is seeing a drivetrain ripped out from under the vehicle.
Line Extenders
These are essentially a really long tow strap. They’re typically around 60-75 ft. (20-25M) in length and don’t flex or stretch. They’re designed to be used when the maximum line distance on the winch is too short to reach a mounting point. Extensions cannot be shock loaded, just like your winch equipment.
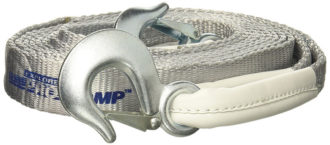
Tree Savers
If you have or intend to equip your vehicle with a winch, a tree saver is a vital piece of equipment. They’re only about 6 ft. (2M) in length, but they’re the absolute best alternative to wrapping your winch cable around a tree. You can use a tow strap if you’re in a pinch, but it’s best to keep a tree saver in your winch kit. Simply wrap the tree saver around a tree, connect the winch hook or shackle to the terminating ends and pull yourself out of trouble.
It may not be a big deal for some folks, but eventually when enough people cut their winch lines into the same tree or group of trees, it will negatively impact the environment. When the environment is affected, the Feds use your tax dollars to shut down those trails. Use a tree saver, for the environment and for the rest of us.
Recovery Boards
If you’ve been involved in the off-road industry in any capacity, you’ve likely heard of the MaxTrax brand recovery boards. There are quite a few variants out there from the popular TRED brand to Chinese knockoffs and even milk crates zip tied together. Recovery boards all serve to increase traction between spinning wheels and the environment beneath your vehicle. The standard for any recovery begins with clearing the mound of sand or mud from in front of your wheels. Most recovery boards can be used as a shovel to facilitate this process.
Once the front of the wheels are clear, the boards are wedged under the tires. Any number and combination of boards can be used for this recovery so long as the spinning wheels can get the traction they need. As a rule, wheels should not spin while on the recovery boards, as this friction will quickly melt the lugs off the surface of the traction aid. Recovery boards are one of my personal favorite methods for recovery when out in remote areas, where winching and snatching aren’t always an option.
When it comes to selection of a particular board, remember that you get what you pay for. We use MaxTrax for our recovery boards; they’re expensive, but in my opinion they’re well worth the money. Getting stuck is usually a good time when you’re wheeling with good friends, but in a bug-out situation it could cost you your life. The time and energy you save with a tougher, more reliable brand of recovery equipment will allow you to focus on the important things in a dangerous situation. I have to stand behind the peace of mind that comes with buying the best equipment for the job.
As an added bonus, recovery boards can be used as short bridges to cross obstacles like trenches and ditches. The cheaper boards may not hold the weight of your vehicle and won’t serve those multiple purposes. For those with a roof tent or a bivvy on the roof rack, recovery boards can also be stacked and used to level the vehicle to provide a more comfortable night of sleep.
Farm Jack and Shovel
If you have space for a shovel, you need one. If it’s just not possible then I won’t hold it against you. There are other ways to dig out your vehicle, but remember that you need something for a bathroom as well. That’s all there is to say about the shovel.
Farm jacks are super cool. Before you go out and strap one to your roof rack or tailgate though, take a moment and ask yourself where you intend to place the foot of the jack during use. If the vehicle isn’t equipped with front and rear armor and rock sliders, then you have no jack points. There are pieces of equipment that can adapt the jack to lift from the rim or D-Rings on a vehicle, but they’re quite bulky and I can’t vouch for their durability.
In a world where you have the necessary equipment to perform a high lift jack of a vehicle, there are some things to consider. First, keep your head clear of the jack handle as you use your body to raise or lower the vehicle. The handle can slip from your hands and catch you in the head, knocking out teeth or damaging some of the more vulnerable tissues.
Never let a child perform the jacking procedure as this will, as expected, result in improper technique and cause injuries. When jacking the vehicle down, maintain contact with the jack handle. The handle should also be locked into position when the desired height is obtained. Should the handle slip at any point during the down-jacking operation, the handle can bounce during each step in the track and allow the vehicle to return to the ground rather quickly.
With the pageantry out of the way, lets talk about the proper application of a farm jack. You’ll probably never want to use the jack on the side of the vehicle. If the jack settles or slides at all while the vehicle is in the air, it can become impossible to lower the vehicle without damaging the body or windows. That will ruin a weekend out, so be sure to consider how it could go badly before you lift it up. Changing a tire should be performed on level, hard-packed ground using the factory or upgraded bottle/scissor jack. A farm jack should only be used for tire changes or maintenance when the terrain does not permit the use of factory equipment.
Farm jacks can be used for several other purposes besides lifting the vehicle for tire changes. I have some friends that swear the best way to get unstuck is to bring a “come-along” winch device. Space is at a premium in our trucks though, so that piece of kit isn’t going to make it past my personal screening process. By securing the top bar of the track to an anchor and looping a recovery line to the foot of the jack, you can create a come-along with a farm jack.
A rarely used technique can be considered when high-centered in mud or sand. This process involves two separate lifts, but will reset your vehicle position in the mud/sand so that you can start with fresh ground. Begin by lifting the front of the vehicle from the center of the armor. Once maximum height is achieved, simply push the jack to one side or the other. You’ll be able to shift the entire front end to the left or the right, respectively, by a couple of feet. Repeating this process on the rear of the vehicle will ultimately put all four tires on fresh terrain and may allow you to progress on the track. This technique is quite dangerous though, as it can cause harm to bystanders, yourself or your vehicle. Use this sparingly, as it requires you to literally push the vehicle off of a jack at maximum extension.
Tire Pressure
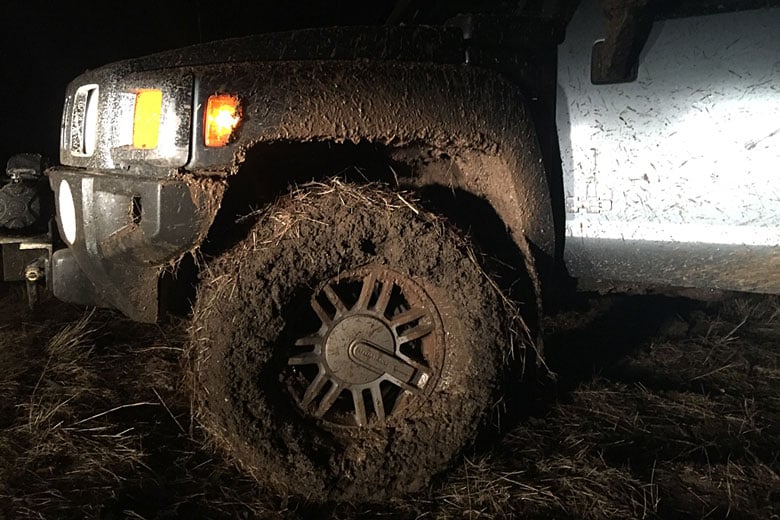
Another thing that blows my mind is how few people know they need to drop the pressure in their tires when going off-road. If you’re going to ride down a dirt road for a few minutes, I’d say there’s no reason to bother. However, if your intended destination is 25 miles into the back country, you should drop the pressure in your tires considerably. For instance, my Toyo Open Country AT2’s are normally around 35 PSI on the pavement. They live there comfortably and don’t show signs of excess wear. When we we turn off of the pavement, I bring the pressure down to about 20 PSI. This not only makes your ride more comfortable, but it helps to preserve the integrity of the trail. Tires with higher pressures will bounce harder and will dig deeper when climbing. This will cause a considerable and unnecessary deterioration to the trail.
Drop the pressure and slow your roll when you get off the pavement. Upon returning to civilization, you’ll want to bring your tires back up to normal operating pressure as soon as possible. Driving with low pressures on pavement will cause rapid deterioration of the internal sidewall rubber of the tires. This will eventually lead to a blow out and no one wants that. How you get air back into your tires is up to you. A company like PowerTank, for instance essentially retrofits a SCUBA tank with a regulator and hose so you can get your pressures back up to the desired pressure. Another great option is an onboard air compressor. We have an ARB dual compressor hidden in the rear panel of our truck and it takes about 5 minutes to bring all for tires from 10 to 35 PSI without the use of a tank.
Do yourself, your vehicle and the environment a favor. Drop your air pressure a little more than you think you should and enjoy the ride. However, be mindful of sharp turns at high speed. Getting a tire back on the bead is a difficult feat if you’re not prepared for it.
Conclusion
While this article wasn’t exhaustive, it should provide a good foundation for those looking for a bit of basics and advice from personal experience. The bottom line is that there’s no alternative to off-road driving skills. The best recommendation is to get out there and get stuck. These awesome rigs aren’t put together based on aesthetics, but rather they’re machines built from necessity.
Getting out with folks that already own some of this equipment can be very helpful for those on the fence about the extra expense. See how the gear works and how it can fit into your plans for an overland/bug-out build. Be careful what advice you take from people though. Advice can be incredibly valuable when it’s good, but some advice can be quite dangerous if it’s incorrect.
Editor-in-Chief’s Note: Please welcome Derek Gill as a contributor on ITS. Derek has been a Plank Owner here at ITS from the beginning and has an extensive background in healthcare, pharmaceutical research and technical diving. He’s been certified in SCUBA since 2000 and diving technical/CCR since 2010. He speaks several languages including Russian and Spanish as well as several computer languages. These combined skills have opened the door to more creative ventures in Network Security and Physical Security consulting. Derek is a veteran of the US Navy and a former Navy Corpsman who worked alongside the US Marine Corps. His military nickname, “Witch Doctor,” has stuck with him ever since and it can now be found across many internet forums where he takes pride in trolling sensational zealots from multiple industries.
Discussion