


Knot of the Week: Snake Knot
Knot of the Week: Snake Knot
We continue our Knot of the Week with a decorative knot called the Snake Knot.
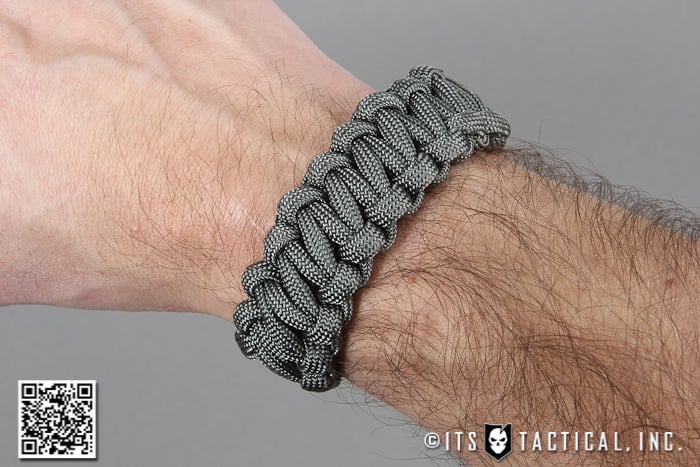
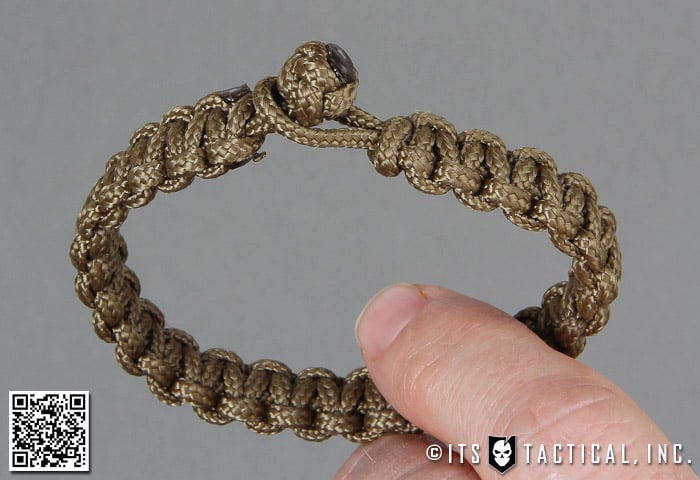
The Snake Knot is a common pattern in decorative knot work, and produces an almost round design.
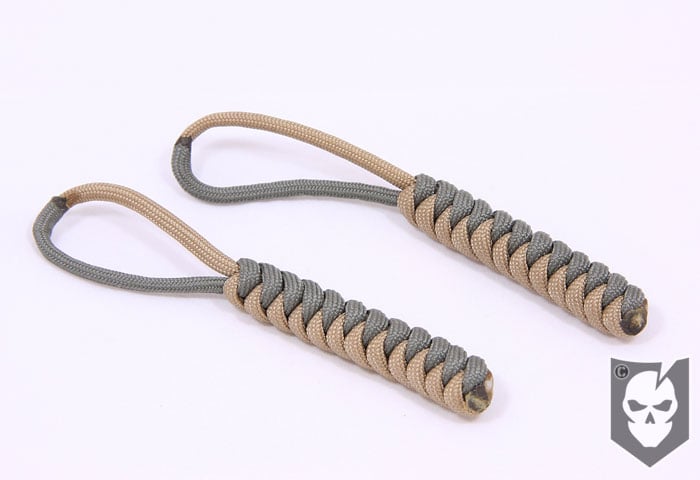
We’ve constructed a Snake Knot Lanyard for this demonstration, with the intent to girth hitch it around something.
The method we used is just one way of attaching the lanyard. A lanyard knot, overhand knot or simply tying it on will work just as well.
Using paracord to make a keychain, bracelet or something else you carry daily, will ensure that you always have some readily available in an emergency.
If you remember back to our article on the Mini Survival Kit, we recommended that in addition to the kit, you also carry some paracord with you.
Snake Knot » Decorative
(Strength: 3/Secure: 3/Stability: 3/Difficulty: 3)
Please refer to our Knot of the Week introduction post for a description of what these ratings mean.
Uses:
- Decorative knot work
- Lanyards
- Keychains
- Carrying paracord for emergency purposes
Tying Instructions:
We tied this Snake Knot Lanyard using a 24″ tan length of paracord and a 24″ ACU length of paracord, which resulted in a 3″ lanyard pull.
- Start with two 24″ pieces of Paracord
- Ensure the ends are melted on one length, and only one is melted on the other
- The side of the paracord length that hasn’t been melted now has it’s sheath pulled back
- About 1/2″ of the inner seven strands is removed and the sheath pulled back down
- Slightly heat up the frayed portion of the sheath to prevent further unraveling
- Insert one side of the other length of paracord into the open ended sheath and melt to fuse
- You should have wound up with a bicolor single strand of paracord
- Using the joint of the paracord as a reference point, halve the paracord
- *These next few steps can be tricky to read, so follow along with the photos too*
- Make a loop with the right side, wrapping around the backside of the left, and over the top
- With the left side, come inside the loop you just created (from the backside)
- Around the back of the right side standing part, and again through the backside of the initial loop (see photo for clarification)
- Tighten the knot
- *The next few steps are a repeating pattern*
- Loosen the right side, take the right most strand, and go around the back of the left strand and down into the loose part
- Turn the knot over, loosen the right side, go around the back of the left most strand, and down into the loose part
- Repeat steps 15-16 until the desired length is achieved
- *At this point you can trim and burn the ends, or tie a stopper knot, such as a lanyard knot or overhand knot*
- Cut off the ends of paracord leaving about 1/16 of an inch
- Burn the ends and provide pressure while cooling to fuse the melted paracord into the surrounding paracord
- Show it off to all your friends!
View the gallery or YouTube video below and follow along with the steps above!
[flickrset id=”72157622494409765″ thumbnail=”square” overlay=”true” size=”medium”]


Discussion