


Developing a Blow Out Kit
Developing a Blow Out Kit
 The term “blow out kit” comes from the Military, and refers to a medical kit to treat life threatening wounds in the field.
Our take on the terminology is that just like a tire has a blowout, so can you if you’re severely injured.
A blow out kit is the human equivalent to a tire’s patch kit, which treats the sustained damage.
Just as a patch kit is a temporary fix for a tire, a blow out kit is a temporary fix until a higher echelon of care can be reached.
A blow out kit is designed to treat the three leading preventable causes of death in the field.
These are Extremity Hemorrhage, 60%; Tension Pneumothorax, 33% and Airway Obstruction, 6%.
While we say a blow out kit is used “in the field,” this doesn’t just refer to a military battlefield, it represents YOUR everyday field.
It can be driving to and from work; serving with local Law Enforcement, Fire or EMS; attending various shooting schools and everyday activities in between.
Be Prepared
The concept of a blow out kit is being prepared. Plain and simple.
Carrying a blow out kit will enable you, or someone coming to your aid, to have the necessary supplies to save a life.
You have to ask yourself if the cost and inconvenience of maintaining, carrying, and having a working knowledge of these supplies is worth saving a life. The answer should hopefully be YES!
We could talk all day about other medical equipment to carry for an emergency situation, but the purpose of a blow out kit is to have the essentials on you to prevent death.
EMS is typically a phone call away, and barring any natural disasters. etc., their response time should be quick. But “quick” depends on many variables, and will they always be quick enough to save a life?
If you’re out in an area away from EMS, then you should adjust your equipment accordingly and have the what’s necessary to sustain for longer periods of time until higher echelon care can reach you.
Law Enforcement
There’s a local Law Enforcement organization in our AO that doesn’t equip their officers with anything more than a boo-boo kit which is just a glorified box of band-aids.
You aren’t going to stop arterial bleeding with band-aids, and their protocol is to call 911 in an emergency. Are the few minutes it takes an ambulance to arrive on scene enough time to bleed out?
Law Enforcement Officers take risks daily dealing with the bad guys, and are more likely to get into a shoot out than any civilian out there with a Concealed Handgun License.
More and more Law Enforcement agencies are starting to adopt some form of a blow out kit today, but as with everything, the Military model takes awhile to be adopted by the LEO model and even longer to reach the civilian world.
We got word not too long ago that the city of San Diego was accepting bids on blow out kits for every single Police Officer. We feel this a huge step in the right direction, and look forward to the day when this becomes the standard across the country, and the world.
If there’s one message to take away from this entire article, it’s how important it is to have the necessary equipment to save a life within your reach at all times.
Keep one in the glove box of each vehicle, keep one next to the fire extinguisher everyone should hopefully have in their homes, It’s just as important.
Military
As mentioned above, the original idea of a blow out kit was developed by the Military to give each soldier the minimum equipment needed to save a life without the need for a medic. In a firefight, a medic could be unable to reach an injured soldier.
Having the individual soldier carrying their own kit also enables a medic to not have to exhaust their own supplies, carry enough for everyone, or worry about running out of essential lifesaving equipment.
We all know that in an emergency situation the only one you can count on is yourself. Local resources will be tied up in a man-made or natural disaster and response times will be out the window.
So how do you treat the three leading preventable causes of death in the field? Let’s break it down by the three causes.
Hemorrhage
 Hemorrhage is merely blood loss from the circulatory system, and commonly treated with direct pressure. This can be done by placing gauze over the injury and either applying pressure yourself, or having the victim hold the required pressure to stop the bleeding.
Pressure exerted on a wound will prevent the collection of fluids in the underlying tissues, and prevent edema (swelling caused by trapped fluid).
If the victim is unable to maintain pressure themselves, or to make things easier, a pressure dressing/bandage can be used. The most common pressure dressing is the multi-functional IBD (Israeli Battle Dressing) which combines a primary dressing with a pressure applicator and secondary dressing.
What if direct pressure is unable to stop uncontrolled bleeding and traumatic hemorrhage?
Your options are to use a hemostatic agent or as a last resort, a tourniquet. While we say a tourniquet is a last resort, applying a tourniquet can be the first response if the severity of the injury warrants it.
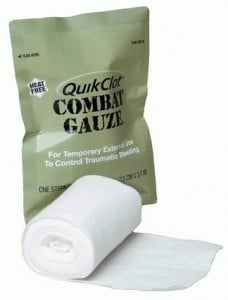
Hemostatic Agents have become increasingly popular because they work to promote hemostasis (stop bleeding) by introducing an agent the allows the blood to clot quicker than traditional direct pressure will.
If a Hemostatic Agent is used, the packaging should try to be saved to show to higher echelon care what was used, or at least be noted somewhere.
When a hemorrhage occurs from major limb trauma or if a hemostatic agent is not enough to achieve hemostasis, a tourniquet is used.
The time that a tourniquet was applied, and that one is applied, is important for higher echelon care to know and should be noted.
If a tourniquet is to be used for over two hours, where higher echelon care is not immediately available, it’s recommended to release pressure for five minutes every half hour to prevent muscle and nerve damage due to compression.
To recap the treatment of simple hemorrhage to traumatic hemorrhage, we’ve described needing these essentials:
- Hemostatic Agent
- Pressure Dressing / Bandage
- Gauze
- Tourniquet
- Something to note hemostatic agent used and/or tourniquet use/time applied
Tension Pneumothorax
 During a penetrating chest wound (Pneumothorax) air is being taken into the pleural cavity with each breath and if not treated, the build up can cause pressure to build against a lung and prevent it from fully inflating (Tension Pneumothorax).
A Pneumothorax can be caused by any penetrating injury to the chest wall, such as a gunshot or stabbing, but can also be caused by a fractured rib.
To treat a Pneumothorax before it becomes a Tension Pneumothorax, a seal of some kind needs to be applied to the source of penetration.
There are two schools of thought for sealing a chest wound, one who recommends a vented chest seal to prevent the further buildup of pressure, and some recommend completely sealing the chest wound.
The argument is that completely sealing the chest wound can lead to the development of a Tension Pneumothorax, but a tension takes some time to develop and can be relieved quickly and easily with a decompression needle should that problem arise.
That leads us to treating a Tension Pneumothorax, which as described above is the prevention of a lung fully inflating due to pressure build up inside the pleural cavity. if left untreated the pressure has the potential to produce pressure on the mediastinum and compress the heart decreasing blood flow, or even cause the trachea to move away from midline.
To treat a Tension Pneumothorax, this pressure build up must be released some how. This is done with the insertion of a 14 gauge 3.25″ needle into the 2nd intercostal space in the midclavicular line (Needle Thoracentesis). A 3.25″ needle is used to ensure it reaches the pleural space.
The 2nd intercostal space is the area between the 2nd and 3rd rib on the affected side. Always double check to ensure the needle is being inserted into the side with pressure built up.
Further treatment of a Tension Pneumothorax may require intubation and higher echelon care should be sought out immediately.
To recap the treatment of a Pneumothorax and/or a Tension Pneumothorax, we’ve described needing these essentials:
- Chest Seal
- Decompression Needle
Airway Obstruction
 An airway obstruction or blockage can often be as simple as a relaxed tongue in an unconscious or semiconscious victim. This can be cleared up with the head-tilt / chin-lift method and looking for chest rise.
In a traumatic situation there may be blood or bone that might be able to be removed with a finger sweep of the airway, but to maintain the airway of a unconscious or semiconscious an NPA should be used.
An NPA or Nasopharyngeal Airway is a soft rubber tube that is inserted into the nasal cavity to bridge the airway between the tongue and the back of the throat or between any other damage that the victim may have sustained.
There’s a flared end at the end of an NPA which prevents it from getting carried down the throat, and always remember to insert an NPA with the beveled side towards the septum (divider between nostrils).
In major facial trauma, ensure the NPA is used on the unaffected side, not the injured side.
An NPA can also be used for an emergency Cricothyrotomy, which is an incision through the skin and Cricothyroid Membrane to secure a patients airway during an obstructed airway or major facial trauma.
Gauze can be used to secure the NPA by placing a gentle overhand knot over the NPA and securing the gauze around the back of the neck.
To recap the treatment of a Pneumothorax and/or a Tension Pneumothorax, we’ve described needing these essentials:
- NPA (Nasopharyngeal Airway)
- Gauze (for emergency Cricothyrotomy)
In addition to all of the above named life saving items, it’s a good idea to carry gloves with you in order to provide a barrier between you and body fluids.
Our Contribution
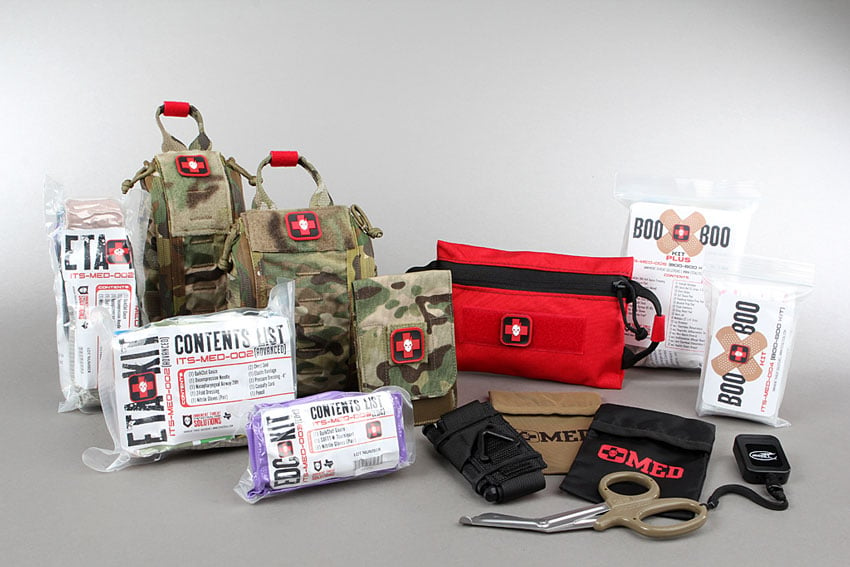
We felt so strongly about everyone needing some kind of blow out kit with the best materials on the market today, that we began to research what was commercially available and whether it filled that need.
While there are many commercially available kits, none that we found matched our requirements or compared to the price point we could offer them to the community at.
So we designed our own, and waited until we had a product we felt confident recommending to our readers in this article before we published it.


Discussion