


DIY Tyvek Stuff Sacks
DIY Tyvek Stuff Sacks
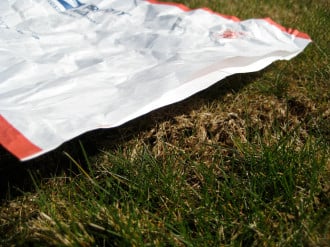
Tyvek is a synthetic material made by DuPont, most regularly used at construction sites for wrapping house frames. It is a rather strong material and fairly waterproof. It is so ubiquitous in industrial usage as to be freely available to the intrepid individual. Partly because of this, Tyvek is popular among many wilderness travelers for use as a cheap, lightweight, and effective groundcloth in conjunction with a tarp shelter.
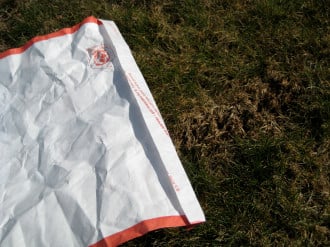
The United States Postal Service’s Priority Mail envelopes are also made out of the material. Some time ago I saw a picture of one of these envelopes in use as a stuff sack. I thought it was a great idea and decided to make my own. I’ve since made a number of them and find them to be very useful. There tends to always be at least one in my pack.
Supplies
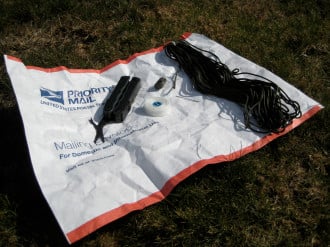
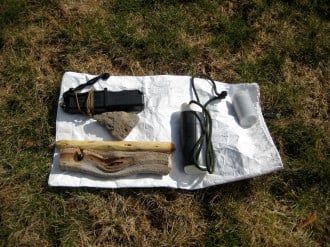
You need only a few items for the project: a USPS Priority Mail envelope, a needle and thread, a bit of cord, a cordlock, and a sharp object. I use the scissors on my Leatherman for this last requirement. It’s also useful to have a half dozen or so pins, but they aren’t required.

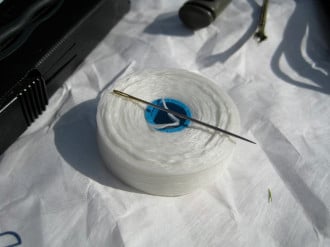
I always keep Kevlar thread in the small repair kits that I stash here and there. Previously, I used that in creating these stuff sacks, but my preference when sewing Tyvek is now to use plain old dental floss. It’s cheap, strong, and white in color, so it blends in with the white Tyvek (hiding my poor stitching).
For me, one of the attractions of these Tyvek stuff sacks is their light weight. The cord that you use can be anything, including your standard type III paracord. In an effort to keep the overall weight down, I prefer to use type I paracord. (It’s true: I have been known to count the ounces and grams of my gear every now and again.) Type I paracord is sometimes known as accessory cord or ALSE survival vest cord (it’s used as dummy cord on some aviation life support equipment). ITS now carries Dummy Cord!
If you don’t have any cordlocks lying around, these can be picked up from Supply Captain.
The envelope itself can be new or used. Any post office will have new envelopes available in the lobby, free for the taking. Still, I feel a little guilty about taking a brand new envelope just for this purpose. There’s plenty enough used envelopes floating around, and it seems a waste to liberate a brand new one.
Disclaimer
This project also warrants a disclaimer: Priority Mail envelopes, whether new or used, are property of the United States Postal Service. They are intended solely for the use of the postal system and, contrary to logic, just because somebody paid to mail you a package in one doesn’t make it yours (or theirs).
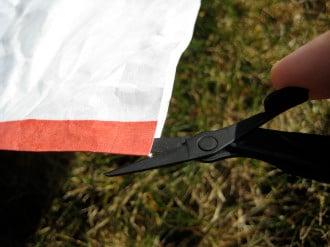
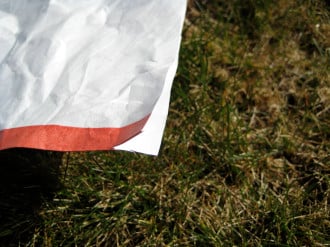
If you do choose to use a new envelope, cut off the closing flap with the sticky stuff on it, so that both sides are mostly even (they need not be exact). On a used envelope, you might have to do some trimming to achieve the same thing, depending on how you opened the envelope.
Directions
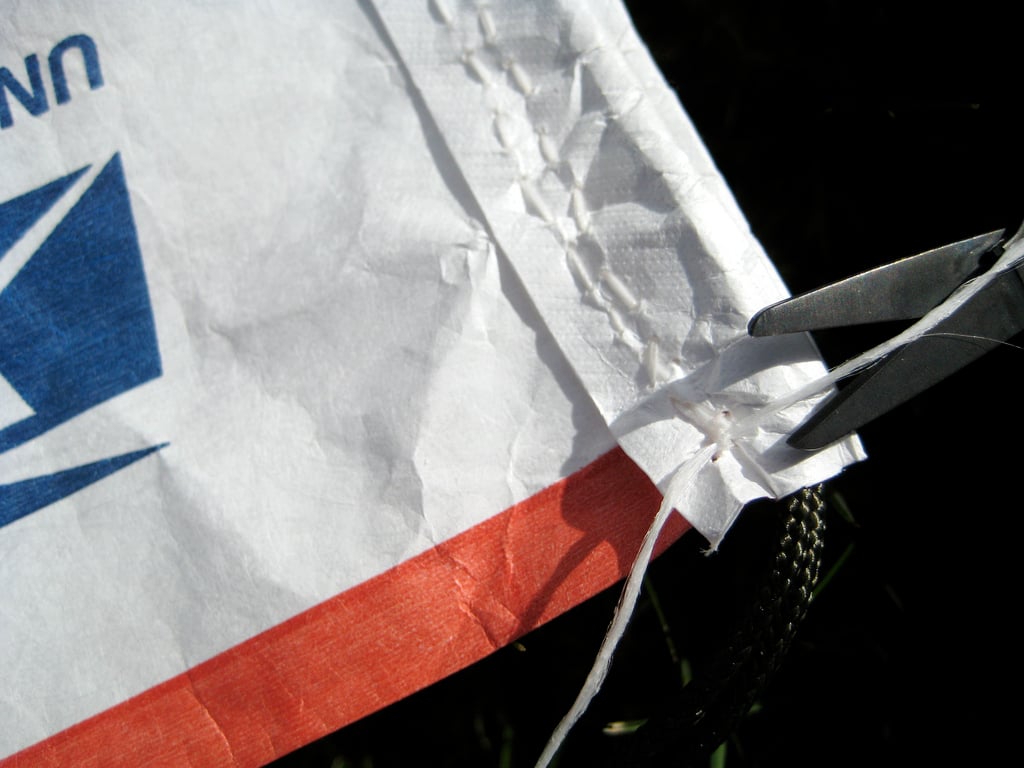
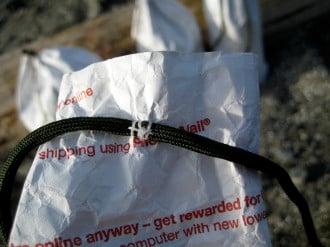
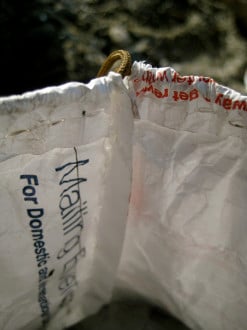
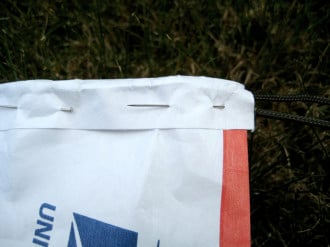
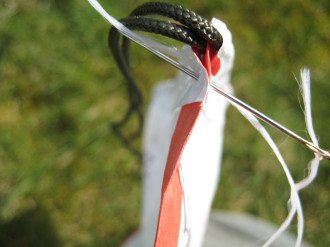
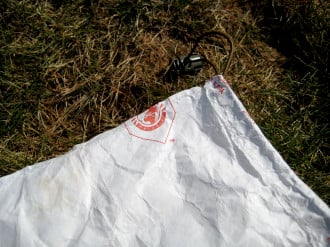
On one side of the envelope, I cut a slit about an inch deep. This will provide the exit for the cordage from the channel that we’ll sew.

After the slit has been cut, I’ll start to fold over the top inch of the envelope on both sides. I fold it down over the outside of the envelope. This collar creates the channel for the cordage. I usually don’t worry about making the fold completely even — at some point, the fold might be an inch, at another point maybe an inch and a half. It doesn’t matter.
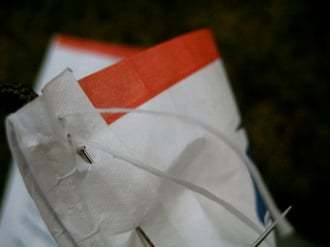
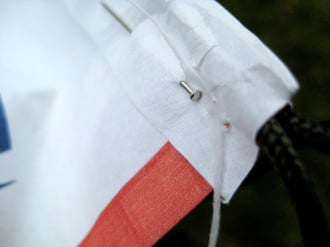
With the fold made, I slide my cordage underneath the overlapping material, up to the top of the fold. Directly underneath where the cordage sits, I’ll pin the fold shut, thus creating my channel. (If you don’t have any pins, you can just hold the cordage in place with a finger or two while sewing the channel shut, but pins make it a bit easier.) Now, we sew!
Sewing
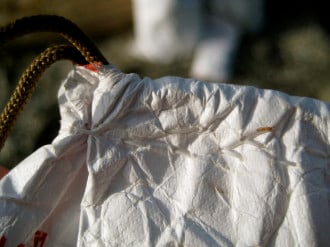
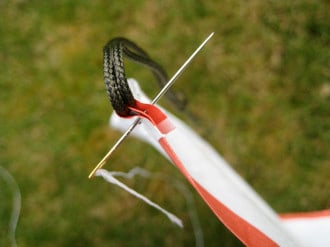
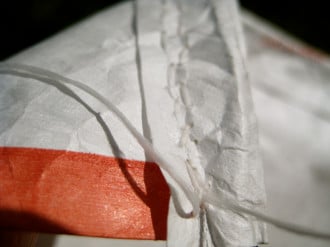
I have little skill with needle and thread. Small projects like this and patching clothes is about the extent of my ability. So there might be a better stitch or knot that someone more skilled than myself can suggest. The first stitch I make is at the end of the envelope where we previously made the slit and the cord is now exiting the channel. I push the needle all the way through both sides of the envelope (which, with the fold on either side, is now 4 layers of Tyvek) and pull all but a couple inches of my dental floss thread through.

Next I put the needle back through and bring all that thread onto the initial side, completing my first stitch. Using the tag end of a couple inches that I did not pull through, I tie a square knot in the floss, securing that initial stitch. (Surgeon’s knots, which I sometimes use to secure other types of thread, don’t seem to hold very well with dental floss. Square knots do.)
As you can no doubt guess, the next step is to sew shut the rest of the channel with a simple running stitch. When you get to the opposite side, you can push the needle through both sides of the envelope again and tie another square knot with the same tag end as before, but I prefer to hold off on that: I double stitch the channel. I’ll head back and do a running stitch all the way back around to the side I started on, then finish it off with a square knot using that same tag end we initially left.
Finishing Touches
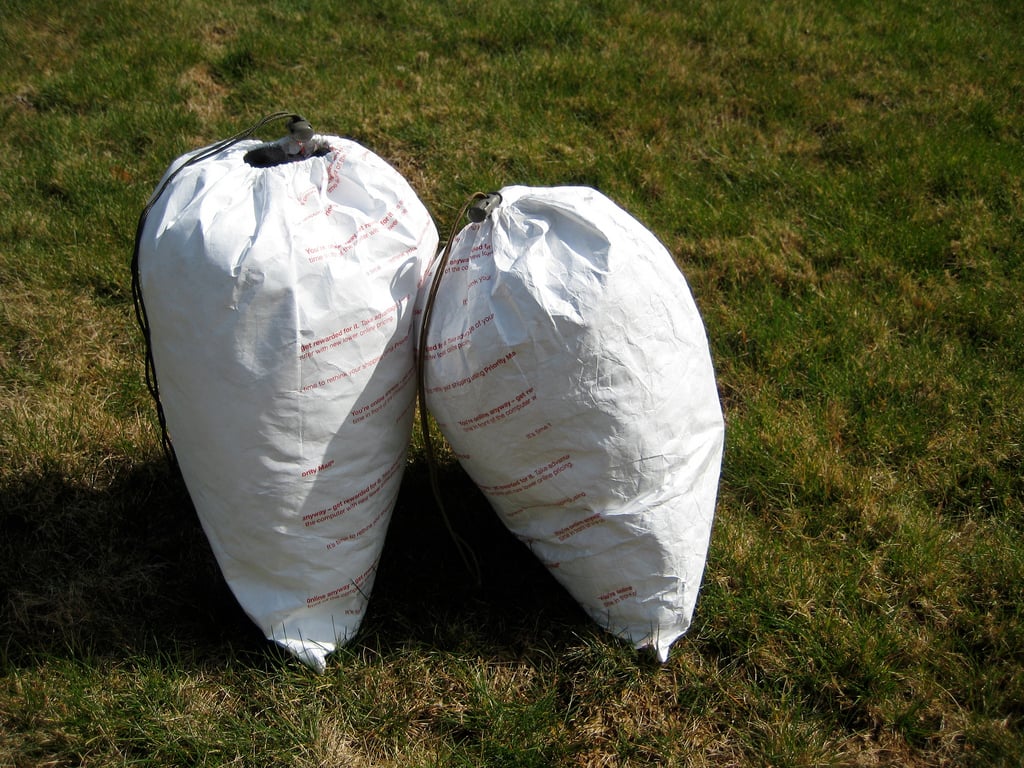
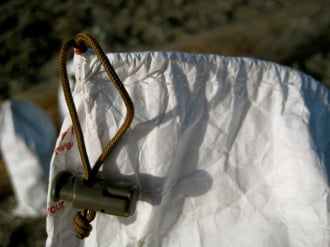
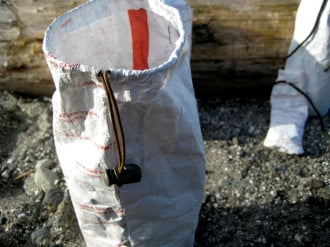
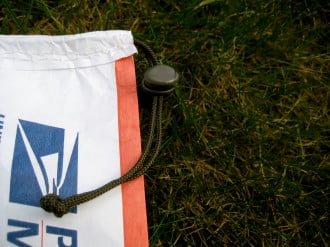
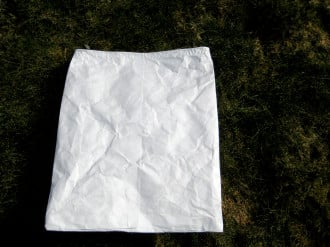
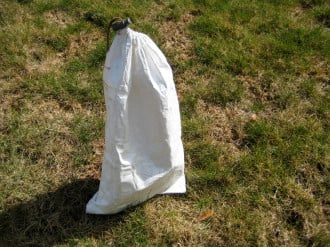
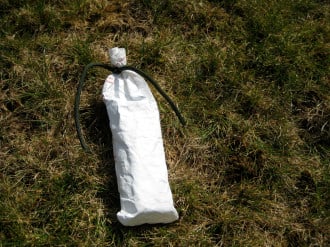
All that’s left now is to toss on a cordlock, cut your cord to length, and tie some sort of knot so that the cordlock can’t be inadvertently slid off the cord. I will also turn the whole thing inside out to get rid of most of the USPS advertising and to put the fold that created the channel on the inside. There you have your stuff sack!

The result is durable, lightweight, and free (or close to it, depending on what materials you had on hand). Lighter, stronger, more waterproof, and better constructed stuff sacks can of course be purchased, but for an exponentially higher price.
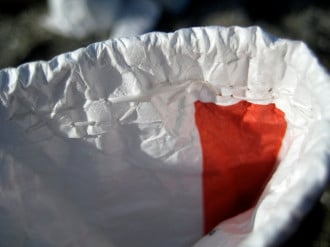
Though you’re obviously not going to get a water-tight seal by cinching the sack closed, the Tyvek material itself is waterproof. It will suffice to keep your gear organized in any pack and do a good job at protecting from an accidental water bladder burst or a leaky bottle. If water crossings and momentary submersion is a concern, use a trash bag as a liner in your pack and you will be very well off for almost no cost in weight or money.
Uses
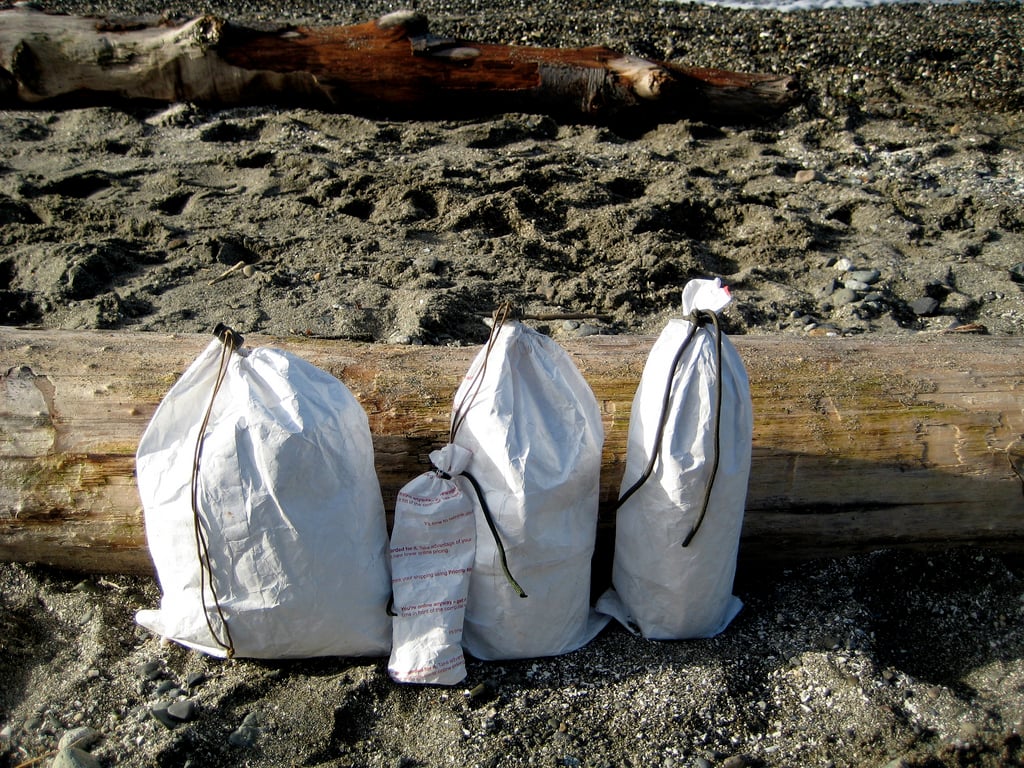
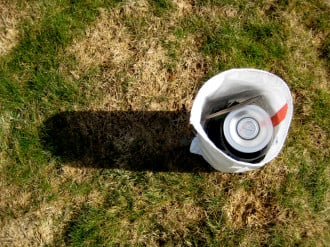
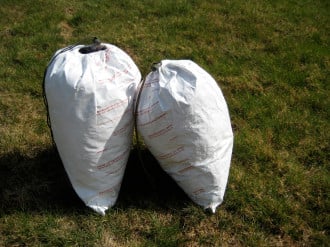
I have fancy, store bought (and very waterproof) stuff sacks that I use for my sleeping bag and the basic spare clothing that I bring on every wilderness trip (socks, fresh baselayers, and the like). Full size Tyvek envelope stuff sacks like the one constructed here tend to see duty in other places. I’ll use them to store bulkier cool weather gear that won’t fit in my normal clothing bag. Or to store and organize rain gear, which I don’t feel the need to keep in a roll-top dry bag. If you’re traveling in bear country, these sacks work great as a cheap and light method to hang your food.
Due to the envelope shape, I’ve found that — stuffed with a bit of spare clothing — the Tyvek stuff sack makes a great pillow at night. I much prefer it to a normal cylindrical stuff sack with rounded bottom.
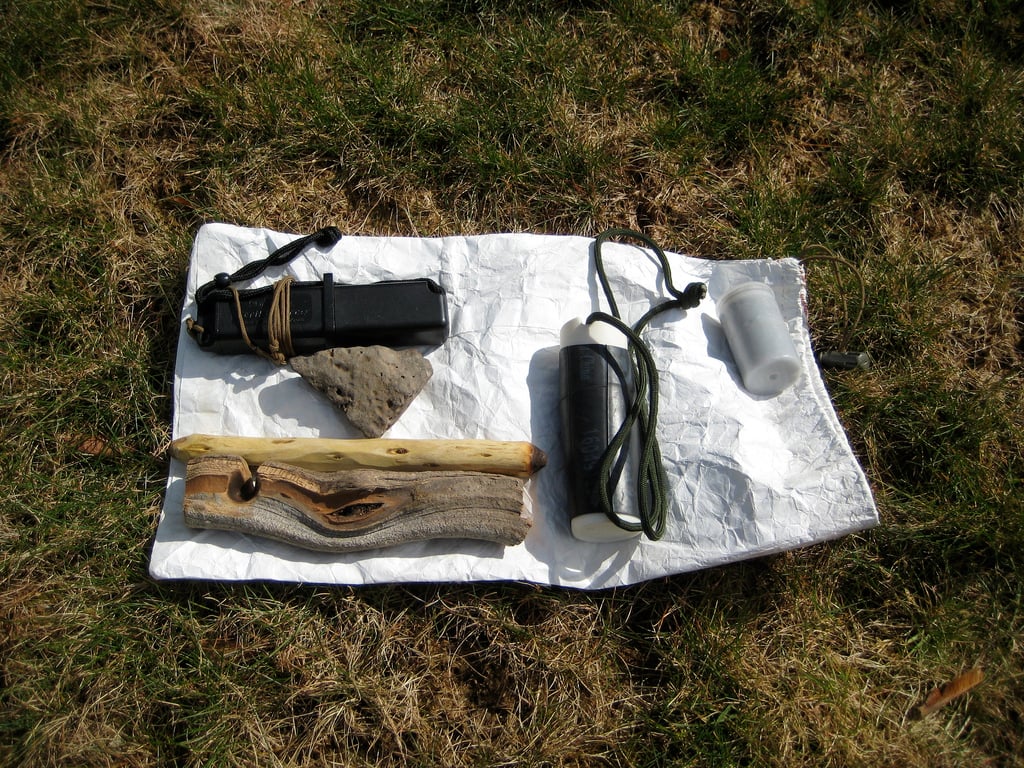
The size of the USPS envelope makes these stuff sacks ideal as a small ground sheet to keep your bum dry when sitting on damp ground. If it gets punctured or in some other way damaged on the ground, I don’t much mind. I certainly can’t say that for a pricey sil-nylon stuff sack! This winter I started to carry a small piece of Reflectix material cut to size so that I can slide it inside one of the sacks. This provides me with a dry and insulated seat that is very cheap and light.
Modifications
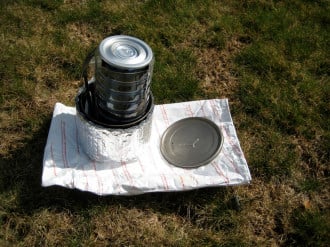
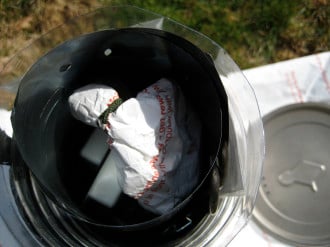
I’ll sometimes make stuff sacks that are different sizes than the normal USPS envelopes. I use one of these to store my cook system, including pot and cozy. The height of the USPS envelope is right on, but it’s too wide for the snug fit that I like.

I just cut off the excess material from one side, sew it shut with a vertical running stitch (terminating my stitching about an inch from the top, thus creating the same exit for the cordage that we previously created by cutting a slit about an inch deep), and sew my horizontal channel as before. Even though one side of the bag is held shut only by my sloppy stitching and not sealed in any way, I have been pleasantly surprised at this bag’s ability to hold water.
I occasionally used a similarly sized sack to keep all my fire making implements dry and accessible. The items themselves only take up a small portion of the available volume of the bag. Thus, if I happen upon some good tinder, or I want to gather a bit of kindling while walking through the woods, I have a place to store it.
You can also get creative with the closure system if you don’t want the standard cordage and cord lock cinch closure. On one sack that I made, I sewed a small length of paracord to the center of the sack a couple inches down from the top. I use that to the tie the sack shut. This particular sack is used alternatively to hold the stakes for my tarp or for small stove accessories.
For more details check out the Pig Monkey Flickr Gallery here or the ITS YouTube video below!


Editor’s Note: Pig Monkey is a Wilderness EMT, anthropologist, and avid wilderness traveler in the Pacific Northwest. He blogs at pig-monkey.com Please join us in welcoming him as a guest writer on ITS Tactical!


Discussion