


FourSevens Preon P1 Flashlight Review and Clicky Tailcap Modification
In 2010, I was first introduced to 4Sevens by way of an ITS Tactical article about the Quark Mini AA(2). I picked one up right away and was amazed by the performance. It was my first real introduction to modern LED flashlights and I was blown away at how much light was coming from such a small package.
I began to find out how useful a small, pocketable flashlight could be and started to EDC the flashlight. Unfortunately, I couldn’t leave well enough alone. Pretty soon, I started to wonder what kind of performance I could get out of an even smaller form factor. If I had been ignorant of the current generation of LED lights for this long, who knew what else I was missing out on?
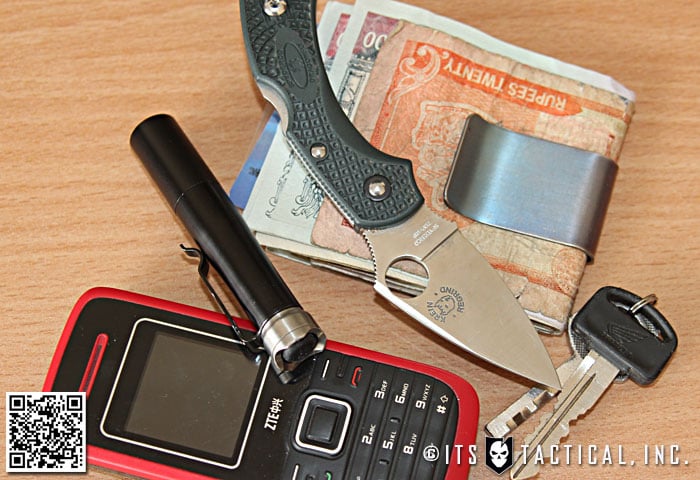
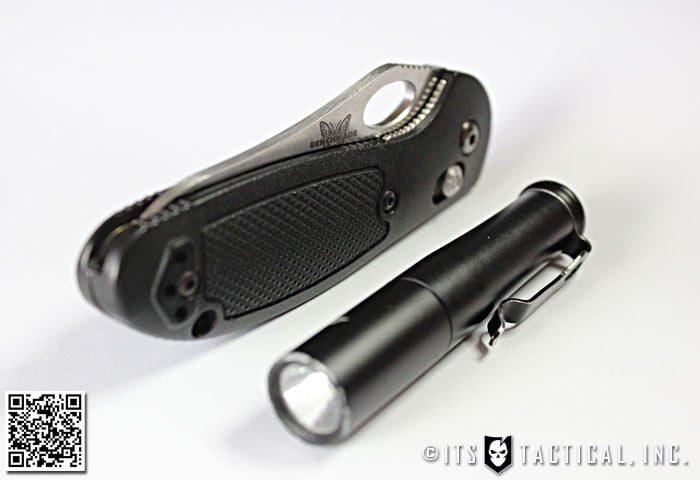
I wanted something with a good pocket clip as I despise bulky keyrings filled with gadgets and gizmos (there are only 2 keys and a clip on my current keyring). I decided on the 4Sevens Preon P1 and it turned out to be exactly what I was hoping for. The Quark Mini AA(2) is definitely not a huge flashlight, but it dwarfed the Preon P1. By moving to the P1, my EDC light became 2 inches shorter, 21% thinner, and more than 50% lighter. These are noticeable, real-world differences and I loved it.
4Sevens Preon P1
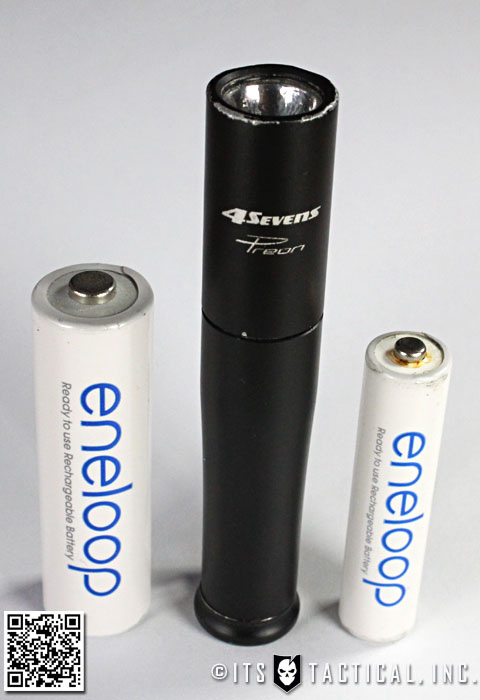
There are smaller AAA lights, but the 4Sevens Preon P1 is still a miniscule light. According to 4Sevens, it weights .6 ounces. When I place a AAA battery in one hand and the empty Preon P1 in the other, I can’t decide which is lighter. In real life, when I clip it in my pocket I don’t feel it or think about it. That’s a high compliment for an EDC light.
But what did I lose in performance? The Quark Mini AA(2) puts out 180 lumens maximum vs. the Preon P1’s 70 lumens maximum. I can honestly say that I have never missed those lumens. This light isn’t a weapon light, a camping light, or a high-performance light. This is a small and light, always-with-you EDC light. I have other, much more powerful lights close at hand in my EDC bag and in my vehicle, but they are almost never used.
Most people agree that, depending on your eyes, 200%-300% increase in lumens (tripling or quadrupling) is necessary before the light appears to be twice as bright. That means that the 70 lumen light sounds much dimmer than it actually is. A 70 lumen light will appear to be ~1/2 of the brightness of a 250 lumen light. I say all that so that you don’t immediately dismiss the light after seeing the max lumen count. This light handles more than 99% of the tasks I encounter that require a flashlight.
The P1 lumen settings (Low-1.8 lumens, Med-2.5 lumens, High-70 lumens) are very useful for:
- Looking for a dropped screw in the dark.
- Reading in the dark without waking the wife.
- Searching for something under the bed.
- Looking for mosquitos on a window screen.
- Examining something more closely in a dark corner.
- Entertaining my 2 year-old son.
- Looking for something under my scooter seat.
- Lighting a dark street while walking.
- Strobing while crossing a busy road.
- Spotlighting wandering cows from the roof of our 3 story home.
Preon Clicky Cap Upgrade
The 4Sevens Preon P1 is not a tactical light and is not intended for stunning people with sudden, blinding light. The light is activated by twisting/tightening the head. It’s difficult to do this with one hand and not recommended for a “tactical” situation. Also, to get to the highest output, you have to cycle through the two lower settings first. In other words, you cannot quickly and easily turn on the highest light output.

To help this, I purchased the optional clicky tailcap for the Preon to check it out. For the clicky tailcap, you keep the head tightened all the way and use the tailcap to activate the light and switch through modes. Unfortunately, I had a number of issues with the factory tailcap sticking, not working, or accidentally discharging. I really tried to work with it, but my frustrations eventually led me back to using the regular Preon twist interface.
I love the speed and access that a good clicky tailcap can provide, but I had pretty much given up on it until I read about a small machine shop in CA that was doing modifications to the tailcap. A flashlight enthusiast was having the same problems that I was having with the factory clicky tailcap, only he decided to do something about it. He reached out to a friend with a machine shop that specialized in machining bike parts. He asked his friend to modify the clicky mechanism so that the button/area that requires pressure is recessed and is less susceptable to accidental discharges.
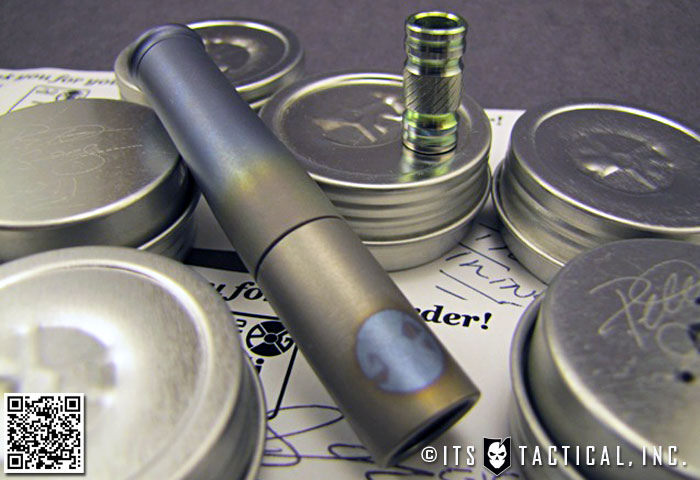
Zodiac Engineering Modification
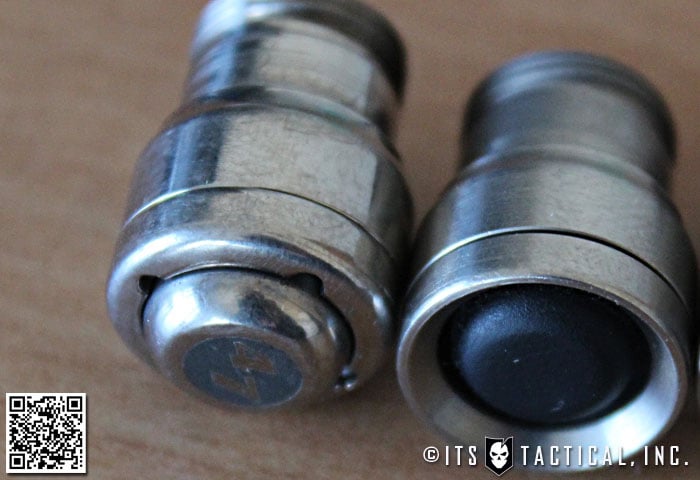
Ken from Zodiac Engineering([email protected]) removed the metal button that extends from the rear of the mechanism and machined down the button casing to make the rubber boot easier to access.
To get a bit of a preview of the mod, you can easily unscrew the clicky tailcap mechanism and remove the metal button yourself. Unfortunately, only removing the button/boot cover makes the clicky very difficult to access. Machining for access is almost a necessity.
Ken did a great job on the modification ($16-20 + return shipping). I had no more sticking issues or accidental discharges. Personally, I don’t do much tailstanding, but the modification does widen the contact/resting surface (previously the small, inner button, now the outer edge of the mechanism) and shorten the flashlight a little. Both characteristics make the light more stable during tailstanding. My only problem was that the button was so recessed it was a little bit difficult to depress. Just a little bit.
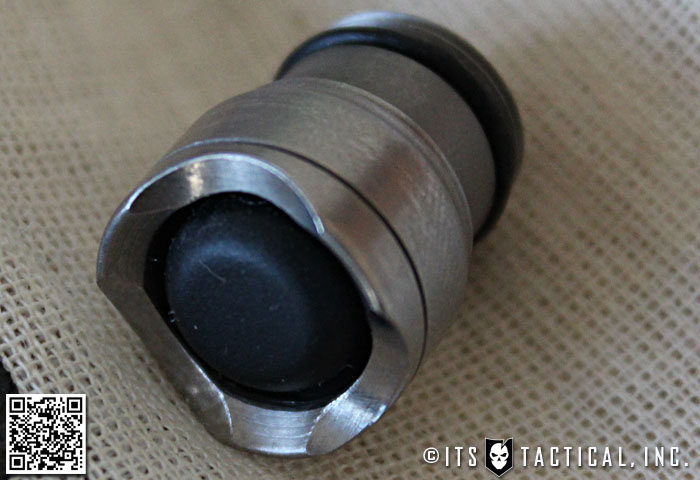
At this point, I was just nitpicking, but why not go for broke and make it perfect. I told them I wanted them to make three crenelations around the tailcap to make it easier for the thumb to get in and access the rubber book. This gives me the best of both worlds. The low spots in the crenelations provide easier access to the switch while the high areas continue to protect from accidental discharges. They did a fantastic job and in my humble opinion it is now perfect. Stable tailstanding, quick and easy access, reliability, and no accidental discharges. The crenelations actually make tailstanding easier on uneven surfaces.
Some have expressed concerns about the removed metal cap/button compromising the water-tight seal, but I have been carrying this setup in monsoon rains and had no issues whatsoever. I realize that this is just anecdotal evidence, but it appears that the two exterior portions of the clicky mechanism still compress the edges of the rubber boot to create a good seal.
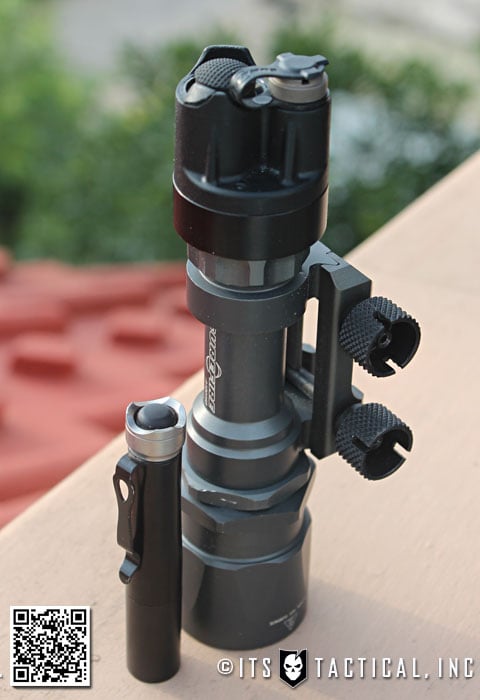
The pictures may make it look bulky, but the clicky tailcap actually only adds ~10% extra length (Preon P1).
- Regular static tailcap – 76mm
- With modified clicky tailcap – 83.5mm
Please note that the clicky mechanism supplied by 4Sevens is a reverse clicky. This means that you must fully depress, then release the switch before the light comes on. Once the light is on, I find it easy to move through the different modes by simply tapping the button lightly. Changing modes does not require full depression and activation of the clicky mechanism. If you want to, you can partially press down the button to momentarily turn off the light with out fully depressing the clicky. I don’t know how useful this is to most people, but I have used it in the past when I need a quick second without light.
Preon P1 Features and Modes of Operation
The software/mode interface is very simple. Activating the tail switch or twisting and untwisting the head cycles you through the following levels: Low -> Medium -> High -> Low -> Medium -> High -> Special Outputs You can continue to cycle through the special outputs in the following sequence: Strobe -> S.O.S. -> Beacon (high) -> Beacon (low) With just a little practice, the mode switching becomes second nature.
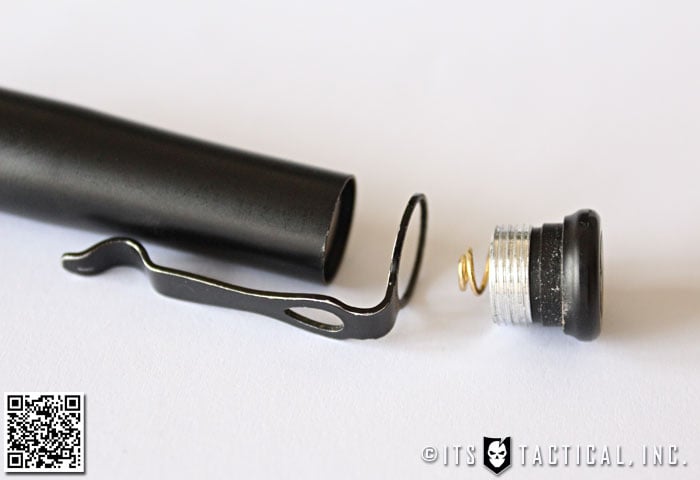
The clip is extremely sturdy. The clip attaches via loop through which the end cap screws into the main body
 There is no danger of of the pocket clip slipping off. It came a bit tight for my liking, but it was easily adjusted with a little pulling and I haven’t had to mess with it since. If you do over-loosen the clip, you can easily remove the entire clip and bend it back to a very tight position again.
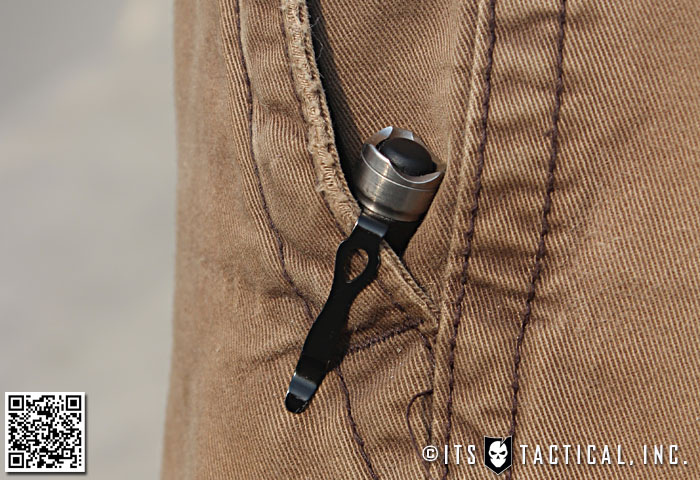
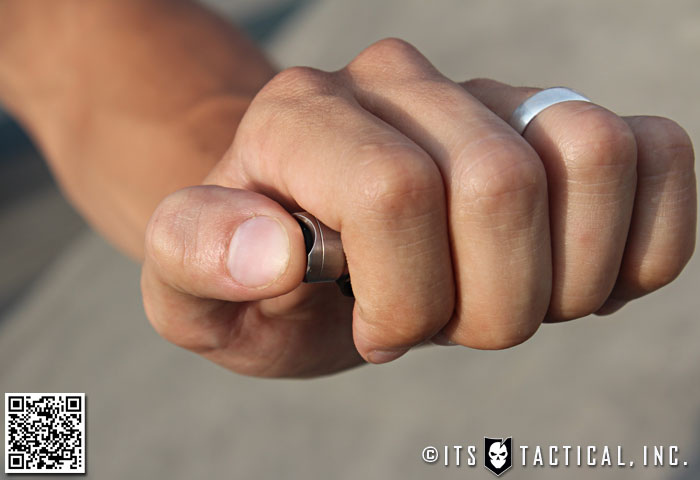
When using the plain (non-clicky) tailcap, the end of the clip is extremely close to the base of the light and allows a very deep pocket carry position. The modified clicky tailcap adds ~7.5mm above the clip. Even if I momentarily stand on my head or jump, the resistance of the deep pocket carry helps hold it in.
The shorter Preon P1 stays in my pocket much better than the Preon P2. I think that the deeper tip of the longer light received more upward pressure when sitting down or moving around (just my opinion).
The plain tailcap of the flashlight is flat and tailstands easily, the factory clicky tailcap is less stable, and the modified clicky is equivalent to the plain tailcap. I have not been able to find a great diffuser for lantern use, but I hear that the white crazy glue sticks work well. After they are emptied!
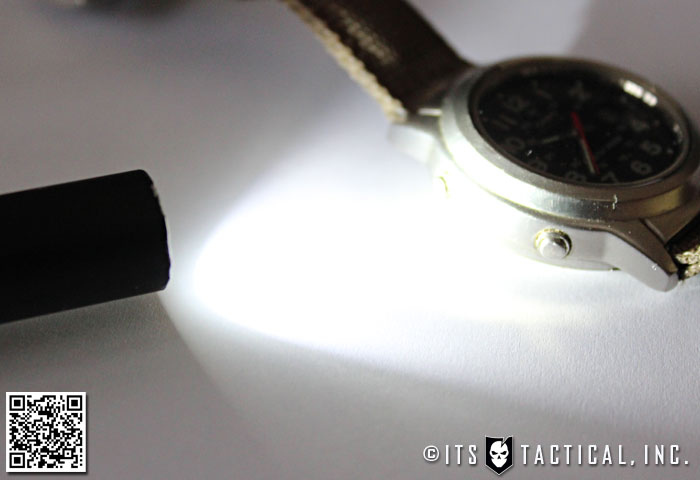
The beam has a spot portion where the brightest light is about 2.5” wide when the light is 6” away. The flood area is ~10” wide. I’m no expert, so I will refer you to this page where you will find beam shot photo comparisons: Candlepowerforums.com 4Sevens Preon P1 Beamshots
When it comes to the battery, it’s a snug fit without being tight. When I shake the light next to my ear, there is no audible or felt battery movement inside the body. The endcap has a traditional conductor spring for tension and the head of the flashlight has no spring. The positive terminal of the battery directly contacts the circuitboard in the head of the light. Personally, I have never used anything but rechargeables in my Preons and I prefer Eneloop AAAs.
 Battery life will vary with different batteries, but 4Sevens claims don’t seem far fetched when compared to my usage with my Samsung Eneloop batteries:
- Low: 1.8 OTF Lumens, 23 hours
- Medium: 8.5 OTF Lumens, 6 hours
- High: 70 OTF Lumens, 0.8 hours
- Strobe 1.6 hours
- SOS 2.4 hours
- Beacon (Hi) 8 hours
- Beacon (Lo) 40 hours
I did not do my own runtime tests, but if you are into that stuff, check out this review: 4Sevens Preon Runtime Tests The charts and graphs can get pretty nerdy, but it’s good information.
Customization and Modifications
The 4Sevens Preon line is very customizable. You can buy individual parts in various colors, finishes, and even materials:
- Heads
- Bodies
- Tailcaps
- Clicky tailcaps
- Pocket clips
If that isn’t enough, you can have someone like Pete Gray of Gray Precision do some custom anodizing for you:
Aside from customization, the spare parts mean that it is easy to swap our broke parts if necessary. Personally, I have had to send back a Preon for repair and I can say that the return process was very smooth. They gave me no trouble and had no problem dealing with the fact that I was shipping from and to Nepal. There are some stand-up people working in the service department of 4Sevens.
Despite my assurances that 70 lumens will be plenty, I am sure that many of you are wishing there was a way to get more lumens out of this light. There are several ways.
- Move to Preon 2 – Double the amount of batteries and you will double your lumen count. It is factory recommended and all you need is a $9 battery tube to lengthen the light.
- Use a 10440 Li-ion cell – This is most definitely not factory recommended and if used in a Preon 2, will most definitely ruin your light. However, there are numerous reports of successful long-term use of a single 10440 cell in the Preon 1 with reported output in the range of 200-300 lumens.(Watch this) Quick heat build-up is the most common concern. Before trying this, please do your own research and be aware of the potential dangers. This will void warranty.
Closing Thoughts
After more than a year-and-a-half of use, I can say without reservation that this is a rugged light! This flashlight has handled some hard use. This light has not been babied.
Our home has marble floors that have caressed the Preon 1 on numerous occasions. Once it fell on stone patio tiles from the second story balcony when my son decided to toss it over the edge. I have carried and used it on numerous occasions during our monsoon season in heavy rain that completely soaked completely through all my clothes.
My son has also tested it by submerging it in water on occasion. The 4Sevens Preon P1 light just keeps on working!
Because of where I live, my EDC light probably sees more use than most. We have scheduled and unscheduled extended power outages for most of the year and the winter dry season leaves us with only ~4 hours of power per day. This means that when stores, restaurants, and other public establishments lose power, I need a reliable, always-with-me light to find my fork, keep from tripping down the dark stairs, or even just keep my 2 year-old son from getting scared. I don’t leave home without my 4Sevens Preon.
It’s close, but not quite a perfect light. Here are a few small changes I hope for in a future iteration:
- Knurling — The head can be turned with wet hands, but it would be much easier with just a little bit of texturing. The protruding clip is enough to keep the body secure during the twisting motion. On the other hand, the lack of knurling helps to keep you from tearing up the edge of your pocket with lots of use.
- Clicky Tailcap — I would love to see the factory rework their clicky tailcaps into something similar to the modified version so that we can purchase an stock light and be done with it.
- More Lumens — The light from this flashlight is more than adequate, but with new light technology and emitters, I hope we will see a few more lumens in future editions. Even if I have to change my batteries a little more often.
Rob Robideau is a husband and father, preacher, self-defense web show host, pilot, writer and more. He currently resides in an upscale village south of Kathmandu in the corrupt and not-so-stable country of Nepal. He has flown bush planes in Alaska, jumped out of perfectly good airplanes, skied the Andes, never owned a television, broken more bones than he can remember, graduated from Providence Baptist College and currently drives a scooter. He is the author of Tactical Bible Stories – Personal Security Tips from the Bible and Practical Guide to Everyday Carry Gear.

Discussion