


Securing Your Valuables: Build a DIY Vehicle Lock Box on a Budget
Securing Your Valuables: Build a DIY Vehicle Lock Box on a Budget
As regular readers of ITS may be aware, I ran into a bit of a situation last year involving my Jeep Wrangler and some immobilizing mud. One of the main things I took away from the experience was the necessity of keeping essential supplies with me in the vehicle. The main problem I faced was a method to properly secure and organize this equipment when I wasn’t with the vehicle. Since my Jeep has a soft top, anything inside the cab can be easily accessed by anyone walking by; an inconvenience Jeep owners pay for the ability to remove the top. The doors lock but the zippers on the windows render them pretty useless. Check out this article on opening a suitcase zipper with nothing more than a ballpoint pen to get an idea of what I’m talking about here.
DIY Vehicle Lock Box
In order to keep essential items in the vehicle, I knew that I needed some form of lockable storage. While there are several ready-made steel lock boxes available, they were either too small or too expensive for me. I decided to set out and create a lockbox that would hold the essentials and keep them relatively secure from unauthorized access. Something we advocate at ITS is a layered security approach and understanding that all locks and safeguards only buy you time. There’s nothing that you can do to keep someone out that’s determined and has the right tools.
1st Generation Lock Box

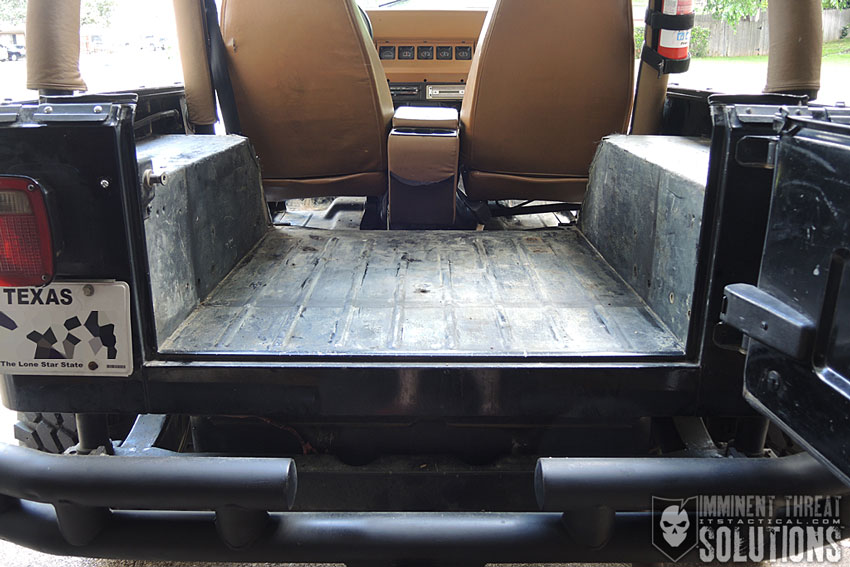
I’d previously designed a similar small lock box made from particle board that would fit behind the backseat and allow me to carry a small amount of useful supplies. The main idea was to cover the open space behind the seat and make the tailgate the opening method. Because the tailgate locks, it was capable of keeping the casual snooper out. The small lock box worked well at first, but I found myself quickly running out of space. I wasn’t able to carry some larger things that would be useful because there just wasn’t enough room. I made the decision to remove the backseat and build a larger lock box that could accommodate much more.
2nd Generation Lock Box
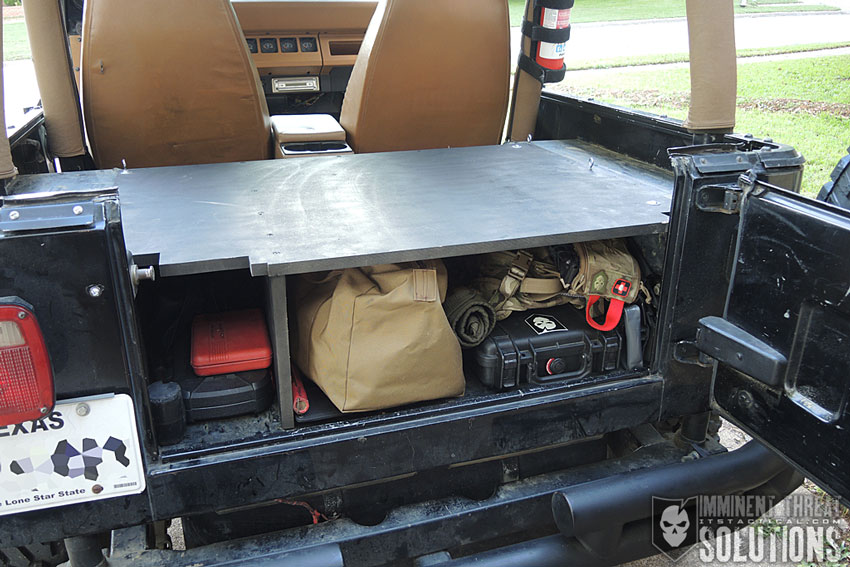
I like to keep a variety of supplies in my Jeep for situations I might encounter on and off-road. Some of these materials include medical kits, fire starting tools, recovery gear and tools. The smaller lock box worked well for carrying these items but I also wanted to be able to store things that could help me live out of the vehicle in an emergency. Things like a sleeping bag, extra food, water, clothing and bulkier items.
Materials
For this lock box, I chose MDF for its strength and durability over the 1st gen particle board version. It’s also very easy to work in terms of cutting and sanding. In order to secure the lock box to the vehicle I needed to put a few holes in the tub of the vehicle. This was a tough choice, but since it’s an older vehicle that I plan on keeping long term, I didn’t have an issue with a few small holes. If you don’t want to drill holes into the frame, I would suggest building a more complete lock box with the ability to run a cable through it. This facilitates attachment to the seat frame or other sections of the vehicle. Remember, this setup isn’t foolproof and anyone with the right tools, opportunity and enough time can take anything.
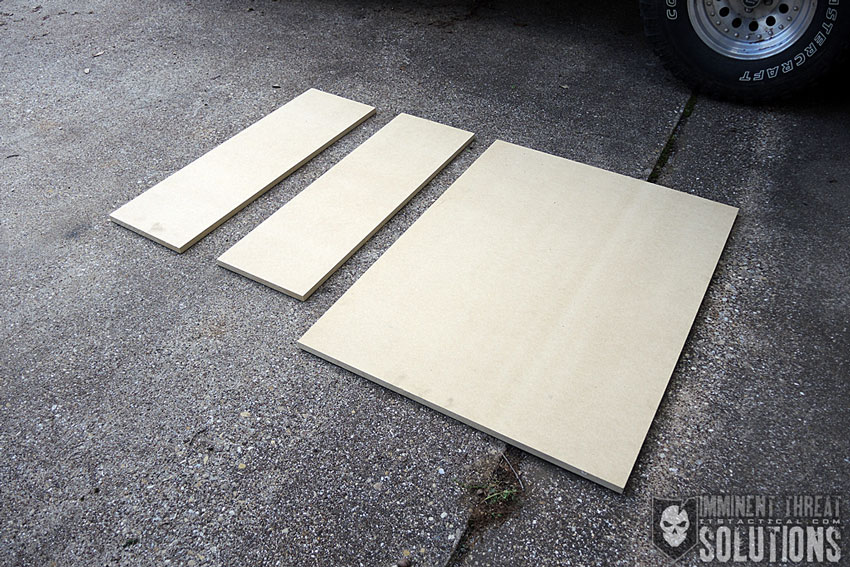
I purchased the MDF from Lowes and highly recommend having them make the larger cuts that you’ll need. For this particular lock box, I needed a 41” X 30” section, a 36” X 11” section and a 30” X 11” section. The three cuts the Lowes employee made for me were extremely helpful and saved a lot of time.

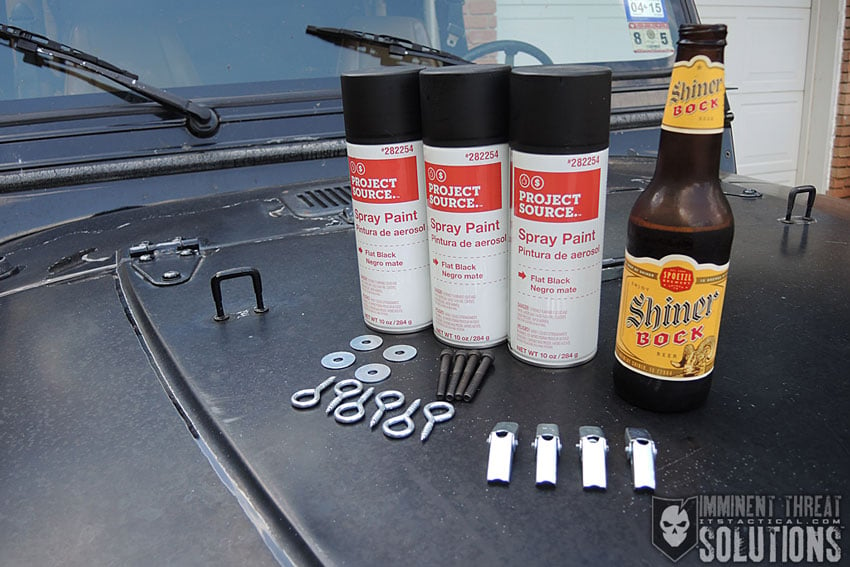
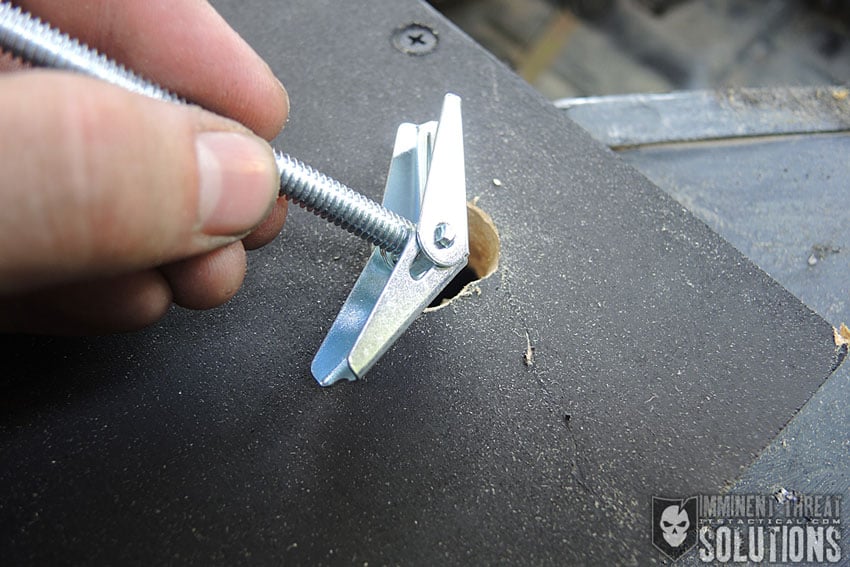
On my previous lock box, I had used 3/16” toggle bolts and I found this method to be very useful since the underside of the frame wasn’t accessible. Toggle Bolts allow you to secure something from only one side and once tightened, they provide a solid connection. The previous bolts I used were Phillips Head bolts and I wanted to change to something that a common thief might not be carrying with them. After checking a few options, I decided on Hex Bolts for this new lock box. Unfortunately, the ones I purchased were only 2 inches and ended up not being enough. I used the 4 inch Phillips Head bolts that came with the toggle side but I plan on ordering some longer Hex Bolts and replacing them soon. I also picked up some cheap flat black spray paint and some eyelets for an addition I was planning. The beer in my photo above is not required for the assembly of this lock box, but I can attest to the fact that it definitely helps in the construction process. Also, you may want an additional set of hands when taking the lock box in and out for measurements, as it can be a bit awkward.
Construction
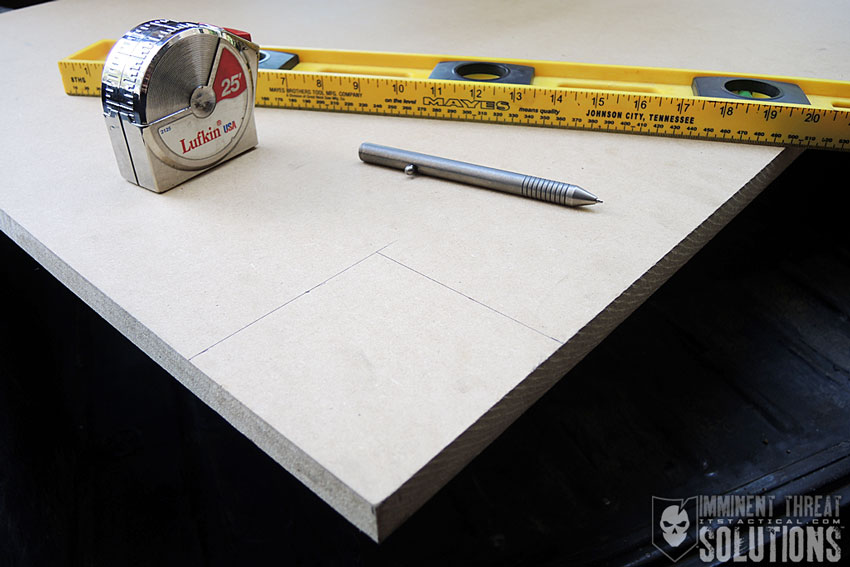
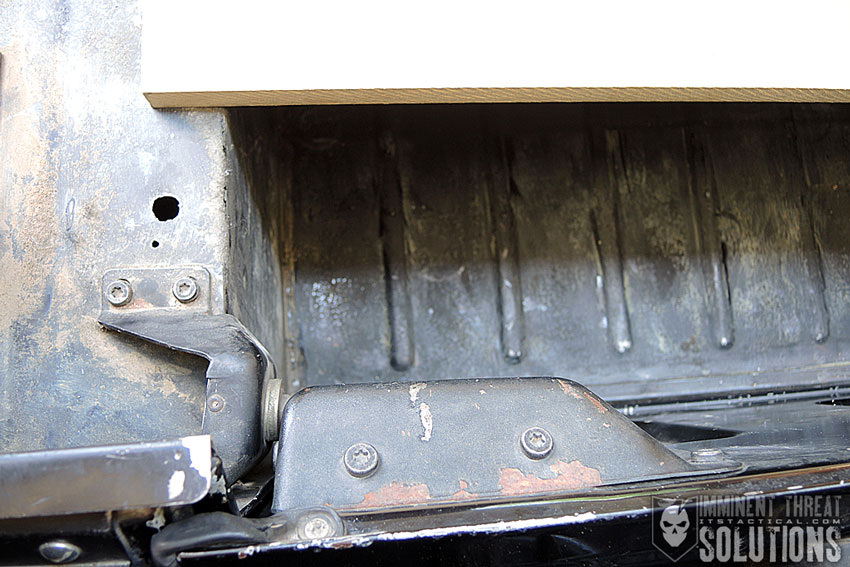
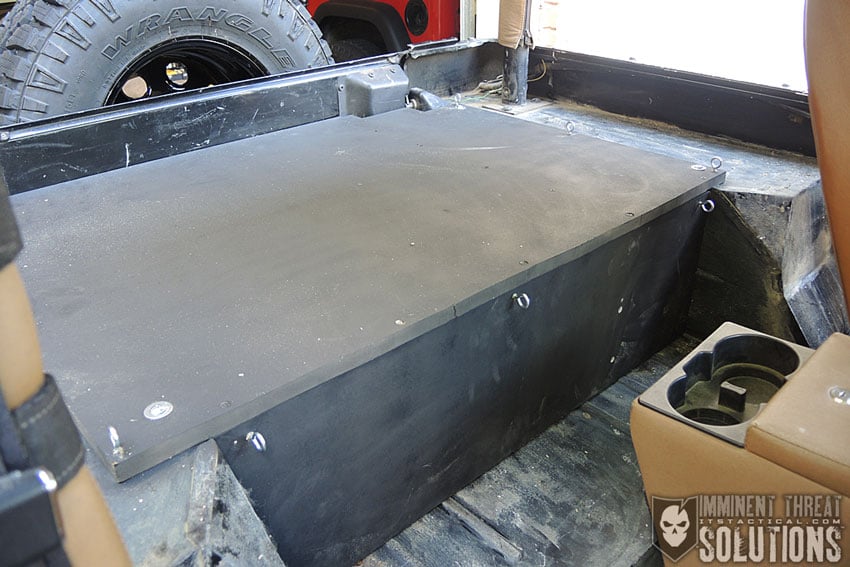
The tub of the Jeep looks like it would be fairly simple to mount the lock box on top of, but there’s a few obstacles that prevent a standard square cut. The hinge and lock portion of the tailgate extends into the tub in an odd shape. While I could have spent a bit more time sculpting the pieces to fit perfectly, I wasn’t too concerned with the gaps left by a few square cuts into the MDF.
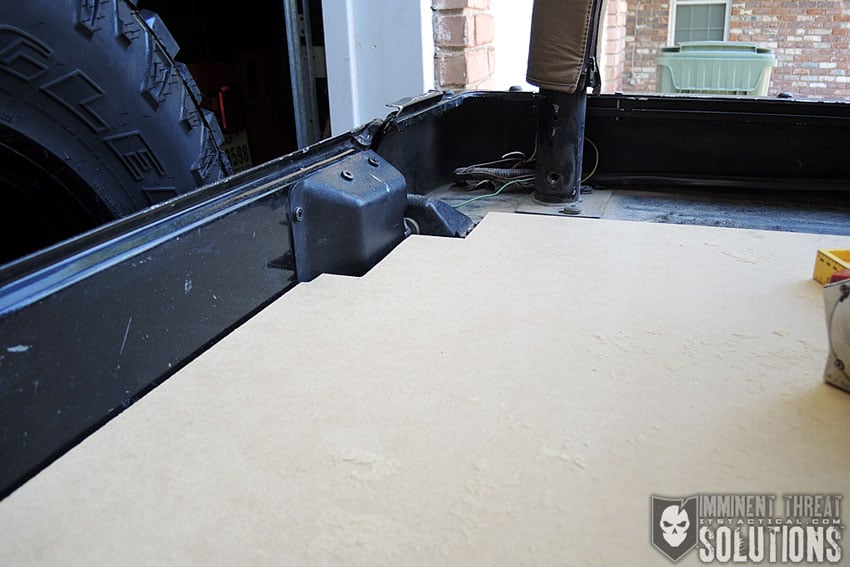
Once this piece was cut correctly, I was able to place the top in the correct position and start assembling the front and support section. After placing the front section in, I marked the location and secured it to the top using 2.5” exterior screws. Something I can’t recommend enough is purchasing a countersink set for your woodworking. Countersinking allows your screws to fit flush and would additionally allow you to fill the sections with wood filler.

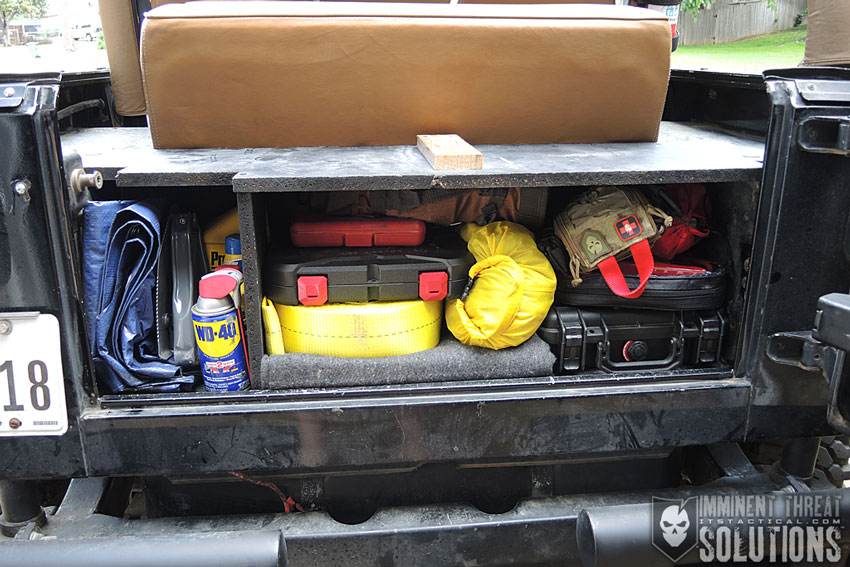
I chose to offset the support side underneath rather than placing it right in the middle. Honestly, with the strength of the MDF, I wasn’t sure I would even need a support piece but I wanted one to use as a divider. Because I keep extra fluids for the vehicle, I wanted a barrier to prevent them from spilling into the gear I was planning on keeping in the lock box in the event they leaked.

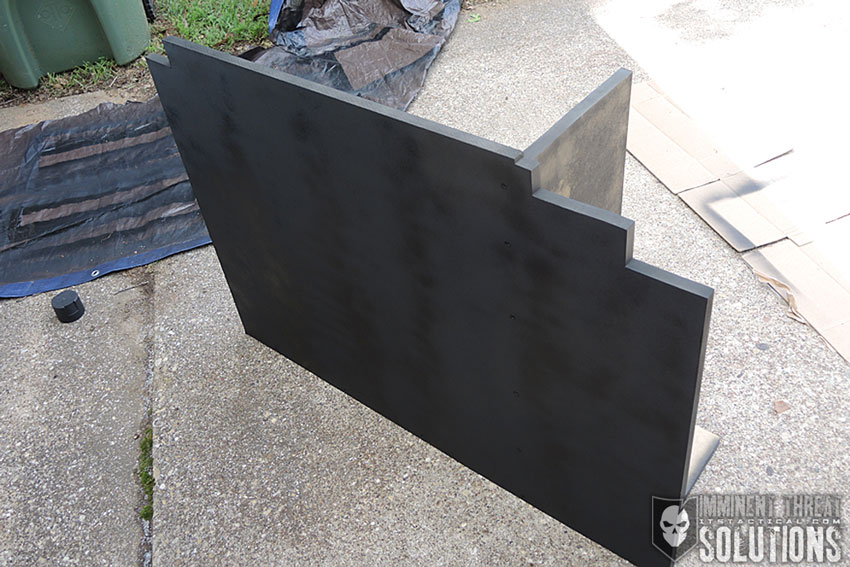
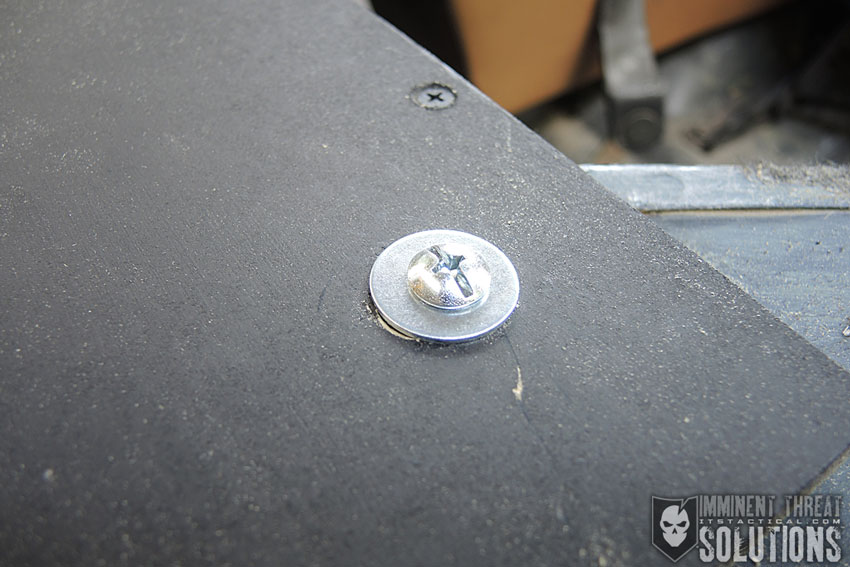
When the front and middle section were screwed together, I hit everything with the flat black spray paint and let it dry for a bit. Once dry, I fitted the lock box into the correct place and started drilling the required holes. This was the most time consuming portion, as I was drilling through the wood and the frame. I wanted to make sure everything lined up perfectly so I didn’t drill unnecessary holes in the frame. The toggle bolts were a bit wider than the bolts and I needed to make the holes larger. In order to mount it properly, I used a washer on the top side to secure it to the wood and also cover the larger hole created for the toggle.


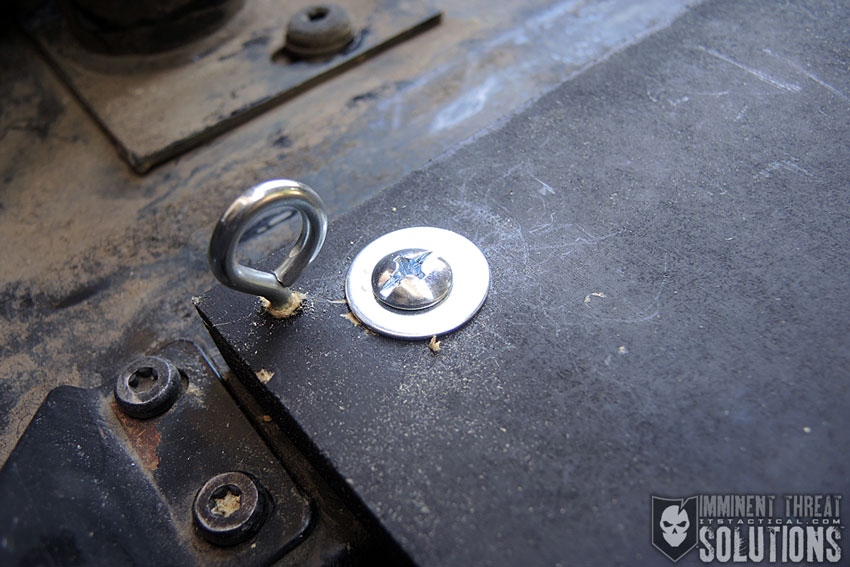
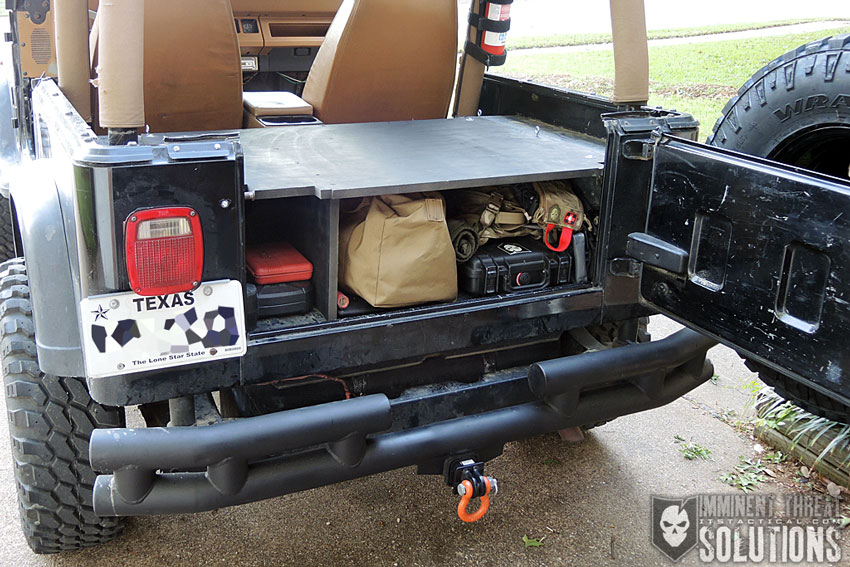
Once the holes were the proper size, mounting was fairly simple and straightforward. After everything was mounted, I secured some eyelets into the top and sides of the lock box for tying things down. I’ve taken a few trips with a cooler and other camping items and hate everything sliding around. I chose to put a middle eyelet on the front of the box, as I still wanted to be able to use the flat top of the box and not have anything sticking up in the middle.
Overall, I’m very happy with the way this larger lock box turned out. The materials were around $50 and it took about three hours of my time. I feel confident that it will be secure enough to keep passersby from getting to my gear. Because the box doesn’t offer water or dust protection, I keep all the supplies in individual bags and containers. Sensitive items are kept in Pelican cases or dry bags. I found this easier than trying to seal the lock box and because I also wanted the option of removing the entire box if necessary.
Hopefully you’ve found this DIY Vehicle Lock Box useful and it inspires your own project. What do you use right now for your vehicle storage? Let us know in the comments below.

Discussion