


Learn these Small Diving Habits to Make Your Excursions Even Better
Learn these Small Diving Habits to Make Your Excursions Even Better
There’s something inherently fascinating about the Renaissance Man of this decade. We have so many resources at our disposal that the ability to sift through the pile and separate the wheat from the chaff is a modern skill in itself. Our hobbies are a direct reflection of our personalities, but there are times when the problem is that “you don’t know what you don’t know.” Today I want to address some common problems in the diving community. This pertains to both the technical and recreational communities alike. It’s my hope that you can use this information to make your dives safer and more enjoyable.
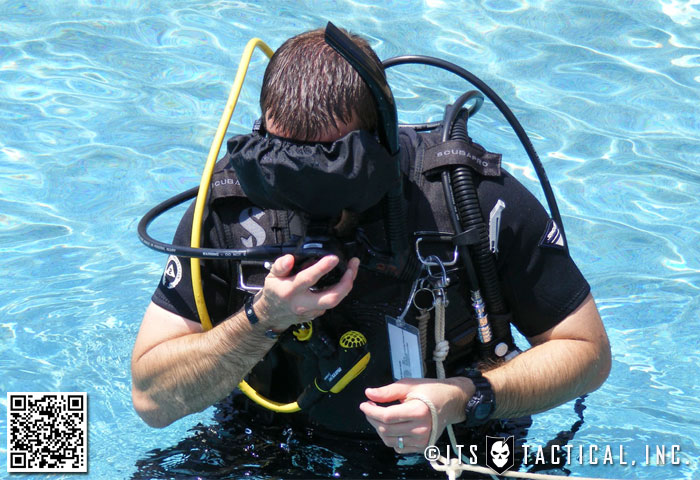
Diving Buddy Checks
Buddy checks are an essential pre-dive component. Any organization or instructor will tell you the same thing. Here’s the thing though, most people don’t actually perform them. More often there’s either no check, or there’s one diver checking the other divers in the group before the dive. It’s essential to discuss the importance of buddy checks as they pertain to your specific dive plan.
If you’re unsure of what to look for on your buddy, I can help you along. Obviously, you want to see that the air supply is functioning properly. It’s ok to check their gauges, purge their regulators and inflator systems a bit. Ensure their weights are present and properly engaged if their rig is equipped with a locking mechanism. Ensure the mask is clear and free from debris, fins are fitted properly and their air supply is functioning.
Any time a hand comes in contact with the tank valve knob, ensure that the air supply is still functioning and turned on. Simply look at the pressure gauge while you purge a small amount of gas from the regulator and notice if the needle moves. Put your hands on the other diver’s equipment. Feel for tears or anything that seems amiss.
After you’ve entered the water, wait for all divers in your party (typically just your dive buddy). Signal “Ok” to ensure your buddy is ready to dive and begin your approach to the mooring line or platform. Before the initial descent, check your buddy again. This is a good place to check for leaks, or what we call “bubble checks” in CCR diving.
On deeper dives where the purpose of the entire experience is to visit say, a shipwreck, then stop and check one last time. This final check at depth can tell you a lot about how the dive is going to progress. You don’t have a lot of time to hang out there since the gas supply is rather limited, but it’s a good idea to make eye contact with your buddies. If anyone is showing signs of uneasiness, check their gas compared to yours and put a hand on their shoulder to reassure them this whole experience is totally normal. Give your “Ok” and begin your dive. If they’re too far outside their comfort zone, you may want to consider surfacing.
Keep an eye on your buddy. Don’t wander into wrecks or areas that don’t have a visible exit on the other side. Pay attention and don’t force anyone into an uncomfortable situation. You can hate them on the surface for not being as brave, but you might feel pretty bad if something happened in that seemingly harmless enclosure.
Take a Knee

I want to start this section by saying “Don’t worry, we’re going to cover both sides of this problem in this article.” I would say that in a completely fact-less estimation of how many people do this, it’s about 30% of you. I dive with people that do it too and in fact, I’ve played hell trying to fix this myself. During Open Water certification, instructors like to bring everyone to a platform in shallow water and run through drills with the group. The normal advice is to dump the gas from your BCD until you sink to the platform, then cross your fins and rest on your knees in an upright position. Unfortunately, this builds a massive training scar that’s not only annoying for other divers (visibility goes away when you take a knee) but it’s also potentially life-threatening for you and anyone around you.
Before we go any further I want to give a shout out to recreational diving instructors. I support everything they do for the diving industry and I don’t want anyone here to think that this issue is their fault. I understand completely the need to gather everyone calmly in one place so they can perform skills drills. If at all possible, I think instructors should work on having students maintain neutral buoyancy while performing skills. Some people don’t even think about it until they see another diver doing it.
So what exactly is the issue? Many divers have a tendency to take a knee in the sand or on the coral to work through a problem underwater. This is ok if you’re on a swim platform with no mentionable accumulation of silt. Taking a knee or standing up essentially reduces your task loading so that problems become a little easier to manage in a timely manner.
Why is this bad? For starters, you’re very likely standing or kneeling on some coral. Coral reefs are an average of 5,000-7,000 years old and a flailing diver can destroy a portion in seconds. Kneeling on the deck of a shipwreck can cause damage to marine life that is only just beginning to make a home for themselves. Divers come to these reefs in droves and can be more harmful in one summer than an oil tanker spill. Maybe that’s a bit dramatic, but think about how quickly a reef can be decimated by stray fin kicks from multiple divers.
In a cave or a wreck, kneeling could mean your life. In fact, that’s exactly the cause of several diving-related deaths in overhead environments. We view spools and reels as a necessary piece of kit for any dive requiring this level of penetration, but it’s not hard to get turned around when you can’t see. Divers lose the line more often than you would think and this is why we practice a “lost line drill.”
If you’re kneeling when diving, it’s time to stop. It will take some effort and a bit of practice, but you’ll get it.
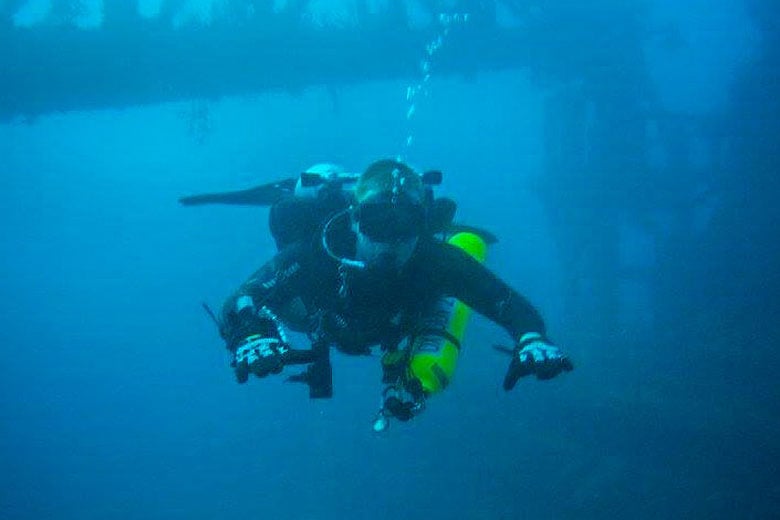
Trim and Buoyancy
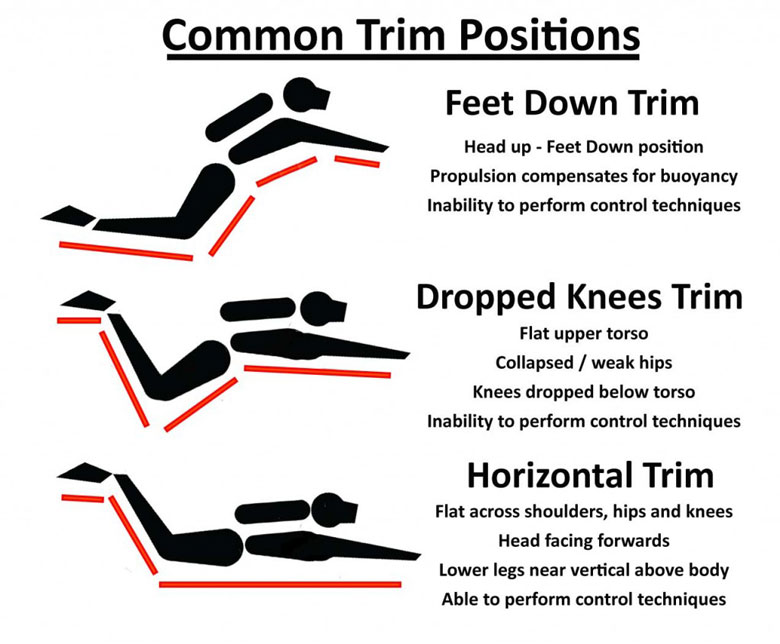
Some of these trim and buoyancy issues have been briefly discussed in a previous article. Primarily, this issue stems from the body’s natural tendency to maintain a heads-up position. It’s unnatural to be in the water and much less natural to be in a position where your head is almost the lowest point of your body. Beginners to the perfect trim position often feel like they’re losing control of their buoyancy altogether and retreat to a heads-up position.
Let’s first discuss what trim is and how it should be done. Trim is the angle of your body as you move through the water. Ideally, you want to be perfectly flat, as if you were lying face down on a table. Your head will remain neutral and your arms will extend in front of you. The knees will bend about 90 degrees for frog kicks or extend straight out during flutter kicks.
Trim can be affected by many different variables, but they’re all generally quite easy to identify and adjust. The type of BCD you’re using may be the primary culprit, as they tend to allow air to collect around the shoulders and waist (common in jacket-style BCDs.) This causes a tendency to put your body in a “heads-up” trim position.
Another common factor can be the placement of your cylinder or other diving rig. If the tank is too low on your back it can not only become unstable, but it can also bring your feet down. No matter what you do from this point, the trim position will be heads-up. Try getting the tank higher on your back, but be careful upon entry to the water. The close proximity of the regulator to your head means an increased chance of mild injury when the tank hits the water. I modify my entry by tucking my chin and arching my shoulders. You’ll want to make sure you’re not letting your mask pierce the water surface or you could break the lenses.
Keep in mind that some pieces of equipment simply can’t be overcome by minor adjustments alone. In the case of many Semi-Closed Circuit Rebreathers, the large cylinders are mounted on the bottom of the rig, causing an inevitable heads-up position. In this instance, we’d place some of our weight on our shoulders. This counterweight helps to maintain a comfortable position in the water. I know some divers that add small counterweights to their shoulders just to combat the weight of their fins!
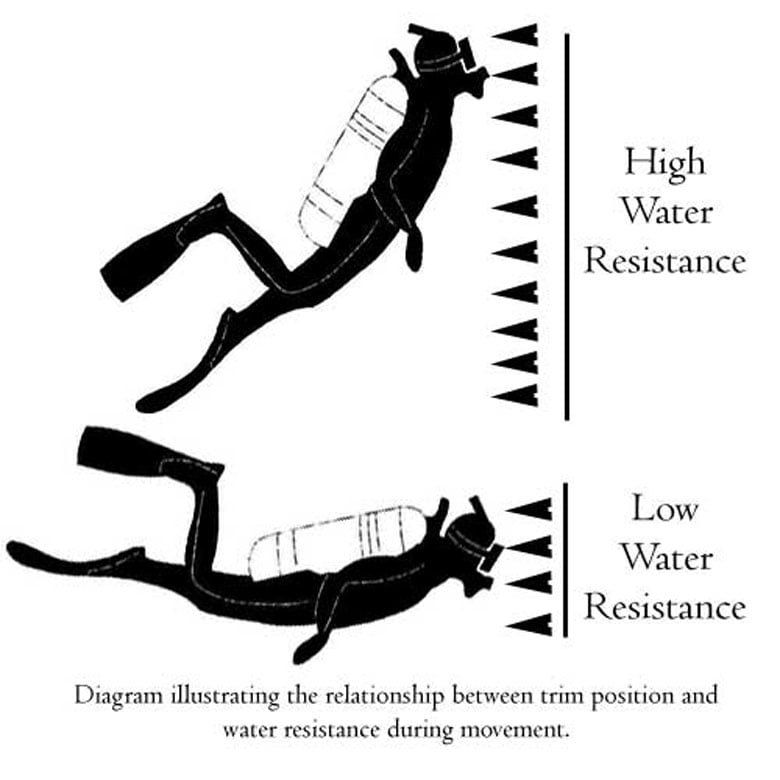
Why does trim really matter? Because you’re destroying the environment by kicking everything, for one. Not only this, but you’re likely to consume much more breathing gas during your dive, due to the added resistance required to move your body from point to point. Good trim means more efficient dives, which equates to more bottom time. I hope I don’t need to justify more bottom time to you.
Buoyancy is where you are in the water column as it relates to depth. You learned in Open Water that something too dense sinks and something too light floats. You aim to be somewhere in the middle. Adding the proper amount of gas can maintain your position in the water column. Making only minor adjustments is beneficial for many reasons, but most notably for gas consumption. As your primary (and generally only) source of breathing gas is typically the same source that feeds your Buoyancy Compensation Device, it makes sense to conserve as much of this gas as possible. Fewer buoyancy adjustments mean more breathing gas for your dive.
So how do we fix buoyancy? Weight is a good starting point. Typically if you’re over-weighted on your dives, you’ll use more gas to correct your depth. This means considerably more air is being consumed as you are required to vent/add more gas respectively. Make sure your weighting is the minimum weight you can possibly carry with you, but don’t forget to factor the positive weight of your near empty SCUBA tank. Maintaining good trim will also help you avoid making constant minor adjustments. Add gas in small bursts constantly on the descent as opposed to one long blast at the bottom. There’s a good chance you’ll overestimate the amount of gas you need for neutral buoyancy. It’s this scenario in which you’ll waste much more gas than necessary.
Once you find a good position, be sure and relax. Buoyancy changes are normally quite subtle. On open circuit dives, you can use your breath to fine-tune your position.
Don’t hold your breath, but rather slow your inhalation or exhalation respectively to make minor adjustments to your depth. This only works well if you’re calm and not working too hard during your dive.
Unfortunately, there are no shortcuts to this kind of precision and the only thing you can really do is practice. If you’re looking for an excuse to use your dive gear at a public pool or in your backyard, hang on because I’m going to give you one. Diving is fun, but it’s only fun if everyone is safe. You’re playing with life support equipment and it just makes sense to be extremely familiar with it. I advise you to find a recreational-level spring or a swimming pool deep enough to effectively don your SCUBA gear and jump in. If you have a camera or other accessories, make sure they’re set up exactly like they will be on your next dive. Additionally, remember salt water is more buoyant than fresh water. You may need to add anywhere from two to six pounds when moving from fresh water to salt water.
Now go practice. Spend hours and hours underwater practicing so that your next dives are completely natural.
Dangling Accessories
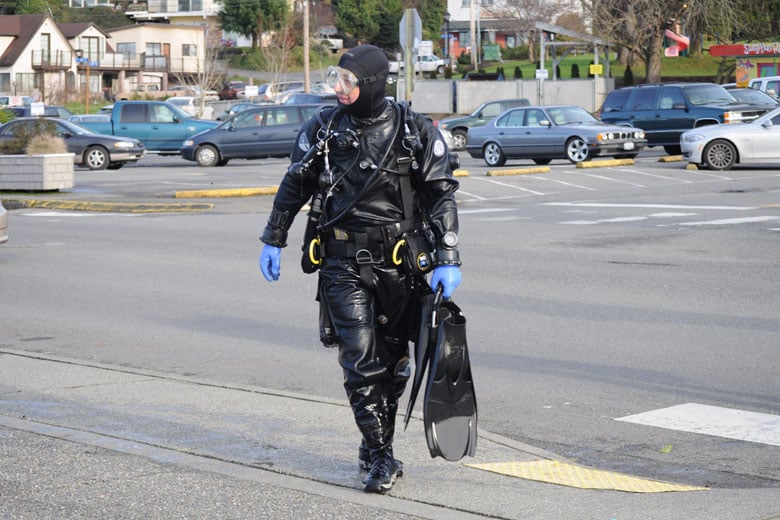
We have a whole article on getting your rig tight. This information is still quite valid today, as many technical instructors will abstain from signing off on a student that still dangles items from their harness. Flashlights, sausages, cameras, other regulators, knives, the list goes on. These not only increase your drag in the water, but they also create entanglement hazards. Entanglement and entrapment can very much be life-threatening, especially if the connections for these pieces are metal on metal.
We don’t need to spend a lot of time here, but we do need to address some common problems. First, knives on the legs. Stop it. Don’t put your knife on your leg, instead consider placing it somewhere along your waistline (in the front). Many technical divers carry one or two knives in the waistline and a small line cutter on their wrist integrated with their computer straps.
If something is dangling, stow it. Try making rubber bands from old bicycle or wheelbarrow tubes depending on the application. ITS has also repeatedly recommended Rigger’s Rubber Bands for use in nearly everything. If you’ve clipped on a pair of shears or a small BC knife, try using zip ties to secure it to your BCD straps. Be sure to file off the ends of the zip ties so they don’t cut into anything, as those things can get pretty nasty.
Conclusion
It’s important that we take the time to analyze our skills and habits to ensure we’re getting the most from our time and our money in diving. Whether you’re developing skills to protect your joy of living or just having fun, it’s essential to be the best we can reasonably be. There are no competitions in diving, but the better you become with these skills, the more you will enjoy whatever it is you’re doing. Remember as always, that diving is supposed to be enjoyable. Go have fun and be safe!
Editor-in-Chief’s Note: Derek Gill has been a Plank Owner here at ITS from the beginning and has an extensive background in healthcare, pharmaceutical research and technical diving. He’s been certified in SCUBA since 2000 and diving technical/CCR since 2010. He speaks several languages including Russian and Spanish as well as several computer languages. These combined skills have opened the door to more creative ventures in Network Security and Physical Security consulting. Derek is a veteran of the US Navy and a former Navy Corpsman who worked alongside the US Marine Corps. His military nickname, “Witch Doctor,” has stuck with him ever since and it can now be found across many internet forums where he takes pride in trolling sensational zealots from multiple industries.


Discussion