


Easily Create your own Rope Ladder with a Ladder Lashing
Easily Create your own Rope Ladder with a Ladder Lashing

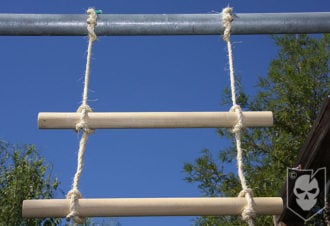
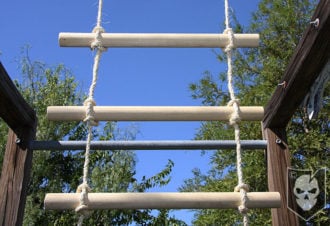
In today’s Knot of the Week, I’ll show you such a simple way to create a Rope Ladder, you’ll wonder how you never knew about it!
That’s the way I felt when I was shown this technique at Boy Scout Adult Leadership training I attended this past weekend. I’ve lashed together a Rope Ladder before, but never with this simple of a technique!
What you’ll see is a field expedient way to quickly throw together a ladder in a rescue situation or to complete the final touches on a Pioneering project. A truly a versatile technique that you should throw into your knotty toolbox.
Ladder Lashing » Lashings
The ladder lashing should be created with natural fiber rope like Manilla, due to it gripping wooden rungs better. Natural fiber is always superior to nylon (or even paracord) in lashing situations, because of how it bites into wood that you’ll typically be using. This of course is dependent on rough wood and not slick wood. Natural fiber rope can also be soaked in water prior to lashing for a stronger hold when it dries in the lashed position.
Something to note on this lashing, that I also mention in the video below, is that there are other ways to lash together a ladder that are more stable. You’ll see in the ratings below that under abnormal load this lashing isn’t stable. This is because the rungs can move out under abnormal load. Even though I mention rescue applications for this lashing, please note that this would ONLY be in situations where putting a ladder together as quickly as possible is required.
(Strength: 3/Secure: 3/Stability: 1/Difficulty: 3)
Please refer to our Knot of the Week introduction post for a description of what these ratings mean.
Uses:
- Field Expedient Rescue/Climbing
- Ladder to reach heights on Pioneering Projects
Tying Instructions:
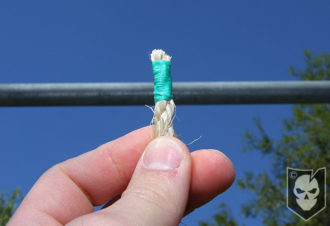
- Start by using two equal strands of natural fiber rope that you’ve whipped the ends on (dental floss works great!)
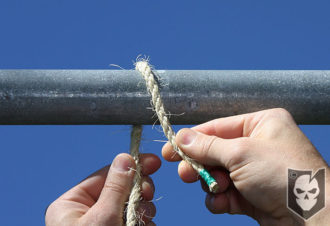
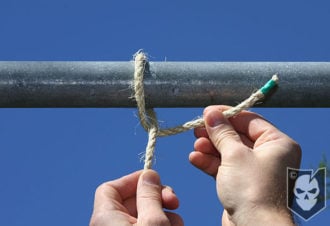
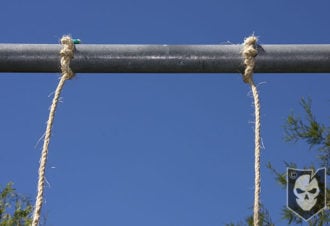
- Secure each strand to a fixed point with a Timber Hitch explained in the video and photos below
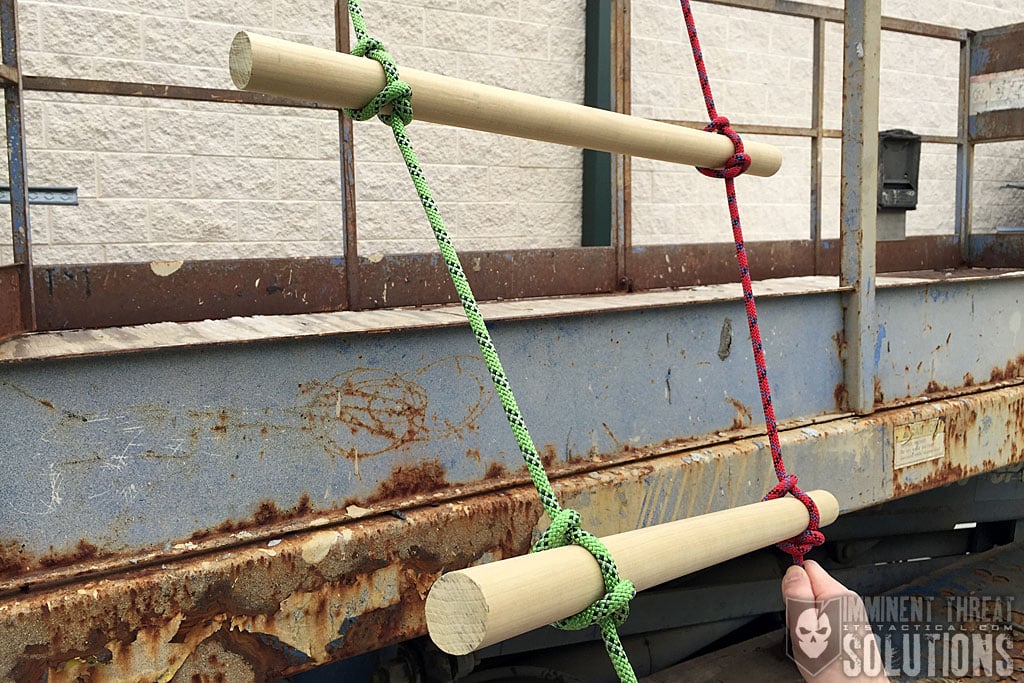
- *For the next steps you’ll need some kind of sturdy post or wood to create as many rungs for the ladder that you’ll need (The rungs we used are approx. 16″ each)*
- Ensure the two strands you’ve secured with Timber Hitches are spaced apart so that when tied, there’s a few inches left over on the left and right sides of each rung
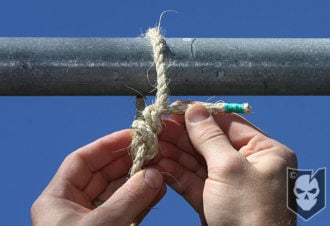
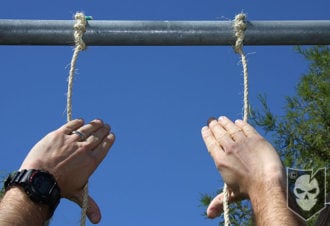
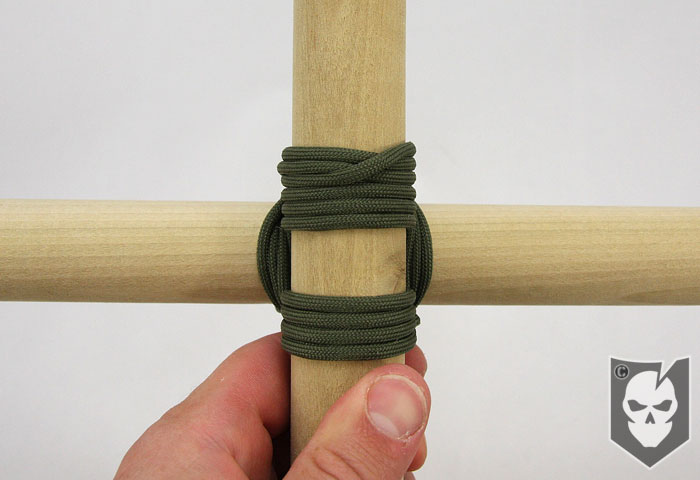
- Reach towards the two strands with both of your hands turned thumbs down
- Let each strand sit in the groove of your thumb/index finger so that your fingers wrap around the strands (see photos and video)
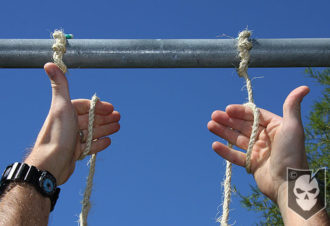
- Turn your thumbs rightside up, creating loops with each hand
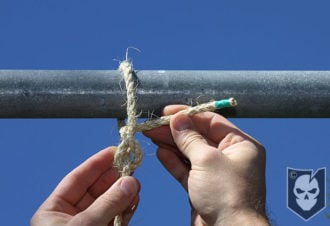
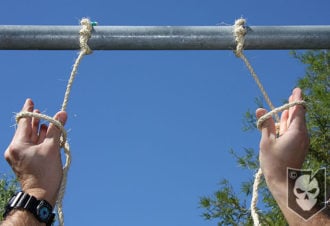
- Insert your thumbs into the loops and grasp the standing part of each strand and pull it through the loop in each hand
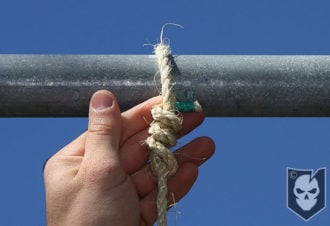
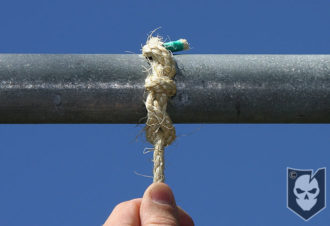
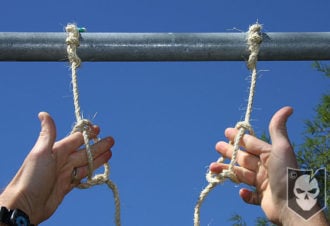
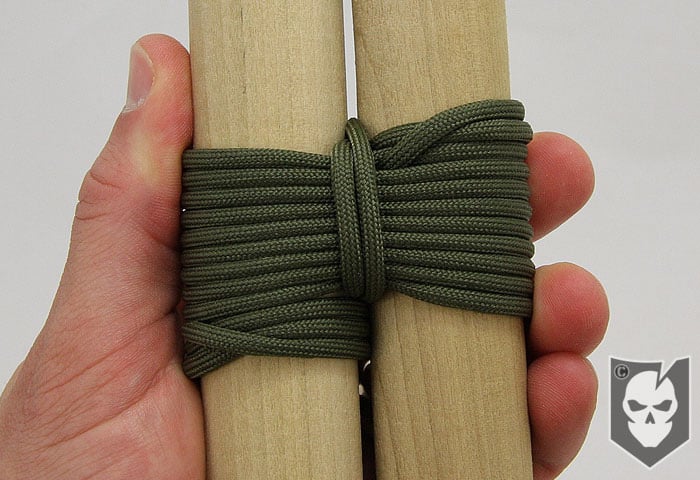
- Have a buddy insert the rung into the gap created behind the standing part you pulled through each loop (see photos and video)
- Repeat steps 5-9 equally spaced down the rope strands to create additional rungs
- *This method can be done without a buddy, but each side must be done one at a time so you’ll have a free hand to grab and insert the rung*
Click here to view step by step photos on Flickr

Discussion