


LandNav 101: Understanding the Universal Transverse Mercator System (UTM)
LandNav 101: Understanding the Universal Transverse Mercator System (UTM)
- LandNav 101: Introduction to Map Terminology
- LandNav 101: Introduction to Map Margins
- LandNav 101: Reading and Associating Terrain
- LandNav 101: Compass Selection and Recommendations
- LandNav 101: Understanding the Universal Transverse Mercator System (UTM)
- LandNav 101: Maneuvering with Map and Compass
In its essence, the Universal Transverse Mercator (UTM) system divides up the globe into small, manageable segments. Rarely is someone going to set out and hike from Oregon to Maine and most planned adventures, even when spending a week in the backcountry, won’t require more than a handful of quads.
Latitude and longitude is obviously a very valid way of referencing your position on the globe, but most recreational outdoorsmen have moved on to UTM. Likewise, the military uses MGRS, another type of globe grid system, in lieu of latitude and longitude. MGRS is a topic which will be covered in-depth in the future.
Dividing the World
 UTM divides the world into 60 north-south zones, each 6 ° wide in longitude. The zones are numbered consecutively, Zone 1 through Zone 60. Based on this width, the entire US is represented with just 10 zones, Zone 10 on the west coast through Zone 19 on the east coast.
UTM coordinates are two-dimensional and they are referred to as an easting and a northing. Northing values originate at the equator and count up from zero as one heads north. Heading south, the equator is assigned an arbitrary northing value of 10,000,000 meters–simply to avoid negative numbers when heading south of the equator.
Northing numbers are found on a map’s left and right margins, Easting values are found on the map’s top and bottom margins. Easting values originate from a central meridian drawn through the middle of each zone; they are assigned the value of 500,000. Any location west of this meridian is a value less than 500,000; east has a value greater than 500,000.
 All USGS 7.5-minute quadrangle maps, 1:24,000 scale, include UTM ticks around the map margin. The tick lines are indicated at intervals of 1,000 meters, typically using the color blue. The full UTM meter value is displayed for the ticks nearest the southeast and northwest corners of the map.
Referencing the Huntsville quad’s northwest corner, we can see a northing value of 3404000 meters, and an easting value of 249000 meters. Based on the easting, we can tell that we are west of the Zone 15 meridian because we are counting up towards 500,000 meters.
The rest of the map uses only 4 digits to represent the UTM location. The first 2 superscript numbers in the northing, for example 34, represent the 1,000,000 and 100,000-meter grids. The last two numbers represent the 10,000 and 1,000-meter grids. Therefore, 3404 on our quad means 3,404,000 meters north of the equator.
Plotting
 Navigating against the UTM grid requires an interpolator, commonly known as a plotter. My personal preference is either the MadAthelete.com UTM plotter, available at Amazon.com for the meager price of $7.50, or this Grid Scale Reader, which is marginally larger. The purpose of the interpolator is to allow you to easily break the 1,000-meter grid down into 100-meter chunks.
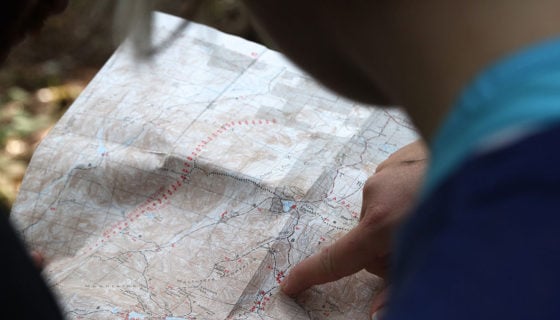
UTM coordinates are always presented Easting/Northing. In other words, we form our UTM coordinates by starting from the left hand side of the map, working right, then moving upward from the bottom of the map to the point of interest. The common phrase to remember is read-right-up. Now, let’s see this in practice.
We want to rendezvous at the Bethel Church Cemetery so we can jump on the nearby hiking trail. Starting at the left side of the map, we navigate towards the east to the cemetery. Using a straight edge, we can mark the closest easting position–in this case 249. We move the interpolator into position moving from the left side of the map towards the east as well. The result is a reading of 49550.
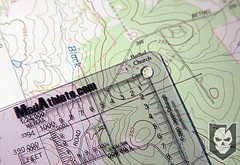 Next, we repeat the process to retrieve the northing value. Using a straight edge, we mark a horizontal line from which we can measure the northing–the closest northing is 3394. We slide the interpolator up, obtaining the reading of 94200. We would give the UTM grid as 4955/9420. Collectively, the 8-digits of accuracy represent a point to within 100 square meters, a measurement that is usually more than adequate for most land navigation requirements. The photo shows how the interpolator helped me determine the granular reading.
You’ll notice that the easting/northing reading usually omits the superscript values. If you are passing these coordinates to recipients who may not have any idea where on the globe you are, you would want to give them a full reading that includes the zone and 10-digits, something like, “Zone 14, 49550 94200.” The 10-digit reading describes a point to within 1 meter.
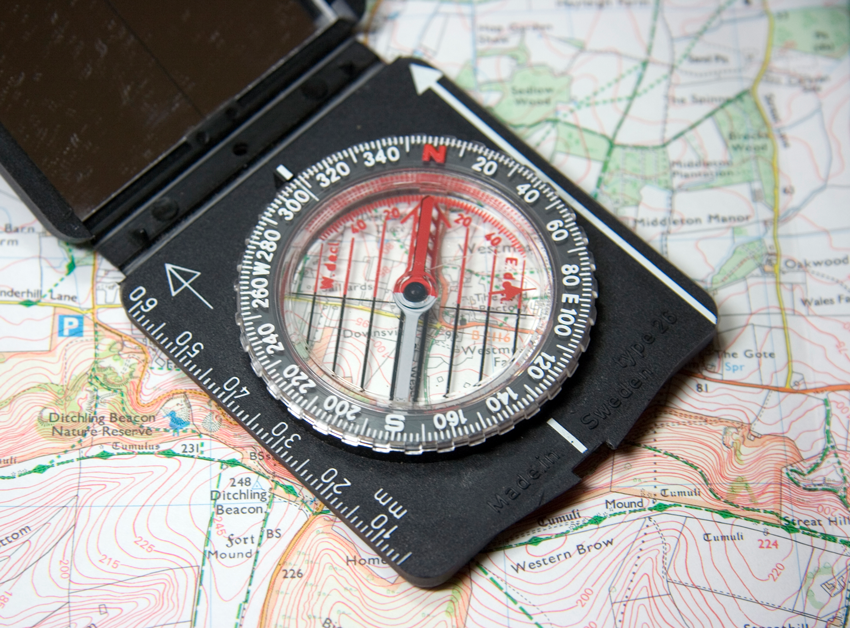
Magnetic Declination
 Knowing that we like to go off-trail, we decide grab our map and trusty compass for the trek. The first thing we need to do to prepare for our hike is to lookup the declination for the area. Using the app on my iPhone that we setup previously, I punch in the zip code of the area I’m heading to (because I know it off the top of my head, and I don’t know the lat/long off the top of my head). NOAA reports that the declination is 3 ° 21′ E, changing by 0 ° 7′ W per year . Armed with this data, I set out to update my compass.
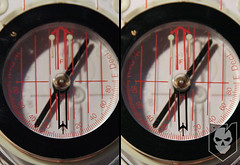
My personal preference is the Suunto M3; it includes a mechanical declination adjustment capability. Flipping over my compass, I adjust it from its default setting of 0 ° to approximately 3 ° E. The compass helps take the guess work out of which way to turn, labeling one side “E Decl” and the other side “W Decl” for me. Gently, I turn the gears so that I line up as reasonably close as I can to 3 ° 21′ E. Now, I can make my heading calculations on the map using the default grid lines of true north, yet know that when I shoot an azimuth with my compass in the field I’ll be heading the correct direction.
Orientation
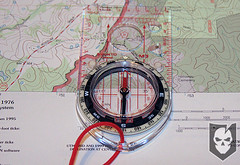 Once I get out to the cemetery, I need to orient my map. I do this by following a couple of steps:
- Lay out my map on a flat surface, not the hood of your truck! Remember, your compass doesn’t behave well around large metals objects!
- I turn my declination-adjusted compass bezel to due North.
- Find an adequate reference line, lining up the orienting lines–the red parallel lines running in the middle of the bezel–with north-south meridians on the map. On your map it should be easy to notice how the direction of travel arrows are all parallel with the meridian lines or ticks–it is difficult to see that in my photo due to the photographic angle.
- Finally, turn both the map and the compass together until the compass needle is “boxed” inside of the orienting arrow. Some people refer to this as red in the shed.
It’s worth nothing at this point one of the subtle challenges of using the Brunton 8096-AR compass that I pointed out in last weeks compass selection article. That compass lacks the orienting lines, making this process much more challenging than it need be.
At this point, we are ready to mark our starting location on the map, and begin the decision process of figuring out where to go on our hike. That’s where we’ll pick up next time, as we talk about shooting azimuths, identifying waypoints, tally counting, and more.
Notes
For the truly motivated, the LandNav series uses the Sam Houston National Forest as the training grounds for most of our cartographic adventures. If you’d like to download a PDF of the topo map we’re using to follow along, it’s the Huntsville 7.5 x 7.5 1997 map. It has an alternate ID of TTX1823, ISBN 978-0-607-93473-1. A printed version can be purchased from the USGS Store for $8.

Discussion