


Modifying an FJ Cruiser for Overlanding: ARB Bumper Upgrades
Modifying an FJ Cruiser for Overlanding: ARB Bumper Upgrades
- Modifying an FJ Cruiser for Overlanding: Introduction and History of the FJ
- Modifying an FJ Cruiser for Overlanding: Security Upgrades and Common Sense Vehicle Security Tips
- Modifying an FJ Cruiser for Overlanding: ARB Bumper Upgrades
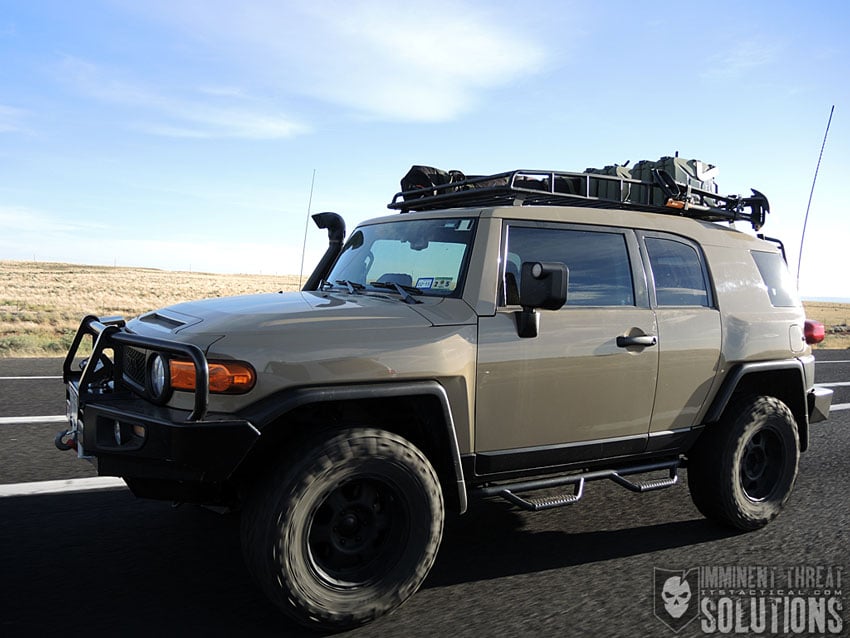
I’ve been running an ARB Front and Rear Bumper on my FJ Cruiser for a little over a year now and I feel like I’ve had a chance to get a good feel for how how they’re performing. That and my installation anxiety has had a chance to fully pass now and it felt like a good time to write up my thoughts here in an article on ITS.
First off, since this is an article on overlanding, I thought I’d talk briefly about my motivation behind replacing my stock bumpers for something that in all respects seems a little crazy. Meaning that I’d be adding over three hundred pounds in weight, decreasing gas mileage and also causing a huge amount of work for myself with the installation of these. What sounds good about that?
Cost is definitely a factor to consider as well, but I’ll be up front and say that ARB reached out to me about providing these for evaluation. The front bumper was purchased at around 20% off retail and the rear bumper was a factory return that was sent at no cost. Honestly though, I’d already made up my mind to personally purchase these exact bumpers, so while ARB’s help was much appreciated, it didn’t change what I’d already decided to put on my FJ.
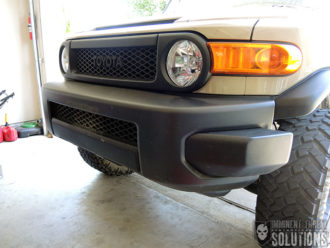
With the seeming cons of installing new bumpers, what are the pros? Namely I wanted the protection, versatility and the protection. So much so that I said it again. I’d been in a fender bender with my FJ about a year before installing the bumpers and the person I hit had a huge tow hitch on the back of his truck that demolished my front stock bumper. I’m not talking about a simple tow ball, I’m talking about one of the massive multi-ball super hook ups. At any rate, it did a lot of damage, but I digress.
Ever since then I kicked myself for not having already bit the bullet to upgrade my bumpers. Protection from fender benders wasn’t the only benefit I was after though. I knew that taking my FJ off-road and crawling over rock and other surfaces would necessitate further bumper protection as well. I have a friend that destroyed his stock bumper in an off-road incident and I learned from his lesson.
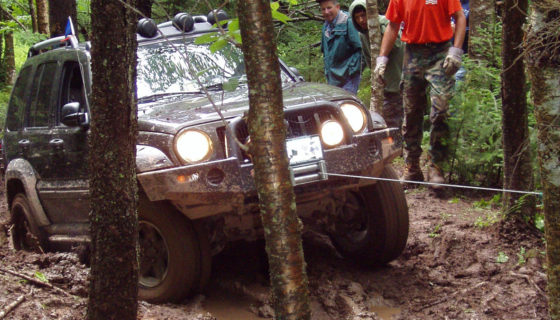
I also knew that my overlanding bug was getting bigger and that I wanted to run a winch for recovery. After attending an Overland Expo a few years back, I got to learn hands-on in classes there what I’d need for equipment and having a winch is important. That and the additional benefits of having dedicated recovery points on the front and rear of a vehicle. While more on that information is coming in a future article, I knew the only way I was going to be able to install a winch and gain those recovery points was to replace my stock front bumper.
Why ARB?
When I started my search for bumper replacements there were numerous options available for the FJ Cruiser. One of the first decisions I had to make was whether to go with aluminum bumpers to save weight, or take the hit and go with steel. Because protection was my primary purpose for upgrading my bumpers, I settled on steel. Then, at least for the front bumper, I had to decide if I wanted protection above the bumper for my radiator, headlights and turn signals.
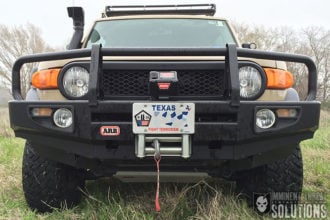
This kind of protective addition is typically a welded tubular frame and referred to as a bull bar. The terminology comes from rural collisions with cattle, or bulls, in which serious damage can occur to a vehicle if they’re collided with. I’m not sure if you’re familiar with damage that can occur to vehicles by hitting animals that dart out into the road, like deer, but it’s actually a legitimate concern.
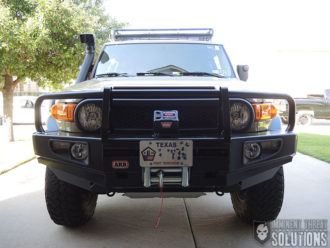
While I definitely wanted the added protection of a bull bar, what drew me to the model from ARB was the fact that not only did they incorporate a welded tubular bull bar into their front FJ bumper, but they also reinforced it with what could double as push/nudge bars as well. What I’m referring to are the two vertical struts that support the tubular bull bar and could allow the bumper to push vehicles. That or act as a battering ram if need be, this is another reason I went with a steel bumper.
Another large reason I went with the ARB is that their bumpers integrate with the vehicle safety system, being approved for air bags. This was important to me, because I still wanted the air bags to function in the event of a collision. A few other features I liked with ARB are that the front bumper has two antenna mounts, is powder coated for durability and not just painted, has optional fog lights integrated into the bumper and mounting holes for additional lighting.
One additional note here is that with the ARB bumpers, you need to ensure compatibility with your suspension. For instance, the OME 889 front coil springs I installed with my lift are made to be used with bull bar bumpers with winches. Meaning they can handle the increased weight load.
I will say that while overall I really love the ARB bumpers, there’s quite a few things that I’ll get into below that left me wanting after the installations. I realize there also may be many of you reading this that don’t specifically own FJs, so here are all my installation photos if you’d like to check out how things went.


ARB Front Bumper Installation
While I actually installed the rear bumper a few months before the front, I’m starting with the front here because it’s the order I’d recommend based on difficulty. Each bumper install is very involved and I don’t want to discourage anyone from doing this install on their own, but you’re going to run into things that make you question the directions and things that need fitting not addressed in the instruction manual. You may also feel like having a stiff drink at times during the install as well.
I will say this, my hope with this article is to address some of these things that caused aggravation and what I wound up doing to overcome them. I’d also like to recognize Mike Petrucci’s help on the the front bumper install, as this was NOT a one-man install. Just be forewarned.
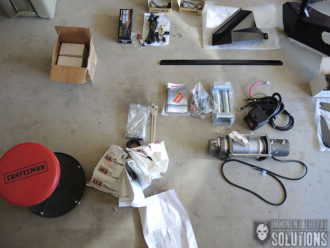
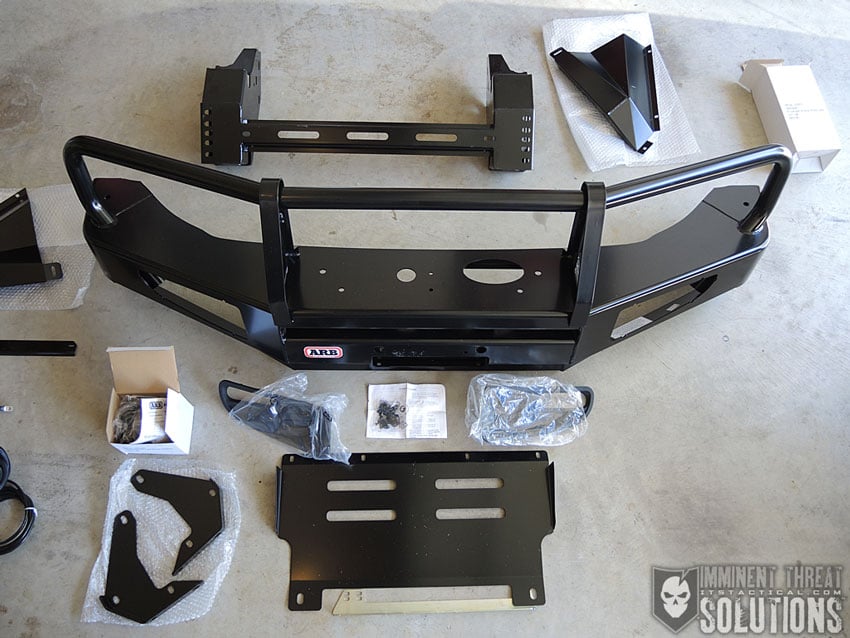
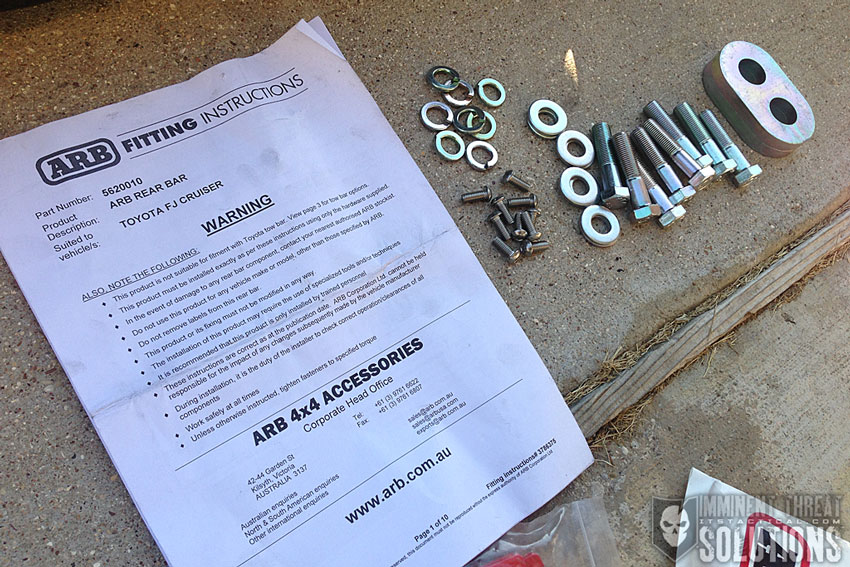
Organizing everything ahead of time will help you tremendously and it’s a step I’m glad I took. This is not only good to compare with the parts list, but a good way to start recognizing the different bolt sizes that come with the install kit. Herein lies the first of my issues with the instructions, perhaps its standard with metric sized bolts to list them as Bolt M6 x 20mm, but frankly I didn’t know how to tell the difference between that and Bolt M8 x 20mm, so there was a learning curve there.

I would have liked to have seen more Ikea-like instructions where pictures were included to show size differences between different hardware. That’s just me though.
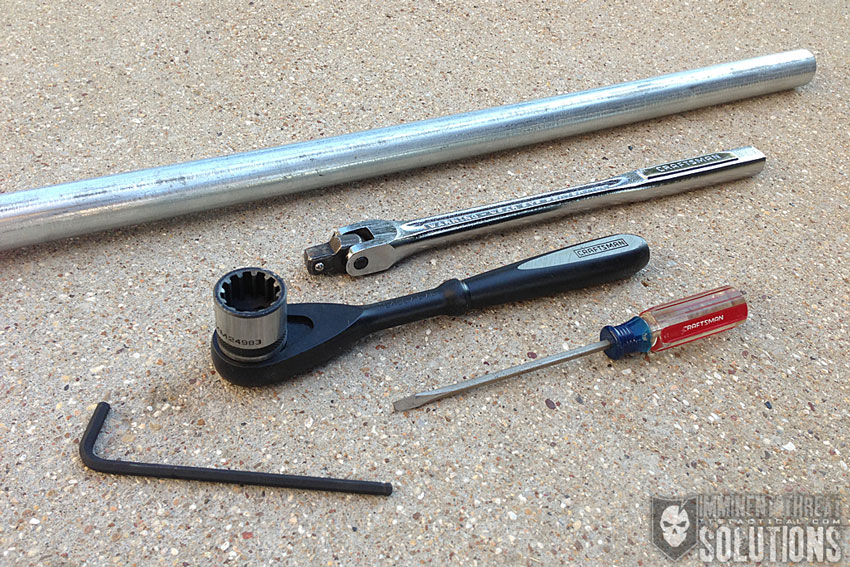
Tools Required
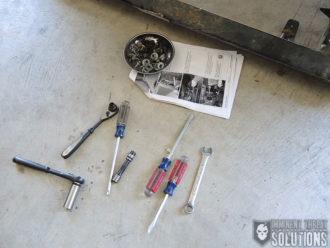
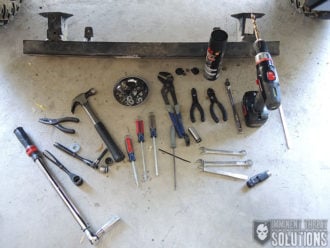
ARB specifically mentions needing a basic tool kit, 17mm Tube Spanner, various metric drill bits, snap-ring pliers, power drill and cold chisel. As you can see with my tools below, there’s quite a few things I wound up using that weren’t mentioned, but fall under the “basic tool kit” for the most part. You’re definitely going to need a torque wrench, which isn’t listed specifically, though torque settings are given. Don’t forget your safety glasses!

Between the hardware you remove off the bumper, some of which is reused and the amount of installation hardware, I’d highly recommend some kind of magnetic tray to keep everything in one place. That and a can of black rust-preventative spray paint to touch up the places you’ll be drilling holes.

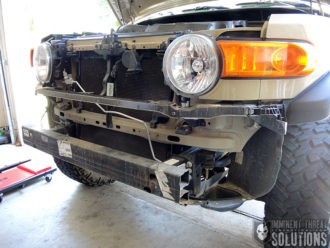
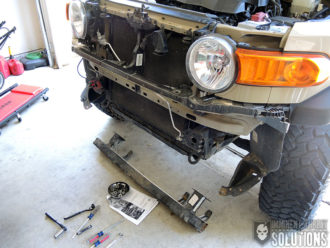
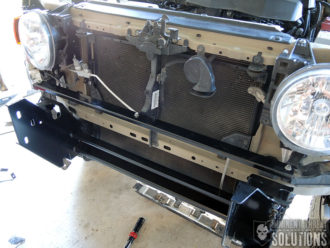
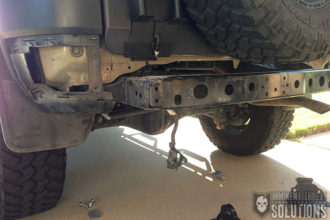
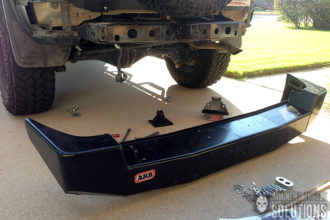
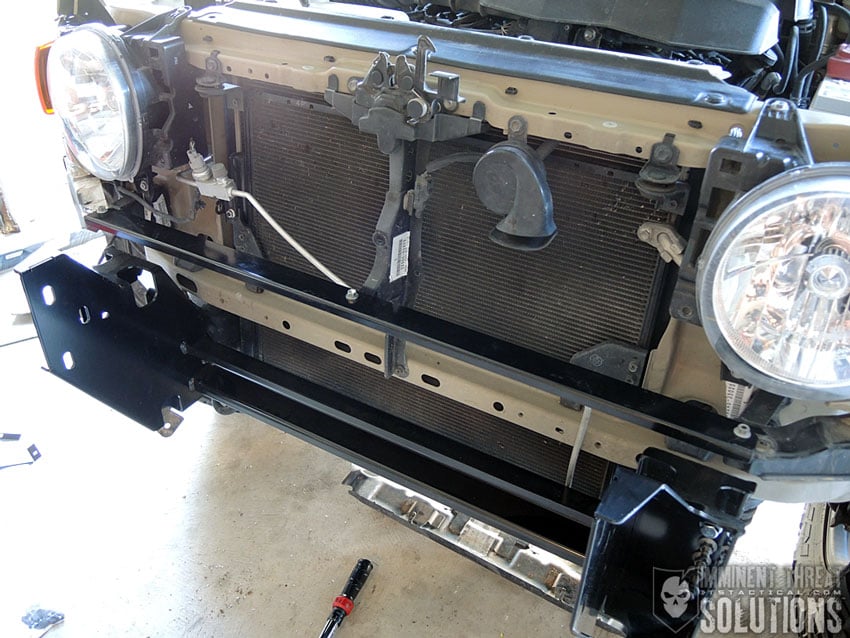
I’m not going to go through much on the removal of the old bumper, as this was a spot where the directions and a little instinct covered everything just fine. I was actually surprised how easy it was to remove the front bumper. After seeing just what was actually protecting me from a front end collision, I felt very good about being done with the stock bumper and why my front end got so trashed in the accident mentioned above.
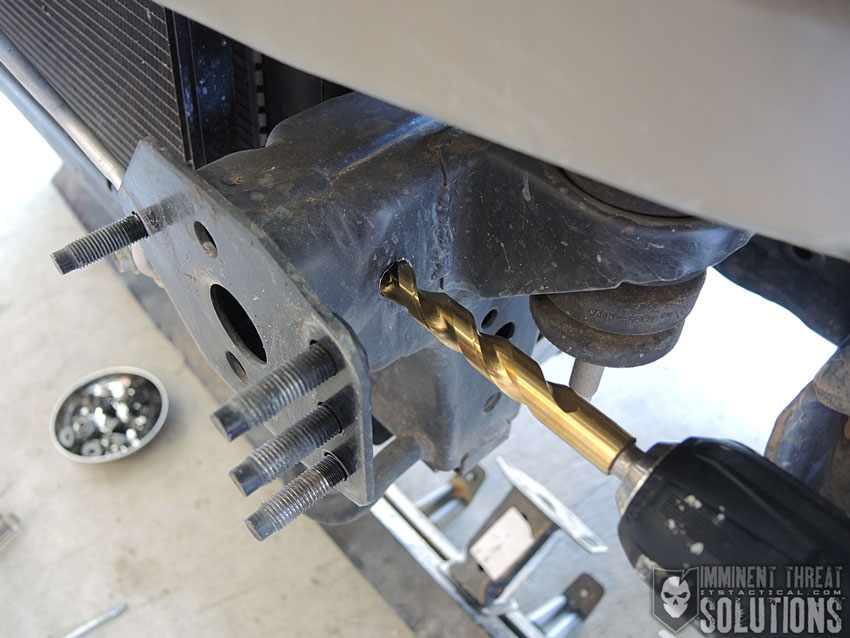
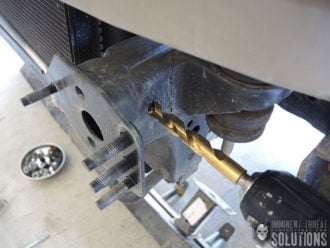
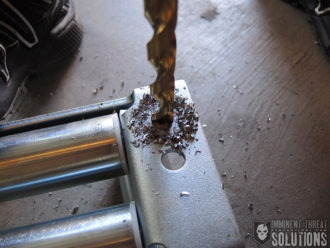
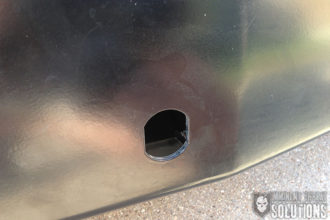
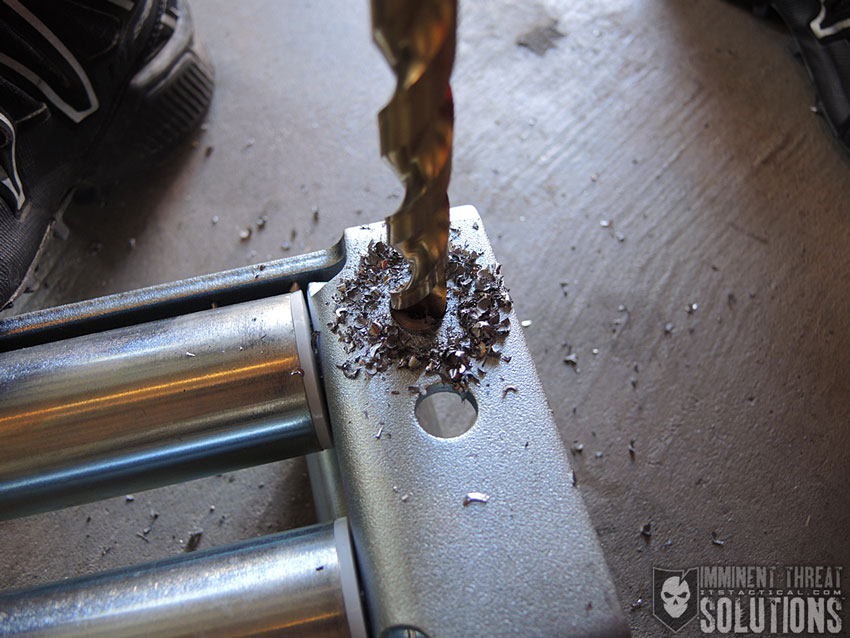
The first install instruction is more of a removal still, but it’s the first part that made me cringe. It requires drilling out a captive nut located on the outboard sides of the chassis (frame) of the vehicle. This is the first “no going back” step, but not that you need more than the one. Using a 13mm bit you drill out both captive nuts (one on each side) and use a cold chisel to knock off the rest of the nut if it’s still attached to the backside after drilling. I only found that one side needed that though.
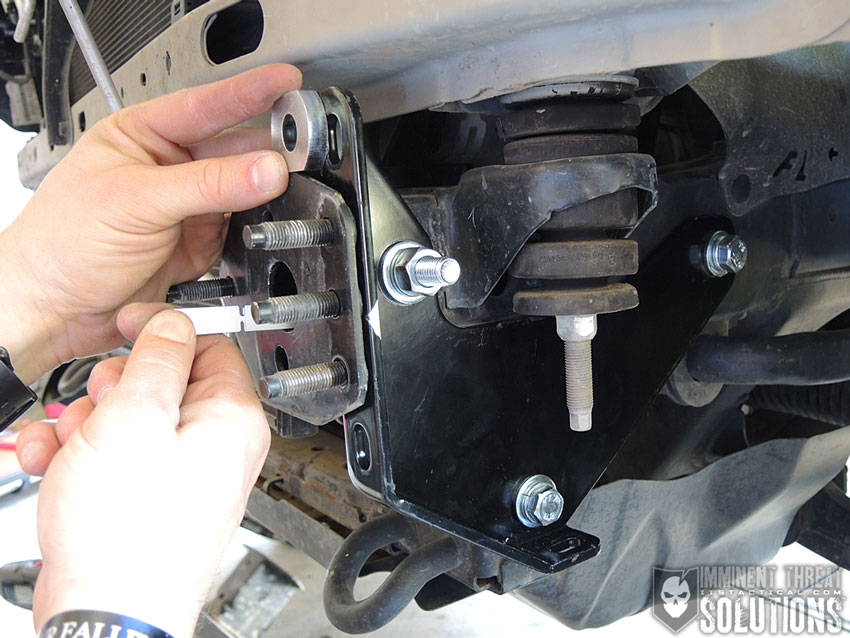
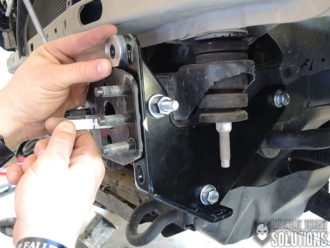
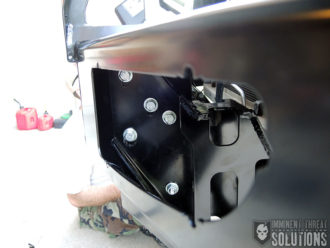
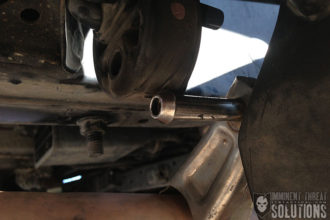
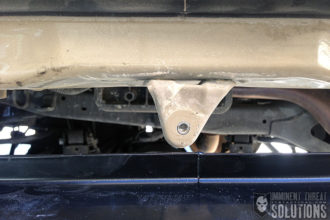
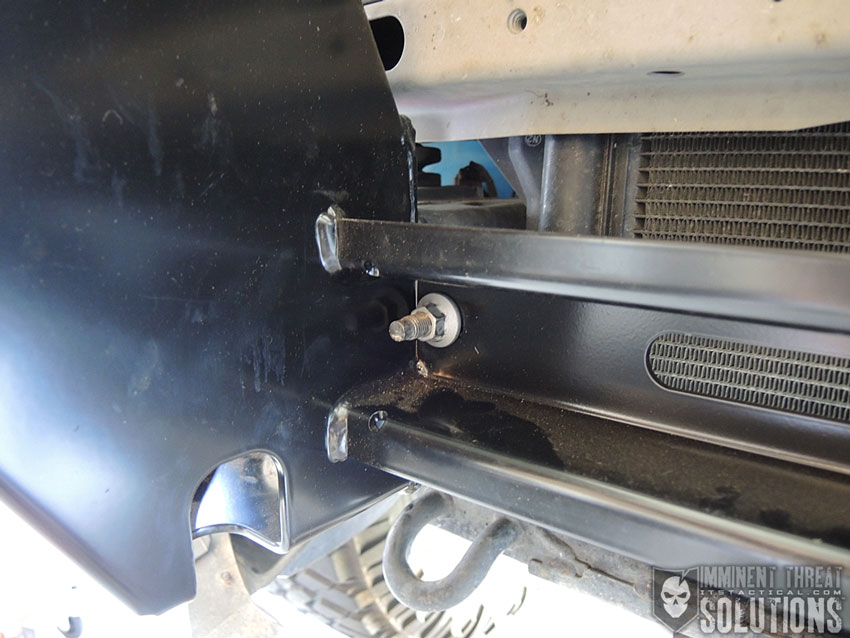
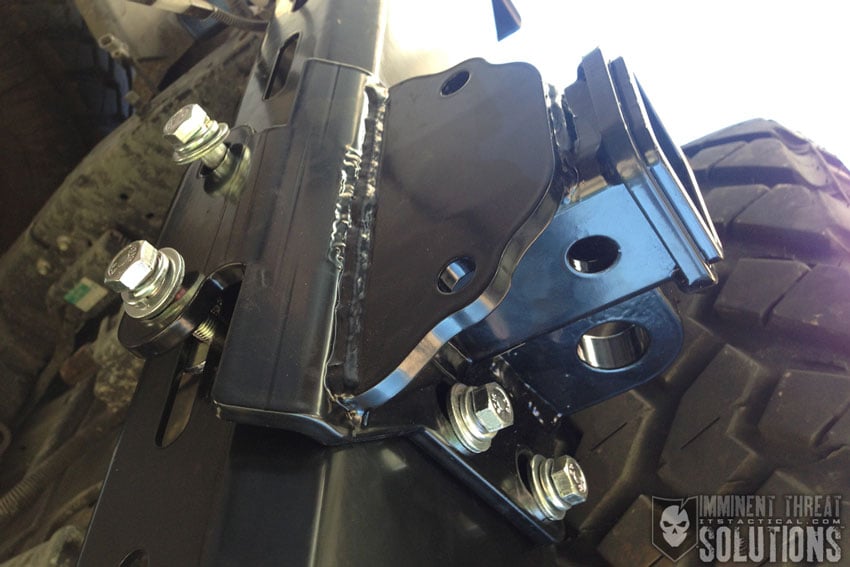
Next was installing a chassis mount brace to each side. These interface with the location that was just drilled. Basically a bolt goes through the 13mm hole to act as the primary point of contact for the chassis mount brace, followed by two support bolts. It’s at this point that I started to get a bit confused and irritated. The directions say to fit a cage nut to each of the captive nut plates, which were two long piece of metal with square cutouts for each cage nut.
Each captive nut plate is then fed through the front hole in the chassis, the same one used with the cold chisel from an earlier step. What I had an issue with was wrapping my head around the fact that you leave this long piece of metal, called the captive nut plate, inside the frame access hole permanently. You’re placing it inside to be able to reach the rearmost bolt and provide the nut to attach it with, but the directions weren’t clear to me regarding this.
Once you get the bolt threaded (and not tightened), you’re supposed to break off the end of the captive nut plate and leave it. My issue is that on one side, when I went to tighten the bolt, the cage nut fell out of the captive nut plate and there isn’t a spare in the kit. I was able to dig it out finally with a magnet, but since the clip portion of the cage nut was bent, it wouldn’t stay in the captive nut plate and took a lot of time and inevitable cussing to finally get it tightened down. You might want to add cussing to your tools required list.
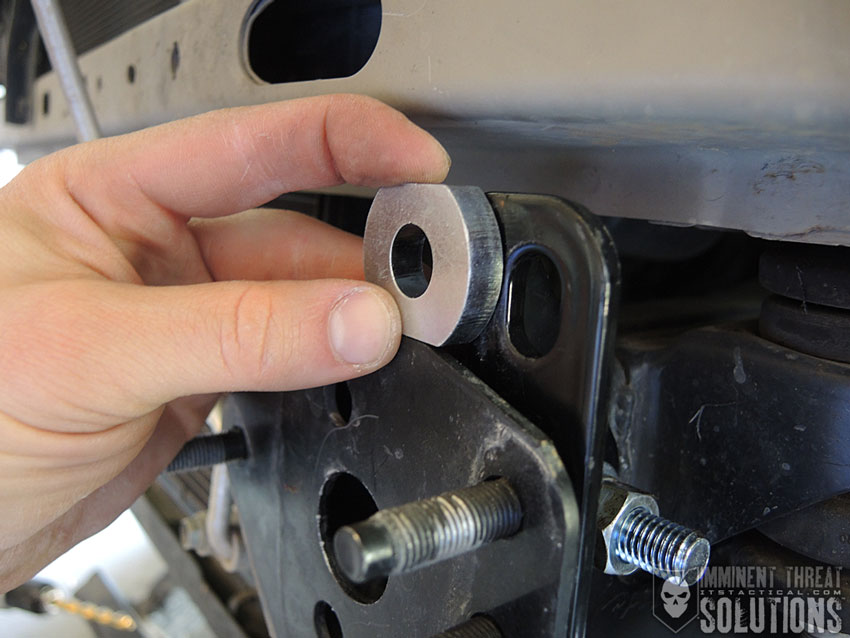
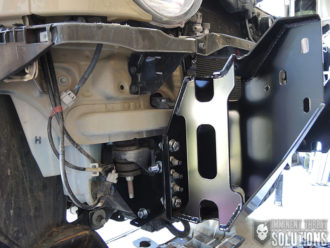
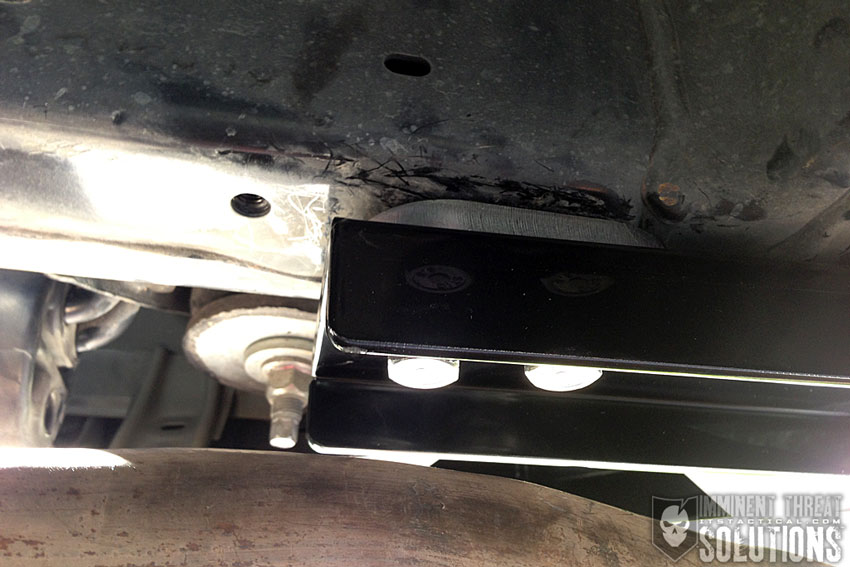
Now that all the bolts are started, an 8mm spacer is held against the chassis mount brace forward facing surface while you tighten the bolts. This is to sit flush while tightening to provide the necessary space required for fitting the chassis mount bracket in the next step.


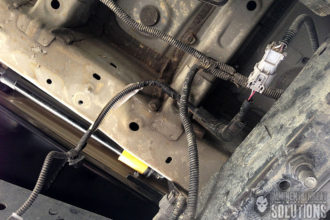
The chassis mount bracket is attached first with some original hardware from your bumper reinforcing bar removal. An air-conditioning line needs to be bend out of the way and care must be taken so it doesn’t rub against any sharp edges. Other hardware is then used to finish attaching the chassis mount bracket, including one 8mm spacer on each side.
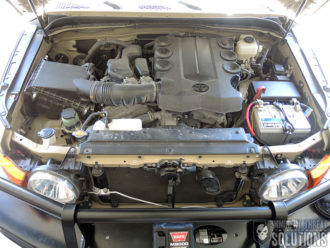
Winch Installation

The next few steps are optional if you’re not installing a winch, but as that was one of my primary reasons for installing the bumper in the first place, I purchased a WARN M8000 Winch to install. One quick tip is that WARN makes a black roller fairlead, which I didn’t know about at the time and wish I would have. Winches are purchased based on a few requirements, first off it has to fit your bumper. Especially if it’s mounted inside, like this one is. Next you have to buy one according to the weight of your vehicle. You want your winch pull rating to be 2 to 2.5 times the weight of your vehicle. My 2011 FJ weighs about 4,000 lbs.

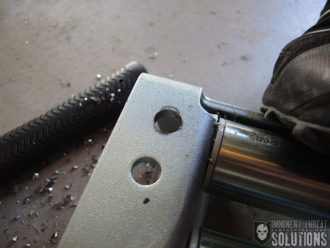
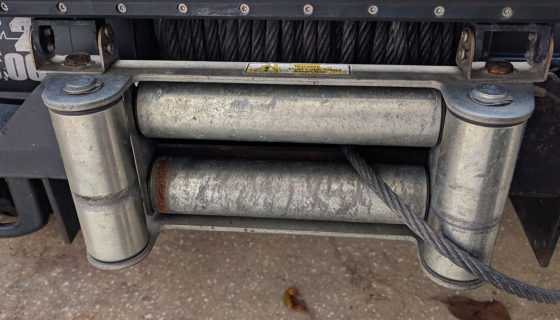
Starting with the roller fairlead, two new 1/2″ holes have to be drilled “25mm below the original holes.” That’s .984 inches if you don’t know the conversion. Don’t worry, I didn’t either. The next few steps involved replacing cables in the winch control box with cables that were supplied with the bumper fitting kit. Label the cables as the instruction direct you to, it’s important.
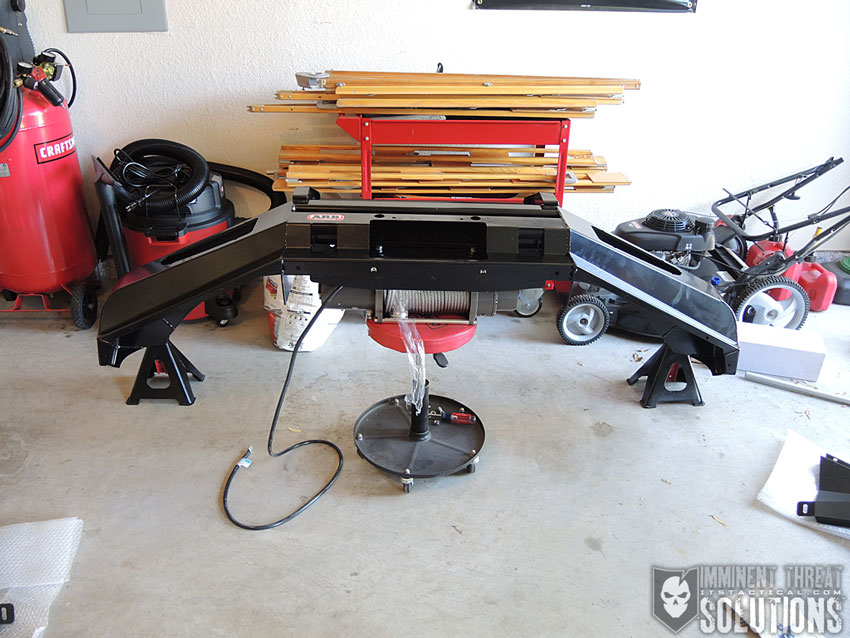

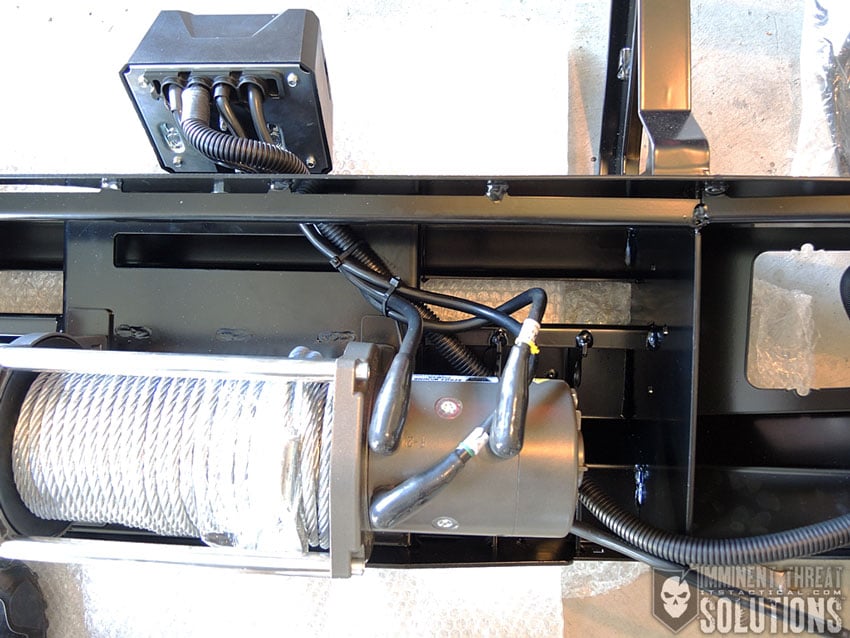
To mount the winch to the bumper, we used a stool to hold the winch, while we lowered the bumper into position and supported it with jack stands. During the attachment with bolts here, it’s important to fit a couple of cage nuts in place as the directions state. There’s no access to these holes later for this step, so you need to do it now (also in the directions).

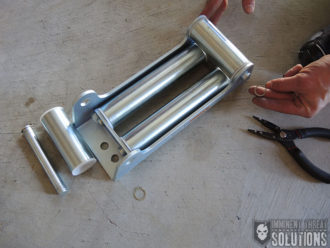
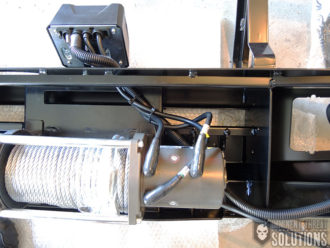
The roller fairlead needs to have the snap-rings removed on the vertical rollers in order to gain access to the lower bolts for mounting. Once the fairlead is attached, reattach the vertical rollers and use snap-ring pliers to facilitate this. Next is installing the control box bracket for the winch. It’s fairly self explanatory here in the instructions, but one thing they leave out is when you’re running the wires down into the bumper to attach the control box to the winch itself, feed them through the rubber grommet that attaches to the hole. I had to do this after the fact because I didn’t catch it and the instructions didn’t mention it. This required cutting a slit in the grommet to fit it around the wires. Not a huge deal, because it looks fine, but something I wish the instructions would have mentioned.

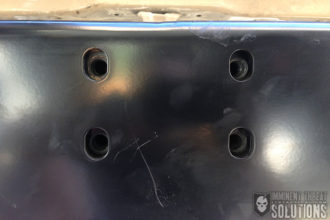
Go with the instructions suggestion of zip tying the wires together to for organization and to keep them away from sharp edges and moving parts in the winch. A couple of grommets now get inserted for attaching a license plate and I really wish there were four rather than just two. There’s a piece of double sided adhesive to secure the bottom half of your license plate, but it stopped sticking a few months back on my bumper. I’m assuming that because the bumper is marketed in different geographic areas not all license plates are the same size and two holes were all they were willing to have. I’m not sure though.
Bumper Attachment
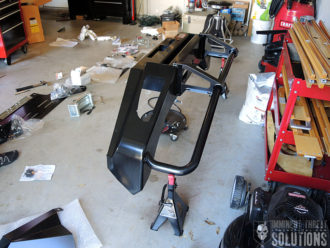
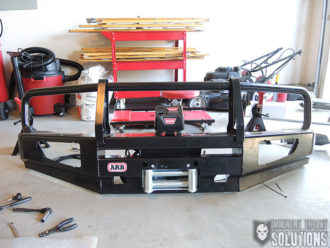
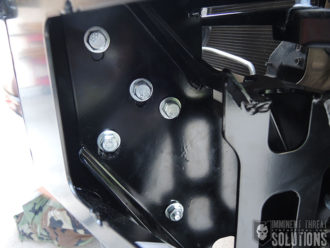
Next up is replacing a stock grill brace and putting on the bumper itself. With the new replacement grill brace, save the hardware from the original, because its used for installation. The fun part is now lifting the heavy bull bumper onto the chassis bracket and installing six bolts to secure it. But wait, there’s more. There’s now four 10mm holes that need to be drilled, one through a pilot hole on each side of the mounting brackets and one on each side through a hole in the upright the sides of the mounting brackets. After affixing these, it’s onto the electrical if you have the optional fog lamps.

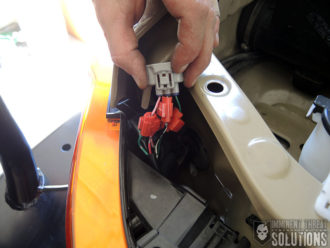
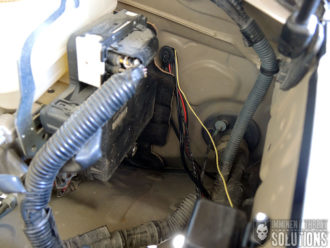
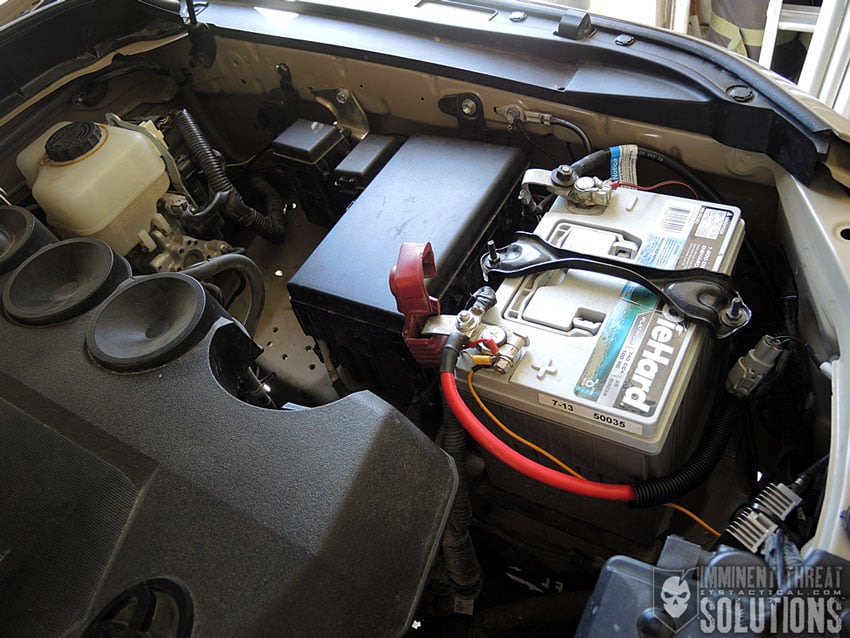
I won’t go into much detail for the lighting, as the loom extensions and fitting kit are very detailed. You’ll have to identify some wire colors and splice them into other wires, which seems like a pain, but I really appreciated the splicing clamps included in the kit. It made short work of splicing and only required crimping on three red splicing clamps to do the job, which would have been nearly impossible without them. You will need some basic knowledge of wiring here, as you’ll have to attach a power line to your battery and route a switch through your firewall and into the cabin. This controls the fog lights and is a simple on/off switch. I honestly wish ARB would have made an FJ factory switch to add it to the array of blank switch plates underneath the radio.


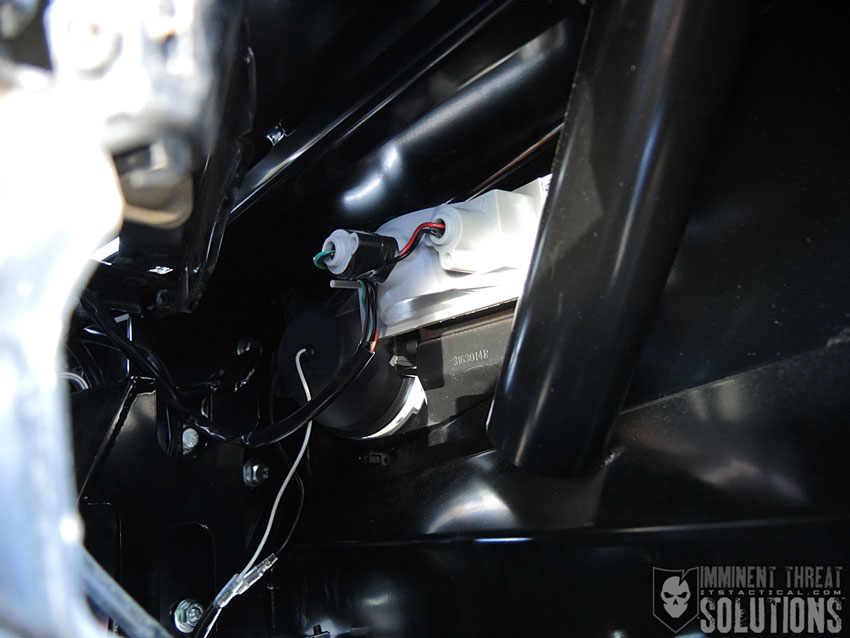

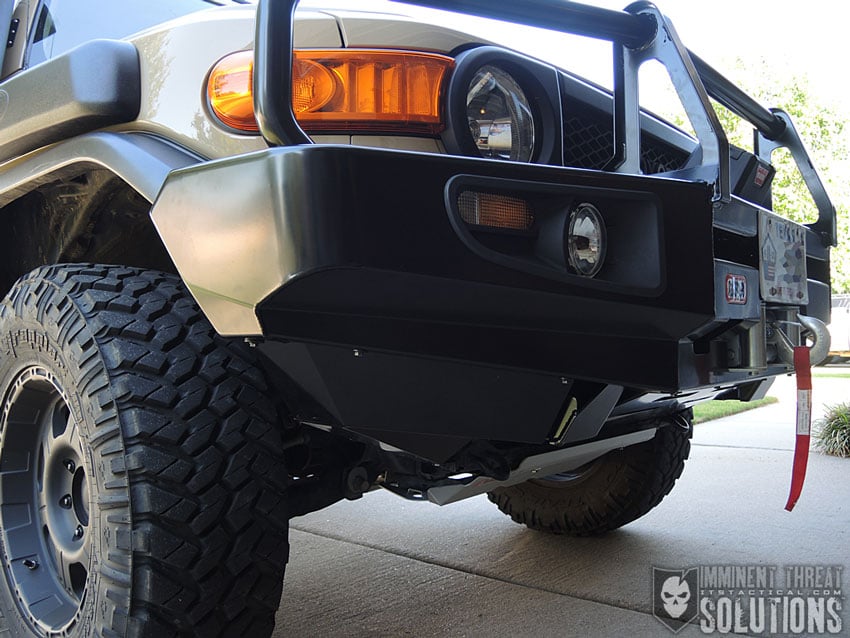
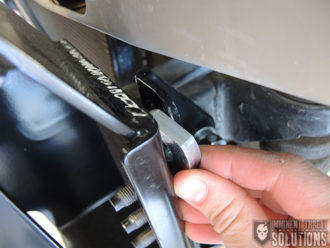
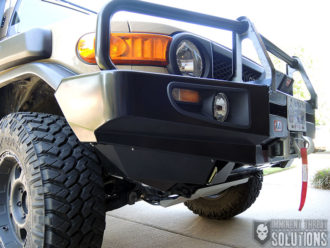
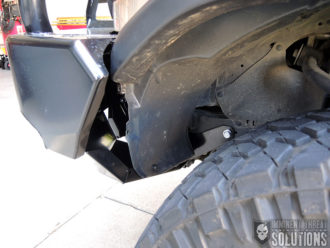
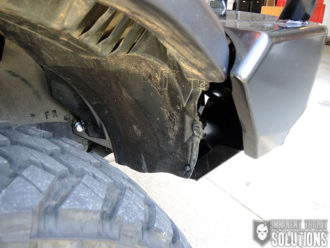
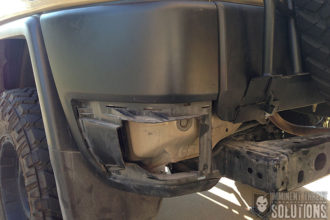
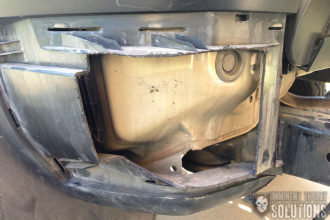
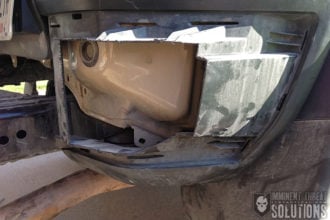
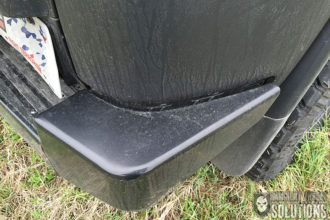
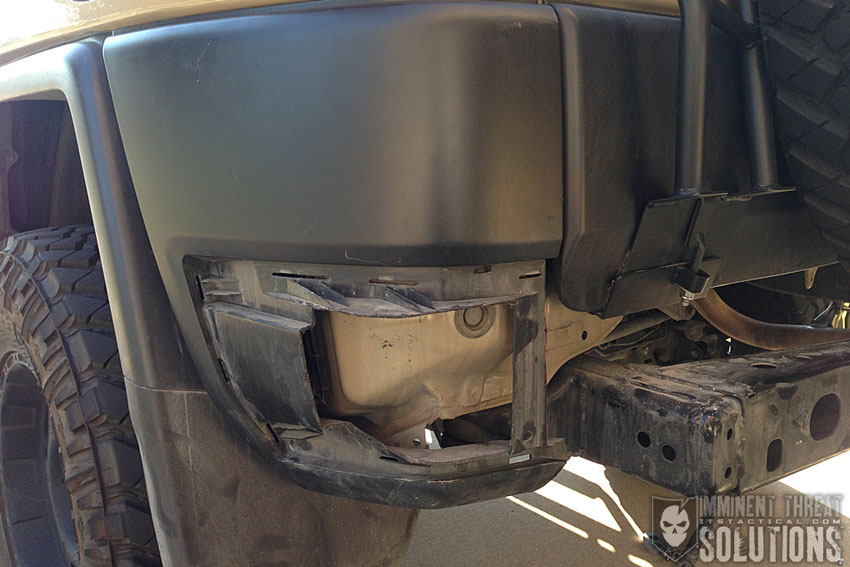
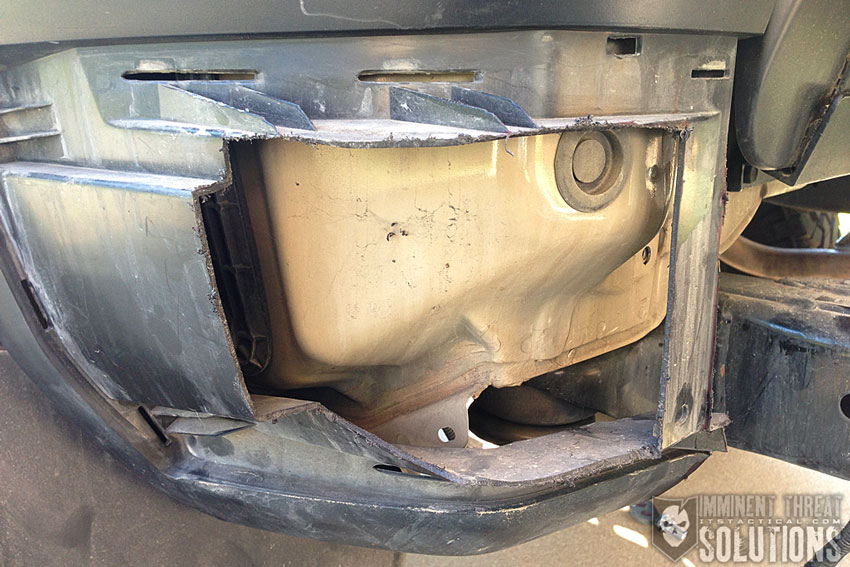
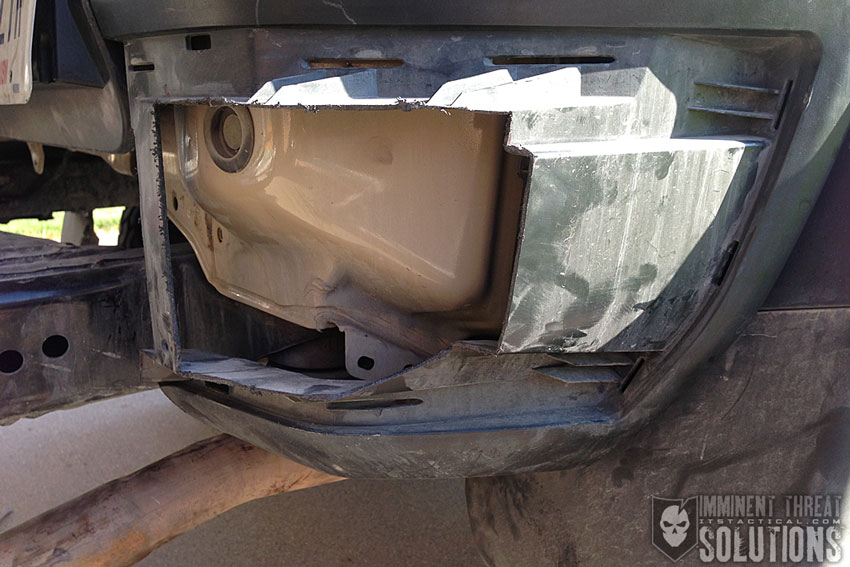
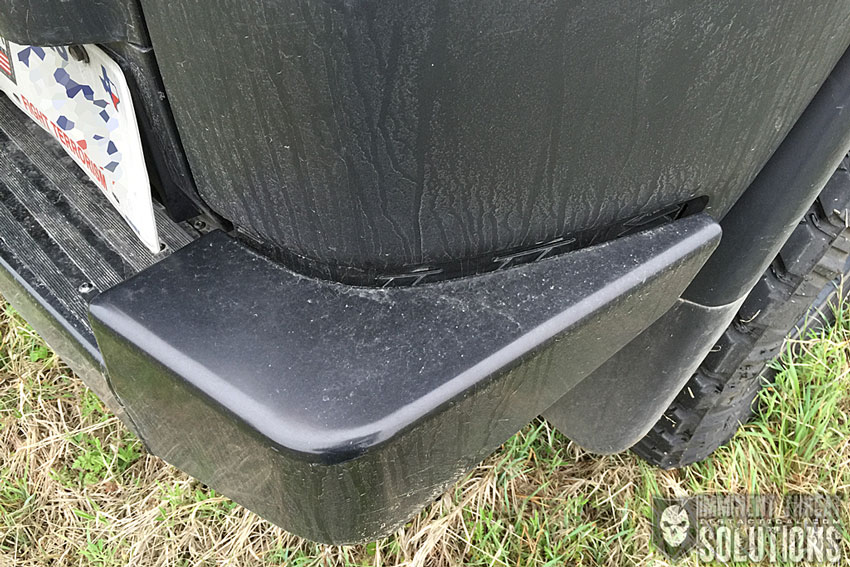
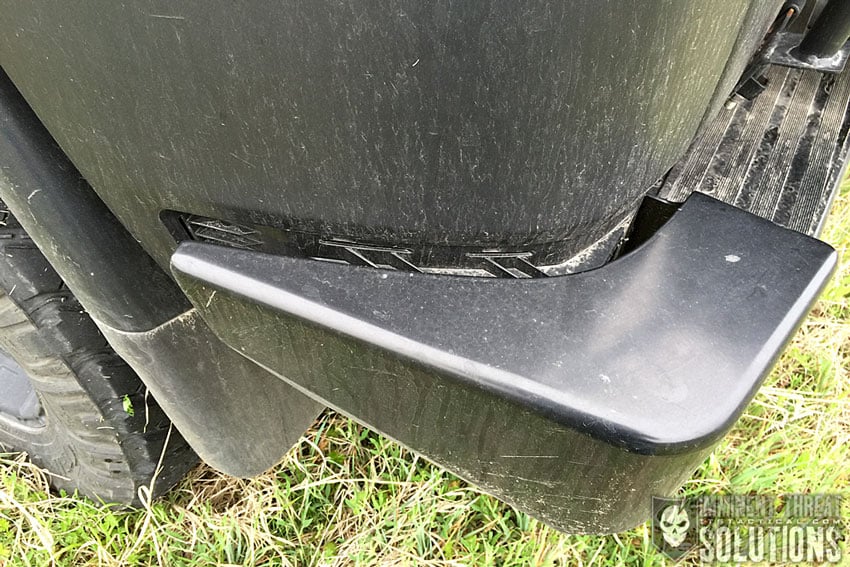
The next few items are supplementary and not part of the bumper itself, but I’d highly recommend them. These are the stone tray and wing under panels included in the optional “fit kit.” I will say that the wings are mud holders, but the reservoir on the passenger side of the vehicle will be partially exposed without the wing to cover it up. The stone tray is pretty self explanatory in terms of fit, but I read on a forum that someone had an alignment issue, so you might want to check the fit before you drill those last four holes in the step above. I’ll mention here too that the FJ Cruiser Forms have a wealth of information and if you have trouble during any part of this, chances are someone else did too and posted about it there.

To fit the wing under panels, I’m just going to refer you to the directions since your mileage may vary here based on your year model. Let’s just say there’s a lot of “fitting” required at this step and you’ll see a few photos here on how mine turned out. This part requires holes to be drilled and the instructions here a bit hard to follow.


Something I didn’t think about until quite awhile after the front bumper was installed is that I wish it had a shackle mount for recovery on either side of the winch. This would be great for increasing the mechanical advantage during self recovery. There’s are aftermarket shackle mounts like these available that can be added on though, it would have just been nice to have already had them on the bumper.
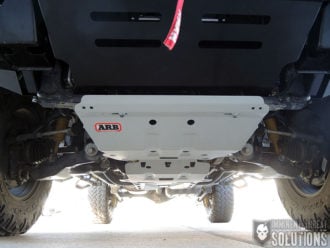
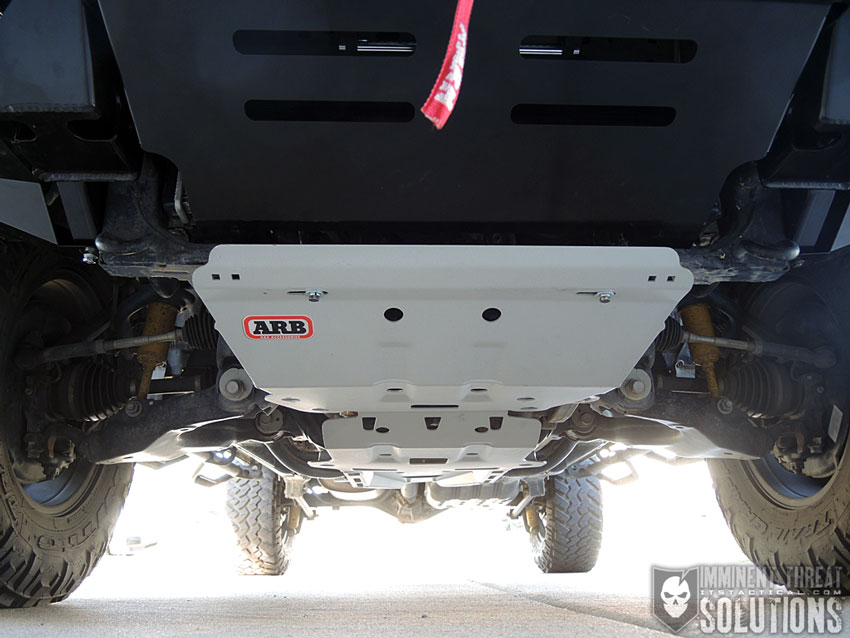
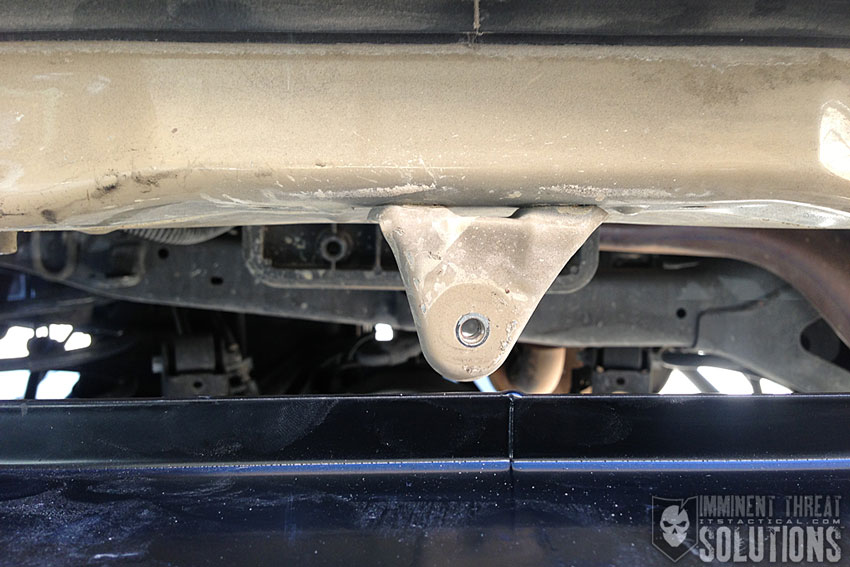
Skid Plate System
Another optional package for the FJ is the Skid Plate System, which is comprised of folded and laser cut 3mm panels to protect underbody components like the steering, engine oil panel, transmission and transfer case. Installation went relatively easy once all the hardware was sourced. I found some pieces to be missing and had to improvise a bit with hardware I had lying around.
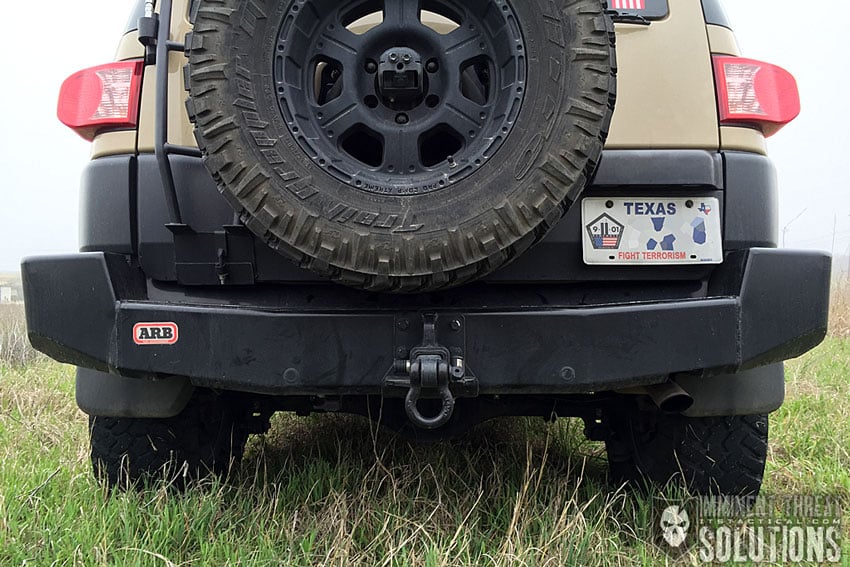
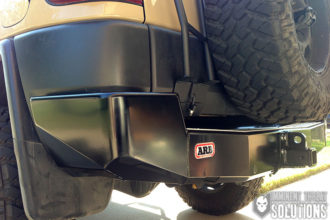
ARB Rear Bumper Installation
I saved the rear bumper for last because now that you’ve seen some areas where the installation instructions are deficient. I don’t have good news for you, it’s even worse on the rear bumper. Specifically when you have to cut up your old bumper. Yes, you read that right, there’s no way to salvage your old bumper or sell it later unless someone wants to buy a cut up bumper. This was something I never knew about the ARB Rear Bumper and at least now you know ahead of time if you don’t already own one.
The first step on the list of instructions states that “to fit the rear bar, the plastic bumper must be cut.” I wish I would have read that on ARB’s website ahead of time. To their credit though, they do have the instructions for installation available as a download, so had I of read those first I would have known. I do feel that this message needs to be on the product page as well though.
One more note here before we get started is that if you have a factory towing package, it won’t work with the ARB rear bumper and will have to be removed. However, ARB makes an optional rear receiver hitch that can be added to replace it. This is different than the recovery hook that comes with the bumper.
Tools Required
As mentioned with the front bumper install, organizing everything ahead of time is important. The bolt identification issue from the front bumper is a little better here, as there’s less hardware necessary to install the rear bumper. The tools mentioned that are necessary are a basic tool kit, jigsaw, hacksaw, 17mm socket, allen wrenches and an air hacksaw.
I don’t think the air hacksaw is required and I didn’t use one, however, it would have probably made the cutting easier, so don’t discount it. Just know it can be done without one.
The stock rear bumper removal is pretty well illustrated in the instructions and I won’t go over much of this. The big deal here is once the stock bumper is removed, you now have to trim quite a bit off of it. My advice here is to download the online instructions, enlarge the photos as much as possible and print them out on a color printer. The black and white instructions that come with this are very hard to see and there’s a lot of measuring and a lot of marking before cutting.
Essentially what you’re doing is saving the left and right pieces of the factory bumper, but trimming off pieces that interfere with the fit of the ARB rear bumper. It’s complicated, just like your relationship. Grab a snack too, because it’s going to take you awhile.

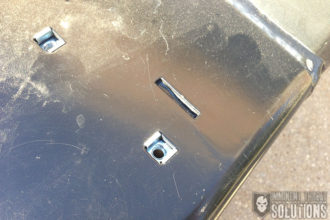
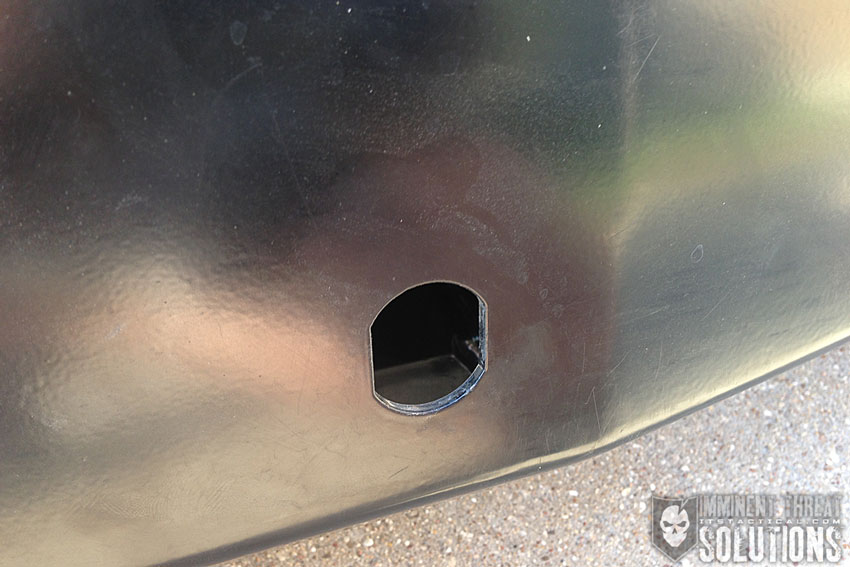
Once the bumper has been cut, refit each corner back onto the vehicle by snapping the clips back in and replacing the screw underneath. At this point you’ll need to release the exhaust from its rubber mount by pulling the mount towards the rear of the vehicle and pushing the exhaust the opposite way. This is so you can access some bolt holes.

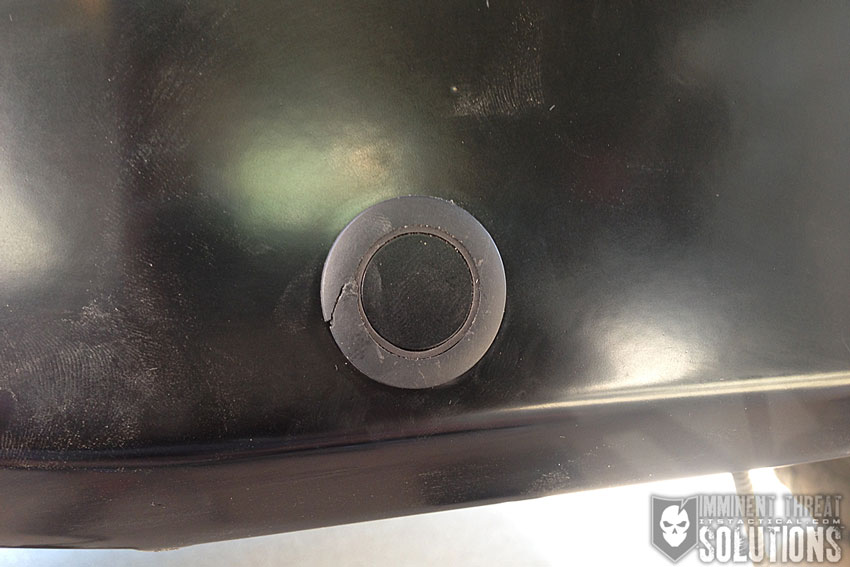
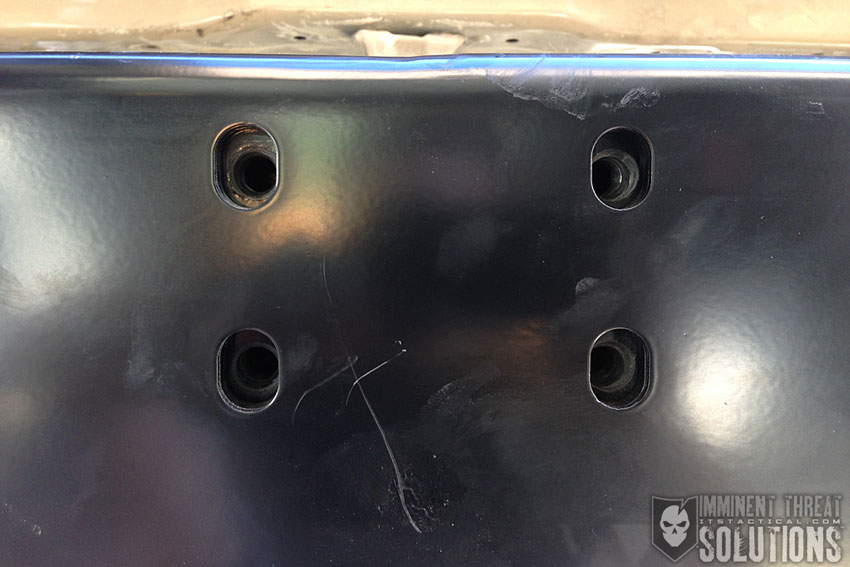
There’s a tab that also has to be bent down with a rubber mallet, but be careful here. If it’s not budging, try a hammer or sledge. A few cage nuts need to be added to the outside 6 holes, three on each side. Parking sensors are now fitted as well and you should be extremely careful here, I snapped an outer ring on one of my parking sensors trying to force it in, but luckily it still fit.

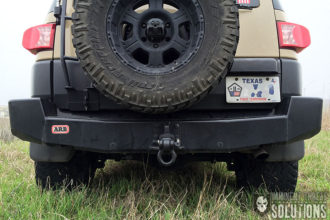
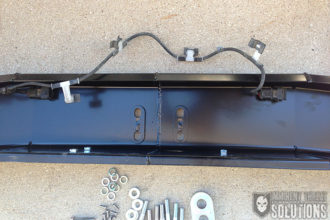
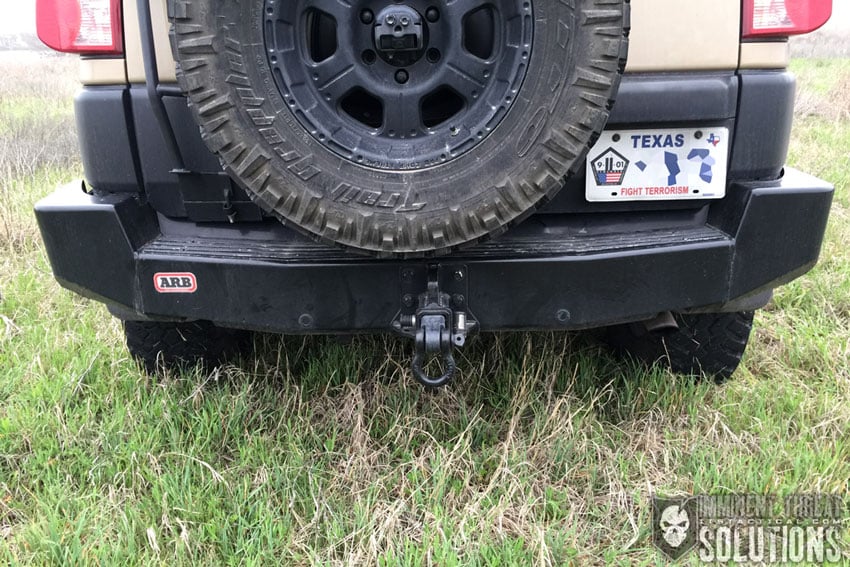
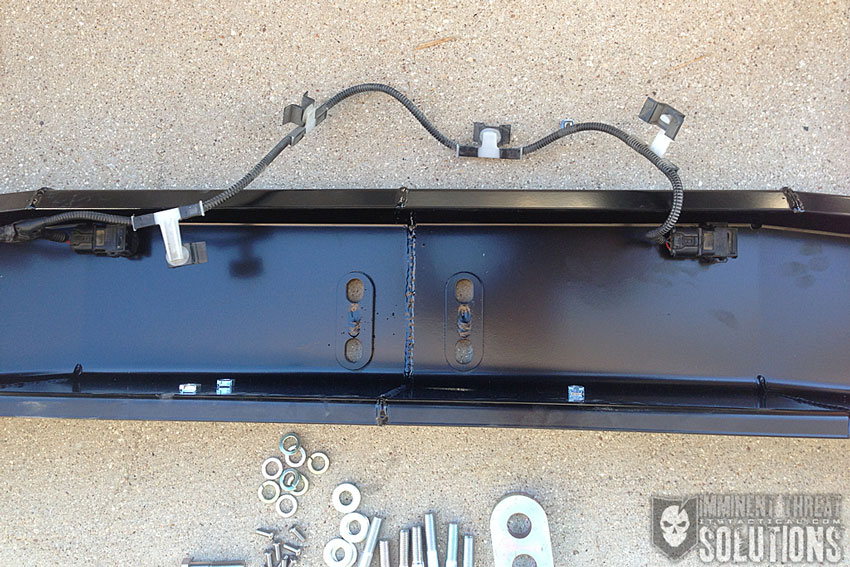
The bumper itself is now fitted and lightly secured with spacers, bolts and washers. There’s a recovery hook attachment that comes with the bumper or you can optionally add the rear receiver hitch that ARB makes. Whichever you choose to install, you’ll see the hitch installed on my photos, go ahead and affix it with bolts, just don’t tighten them down yet.
Check the alignment here, especially how it fits on each side of your vehicle. Despite shifting it around quite a bit, there’s still unequal gaps on the fit of my bumper and I’m not sure why. Once you align the bumper, torque the bolts down to the settings noted in the instructions.
Lastly, there’s a few more cage nuts to install on the top of the bumper before installing the cover trim and aluminum top. I painted my aluminum top and button head cap screws black before installing them. Don’t forget to plug back in your parking sensors and refit the exhaust mount.


Notes
In all, I’m very impressed with the ARB FJ Cruiser Bumpers, as well as the Skid Plates. Everything is extremely well made and I wouldn’t hesitate to recommend these for your FJ, as long as you know these issues I’ve had along the way. I hope these are things that ARB will address in the future and I’m optimistic that they will.
Primarily, the instructions need an overhaul. More description, better photos and maybe some online videos showing the more difficult steps of installation. In all I think there were about 20 hours of labor between the two bumpers and the skid plates. Now that I’ve done it though, I think that time would at least be cut in half. I also feel a future installer’s time could be cut in half with better instructions too. I will mention though that ARB states in their instructions for both bumpers that “it is recommended that this product is only installed by trained personnel,” but I’m not quite sure what kind of training they mean.
A few things I really love about the ARB bumpers are how solid they are. I don’t hear any road noise from the bumpers themselves and haven’t had any issues over any terrain I’ve covered over the past year. I did go through and recheck everything I could with a torque wrench after about a month of driving and everything stayed pretty tight. I really like the hi-lift jack points that are built into both the front and rear bumpers, as well as what a stable standing surface the rear bumper is. It really helps me reach things on my roof rack, like my gas tanks.
The powder coating has held up very well on the bumpers so far and there’s only one or two spots I need to go back and hit with some paint from road chips, but considering that’s all that’s happened over the last year from being parked outside in the elements, I’d call that a win for ARB’s coatings.
Thanks to ARB for all their help in making this evaluation possible and please leave any questions you might have in the comments and I’ll do my best to address them.

Discussion