- DIY AR-15 Build: Upper Receiver Assembly Introduction
- DIY AR-15 Build: Ejection Port Cover and Forward Assist Installation
- DIY AR-15 Build: Barrel and Free-Float Rail System Installation
- DIY AR-15 Build: Front Sight Base Installation
- DIY AR-15 Build: Muzzle Device Installation
- DIY AR-15 Build – Bolt Carrier Group Installation
- DIY AR-15 Build – Welding and Checking the Headspace
- DIY AR-15 Build: Lubrication, Assembly and Firing
Today we’re continuing our DIY AR-15 Build with the first step in assembling your Upper Receiver, installing the Ejection Port Cover and Forward Assist.
We’ve combined these two assemblies, as they’re fairly simple, yet still take some attention to detail to ensure you get them in installed correctly.
Particularly the Ejection Port Spring and what direction to install the Forward Assist Roll Pin. We won’t be building the Forward Assist from the ground up and recommend that you buy an already assembled Forward Assist. It’s not difficult to assemble one, but you’re better off purchasing one pre-assembled.
As mentioned in our intro article on the upper assembly, we’re starting with a stripped Upper Receiver to highlight each and every step.
Ejection Port Cover
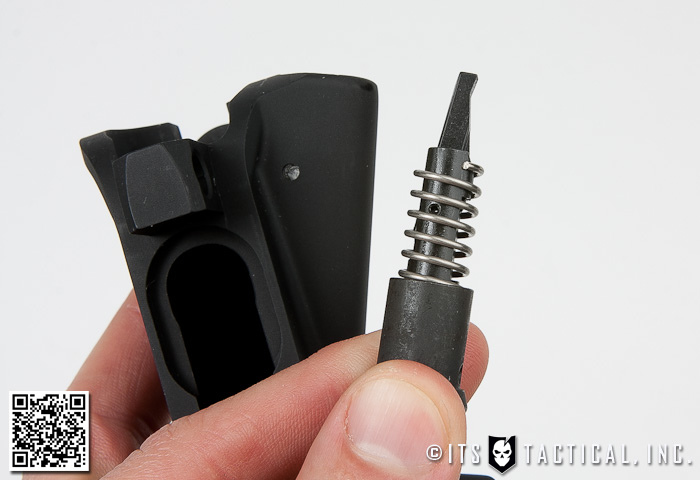
Getting the Ejection Port Cover installed can be tricky, so pay particular attention in the photos, instructions and video below to ensure the spring is in the correct position on assembly. The cover is one of the worst designed parts to assemble, the reason is that it has to be installed when the barrel/rail system is removed.
What’s bad about this design is that if you ever have a spring break or the door fail you’ll have to strip down your AR to fix it. There is a way to fix it in reverse and not totally undoable, but it’s definitely a pain. What makes it so is the small c-clip that’s installed on the pin. To operate on it with the barrel installed, you’d need to remove and replace the c-clip in a small working space.


You’ll have a better idea of this when you see the installation below.
Forward Assist
The forward assist is fairly self-explanitory and was initially added into the AR-15 to combat the issues that were eventually fixed in the design, yet it remains integrated on may Upper Receivers.
It’s purpose is to help ride the bolt into full lockup on the chambered round if fouling or other trouble exists. It’s never a good idea to chamber a round that won’t chamber on its own by depressing the bolt release, but there are times when you might not want the noise of the bolt release chambering a round.
This “silent loading” is where you ride the charging handle closed and hit the forward assist to close the bolt the rest of the way. This isn’t something that’s typically an issue, because if you’re waiting to load until you’re close enough to danger for the sound to be heard; it’s too late. That is if you’re using your AR-15 for defensive purposes.
The forward assist can also be used in an immediate action drill to clear a stoppage (more on that in future articles). Pay particular attention below to the orientation of the Upper Receiver when driving in the Forward Assist Roll Pin.
Parts Needed
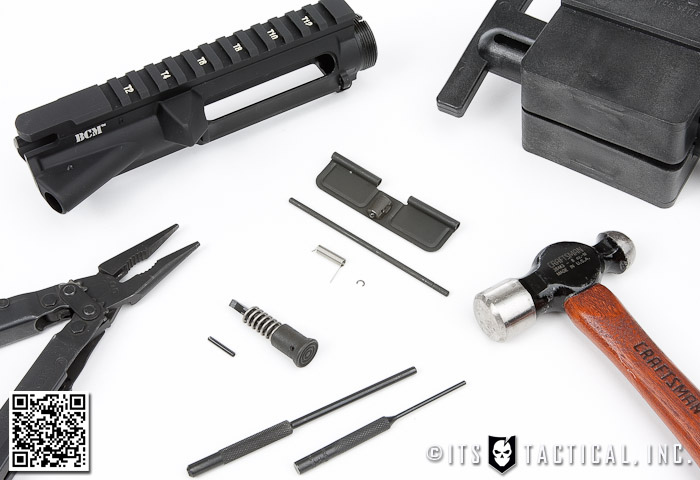
- Upper Receiver
- Ejection Port Cover Assembly
- Ejection Port Cover
- Ejection Port Cover Spring
- Ejection Port Cover Pin
- Ejection Hinge Pin Snap Ring (C-Clip)
- BCM Forward Assist Assembly
- Forward Assist
- Forward Assist Spring
- Roll Pin
Tools Needed
- Bench Vise
- AR-15 Vise Block
- Padded Vise Jaws (optional vs. upper action block for these steps)
- Brownells Upper Receiver Action Block
- Ball Peen Hammer (4 oz.)
- #3 Roll Pin Punch and #3 Roll Pin Holder
- Multi-Tool or Needle Nose Pliers
Assembly Instructions
- Ejection Port Cover
- Place Upper Receiver on its side with the Ejection Port facing up.
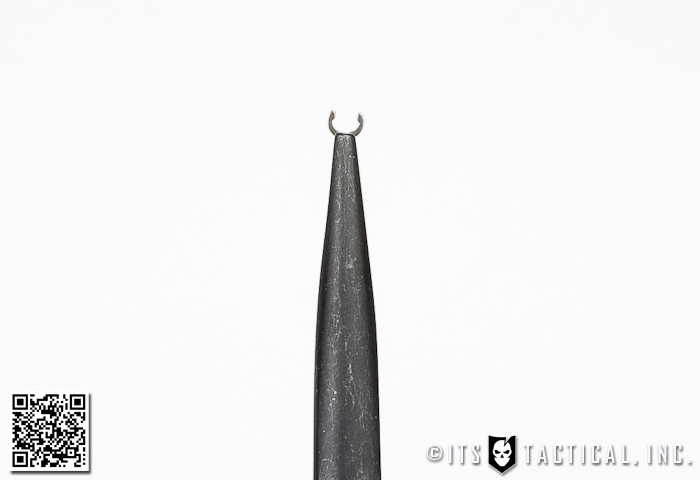
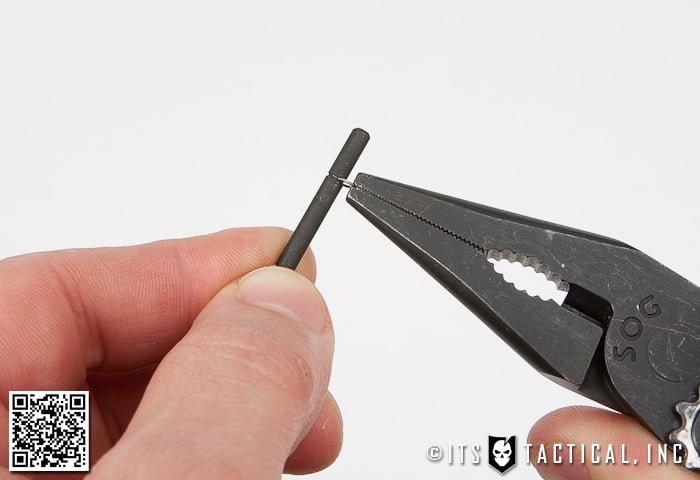
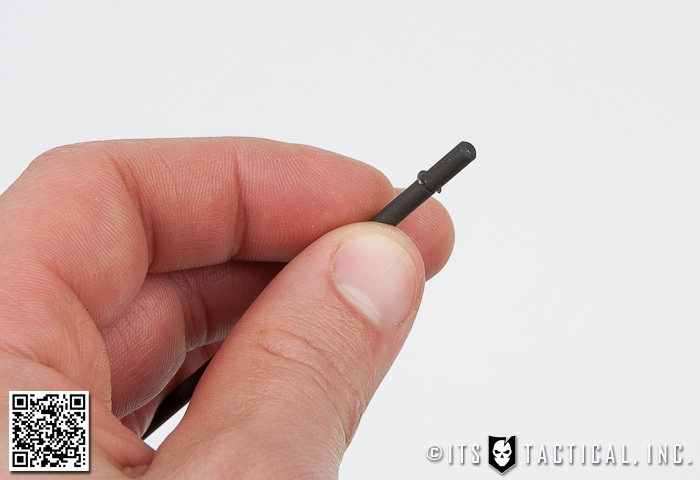
- Using the needle nose pliers, place the snap ring onto cut in the hinge pin.
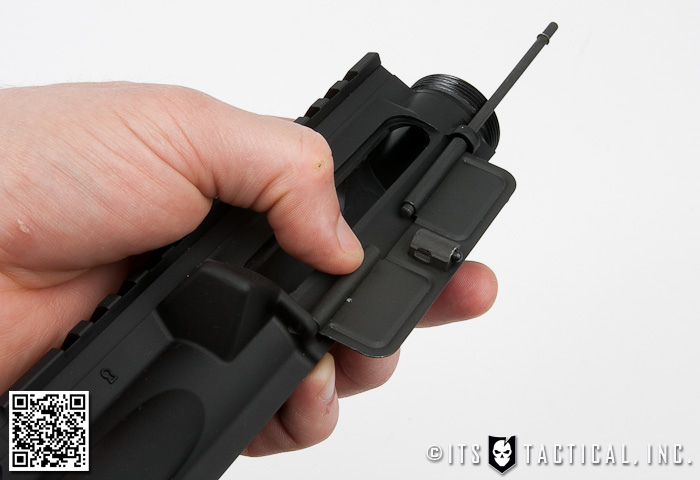
- After attaching the snap ring, install the opposite end of the hinge pin into the Upper Receiver.
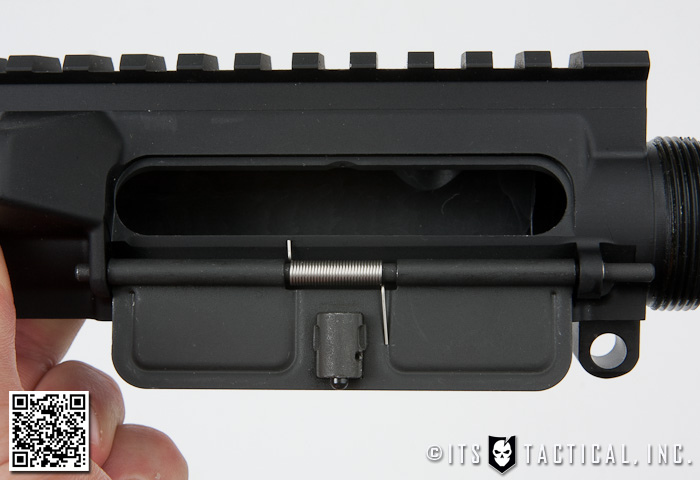
- Place the Ejection Port Cover in place and slide the hinge pin through just until it appears in the gap where the Ejection Port Cover Spring will be installed.
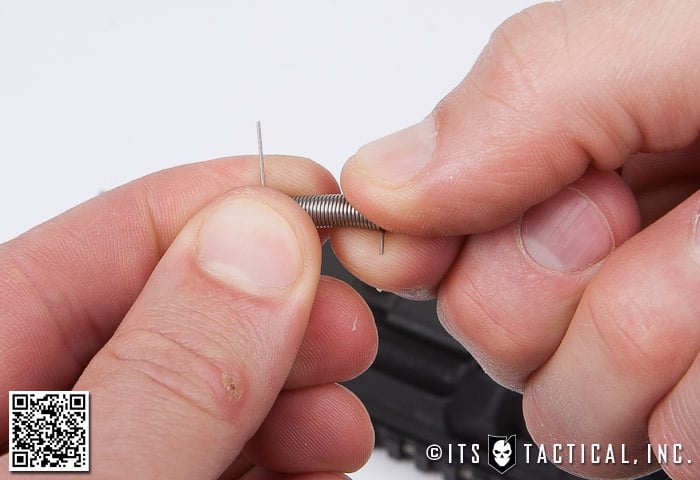
- Twist the spring 180 degrees so that the spring legs provide the proper tension on the upper receiver and the Ejection Port Cover.
- Complete the installation by sliding the remaining hinge pin the rest of the way through.
- Test the function by closing the cover and the press it open from inside the upper receiver. It should flip open smartly under the tension provided by the spring.
- Forward Assist
- Place the Upper Receiver into the Upper Receiver Vise Block.
- Install the insert and place into the vise upside down (looking down on the underside of the upper).
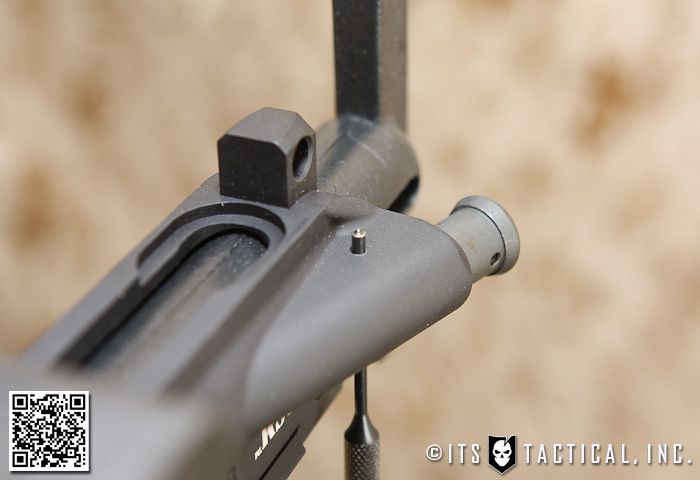
- Insert the forward assist assembly into the forward assist guide hole in the upper receiver.
- *You want the claw shape of the pawl to be facing towards the interior*
- Push the Forward Assist in until you can insert the #3 Roll Pin Punch from the underside to hold it in place.
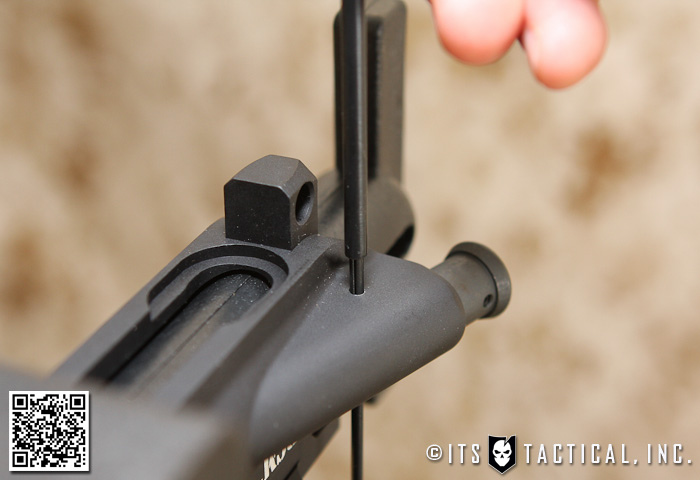
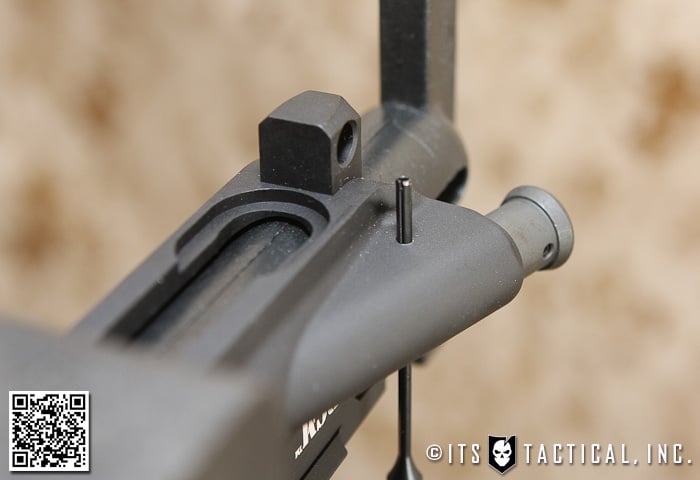
- Start the roll pin with the #3 Roll Pin Punch, driving it from the top (actually the underside of the upper).
- Your #3 Roll Pin Punch will fall out as the roll pin is driven in and is used to complete the driving of the roll pin (ensure it’s flush).
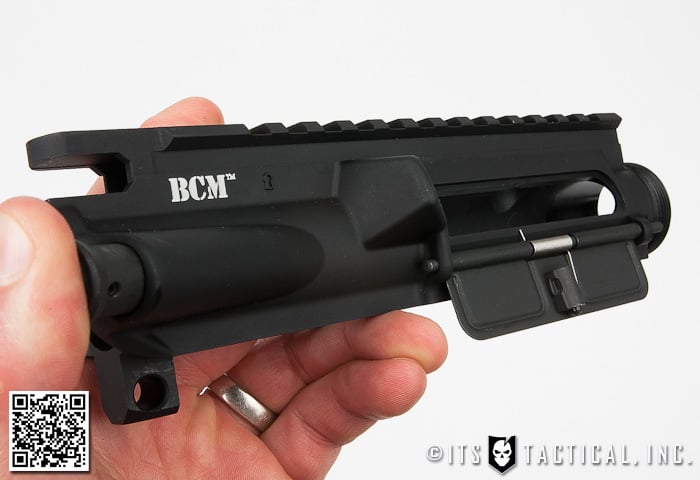
- Test the Forward Assist by depressing it to ensure it spring back into position.

Join us back here soon for our 2nd installment in the DIY AR-15 Build (Upper Receiver) where we’ll be assembling the Barrel and Rail before moving on to the Front Sight Base!