- DIY AR-15 Build: Introduction, Parts and Tools Required
- DIY AR-15 Build: Magazine Catch Installation
- DIY AR-15 Build: Bolt Catch Installation
- DIY AR-15 Build: Pivot Pin Installation
- DIY AR-15 Build: Trigger Group Installation
- DIY AR-15 Build: Safety Selector and Pistol Grip Installation
- DIY AR-15 Build: Trigger Guard Installation
- DIY AR-15 Build: Buttstock Installation
Today in part six of our DIY AR-15 Build you’ll learn how to install an Ambidextrous Safety Selector and Pistol Grip in your Lower Receiver.
Ambi Safeties are definitely a personal preference and not for everyone. We’re of the opinion that if having to transition to an off-handed shooting position, the ambi safety is a definite benefit.
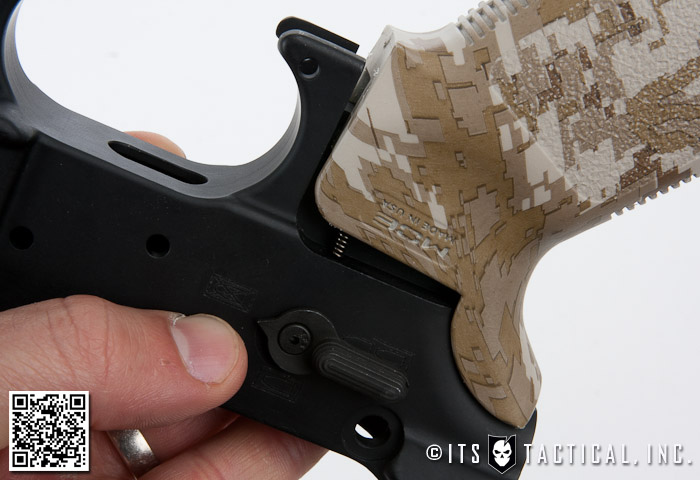
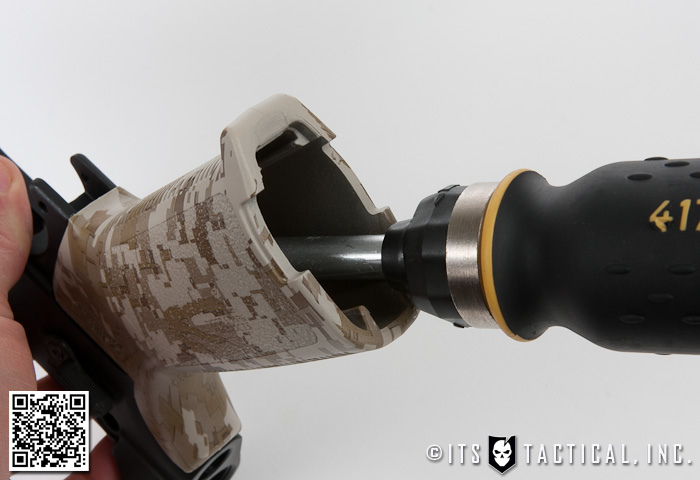
The Pistol Grip we’re using is the Magpul MOE Pistol Grip that’s been coated in Desert Digital by our friends at CRC Hydrographics. They’ve also introduced a brand new rubberized clear coating we’ll be talking about as well.
Continue reading for our step-by-step instructions for installing the Safety Selector and Pistol Grip with detailed photos and video.
Safety Selector and Pistol Grip Installation
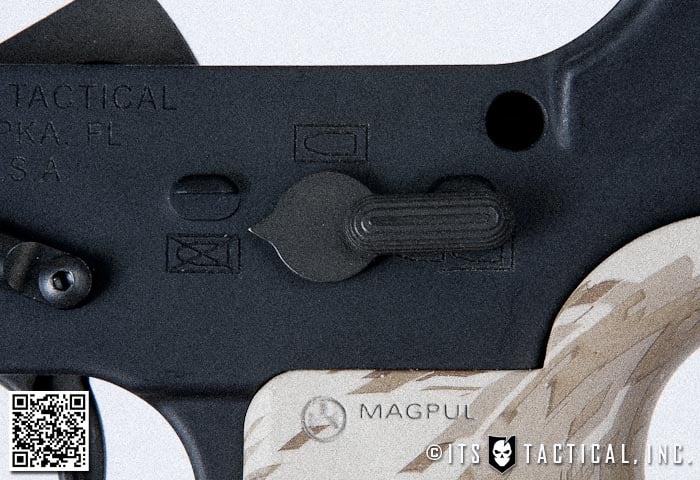
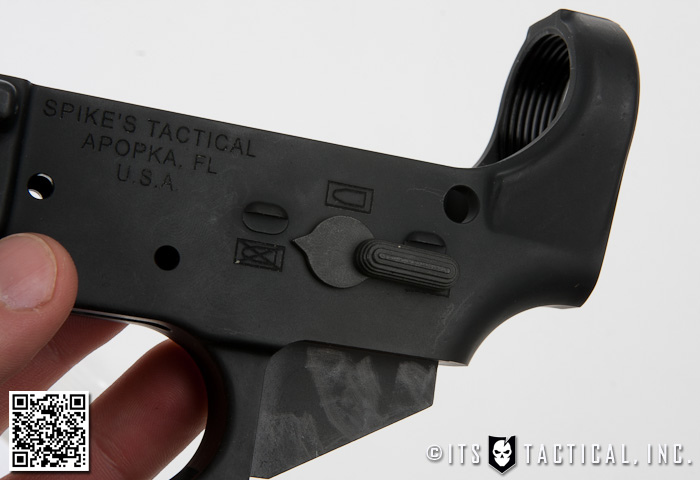
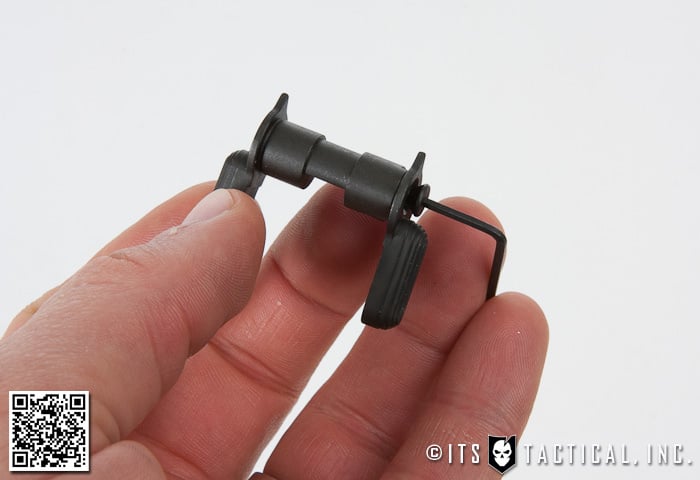
The Stag Arms Ambi Safety Selector is a quality selector that will add some versatility to your safety manipulation, especially if having to transition to your off hand. The downside is being accustomed to having the ambi selector and then in the situation where you’re not shooting your own firearm. This goes with any accessory though on the AR platform.

Something to note on the Safety Selector spring is that it looks very similar to the two takedown pin springs included in a lower parts kit. The easy way to tell the difference is to play the “one of these things is not like the other” game, but the Safety Selector Spring is stiffer than the other two and definitely looks different.
One reason we’ve used the Magpul MOE Pistol Grip for this build is due to its versatility of being able to house a spare bolt and firing pin in the storage core. This is also great if you have more than one AR and they each have Magpul Pistol Grips capable of holding the core, as you can have a single spare firing pin and bolt and switch the core to the gun you’re running.
CRC Hydrographics
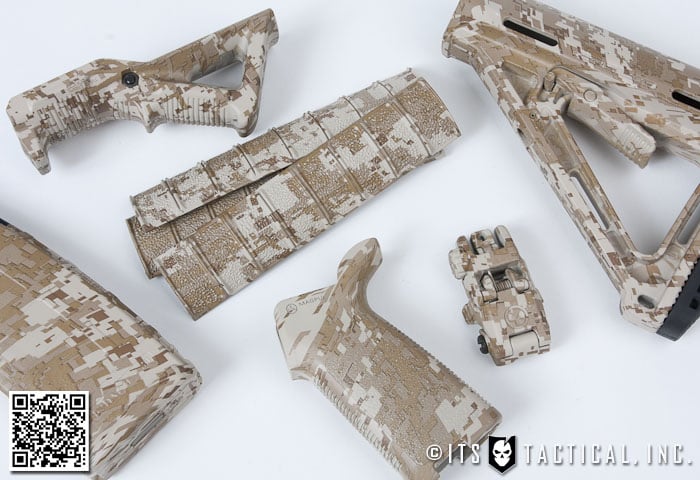
We were interested in getting all our Magpul accessories coated while assembling this build, as we’ve had an interest in the durability of water transfer imaging and how it holds up compared to Krylon. We reached out to CRC Hydrographics and are very fortunate we chose them for our needs, as they’ve just released an additional service they call “Grip-Tec.”
Grip-Tec ads an additional flat protective coating on top of the water transfer, which is nicely rubberized! It’s hard to show photos or video of the Grip-Tec at work, but from what we can say about our feedback so far is awesome! It really seems like a fantastic addition to their dipped patterns. Some intial feedback they’ve gotten so far is that it works well both combined with gloves and without.
It’s also important to note that the Grip-Tec is for use on firearm contact points such as stocks, grips, rail covers and handguards, etc. CRC notes that it’s also been popular on bolt action rifle stocks. We’re thoroughly impressed with the quality of the water transfer imaging and are looking forward to getting this build completed and putting it to the test.
Parts Needed:
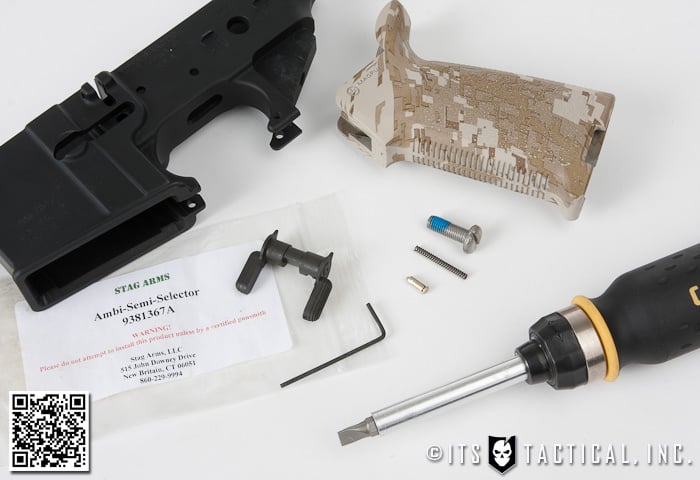
- Safety Selector Spring
- Safety Selector Detent
- Stag Arms Ambi Safety Selector (or standard Safety Selector from LPK)
- Magpul MOE Pistol Grip (or standard Pistol Grip from LPK)
- Pistol Grip Screw
Tools Needed:
- Bench Vise
- Lower Receiver Vise Block
- Large Flat Head Screwdriver (at least 3 1/2″ shaft)
Assembly Instructions
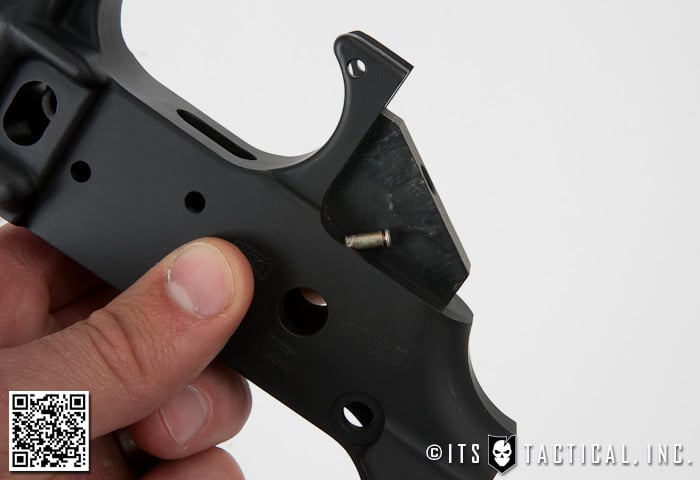
- Insert the port side of the Ambi Safety Selector into the Lower Receiver, pointing to the safe position.
- Insert the Lower Receiver Upside down onto the Vise Block so you’re staring at the threaded hole where the pistol grip will secure to. (Make sure your hammer is set in the rear position)
- Affix the opposite side of the Ambi Safety Selector and using the included hex wrench, tighten the screw. Witness marks help too.
- Drop the Safety Selector Detent into the small hole just port of the Pistol Grip Screw hole.
- Take the Pistol Grip, In this case we’re using a Magpul MOE Pistol Grip, and insert the Safety Selector Spring into the hole on the top of the Pistol Grip (pointed side down).
- Hold the spring with your finger as you work the Pistol Grip into proper position.
- Once in place screw in the Grip Screw into the bottom of the Pistol Grip.
- Perform a function check at this point by placing the Safety Selector in the safe position and cock the hammer back. Leave your thumb on it so that it doesn’t accidentally get thrown forward, as this can damage your lower in some cases.
- Squeeze the trigger, ensuring that the hammer doesn’t release and the safety is doing it’s job.
- Keep your thumb on the hammer and rotate the Safety Selector to “fire.” When you now squeeze the trigger you should feel the hammer release. Guide it forward while keeping the trigger depressed.
- Move the hammer to the rear and hear it engage the disconnector. Release the trigger now while keeping your thumb on the Hammer. You’ll see the hammer move forward slightly while it disengages from the disconnector and engages the trigger sear.

Join us back here soon for our 7th installment in the DIY AR-15 Build where we’ll be assembling the Trigger Guard!