


How to Keep Your AR Running, Part 3: Limited Technical Inspection
How to Keep Your AR Running, Part 3: Limited Technical Inspection
- How To Keep Your AR Running, Part 1: AR History
- How to Keep Your AR Running, Part 2: Nomenclature and Cycle of Operation
- How to Keep Your AR Running, Part 3: Limited Technical Inspection
In our last article on keeping your AR running we went over nomenclature, a simple field strip and the cycle of operations. Prior to that was a history lesson on the AR platform in the first part of this series. We’d encourage everyone to read the first two articles before diving into this one, as these are building blocks.
Today we’ll be conducting an LTI or Limited Technical Inspection and show you how to assess each component for damage and replacement. Knowing how to properly inspect your AR is paramount in ensuring the platform functions correctly each time you pull the trigger.
Some will argue that the AR platform is nowhere near as maintenance free and reliable as the AK Platform; there’s no doubt that the AK platform is an extremely reliable platform, but we’re here to tell you that by following along with the information we’re presenting in this series, you can achieve maximum performance out of one of the most popular weapons platforms out there today.
There are thousands of AR owners out there and the platform isn’t going away any time soon, so let’s get right into it!
Limited Technical Inspection
The goal of the LTI is fairly self-explanatory; it’s essentially “limited” because most everyone out there isn’t a trained armorer that can take an AR through a full inspection, but the LTI does a pretty good job. In our opinion it will expose most, if not all of the issues your AR may be having and can even prevent those that haven’t happened yet.
There’s a lot to check on your weapon, even before field stripping it. In an attempt to help better illustrate the LTI we’ve not only listed the steps below, but created a YouTube video embedded below the step-by-step instructions.
- ENSURE A SAFE AND CLEAR WEAPON!!
- Check Flash Suppressor for alignment/tightness and that the peel washer is in good shape (no hairline cracks).
- Check that the gas tube roll pin is still in place and flush. The gas tube should not be in contact with your rail or handguards.
- Check that front sight taper pins are flush.
- Check tightness on any screws that your rail system and accessories might have. Use witness marks!
- Take a look at your front and rear sights, whether fixed or BUIS (Back Up Iron Sights) and ensure all detents are working properly. Also check for BUIS tightness.
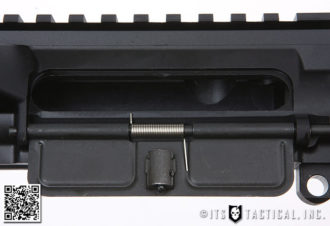
- Check that the “C” clip is installed on the ejection port cover pin and that the pin isn’t going anywhere.
- Check that the ejection port cover securely closes and keep it closed.
- Pull the charging handle to the rear, ensuring that the ejection port cover pops open smartly. Instead of letting the charging handle go, allow it to go forward slowly and “feel” the close of the bolt carrier to receiver extension.
- At this time also check the ejection cover port spring legs and ensure they haven’t become damaged.
- As you’re working the charging handle further, note that it not only works, but that the action spring is providing enough tension to close the bolt into the barrel extension. We’ll be inspecting the charging handle in detail later after the field strip.
- Check that the forward assist is working and that the roll pin is in place and flush.
- Check for proper movement, unnecessary play and locking function of sliding buttstock.
- Check that the castle nut is properly staked, optimally in three places.
- If your stock has a top vent hole, ensure it’s clear of any obstructions to allow for proper air pressure and water release.
- Check that buttplate screws are tight.
- Manipulate safety selector and leave on safe, ensure correct operation and that the detent is catching it.
- Check that hammer and trigger pins are flush with the outer surface of the lower receiver.
- Check trigger guard roll pin is in place and flush.
- Work the magazine release to check tension, insert magazine and push/pull ensuring the magazine catch locks in. Depress the magazine release and ensure the magazine drops free.
- With magazine reinserted, pull back on charging handle ensuring that the bolt locks to the rear and push charging handle in. Depress the bolt catch and send it home. Additionally you can check this function without a magazine.
- Last step before the field strip is to check the pistol grip for tightness and any gaps. As you’re checking the tightness with a screwdriver, ensure the lock washer is there as well.
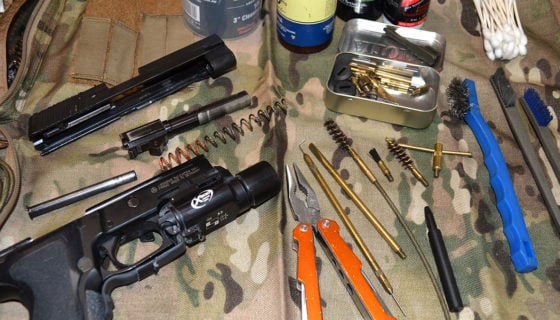
Field Strip Your Weapon at this Point
- Check front pivot pin and rear take down pin for proper function of springs/detents
- Move the safety selector to fire and with your finger in place, test the function of the hammer, trigger and disconnector (see video).
- Check buffer retainer and buffer spring for proper function and tension.
- An optional step before you strip the bolt carrier group is to test the gas rings by pulling the bolt forward and standing the BCG up on the bolt. It should not fall under the weight of the bolt carrier group. (see video)
- Visually inspect buffer and action spring for damage. We’ll get into more detail with action springs later.
- Visually inspect charging handle for damage, hairline fractures and that the latch roll pin is installed and spring is working when the latch is manipulated.
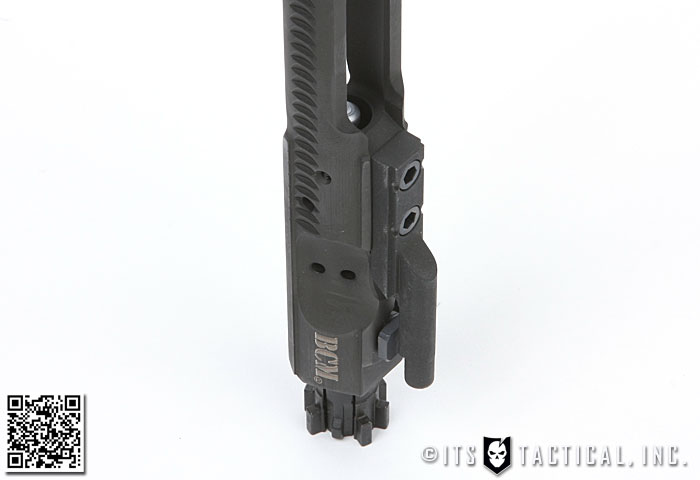
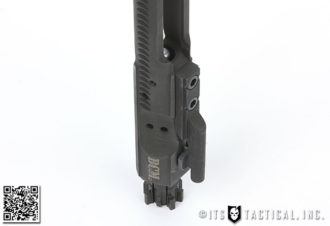
- Visually inspect bolt carrier for any damage and proper staking in carrier key bolts (see video)).
- Visually inspect firing pin for damage or bending.
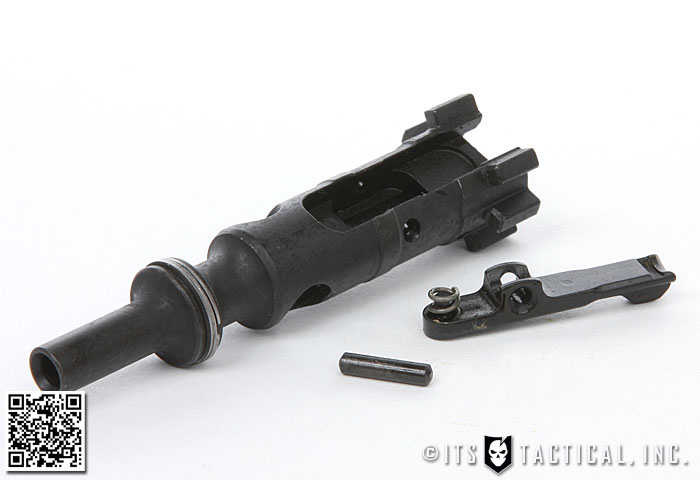
- Visually inspect bolt (especially lugs), extractor, extractor pin and cam pin for any hairline fractures or damage.
- *More on gas ring position and alignment below*
- Ensure ejector roll pin is in place as well as checking the ejector for proper function and tension.
- Check firing pin retaining pin for damage and proper tension.
- Grab extractor and drag your finger across the extractor spring feeling for a “bite” (you want this). More on proper extractor springs and inserts in the next article.
Reassembly and Functions Check
This completes the LTI for the most part and all that’s left is a functions check to ensure you’ve properly put the weapon back together properly and everything is working well.
Functions Check
After assembling the AR, re-ensure that the weapon is clear and safe. With the safety engaged, depress the trigger and the hammer should not fall. Rotate the selector to fire and depress the trigger and listen to the hammer fall. Keep the trigger depressed and rack the charging handle; slowly release the trigger and you’ll feel and hear the disconnector click.
Common occurrences when putting the weapon back together again are either improperly installing the firing pin retaining pin or completely forgetting the action spring and buffer. First off, the weapon won’t work without the firing pin retaining pin properly installed and you’ll notice that you forgot the the action spring and buffer as soon as you get into the functions check.
The firing pin issue is the reason you should always test-fire your weapon before depending on it in a real-world situation. To solve the issue that’s occurred from pulling back on the charging handle when there’s no action spring and buffer, simply hit the weapon on the flash suppressor and the bolt carrier should move forward again allowing you to put that action spring and buffer back in, dummy.
What Now?

First thing’s first. We’ll quickly cover the single most important step in keeping your AR running; Lubrication! We won’t spend too much time on it other than to say ditch the CLP and use SLiP 2000 EWL (Extreme Weapon’s Lubricant). You won’t go wrong, trust us!
The next thing is to take a look at the results of your LTI and with the steps outlined in our next article, come up with what needs to be replaced and what spare parts to carry on you to ensure reliability.
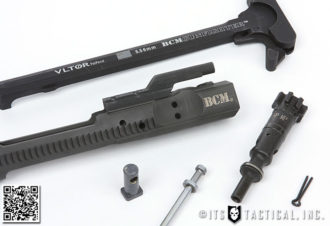
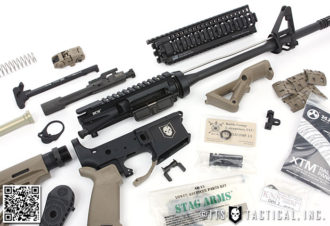
For now we’ll leave you with a teaser image of what’s to come on ITS. Running along with our how to keep your AR running series we’ll be introducing a step-by-step series on building a direct-impingement AR from the ground up. We’re super excited to be announcing this series and have already begun outline our ITS Tactical Build!


Discussion