


Knot of the Week: Japanese MK II Square Lashing
Knot of the Week: Japanese MK II Square Lashing

Today’s Knot of the Week builds on our first example of a Japanese Square Lashing, with the Japanese MK II.
While the Japanese are known for their intricate knot work on bamboo structures, we feel you’ll see the benefit in the time saved using these lashings. They’re truly faster than traditional lashings you may have learned in Boy Scouts.
The demonstration we’ve provided in our photos and video below show the Japanese MK II being tied with Paracord, but it’s always best to use natural fiber rope when working with timbers or spars.
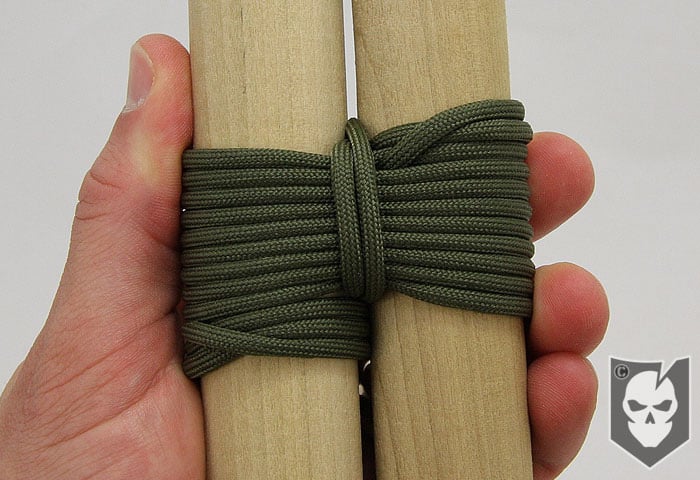
Japanese MK II Square Lashing » Lashings
As we’ve mentioned in previous articles on lashings, it’s always best to lash with natural fiber rope like Manilla. Japanese are also fond of using Hemp rope as well. This version of the Japanese Square Lashing is commonly known as the Japanese MK II (Mark 2). There are a few other versions of this lashing that we’ll be covering soon.
(Strength: 5/Secure: 4/Stability: 3/Difficulty: 2)
Please refer to our Knot of the Week introduction post for a description of what these ratings mean.
Uses:
- Binding two timber poles together
- Weight bearing joint in structure building
Tying Instructions:
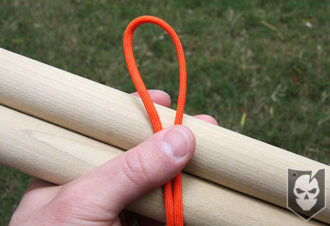
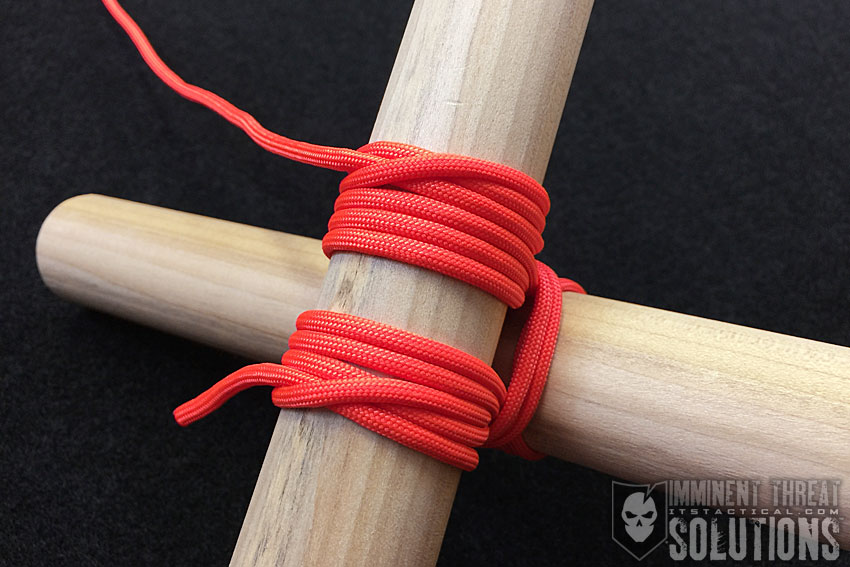
- Start by using a 6 ft. section of natural fiber rope that you’ve whipped the ends on (dental floss works great!).
- Double the strand and find the midpoint.
- Ensure your two spars have the topmost spar crossing horizontally over the bottom spar.
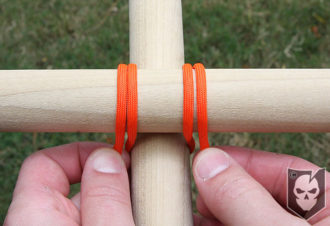
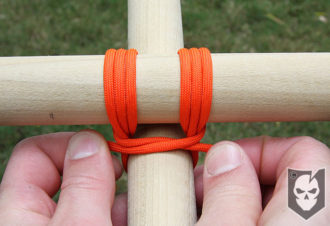
- Take the midpoint bight and loop it over the lower portion of the bottom-most vertical spar.
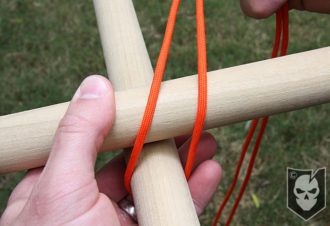
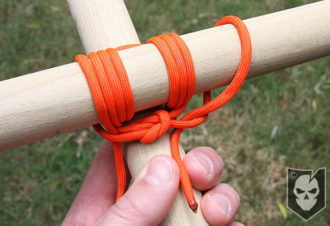
- Pull both strands up tightly over the horizontal spar and around the upper backside of the vertical spar, crossing in the rear (wrapping 1).
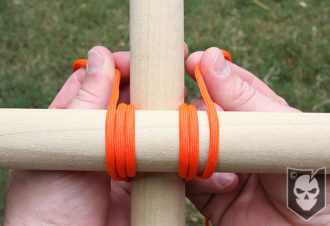
- Pull the strands back over the horizontal spar and around the lower backside of the vertical spar, crossing in the rear (wrapping 2).
- Pull both strands up tightly over the horizontal spar and around the upper backside of the vertical spar, crossing in the rear (wrapping 3).
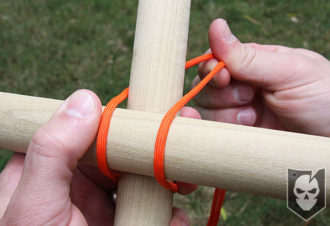
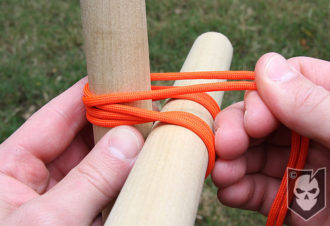
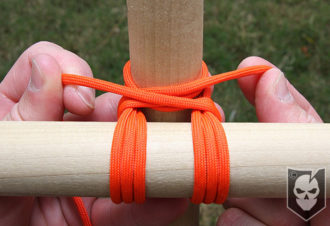
- Bring the strands to the point at which the two spars intersect each other and cross them to prepare for the frapping.
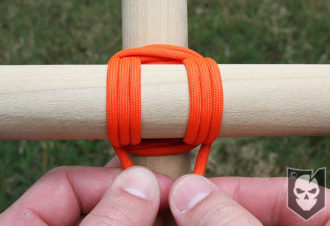
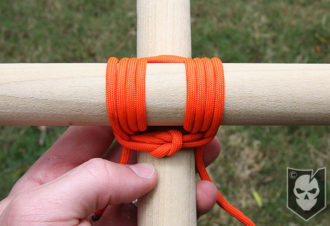
- After crossing the strands bring them both behind the horizontal spar and cross them on top of the lower vertical spar (frapping 1).
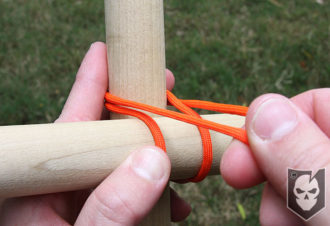
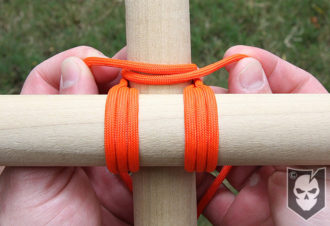
- Pull tightly and repeat on the upper intersection where you made your first cross to start the frapping (frapping 2).
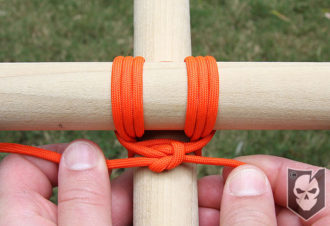
- Bring the strands down as you would if you were making a third frapping, but now simply tie a square knot to secure.
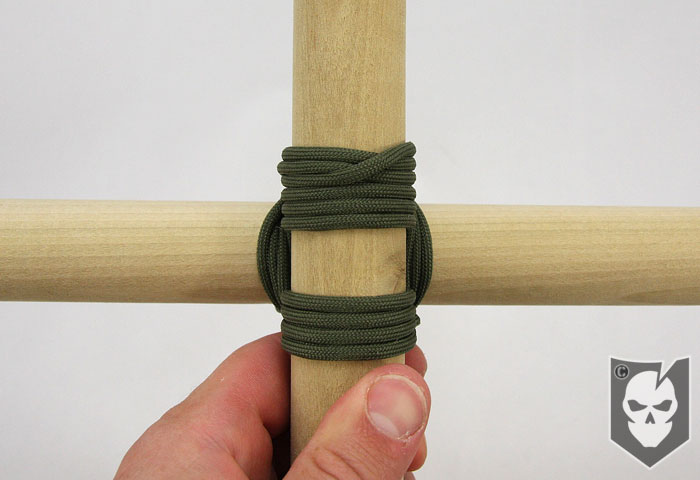
- Security hitches can be now placed by creating a single half hitch with each working end on the respective side of the horizontal spar (see photos).
Discussion