


Build a DIY Knot Tying Station to Practice Your Knots
Build a DIY Knot Tying Station to Practice Your Knots
Picking back up with our Knot of the Week series, today I’d like to show everyone how to build a Knot Tying Station to either practice your knots or race your friends.
This Knot Tying Station is modeled after one I saw at Boy Scout Summer Camp this year when I attended with my son as an adult volunteer. I’ve been involved in his troop for a few years now as an Assistant Scoutmaster and it’s been very rewarding to help teach the next generation what I know.
One of the events this year at camp was a knot tying race, where two competitions took place, one on the scouts side and one on the adult leader side. The objective was to tie the six Boy Scout knots in the fastest time. We utilized one of these Knot Tying Stations to compete on and I loved it so much I constructed one for our troop the next weekend.
Making notes on how I put one together, I thought it would be excellent to share with everyone at ITS, so let’s get into how to build your own!
DIY Knot Tying Station
First off, let me explain the six Boy Scout knots, as it will help you understand the premise behind the seven ropes shown on the station. The first two pieces of cordage on the far left, are used to tie the Square Knot. Working from left to right, the next four strands are for the four hitches; Taut-Line Hitch, Timber Hitch, Clove Hitch and Two Half Hitches. The far right strand is for the Bowline.
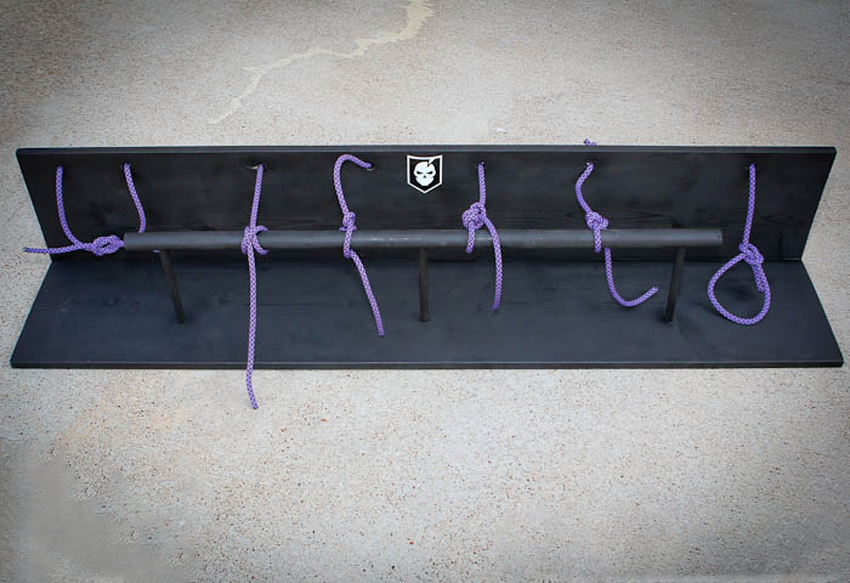
The hitching post is what truly makes this Knot Tying Station, as it’s always difficult to find something to hitch on to when practicing your knots. You can always use your fingers to tie around for some of these hitches, but what’s great about this station is that it’s all there for you.
At summer camp, the supposed camp record is 13 seconds, but I finding that hard to believe. I recorded the fastest adult time of 30:36 and there was a scout there that beat my time by a second. Now that I’ve constructed one of these for myself, I’ve been able to lower my time, but certainly not down to 13 seconds.
To highlight even more versatility from this station, it can also be used to tie the five BUD/s knots that are tied by Navy SEAL candidates in the Underwater Knot Tying Test. Those knots are slightly similar to the Boy Scout knots with a few changes. The Square Knot is still utilized, as are the Clove Hitch and Bowline. Added are the Becket’s Bend (Sheet Bend) and the Right Angle, which is essentially a Clove Hitch with an extra turn.
For SEAL candidates, these knots may seem simple, but let me tell you that with all the stress that’s added onto you during this evolution and the multiple times you’re heading down to the bottom of a 15 ft. pool on a breath hold, it can certainly be challenging. Not to mention that the instructor checking your knot for approval can take his sweet time, causing you to do the funky chicken while you patiently wait to be able to untie it and ascend.
As for the simplicity, these knots are chosen due to their use underwater to rig demo in beach clearing operations. The knots in the test are utilized on det cord to link sections together, tie off to a trunk line, or to tie on objects to be detonated. The primary mission of the UDTs (Underwater Demolition Teams) was to clear obstacles such as coral and jap scullys (horned scullys) so that amphibious landings were unhindered.
If you’re interested in more information on the BUD/s Underwater Knot Tying Test, we put together a video where I go through the whole test underwater, check it out here!
Creating Your Knot Tying Station
Now that you understand the functionality and purpose behind the Knot Tying Station, let’s get into how you can make your own. The video embedded below goes over the step-by-step instruction for creating your own and rather than put into words what the video does a great job explaining, I’ll refer you to this for starters.

Below, I’ll list the required materials and some notes on the cuts and measurements you’ll see described in the video. This should give you a good reference for what to gather and how to mark your cuts on assembly.
Materials
- 1″ x 12″ x 10′ pine board – have the hardware store cut it in half, making two 5′ long sections (Home Depot and Lowes both will cut this for you)
- 41″ long by 1 1/4″ or preferably 1 1/2″ diameter dowel rod (poplar) – These come in 6′ and 8′ lengths
- (3) 7 1/2″ long sections of 5/8″ dowel rod (poplar) – Purchased in 4′ section.
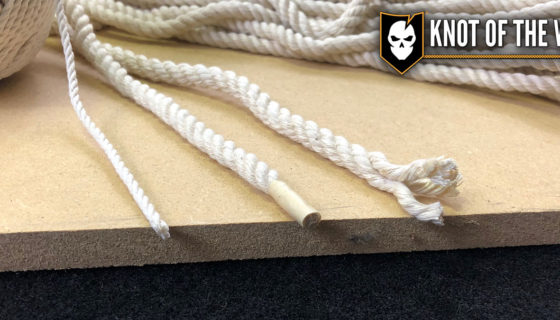
- (2) 23″ lengths of rope (no larger than 1/2″ in diameter)
- (5) 36″ lengths of rope (no larger than 1/2″ in diameter)
- Rope Cutting Gun (optional) – This will save you an immense amount of time on this and future projects, it both cuts and fuses synthetic rope simultaneously.
- Box of 1 5/8″ screws
- 5/8″ Speedbor Spade Bit
- 1/2″ drill bit (optional, can use 5/8 Speedbore Bit for cleaner holes)
- 7/64″ drill bit for pilot holes
- Countersink set (optional)
- Power Drill
- Hacksaw (to cut 5/8″ and 1 1/4″ – 1 1/2″ dowel rod)
- Wood Glue
- Sandpaper (optional – 180 and 220 grit)
- Measuring Tape
- Pencil
- Spray Paint or Stain (optional – either/or – used flat black spray paint and Maxim Canyon Brown Stain in video)
Measurements
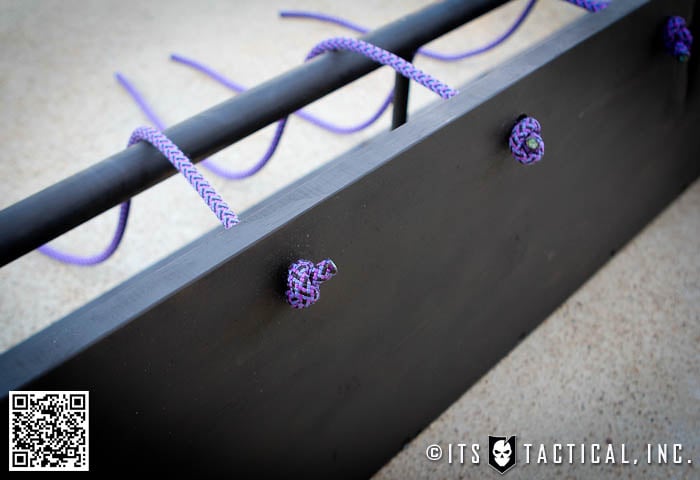
- Two 5′ lengths of pine are assembled with screws drilled with pilot holes and counter sunk at approx. 6″ intervals and a 1/4″ from the edge.
- Pilot holes for the 5/8″ dowel rod sections are drilled through the bottom at 12″, 30″ and 48″ approx. 4 1/2″ from front edge.
- From the top those holes are then routed out with the 5/8″ Speedbor Bit (don’t drill too far!)
- 5/8″ Speedbor holes are drilled in the 1 1/4″ – 1 1/2″ dowel rod at 2 1/2″, 20 1/2″ and 38 1/2″ (ensure they’re kept in line and at the top of the dowel)
- 5/8″ Speedbor holes are drilled in the backside of the Knot Tying Station 1 1/2″ from the top edge at 3″, 8″, 18″, 26″, 34″, 42″ and 54″ to create the holes your rope will be fed through.
Notes
In all this project shouldn’t take you anymore than about an hour and a half of total construction time. As mentioned, Home Depot and Lowes will gladly cut that 10 ft. piece of lumber for you at no charge and I’d highly recommend you take them up on that.
Total cost was right around $40 and could even be cheaper if you don’t want to use the better pine that I did for the 5 ft. sections. That cost is also based on you having some of the tools already, like the drill, hacksaw, tape measure and pencil. I hope you’ve enjoyed the DIY on the Knot Tying Station, I’d love to see photos of yours once you build it!
Feel free to leave any questions here in the comments and I’ll help you out however I can. There’s a little incentive for you to build your own Knot Tying Station too, there will be a contest soon on ITS, so start practicing!
Discussion