


DIY AR-15 Build: Buttstock Installation
DIY AR-15 Build: Buttstock Installation
- DIY AR-15 Build: Introduction, Parts and Tools Required
- DIY AR-15 Build: Magazine Catch Installation
- DIY AR-15 Build: Bolt Catch Installation
- DIY AR-15 Build: Pivot Pin Installation
- DIY AR-15 Build: Trigger Group Installation
- DIY AR-15 Build: Safety Selector and Pistol Grip Installation
- DIY AR-15 Build: Trigger Guard Installation
- DIY AR-15 Build: Buttstock Installation
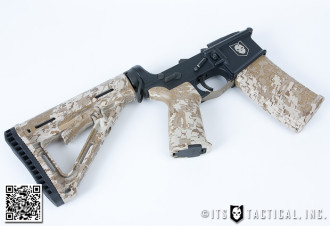
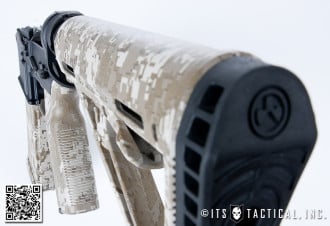
Today in part eight of our DIY AR-15 Build we’ll be showing you how to install the final part onto your Lower Receiver, the Buttstock.
While we say Buttstock, this step is comprised of quite a few different parts that aren’t in the standard Lower Parts Kit, like the one we recommend from Stag Arms.
This isn’t the place to skimp on quality parts and doing so will cause unnecessary problems that could have been avoided in the first place, namely the Buffer and Action Spring. Believe it or not these are some of the most important pieces of the entire Lower Receiver and are the cause of many puzzling AR-15 issues.
Continue reading for our step-by-step instructions for installing the Buttstock with detailed photos and video.
Buttstock Installation
Before we get into the actual steps of installation, let’s talk a bit about the selections we’ve made on parts here and why we recommend them.
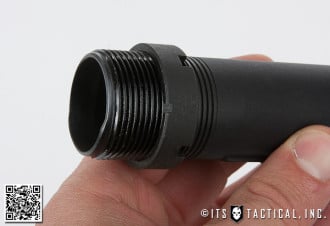
Mil-Spec Receiver Extension (buffer tube)
Commonly referred to as the buffer tube, Receiver Extensions are available in a Mil-Spec or Commercial version. The differences are typically that the Commercial tube is made from extruded aluminum rather than forged aluminum like the stronger Mil-Spec tube. The two differ in size as well and you’ll find more aftermarket stocks built for the Mil-Spec tube.

As a rule of thumb here, inquire about the manufacturing process of your Receiver Extension, as there are instances of extruded Mil-Spec diameter extensions being sold out there.
Why Stake?
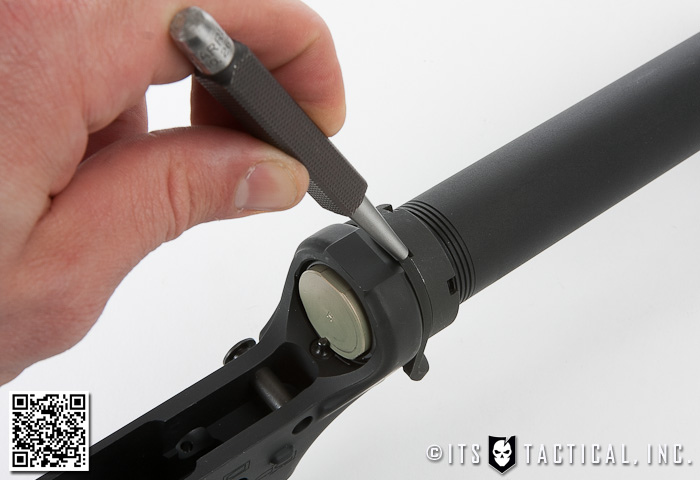
Something we’ll get into with the installation video is staking the Receiver End Plate and Castle Nut. This is done to ensure the Castle Nut doesn’t work free and allow your Receiver Extension to turn. If allowed to turn, the buffer retainer could release causing a headache and leaving you with a non-functioning firearm.
Staking is the process of pushing the metal from the Receiver Endplate (Sling Plate) into the staking slots on the Castle Nut. Four of them are available and optimally you should at least try to stake in two spots if possible. With many of the newer sling plates and their flared orientation, you may not be able to get more than one spot staked. That was the case with our IKICKHIPPIES SLAP Plate as well as the Magpul ASAP we’ve got on another build.
If you plan on switching out your endplates and experimenting to find the one you like best, you can utilize blue Loctite (non-permanent) on your Castle Nut after tightening or torquing it down (specs below). The Castle Nut is also a great place to add a witness mark, particularly if you leave it unstaked.
Buffer Differences
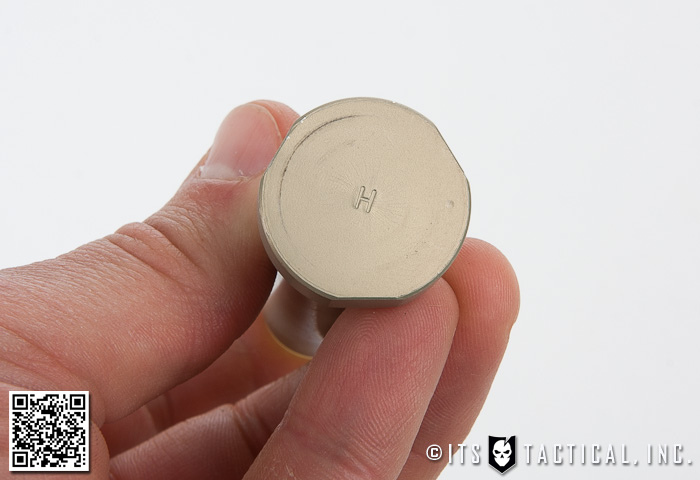
With this build we’re using a Bravo Company H (Heavy) Carbine Buffer, which is weighted with 1 Tungsten and 2 Steel weights. As your gas tube is shortened (From Rifle Length to Mid-Length to Carbine Length) it becomes more important to utilize a heavier buffer to regulate the added pressure pushed into the Bolt Carrier Group by a Direct Impingement system like we’re building here.
The heavier buffer absorbs the added pressure, as well as partially delaying the “unlocking” phase in the cycle of operations. This delay can help with early/hard extraction problems which occur when the bullet hasn’t departed the barrel and there’s still built up pressure in the cartridge case.
Piston guns also tend to run better with an H buffer to mitigate their inherent hard extraction due to the close proximity of the piston to the gas port. Heavier buffers can also help to control bolt bounce, which is the bounce that occurs when the Bolt Carrier Group returns after making contact with the Receiver Extension.
Utilizing an H Buffer in this build is also a test for us, as you’re never going to truly know how everything in a build functions until you get out and shoot it. One last thing to mention here is that underpowered ammunition in combination with a heavier buffer may cause malfunctions. We’ll be testing that too though.
Action Springs
Commonly known as a Buffer Spring, the Action Spring is an often neglected and tremendously important part in maintaining a properly cycling AR-15.
A Carbine Action Spring, like we’re using with this build should be between 10 1/16 in. and 11 1/4 in. If it falls outside of these parameters it should be replaced, this is it’s go/no-go measurement. On a rifle length spring the go/no-go changes to 11 3/4 in. to 13 1/2 in.
Parts Needed
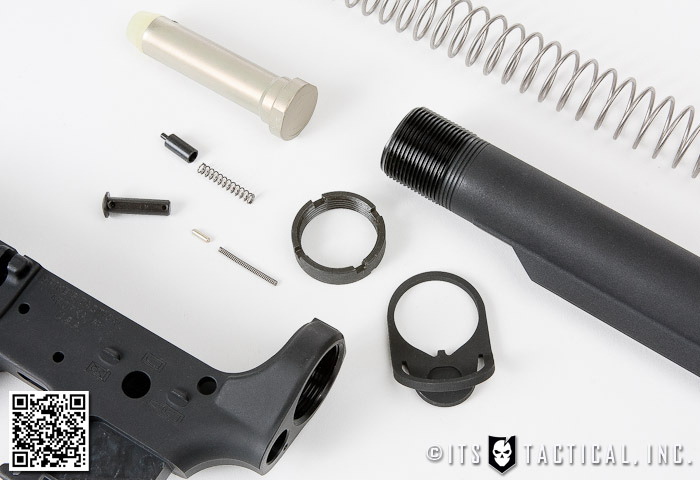
- Magpul MOE Stock (Mil-Spec Model)
- IKICKHIPPIES SLAP Plate
- Receiver Extension (Buffer Tube)
- Receiver Extension Nut (Castle Nut)
- Carbine Action Spring
- — The following parts are in the Stag Arms Lower Parts Kit —
- Buffer Retainer
- Buffer Retainer Spring
- Rear Takedown Pin
- Takedown Pin Detent
- Takedown Pin Detent Spring
Tools Needed
Assembly Instructions

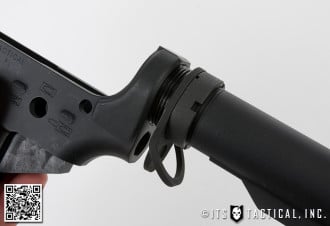
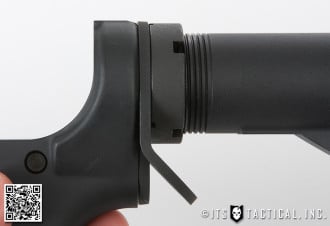
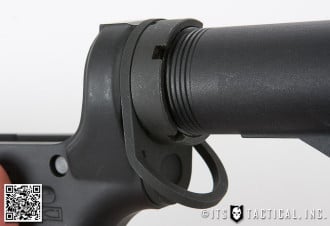
- Thread the Castle Nut onto the Receiver Extension Tube with the Cuts facing aft.
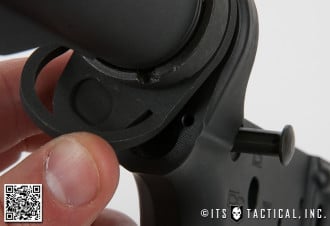
- Place the Receiver End Plate, in this case a SLAP plate, on the Receiver Extension with the raised area facing forward.
- Thread the Receiver Extension Tube through the back of the Lower Receiver, stop just before the Buffer Retainer hole.
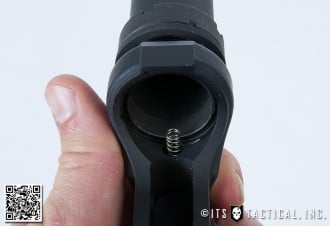
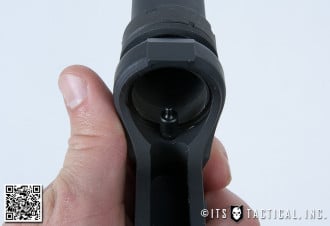
- Insert the Buffer Retainer Spring and Buffer Retainer into the hole and depress the corner of the retainer with your index finger.
- Hold it down while continuing to screw in the Receiver Extension Tube until the Buffer Retainer is trapped down by the tube.
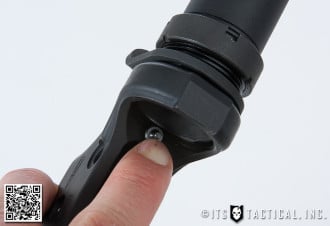
- Insert the Rear Takedown Pin halfway in the hole from the starboard side. Ensure that the cut in the pin is facing aft.
- Place the Takedown Pin Detent into the hole in the back of the Lower Receiver, followed by the spring.
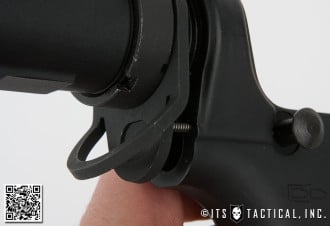
- Move the Receiver End Plate into position to set just on top of the Takedown Pin Spring. Press it against the spring, being careful not to bend the spring.
- Screw down the Castle Nut to lock the spring in place and tighten with your buttstock tool to the proper torque of 40 ft. lbs. or just make it tight!
- Alternatively you can use Blue Loctite (not Red!) to ensure your Castle Nut doesn’t come free or stake it.
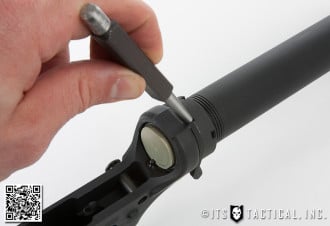
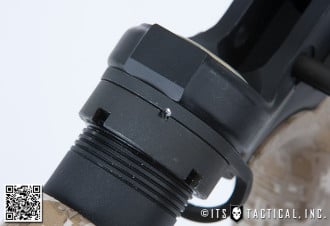
- To stake the Castle Nut, take your Center Punch and drive some of the material from the Receiver End Plate into the pre-cut areas in the Castle Nut. Optimally you want at least two areas staked, but when using some end plates you may have just the top area to stake. This was the case with the SLAP Plate and also the Magpul ASAP we’ve used in the past.
- It’s also a good idea to make a Witness Mark so you visually know if the Castle Nut is coming loose on you.
- Insert the Action Spring and Buffer into the Receiver Extension Tube and finish the Lower up by installing the Magpul MOE Buttstock on to the Receiver Extension Tube.
- This is done by pulling the release lever pin straight down to get it all the way on. It’s a pain in the butt on the Magpul MOE, as most collapsible buttstocks simply require you to pull town on the release lever.
That completes the Lower Receiver portion of this DIY AR-15 Build. Join us back here soon for our first installment in the Upper Receiver Assembly!


Discussion