


DIY AR-15 Build: Upper Receiver Assembly Introduction
DIY AR-15 Build: Upper Receiver Assembly Introduction
- DIY AR-15 Build: Upper Receiver Assembly Introduction
- DIY AR-15 Build: Ejection Port Cover and Forward Assist Installation
- DIY AR-15 Build: Barrel and Free-Float Rail System Installation
- DIY AR-15 Build: Front Sight Base Installation
- DIY AR-15 Build: Muzzle Device Installation
- DIY AR-15 Build – Bolt Carrier Group Installation
- DIY AR-15 Build – Welding and Checking the Headspace
- DIY AR-15 Build: Lubrication, Assembly and Firing
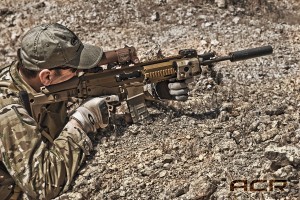
Welcome back to our DIY AR-15 Build and the start of our tutorials on assembling your Upper Receiver and finishing the build!
In this article we’re going to re-address all the parts and tools you’re going to need to assemble your Upper Receiver. While there are many complete uppers out there to purchase, we’ll be taking you through a complete upper assembly.
From the forward assist to the compensator and everything in between, when we’re done with this second series you’ll have all the resources available to you to take an AR-15 build from the ground up! Let’s get started!
Upper Receiver Introduction
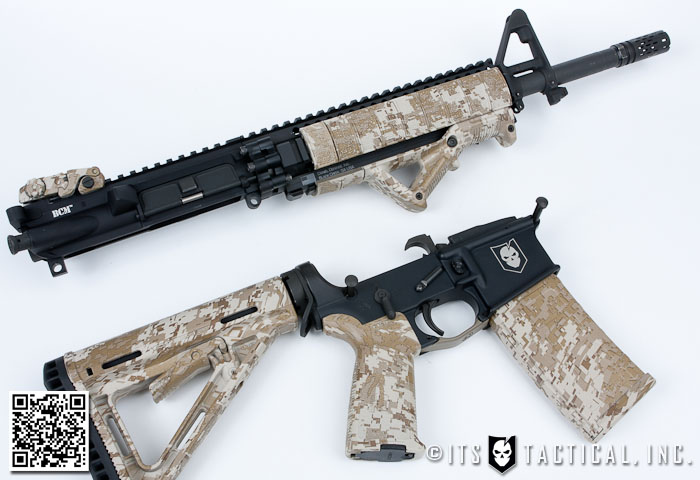
In this series of articles on the Upper Receiver assembly there’s a whole lot to discuss and many things to consider when you’re selecting the parts that will go into your upper. Today we’re simply going to discuss the proper tools and the parts that we’ve selected for our 14.5″ Direct Gas Impingement Hybrid AR-15 build.
We’ll save the individual assembly articles for what to consider at each stage of the build and why. For an in-depth look into the tool selection we’ll highlight below, please refer to the initial introduction article to the DIY AR-15 Build.
While we’ve also referenced the parts we’re using in the original intro article, we’ve broken the list down a bit here to further highlight the individual pieces should you choose to undertake a ground up upper build like we’ll be going through in all these upcoming upper articles.
Parts
Something to note here before we get into the parts list is to ensure you’re aware that the stripped parts we’re linking to in regards to the barrel will require a gunsmith to drill the holes for the taper pins and the pins themselves are not included here on our parts list.
With our 14.5″ barrel you’ll also need to get a gunsmith to permanantely affix the BattleComp 1.5 that we’re using in this build to satisfy the requirements of the National Firearms Act. Permananetly affixing the 1.5″ BattleComp brings the barrel length to the required 16″ length without having to apply for a SBR and pay the $200 Tax Stamp.
Below you’ll find links to the “Group” part (in bold) as well as the individual parts contained in the group in a sub-category below it. Some sub-category listings are simply features of the group.
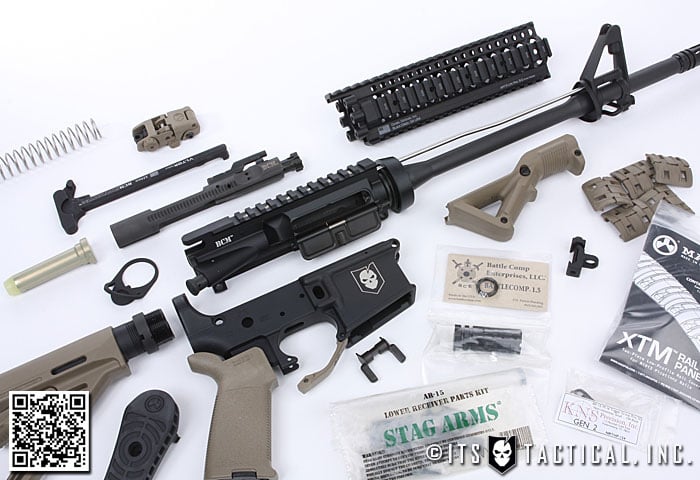
- BCM 14.5″ Mid Length Upper Receiver Group (Can be purchased complete here)
- Cold Hammer Forged 14.5″ Barrel with 1/7 Twist
- HPT / MP Inspected Barrel (High-Pressure Test / Magnetic Particle Inspected)
- Chrome Lined Barrel and Chamber
- 5.56 NATO Chamber
- M4 Feed Ramp Barrel Extension
- M4 Feed Ramp Flat Top Upper Receiver
- Mid-Length Gas Tube
- Mil-Spec F-Marked Forged Front Sight Base
- Daniel Defense AR15 Lite Rail 9.0
- Ejection Port Cover Assembly
- BCM Forward Assist Assembly
- BCM Bolt Carrier Group (MPI) (Can be purchased complete here)
- HPT/MPI Bolt
- Firing Pin
- Cam Pin
- Firing Pin Retainer Pin
- Chrome Lined Carrier and Gas Key
- Staked per Mil-Spec
- Black Extractor Insert
- BCM Extractor Spring
- Mil-Spec Crane O-Ring
- BCMGunfighter Charging Handle Mod 4
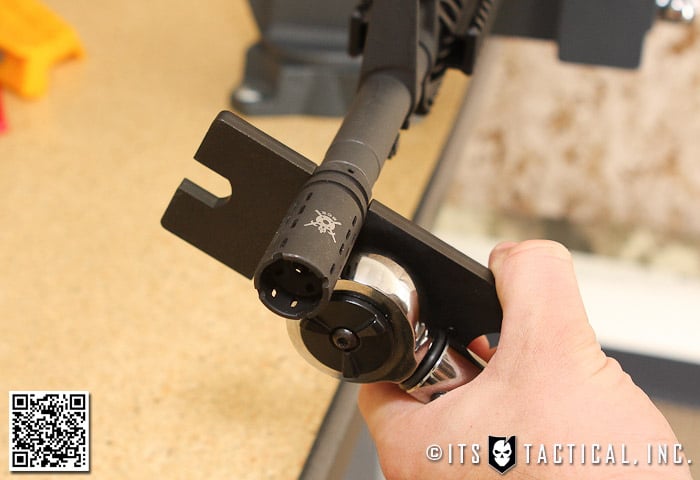
- BattleComp 1.5 Compensator (w/ included Crush Washer)
- Magpul XT Rail Panels
- Magpul AFG
- Magpul MBUS — Rear
- Midwest Industries MCTAR-TS
Tools
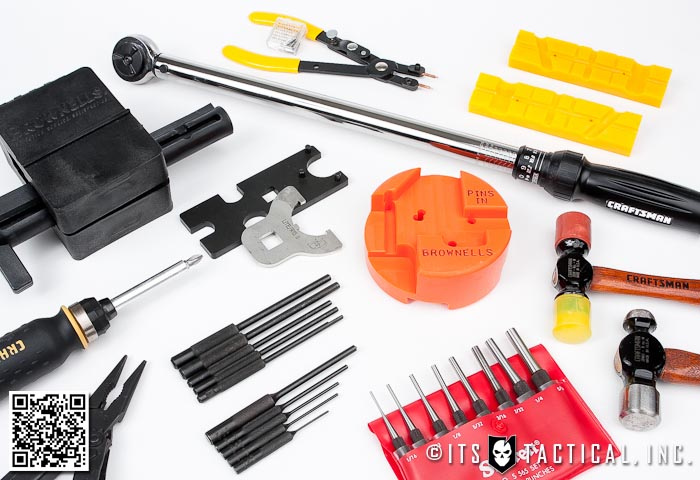
- Vise
- AR-15 Vise Block
- Padded Vise Jaws
- Brownells Upper Receiver Action Block
- Ball Peen Hammer (4 oz.)
- Nylon/Brass Hammer (Optional)
- Taper Pin Starter Punch (Optional to drive out Front Sight Base Taper Pins)
- Starrett Punch Set
- Brownells Roll Pin Punch Set
- Brownells Roll Pin Holder Set
- Front Sight Bench Block
- 1/2″ Drive Torque Wrench (capable of 20 – 100 foot pounds)
- Screwdriver
- Multi-Tool or Needle Nose Pliers
- Barrel Nut/Combination Wrench w/ 1/2″ Cut to accept Torque Wrench
- Proprietary Barrel Nut Wrench (If your Picatinny Rail requires it – the DD Rail we’re using does)
- Snap Ring Pliers (If removing a Delta Ring to install a Picatinny Rail)
- Small Flashlight (Optional)
Stay tuned next week as we continue our DIY AR-15 Build with the first part of our Upper Receiver assembly installing the Ejection Port Cover and Forward Assist!
Discussion