


Learn How to Build Your Own AK with the Rifle Dynamics AK Builder Class
Learn How to Build Your Own AK with the Rifle Dynamics AK Builder Class
Rifle Dynamics is one of the most innovative rifle manufacturers in the in the industry; continuously pushing the boundaries of what’s capable with the AK platform and designing purpose built firearms that become highly valued for their craftsmanship, functionality and attention to detail on every level.
However, Rifle Dynamics is much more than the great firearms they produce. They’re a company that I highly respect for their passion, integrity and ingenuity in a platform of firearms that’s largely ignored when compared to the popularity of the AR-15.
There’s a certain level of mystery surrounding how to work on AKs, at least to me. Perhaps this is due to their extreme reliability in nearly every environmental condition and the low maintenance they require. I’ve owned an AK for over 10 years and put a few thousand rounds through it, but have never had to do much more than keep it well fed.
I feel this and the stigma of the AK being the “enemy’s weapon of choice,” has largely hindered its popularity. This mindset is changing and has been for the past few years. With our troops having faced this weapon in the battlefield and the recent resurgence of the platform, more people are starting to notice the once forgotten AK and appreciating it for its merits.

From my perspective, the resurgence is due to a few things. The first is with our military needing to understand the platform on the battlefield, including it’s capabilities, operation and pitfalls. Battlefield pick-ups are a reality and the need has never been greater for our military’s familiarization. The next reason for the growing popularity, in my opinion, is due to companies like Rifle Dynamics, who have be advocating the AK for it’s reliability and performance while uniting the industry with good information. Finally, I feel that ammunition costs and the availability of 7.62×39 and 5.45×39 (until recently) have helped the resurgence as well.
AK Builder Invite
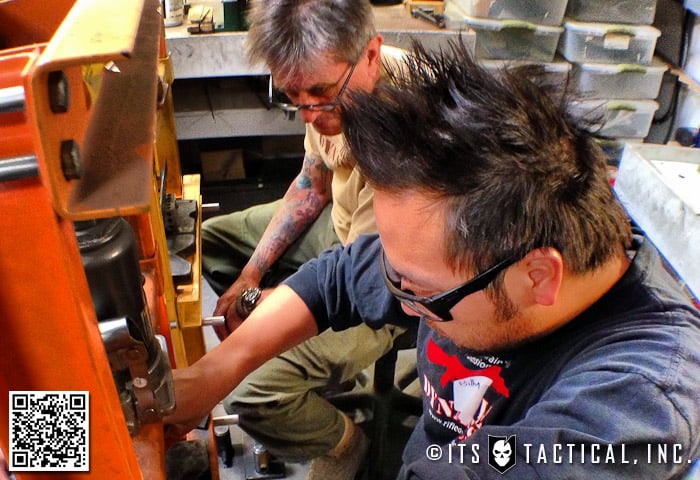
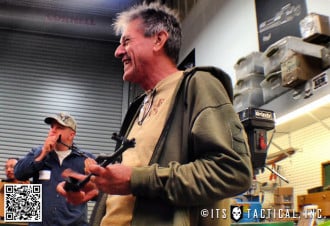
I’ve become very fond of the AR platform in recent years and spent countless hours learning and building my own. Recently, I’ve wanted to expand my firearm building skill-set and dig deeper into the AK platform. Visiting Rifle Dynamics last year was my tipping point. Getting the opportunity to meet Jim Fuller, Billy Cho and the entire RD staff was an eye opening experience.
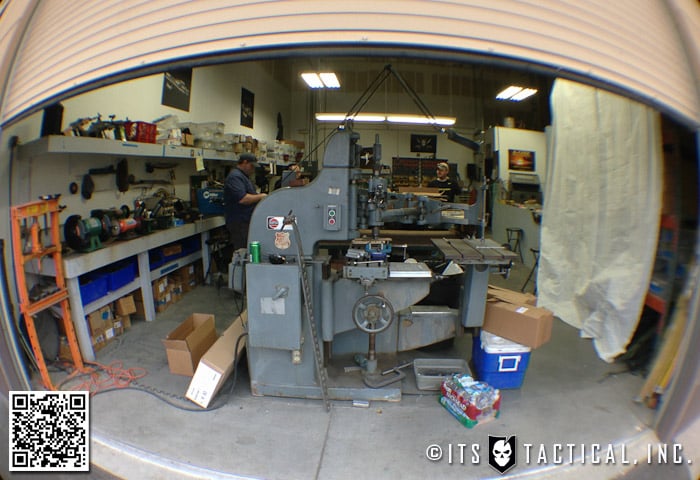
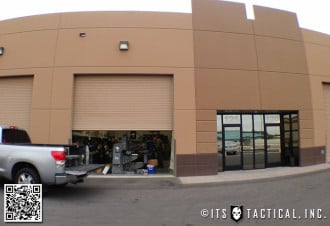
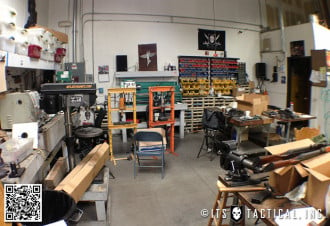
Words can’t describe the pulse of their shop in Las Vegas, NV. The overall feel of metal clanging and the magic of seeing the level of detail that Rifle Dynamics pours into everything they do, is something I really geek out on. Their passion is projected with each turn of a wrench and is visible every time you look at a Rifle Dynamics AK.


When Jim and Billy asked if I’d like to attend their first public AK Builder Course at Rifle Dynamics HQ, I was all over it! (They’ve run one other open-enrollment course on the road but, this was the first at RD HQ.)
Before receiving the invite, I’d recently taken up the task of building my own Krink in a DIY series on ITS. I realized the best way to learn how to build an AK was to do it myself through trial and error and share my lessons learned.
Needless to say, I was stoked at the chance to learn directly from Rifle Dynamics and not only be able to share that information with you, but learn how to avoid pitfalls that would surely be inevitable when building my Krink.
True Craftsmanship
Having finished the AK Builder Course, my perspective on the AR platform has changed. While I’m in no way discrediting the skill required in building an AR-15, I now look at it as a cookie-cutter assembly, much like legos.
By that, I mean that each part has a specific place, a measure of torque, an easily obtainable tool to put it in place with. Not so with the AK. There’s certainly skill involved in putting together an AR, but not the same kind required when building an AK.
You can easily find information on the Internet on how to put together an AR, we’ve even walked through each and every step in our ITS DIY AR-15 Build Series. Not as much with the AK. Sure, there are plenty of forums and articles about the steps to assemble an AK, but it’s extremely easy to screw things up quickly.
An AR is assembled, an AK is crafted. I mean that with all sincerity too. An AK is an under appreciated work of art and until you’ve built one from the ground up, you’ll never fully understand the meaning of that statement. I’m not saying with some sort of self-righteousness, I’m saying that from someone that’s seen the light and truly learned from the master craftsmen at Rifle Dynamics. Jim touched on the fact that “not many manufacturers in the US truly know how to put these guns together right” and that “there’s just a different mindset here in the West.”

The amount of fitting, manipulation, precision, feel and sweat that goes into building an AK, will make you truly appreciate each one you touch. Some may be reading this and say, “see, this is exactly why I like ARs. They’re easy.” That’s fine too, there’s nothing wrong with that way of thinking.
But why not step outside of your comfort zone and tackle something you don’t understand? That’s what life is all about, right? I thought I knew the AK, but after the builder course, I’m now confident in that statement. I know the AK and can not only troubleshoot problems, but fix them too.

The wealth of knowledge obtained from the Rifle Dynamics AK Builder Course is immeasurable. My brain is swollen with the amount of information I learned and it’s going to take me awhile to even process everything. Thanks to my multiple pages of hurried note taking, videos and photos, I can only hope to retain it all. My hope with this article, photos and videos, is to pass along as much as I can to you.
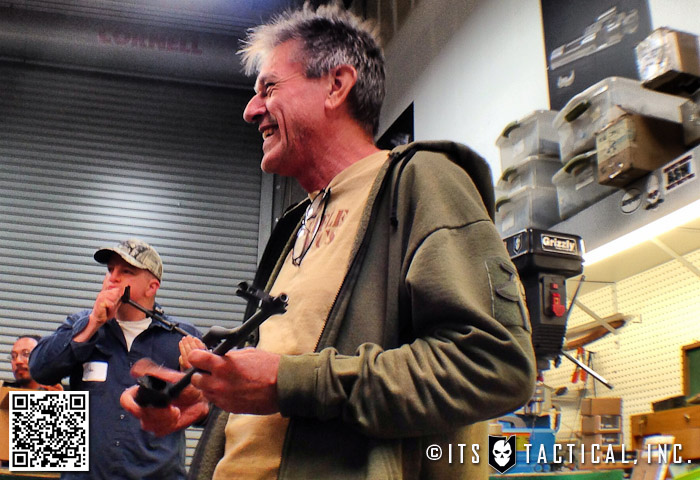
Something that really hit me during the course is just how passionate and dedicated Jim Fuller is to sharing his knowledge with as many people as possible. Jim is probably one of the most unselfish people I’ve ever met and even though I’ve met him on multiple occasions and consider him a great friend, after this weekend, I fully know Jim.
To give you an example, not only did Jim say that he hoped we’d all go back with the information we learned and teach others, he said he’d be thrilled if we all opened up companies building AKs. Why? Because after observing our skills, he was confident we’d be doing it the right way and that there are plenty of AKs out there that need those skills. Also because Jim is a living, breathing patriot that believes in our inherent right to bear arms and that those rights shall never be infringed.
Jim stated that he’s only got a short time on this earth and if he can make a difference in peoples lives by passing along what he’s learned through years of trial and error, then he’s done his job. That, folks, is what the world needs more of. Integrity, passion and giving back.
After you see what’s required to build an AK properly and just how much craftsmanship goes into each and every step, I hope that you can appreciate just what Jim and Rifle Dynamics have done by offering the AK Builder Class to the public.
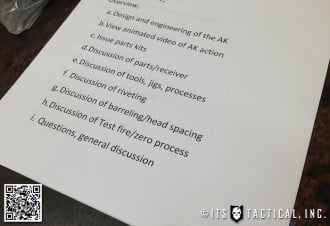
Course Curriculum
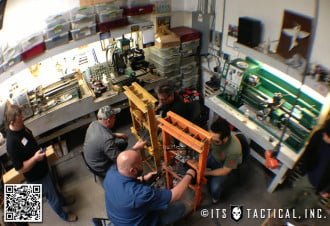
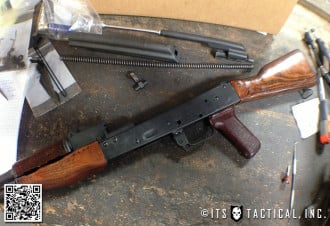
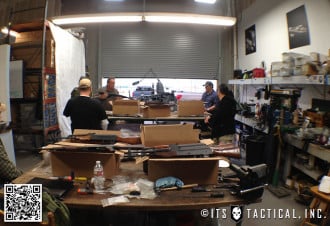
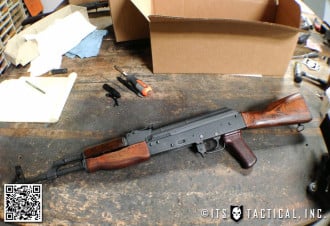
When I showed up at Rifle Dynamics HQ on the first of three days, we made the rounds with introductions and filled out some paperwork while staring at the luminous cardboard box placed before us.
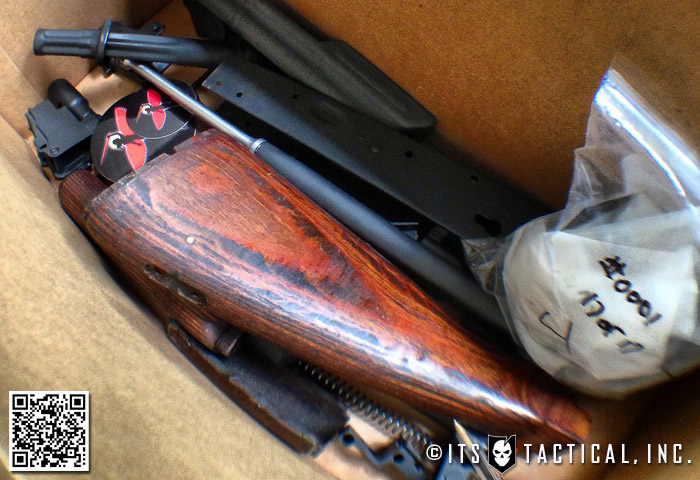
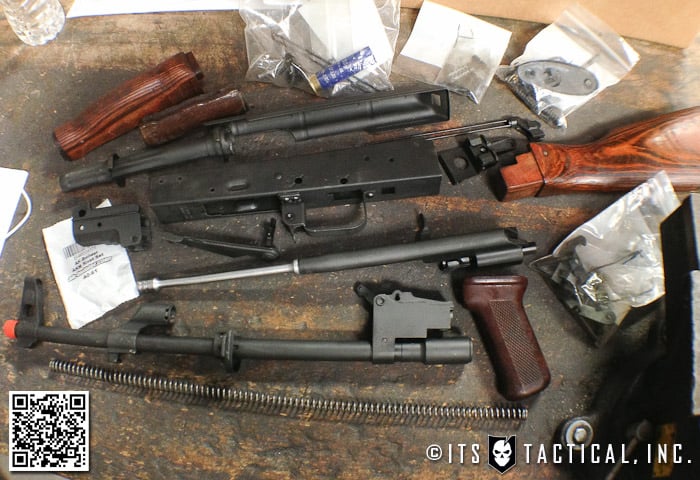
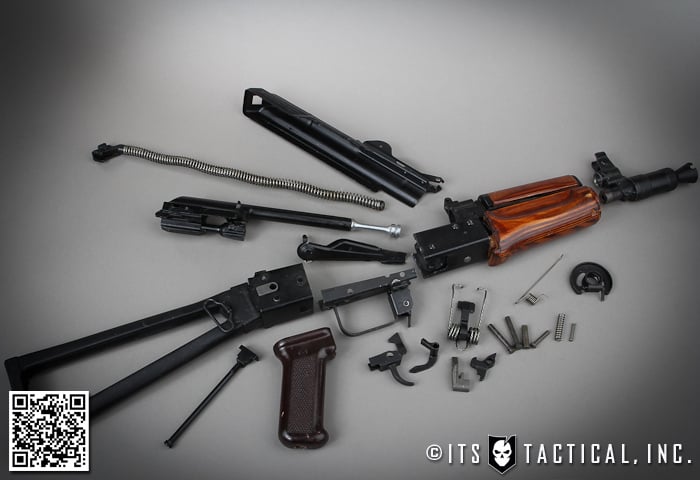
Luckily I wasn’t intimidated when I opened the box and saw a disassembled AK, having that Krink kit that I started really helped me to learn more about the AK and to be able to identify parts.
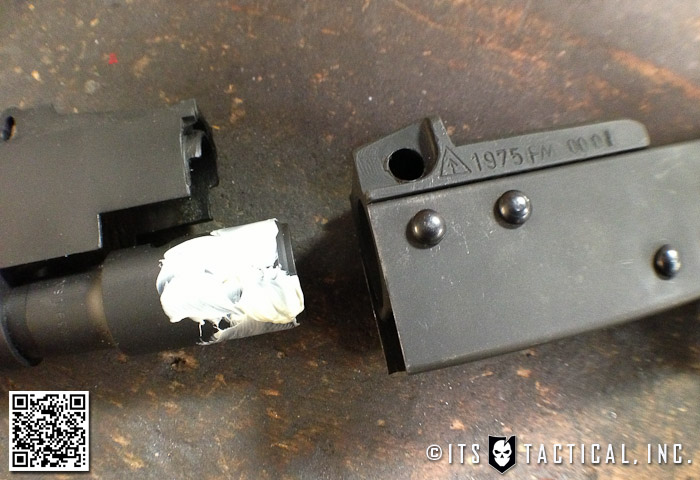
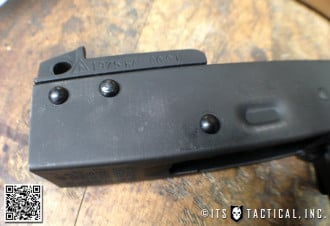
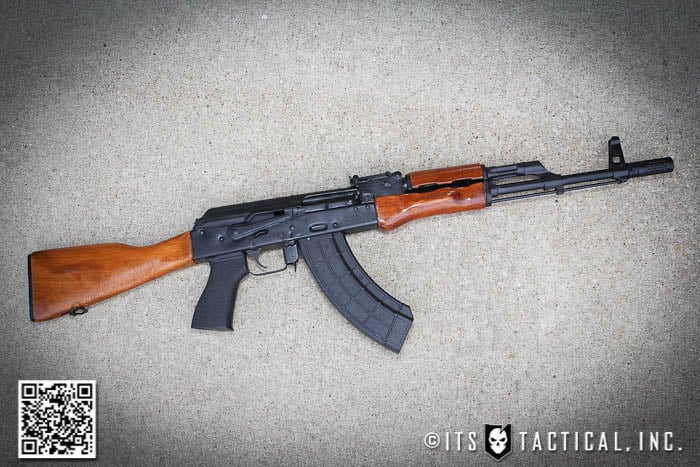
Jim described that these were Romanian Military AKM Kits and that they’re higher quality than the Romy “G” kits typically found. AKM, if you remember from our AK history article, means AK (Avtomat Kalashnikova) Modern, another way to say that they’re a modern AK-47 (7.62 x 39mm) variant. My kit was marked as being originally manufactured in 1975.
I’m a sucker for a traditional looking AK and I was excited to see the wood furniture in the box. Jim mentioned that the wood hand guard had been cut and sanded down by Rifle Dynamics to remove the fore grip.
One thing I also noticed when checking out the box of parts in front of me, was that the barrel already had the rear sight tower and front sight block pinned on. The reason for this was that the course would have to have been extended another day to a day and a half if we all needed to fit these ourselves. Not to say that it takes that long, but in a class of 20 people there’s limited resources available.
The goal of the 2.5 Day AK Builder Course was to reproduce exactly what the Russian’s did with the AKM. A completely assembled 1mm stamped sheet metal receiver properly riveted with leaded rivets and guaranteed to run forever with the same 4 MOA capability as an out of the box AR. Yep, the AK is just as capable as an AR, despite the common myth that they aren’t.
Video Walk-Through
Below is the 3-part compilation of the Rifle Dynamics AK Builder Course I filmed during my time with Rifle Dynamics, there’s a lot that this article doesn’t cover contained in the videos and vice versa. For a comprehensive look at the entire experience, I’d recommend reading the article first and then coming back to watch the videos. It’s certainly your choice though, just merely a suggestion.
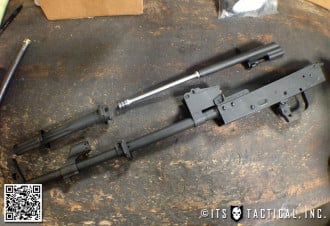
Parts Considerations
Most AK parts kits you come across are demilled, which means that the firearms are imported to the US and taken to a bonded BATFE chop-shop, where they have their evil parts removed per BATFE regs for import. After inspection, they’re released to US importers. Demilling is essentially cutting up the barrel and receiver, while leaving the integral parts intact. Here’s a photo of my Krink parts kit for an example of what a demilled kit looks like.
All you “should” need to do to assemble one of these kits, is to remove the cut up parts, add a barrel, a receiver and the necessary rivets. This of course all depends on the quality of the parts kit and that you don’t screw something up. These Romy kits have already had all the existing parts removed by Rifle Dynamics to ensure we were starting with a clean slate.
Something to remember is that AKs aren’t rigid and firm like US guns, they stretch, move and flex like jello. Everything is hand fit, there’s no CNC Machining or Mil-Spec on the AK. One of the results of this flexible design is the need for leaded rivets. Not just any rivets will suffice and the reason leaded rivets are used on the AK is that they stretch like a rubber band right along with the gun.
Regular pop rivets will shear right off and you may get off a round or two before the gun falls apart or you get physically damaged when the front trunion falls apart. Same goes with screws and don’t even think about welding an AK together. Build it properly from the beginning and it will run forever.
The US made barrels that we utilized on these builds were from Green Mountain Rifle Barrel Co. and the US made receivers were NDS-1’s from NODAK Spud. The “US made” part is important and will be a bit clearer why when we get into 922r compliance. Just remember, not all receivers are made equal. This is especially true with the recent surge of 80% blanks, flats and other non-complete receivers that don’t require an FFL transfer to acquire.
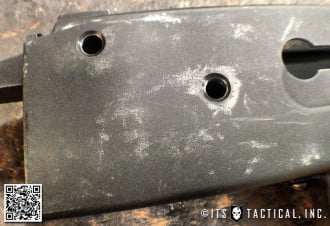
Heat treating on a receiver is crucial because of the twisting factor and the fact they’re made of 1mm stamped steel. If you don’t properly heat treat a receiver, or try to use one that’s not even heat treated, minor pressure can cause it to warp and over time the hammer/trigger pin holes will stretch. Some receiver manufacturers attempt to counter this by only heat treating these holes, which is just as bad as not heat treating.
It’s also possible to heat treat a receiver too hard, which can cause it to crack along the sides where they’re bent when formed. It makes it a nightmare to drill into them and they’ll eat up cobalt bits all day long. The correct heat treating on AK receivers is between 38-40 on the Rockwell C scale. The NODAK and 74uLLC are a few of the receivers Rifle Dynamics recommends.
Tools/Parts
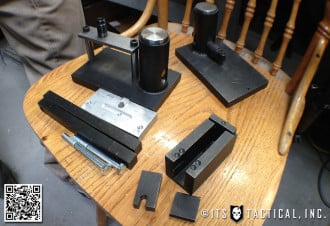
You’re going to see some custom tools that Rifle Dynamics made to assist them in multiple assemblies, but everything you need to assemble an AK can be sourced commercially. I’ll provide some links during and at the end of the article where you can pick up these tools if you desire. Everything can be purchased for about $600-$700 and while that cost doesn’t make sense if you’re building just one, pitching in with buddies can make that expense more tolerable.

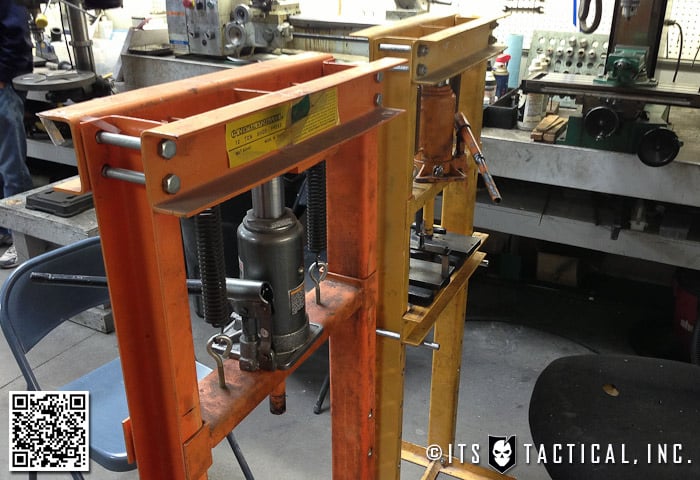
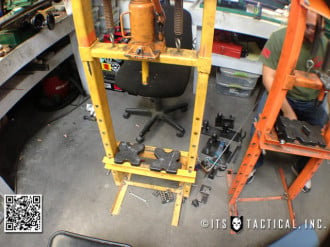
With the exception of a few things, the main tools needed are an AK-Builder Rivet Tool, AK Trigger Guard Riveting Jig, Barrel Press Kit and a 12 Ton Press. The AK Jigs can all be purchased through AKBuilder.com and the 12 Ton Press can be purchased for about $125 from any Harbor Freight. You can also add in a Drill Press if you can afford it. Add in some go/no go headspace gauges (don’t skip these), drill bits and miscellaneous tools you’ll see throughout the article and videos and you’re good to go.
When I continue the DIY Krink Build Series, I’ll get a comprehensive list together of the tools required, just like we did on the DIY AR Build Series.
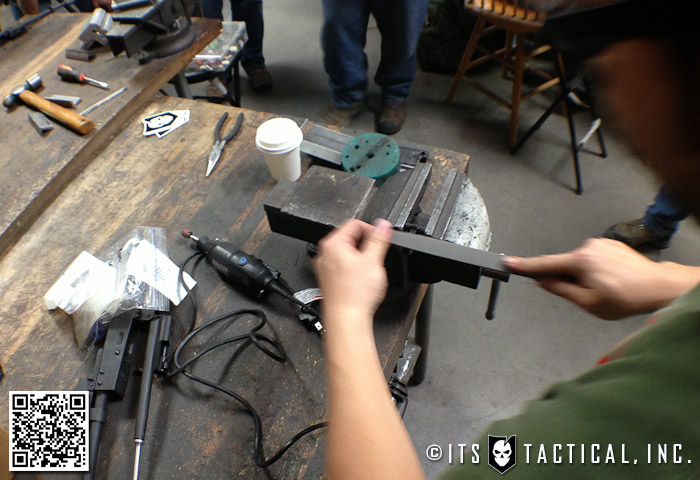
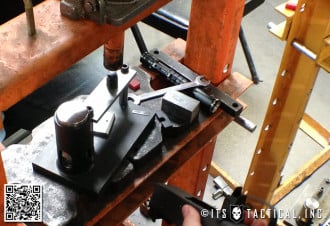
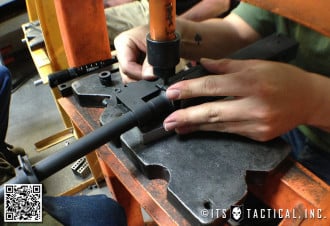
Trunion and Trigger Guard Assembly
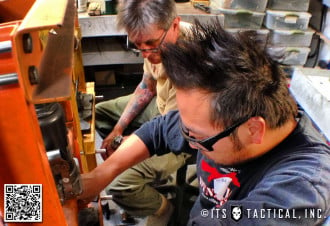
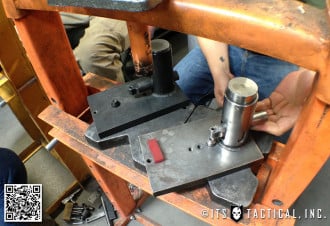
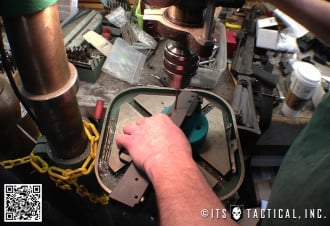
The first thing we did in the AKM assembly process was to rivet in the trigger guard using the AK Trigger Guard Riveting Jig. The front four rivets are pressed in at the same time and the rear single rivet is pressed by itself.


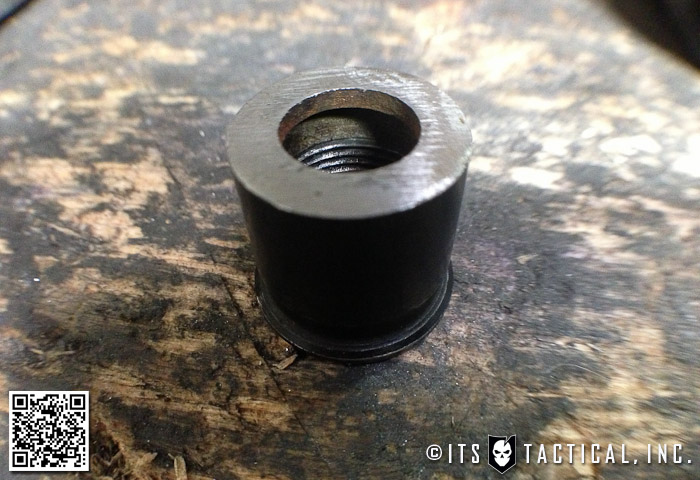
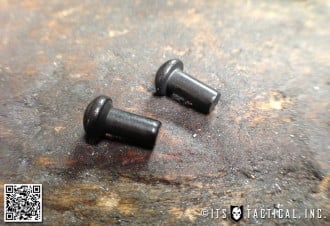
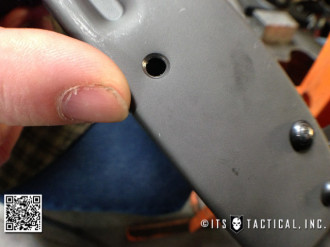
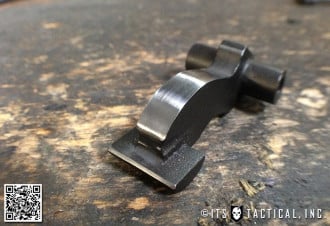
One thing I’d like to note here is the difference between the standard AK rivets and AK swell neck rivets. This identification is an important thing to learn if you’re building your own AK and you purchase a rivet kit.
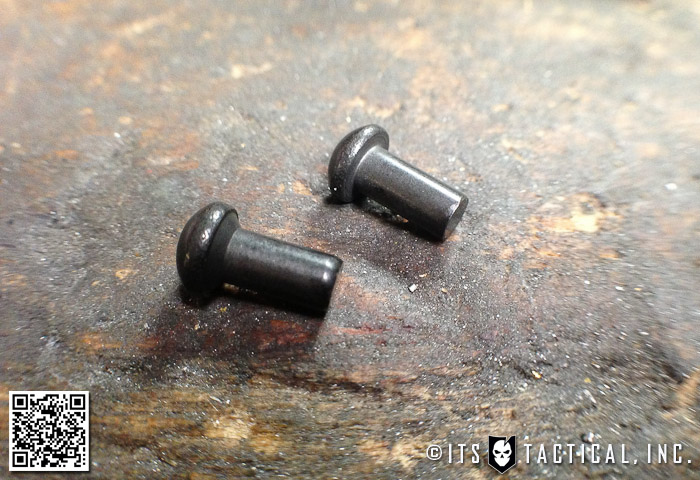
Swell neck rivets are nearly identical to standard rivets but instead of sitting flush when pressed in, they have a curve or “swell” under the head of the rivet. This is to fit into a dimpled hole; dimpling adds shear strength to a rivet hole. For instance, instead of having four rivets on each side of the front trunion for strength, there are two regular rivets and one swell neck rivet.

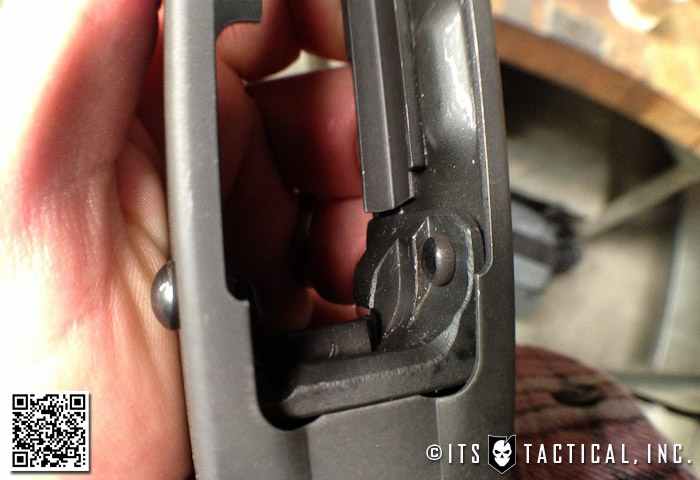
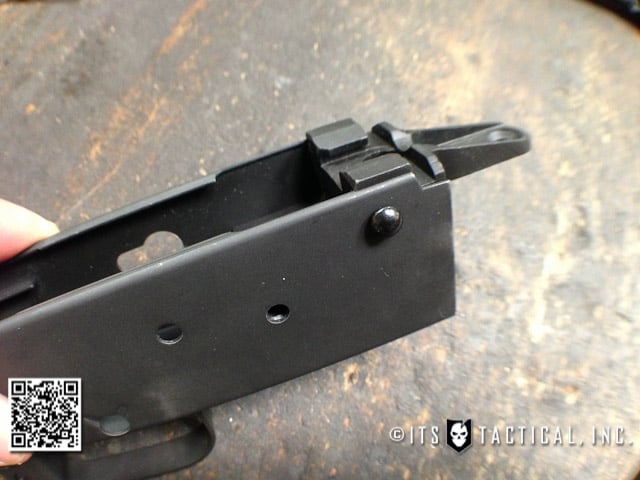
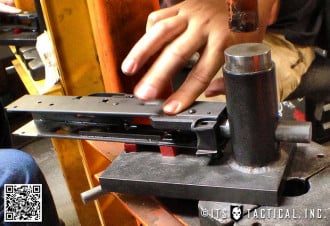
Next up is riveting in the front trunion to the receiver using the AK-Builder Rivet Tool. A tip here is to start with the rearmost rivets, as this is the centerline of the front trunion and things are easier to adjust later if needed. With each rivet installed, it’s also important to check that the front of the receiver is still square and the front trunion isn’t protruding and throwing things off.


Another check at this point is to also ensure that the interior of these four rivets aren’t going to interfere with the barrel being pressed in. After the four regular rivets are pressed in, you may need to chase the swell neck rivet holes.


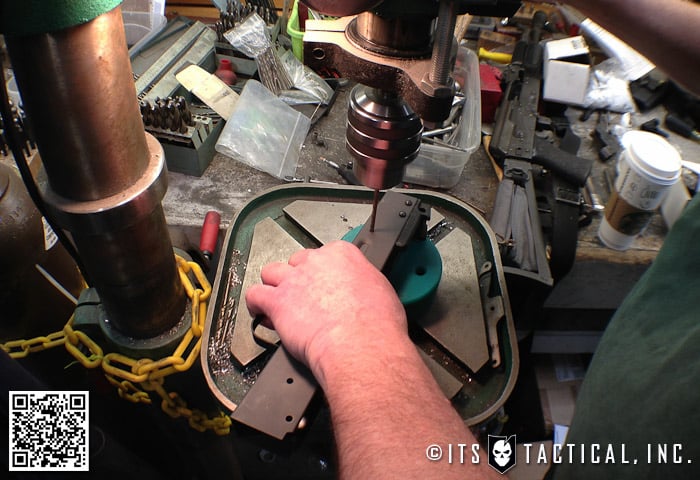
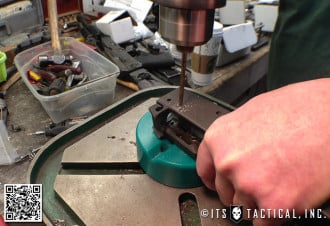
Chasing the holes, means to drill out the receiver sheet metal so it lines up with the hole in the trunion. Even if there’s a slight offset after this procedure, it will get covered when the rivet gets pressed in.
Since these remaining two rivets in the front trunion assembly are swell necks, these holes need to be dimpled first. This is done with an added attachment that’s included with the AK-Builder Rivet Tool.


The last step is riveting the rear trunion in with the two long swell neck rivets. These four rear trunion receiver holes will also need to be dimpled first. Just be sure here that you don’t dimple the hole that the safety inserts into. These long swell neck rivets are also pressed with the AK-Builder Rivet Tool assembled in a different configuration.

What’s interesting about this step is that as you press the rivet, the end forms a rivet head with the forming die. Check after the first rivet is pressed that the holes for the remaining rivet don’t need to be chased.
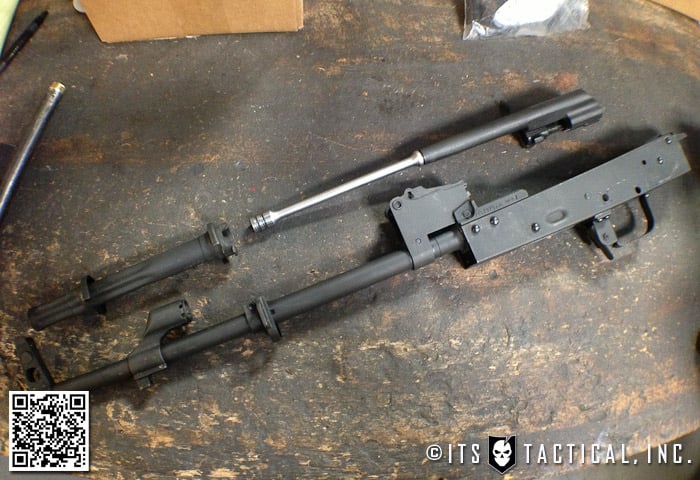
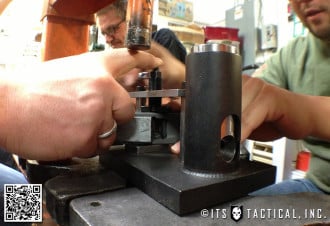
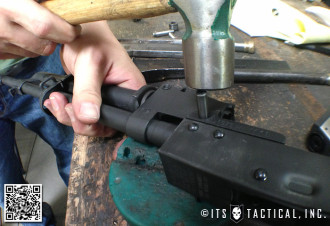
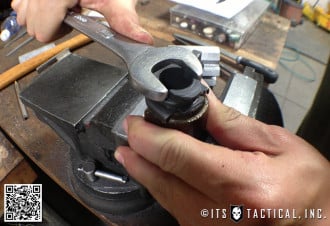
Barrel Assembly
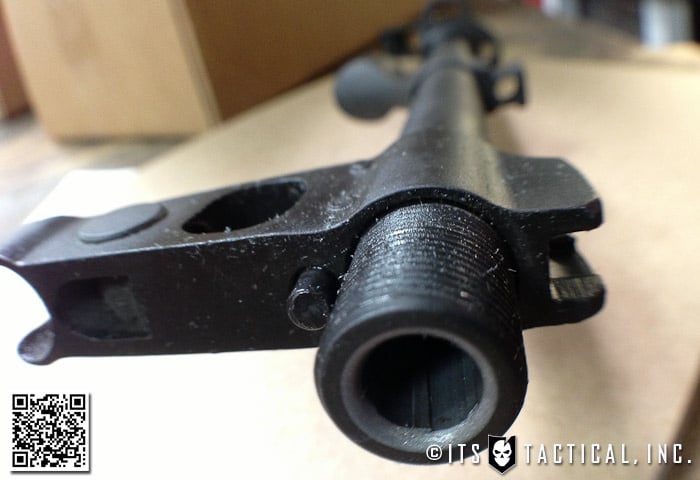
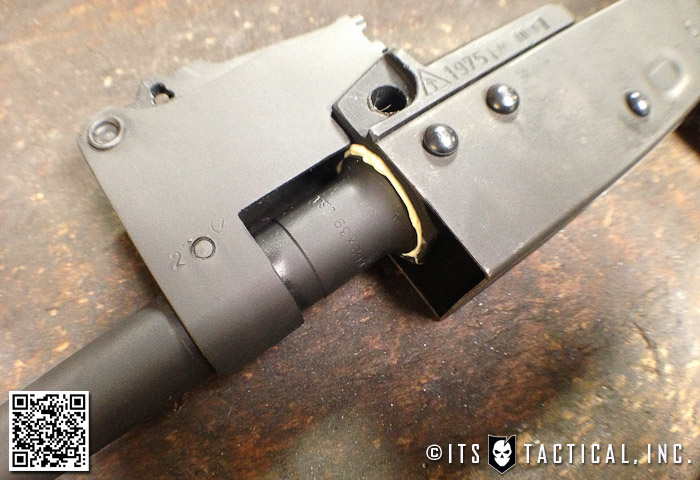
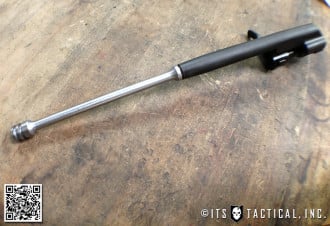
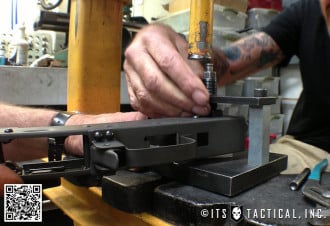
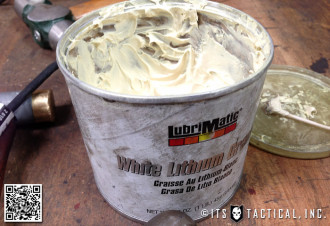
As mentioned previously, our barrels already had the front sight block and rear site tower assembled. Starting with this configuration, the first step is to apply a small amount of lithium grease around the barrel. There’s way too much in my photo below and I wiped about half of that off before pressing my barrel.
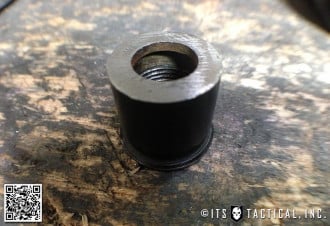
The good thing with having the rear sight tower in place already is that it guides right along with the front trunion and helps in the alignment. At this point, we added a modified slant comp that threaded on the barrel and acted as a thread protector. You press directly on the top of the barrel, so it’s important to protect those threads.
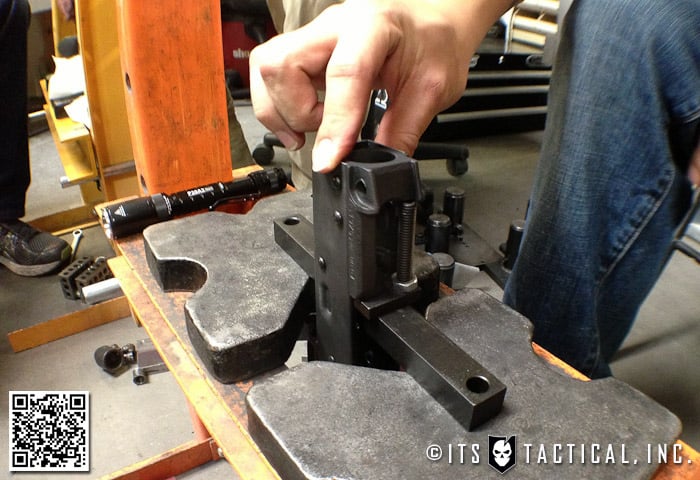
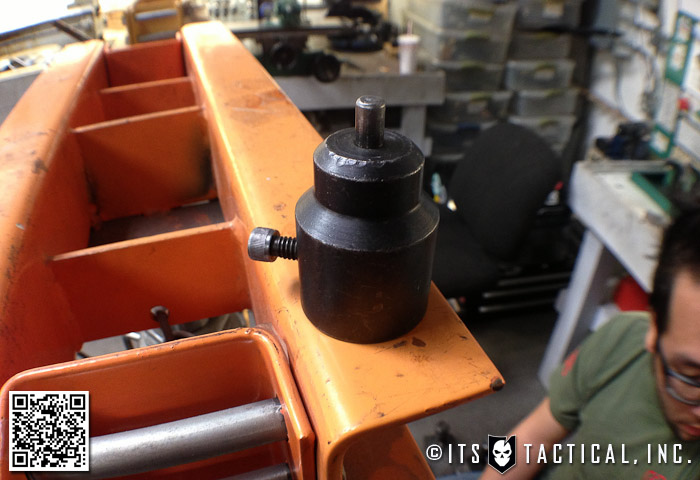
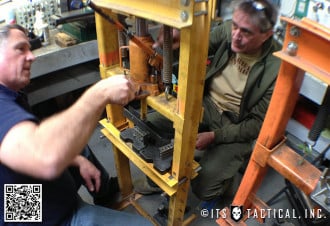
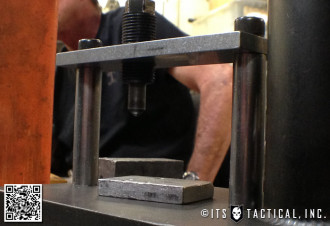
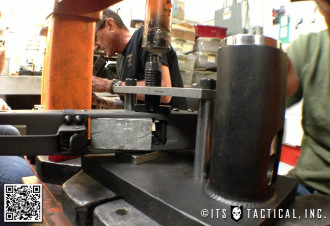
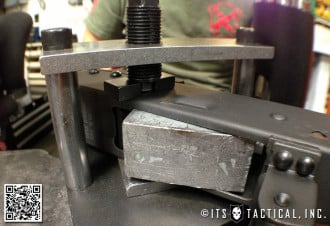
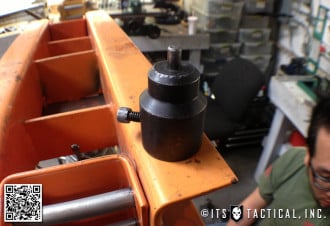
During the barrel pressing, we had one 12 Ton Press running a custom Rifle Dynamics barrel press tool and one running the AK-Builder Barrel Press Kit. The gist of this process is that the Barrel Press tool supports the front trunion while the barrel is being pressed.
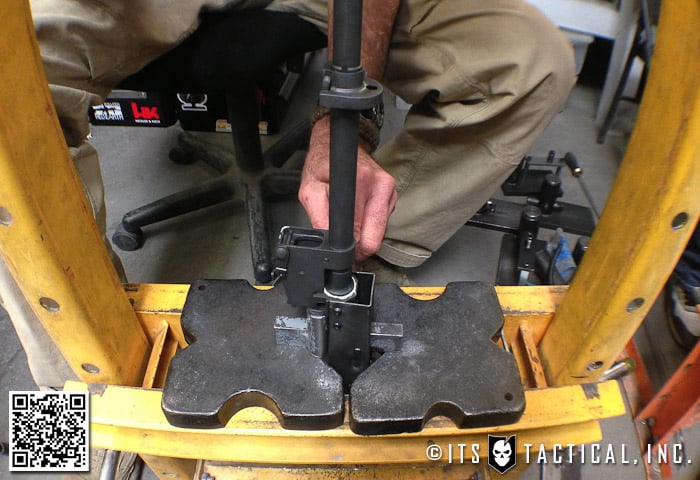
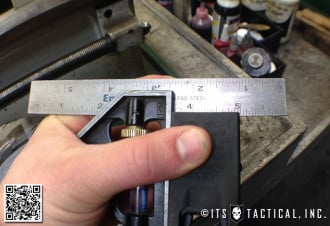
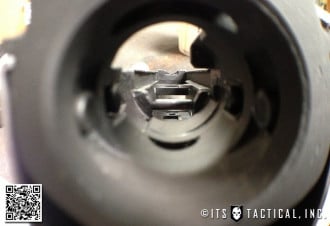
It’s important not to press the barrel in too far or too shallow. One reason being that the hole won’t line up in the front trunion for the barrel pin. This also affects headspacing; here’s how AK headspacing works:
If the bolt can’t close on a go gauge, then the barrel is pressed in too far, if it can close on a no-go gauge, it needs to be pressed in further. WASRs are notorious for being improperly headspaced, not being able to close on a go gauge.
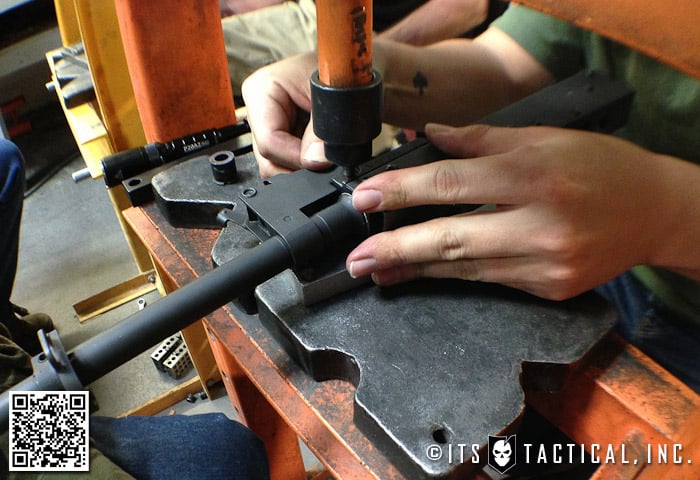
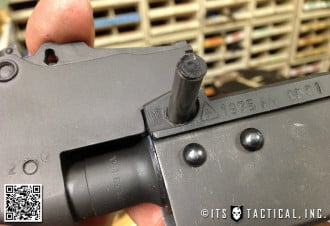
After checking and adjusting headspace, we used the barrel pin attachment from the AK-Builder Barrel Press Kit and pressed the barrel pin in.

Before we move on, it’s important to note that you can’t just buy any AK barrel and expect it to fit your front trunion. There are a few different sizes of front trunions, so be sure you get the right match if you’re replacing a barrel.
Hammer/Trigger/Safety and Bolt Assembly
I found the bolt assembly to be pretty interesting and as Billy also explains in the second video (above), there’s a lot of pin alignment that needs to take place. It’s definitely more complicated when compared to the assembly of an AR bolt.
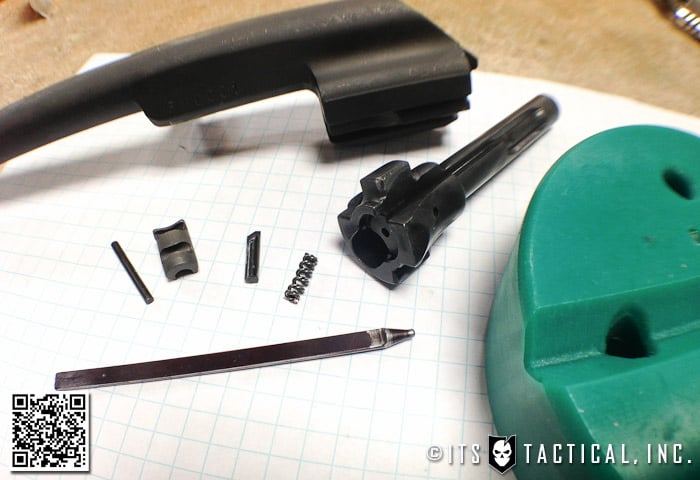
Installing the Hammer, Trigger and Safety weren’t in themselves that difficult, but one step in this process really got me and was the only point in the build I said a few choice words to my new AKM. To start this procedure, we began by filing down the hammer face to remove the sharp edges and bevel that came on the US Made TAPCO G2 trigger.

In the second video, Billy demonstrates how to to properly file, sand and polish the hammer. This ensures the bolt carrier doesn’t get stuck when charging. Be very careful here, because if you take too much off the hammer, you’ll get a dead trigger and the trigger won’t reset properly.

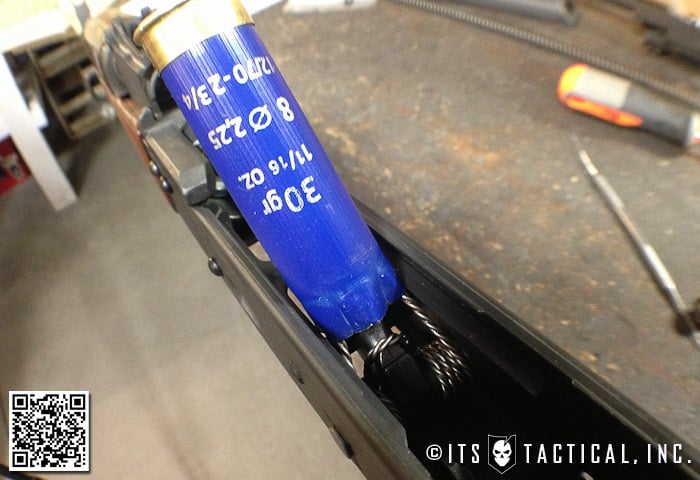
The next step is to set the spring onto the hammer and hope that the cobra doesn’t bite you! The legs of the AK spring are like a cobra ready to strike after you finish wrapping them on the hammer. A neat trick here is to take an empty shotgun shell and place it over the hammer and “set” legs, so it doesn’t get you if it strikes when you’re installing it.
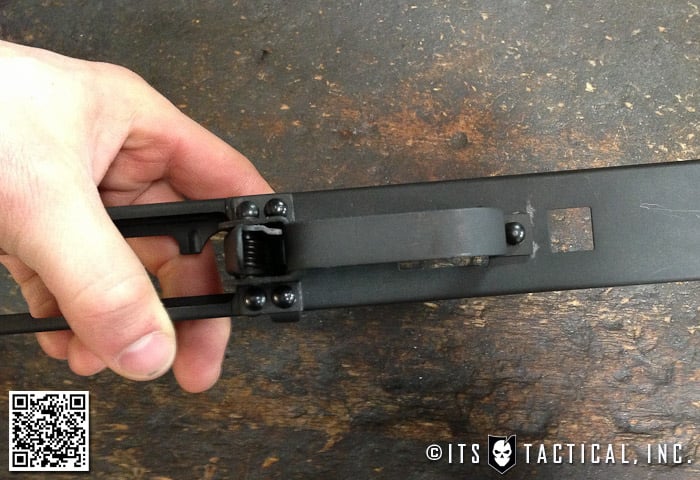
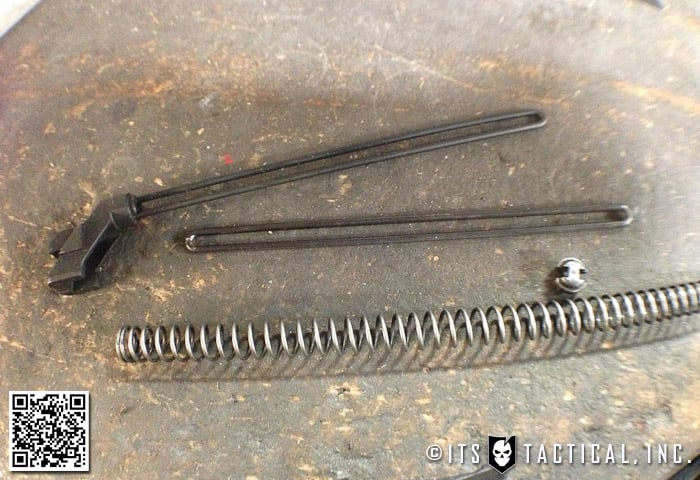
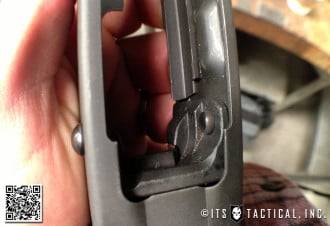
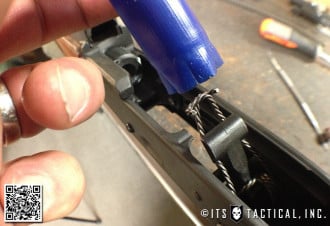
Once you have your hammer spring set, install the trigger disconnector, disconnector spring and sleeve. You’re now ready to install the hammer and trigger. If you notice, the hammer/trigger pins have a groove around the entire pin, which was originally used to rest a wire on to hold them in.
Advancements have thankfully come around and we now have things like the Krebs Retaining Plate, which do a better job of retaining the hammer/trigger pins and are easier to install. There’s nothing wrong with using the wire, other than it being a pain in the ass to install. I had an issue with the Krebs plates I used and had to default to the wire, which is why my choice words came out during this step.
It’s easier if you install the hammer into the receiver before the trigger, as there’s more room to get it to fit correctly. Once it’s in place you may need to tap the pin with a hammer to get it to seat properly. Next put the trigger in place and insert the pin before adding the wire or retaining plate.
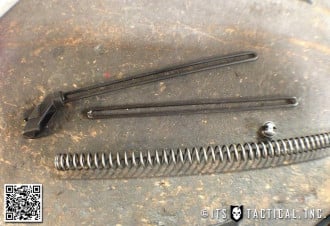
The last thing is releasing the mouse trap hammer spring on top of the trigger and ensuring the wires are resting on the trigger correctly. The Recoil Spring assembly is also an important step that Rifle Dynamics has a neat trick for. Billy demonstrates in the video below:
Furniture Assembly and Polishing
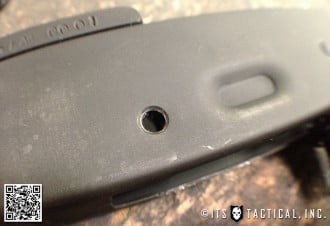
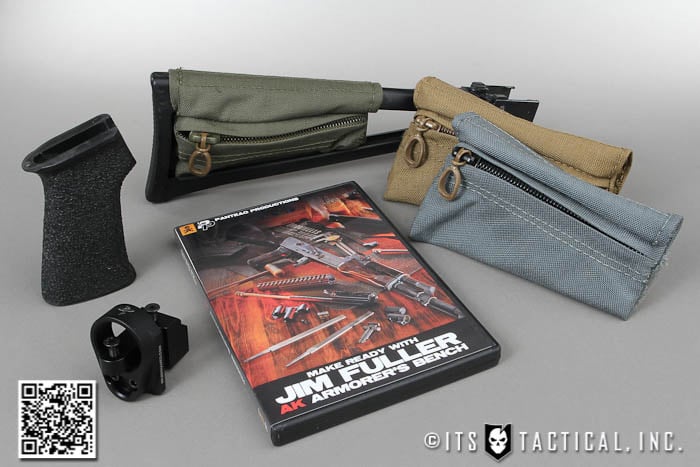
Assembling the furniture on the AK is almost the easiest thing to do. There’s two large screws that hold the stock on and another two that hold on the rear stock plate that features a trap door which houses the cleaning kit. I’ve always loved the feature on the stock that stores the cleaning kit until it’s needed. Yet another reason why I like AKs with their original wood furniture.

I did run into a few problems installing the top section of wood to the gas tube. You basically take a large wrench and spin the wooden cover 180 degrees into position. You can split the wood here if you’re not careful, so don’t force it.

The pistol grip is fairly self explanatory as well. There’s only one way the nut will fit inside the receiver and you’ll know immediately if you have it in the wrong way. Then it’s just a quick adjustment with a screwdriver to tighten it up.
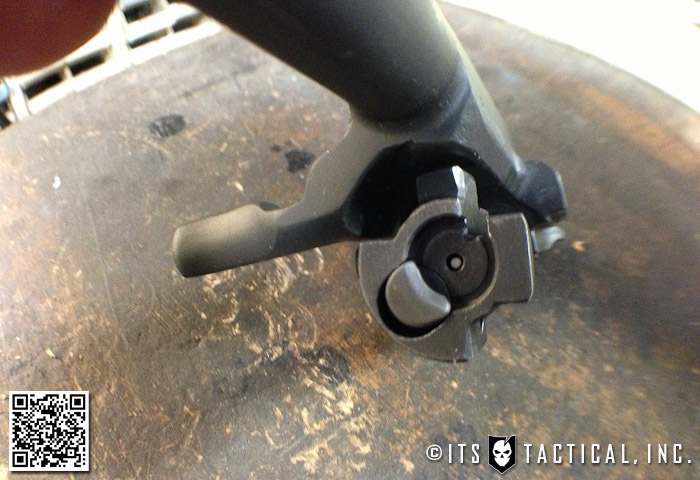
At this point, we assembled the bolt carrier group and recoil spring and got to see if the bolt carrier was sticking. On my AKM, it was sticking in the rearmost position when racking the charging handle. This was easily fixed by some slight polishing with a dremel diamond wheel on the receiver rails and the area on the bolt carrier group that they interface with.
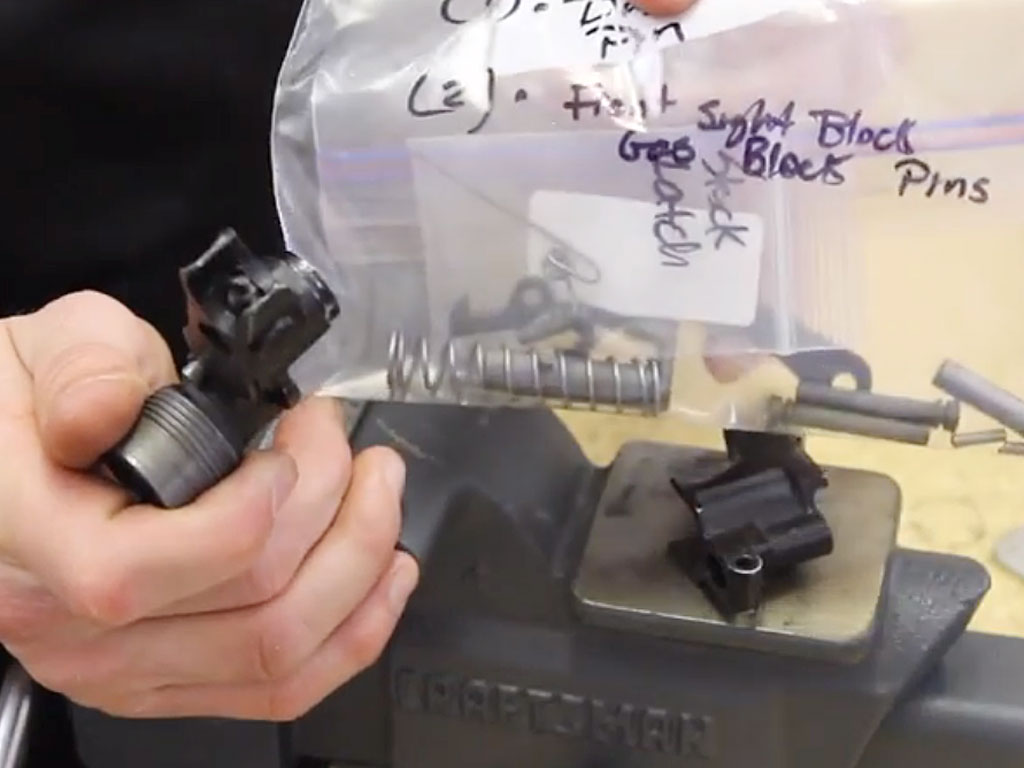
Front/Rear Sight Installation
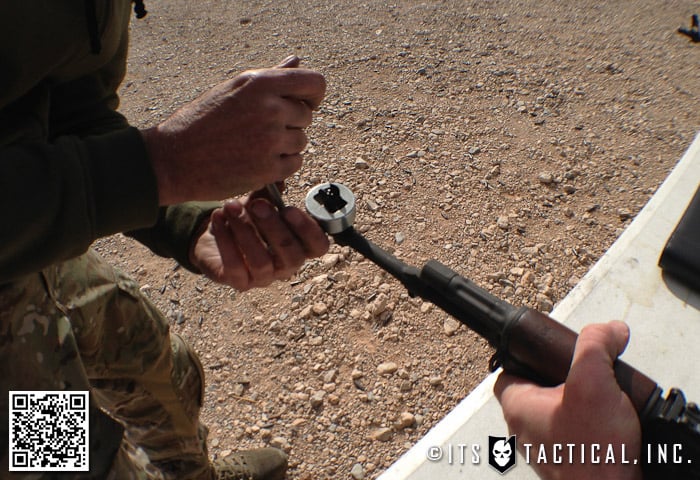
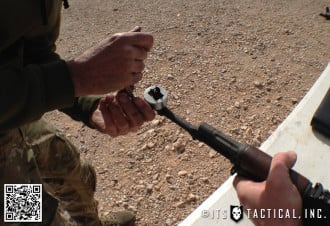
The AK cleaning kit, which is probably one of the most versatile inventions, can be configured to handle almost any work you might have to do in the field to your AK. Jim demonstrates these configurations in the third video (above.)
One such configuration is using it as a front sight adjustment tool that can also install the front sight. The rear sight is a bit more difficult, as you have to depress the leaf spring with a flat head screwdriver while you slide the rear sight in.
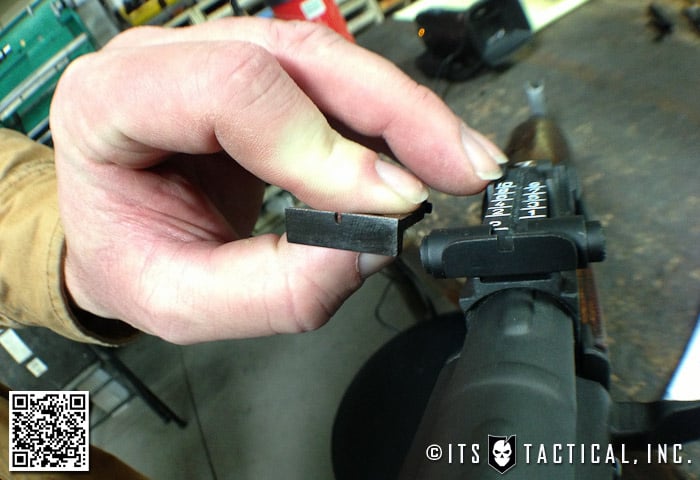
We also utilized the Fuller rear sight modification, a custom filing done on the rear sight to draw the eye into the sight. Jim also explains this modification in detail in the videos.
Function Check, 922r Compliance and Test Fire
At this point, everything was coming along perfectly with my build and Day 2 was wrapping up. Jim pointed out that you could realistically assemble a complete AK in about 2 hours if you knew what you were doing. I don’t think that I’m there yet, but I’ll reiterate here how invaluable learning hands-on like this is.

This is also a good opportunity to mention 922r compliance. In the video on day three, Jim briefly goes over 922r, but I feel that this video below from my previous trip out to Rifle Dynamics spells it out a little clearer:
If you’re interested in reading the full 922r compliance specs, they can be found here: http://www.atf.gov/firearms/faq/firearms-technology.html
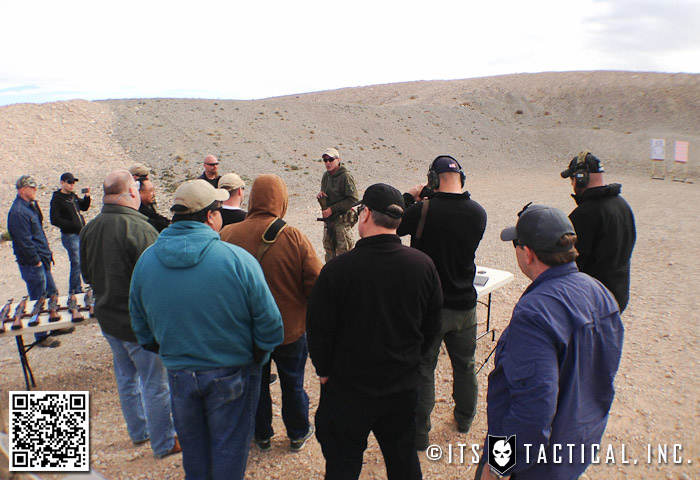
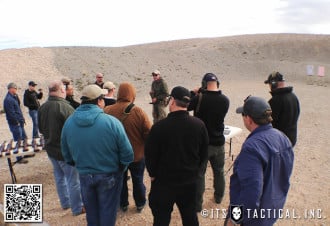
Day three commenced with a final function check to ensure our trigger groups were behaving before heading out to the range to test fire. The goal of the test fire was to burn through a mag first to look at the ejection pattern of the spent cartridges. Optimally these will launch at the 2 o’clock to 3 o’clock position and fly at least 10 feet away. If that occurs, it means your gas system is working properly. There could also be junk in the gas port that will more than likely blow out as you’re running that first mag.
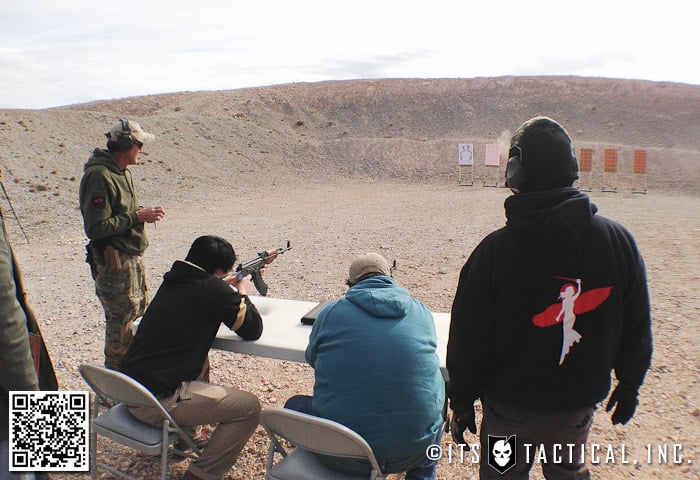
The other things you’re looking for is how the gun feels, is the furniture working loose? Are the hammer and trigger pins staying in? Zeroing was also done at 25 yards and I was very impressed with how well my AK shot. There was hardly any adjustment at all needed.
Wrap-up and Future Course Offerings
During the time between the AK Builder Course and this article, Rifle Dynamics has already offered another class and I believe it filled up immediately. Here’s the announcement on Facebook for that course though if you’d like to inquire for available spots.
The best thing to do if you’re interested in getting in on a Rifle Dynamics AK Builder Course, is to watch the Rifle Dynamics Facebook Page. They’re using the page for announcements of these classes and you need to be quick if you want to get in on one.
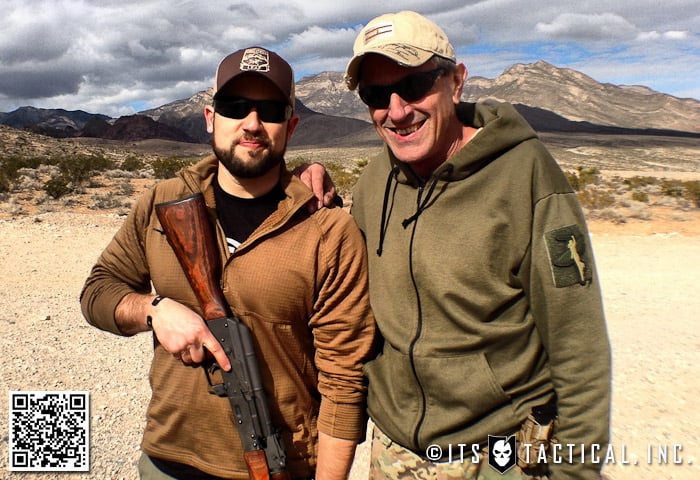
I want to thank Jim and Karen Fuller, Billy Cho, Mark Flinn and the entire Rifle Dynamics staff for an amazing course, I feel honored to have attended the AK Builder Course and words can’t express what a tremendous opportunity it is to learn how to build an AK first hand from the RD staff.
If you have the resources to attend this course, it’s some of the best money you’ll ever spend, not to mention the fact you own the AK that you build during the course! This is craftsmanship at its finest and is a true trade that needs to be learned in the old way like this. There’s not enough of this kind of learning out there today if you ask me.
I’ll leave this with a great quote from Jim after the course was over that I think speaks volumes about what this course means and the caliber of company that Rifle Dynamics holds itself to.
“Another aspect of this class is “freedom and the American way.” We are a country that was founded on personal achievement and excellence driven by capitalistic offerings of services, goods and products. We have unfortunately moved away from that mindset today but we hope that these classes will inspire some of the students to go on to build their own AKs or even go into business building for others. We just want to make sure they’re doing it right for the sake of maintaining a standard of quality in American AK variants. Not to mention that the freedom you have to do something like this is important for our survival as a free nation.“

Links/Resources
- Rifle Dynamics – Information on production AKs, custom work and training
- AK-Builder.com – AK jigs, presses, rivets, parts, magazines
- Green Mountain Rifle Barrel Co – AK barrels
- NODAK Spud – AK Receivers
- 74uLLC – AK Receivers
- RGUNS – AK parts kits, barrels, accessories
- Krebs – Retaining plates, etc.


Discussion