


Off-Road Staple: Unconventional Methods of Using a Hi-Lift Jack
Off-Road Staple: Unconventional Methods of Using a Hi-Lift Jack
- Off-Road Staple: Selecting and Mounting a Hi-Lift Jack On Your Rig
- Off-Road Staple: Using a Hi-Lift Jack and the Associated Hazards
- Off-Road Staple: Unconventional Methods of Using a Hi-Lift Jack
Editor’s Note: In this final article of a three part series, contributor Derek Gill discusses some of the unconventional uses for a Hi-Lift jack. He also highlights why you should always practice with your jack before you need it out on the trail.
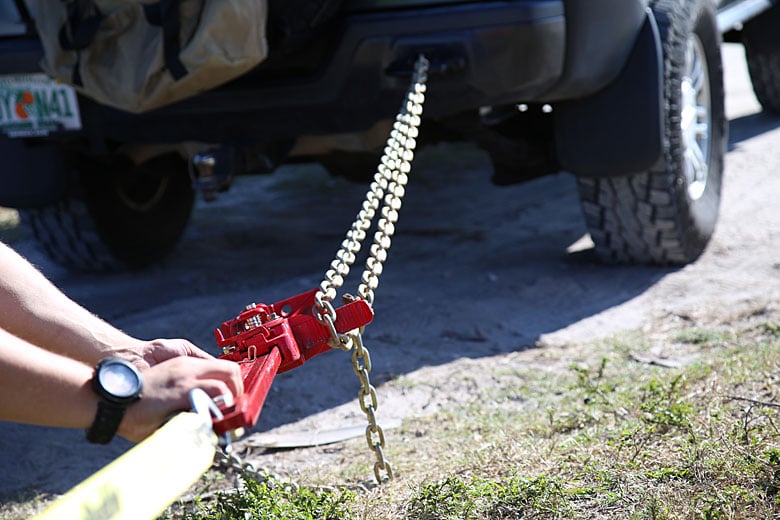
Sometimes winches fail. Sometimes you need a little extra pulling force or a different pulling angle. Sometimes you spent the winch money on something that wasn’t a winch. Whatever your reason for needing to pull your vehicle approximately 3 feet at a time, the Hi-Lift jack has the answer.
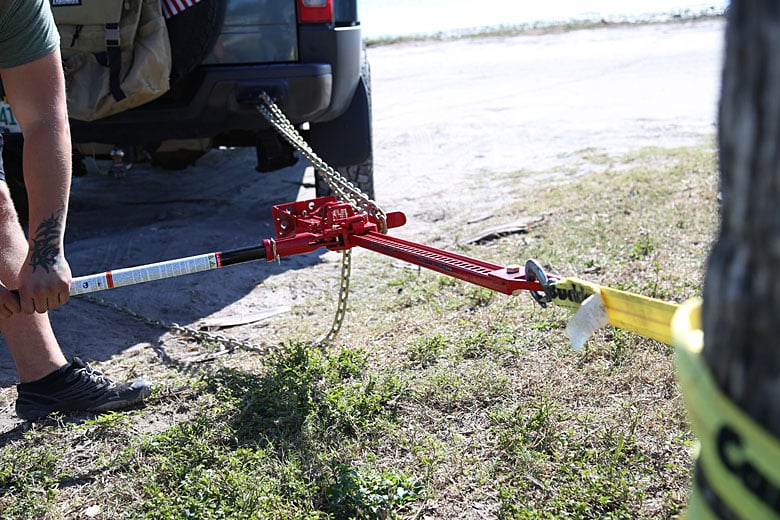
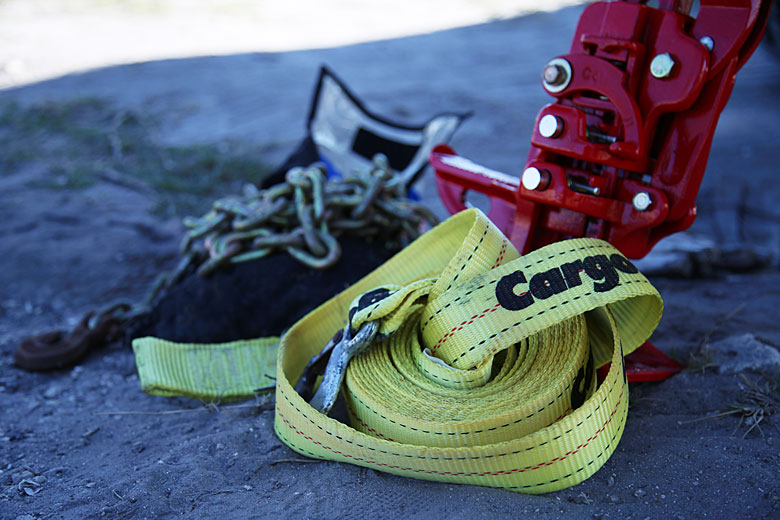
This procedure is quite simple. You’ll need a pair of chains or straps and probably a bow shackle of some sort. I trust your judgment on which items are necessary for your application. First you’ll secure the top of the jack to an anchor point away from the vehicle. Next, loop a chain or strap around the foot and connect the other end to your vehicle. Now simply jack like normal and you’ve got a 5,000 pound winch. The variance here will be that the jack is horizontal and that you may need to hold the base plate until the line is tight.
To release tension on the jack winch, simply flip the lever and jack the lever back down. The alternative is that you can simply drive toward the anchor point until the jack/winch assembly makes contact with the ground.
Accessory to Winching
There are times when leverage can be increased or applied in a unique manner through the utilization of the Hi-Lift Jack. I think we’ve all seen the “suction cup” effect of mud when a vehicle gets brutally stuck. A common problem with this situation is the inevitable winching operation that introduces hard angles and unnecessary stress to several components of the truck.
A quick search on the Internet will reveal a slew of videos that depict vehicles being snatched or winched incorrectly. The end result is typically the complete destruction of the vehicle as the body is peeled off the frame or the entire driveline is ripped from the undercarriage. This is a result of shear force being applied where it isn’t appropriate and a jack can help prevent this from happening on your watch.
In order to free a “suction cupped” vehicle, you have to first break the suction on the wheels and then physically lift the vehicle out at an upward angle. Hopefully you have the shovel we discussed in our previous article or you’ll need to make someone get a little dirty and start digging with their hands.
Begin by clearing as much mud as possible away from the tires, any little bit helps. Next, connect the winch cable to a suitable anchor point; trying to pull the vehicle as straight as possible. Shear force at this point will only stress the undercarriage, so this is the time to add the jack. Move outward about 10 feet and fully extend the jack beneath the winch cable. Don’t apply full tension to the cable, but rather enough to keep the jack in place. The result should be an interesting and wildly awesome combination of science, art and brawn that would make your ancestors proud. Now you’re ready to winch!
As the winch cable is pulled in, the jack will begin to track with the cable, sort of like the second hand on a clock. This will keep the force of the pull at a steep angle and will prevent those nasty shear forces from accelerating the need for ball joint replacements. As the angle becomes too acute, it will be necessary to reset the jack. This is not a time to be lax about safety though. One could see the simplicity in running to the cable and releasing the jack. This is ill-advised as someone would need to place their body within inches of a jack and cable under immense pressure.
Some options are available for safely resetting the line. Since the jack is not being used to actually jack on anything, there’s no reason to approach it while under load. The winch operator has the option to continue the pull until the jack falls to the ground so long as the winching operation is progressing smoothly. In the event that the jack needs to be re-positioned without drawing the winch, the winch operator may opt to release tension on the cable manually and allow the readjustment to be performed. This entire process is inherently dangerous and as such, we recommend using this sparingly and with extreme caution. This method will likely accelerate the deterioration of the winch cable and may be detrimental to a synthetic rope.
Resetting Tire Placement
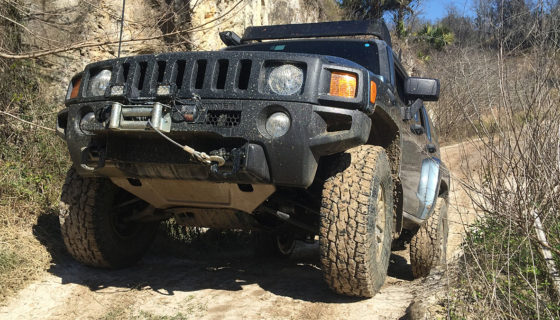
As I write this section, I recall the most embarrassing moment I shared with my friends on a day trip to some swampland in Florida. I was following a Jeep Grand Cherokee and a P38 Range Rover through some pretty rough terrain with a couple other vehicles trailing me. I’d slowed down to lock the transfer case on my truck and lost sight of the Rover ahead of me. Being that we were out to get the trucks muddy, there wasn’t a lot of concern about hitting everything with precision and deliberation; we expected to get stuck. We were diving our trucks into blind pools of muddy water without any regard for the potential disasters that loomed overhead. As I looked at the trail ahead of me, I saw only one route through a suspicious looking patch of mud.
I knew something was a bit odd because there was no other direction to go and the water was completely undisturbed. I was already in the accelerator and heading right for what I thought was an easily manageable traverse. Wrong. The other two vehicles had taken a bypass through the tall reeds and grass, while I high-centered my truck on the front skid plates and rear differential. The previous folks at this juncture had slammed through this section with much larger tires and a whole lot of lift kit. We tried recovery boards, shovels, snatching and even towing with a chain, but this was going to take the winch. There was no way to anchor the winch line except the bow shackles on my friend’s much lighter Jeep Grand Cherokee. The winch only pulled his vehicle closer and closer with every run; I was hopelessly stuck.
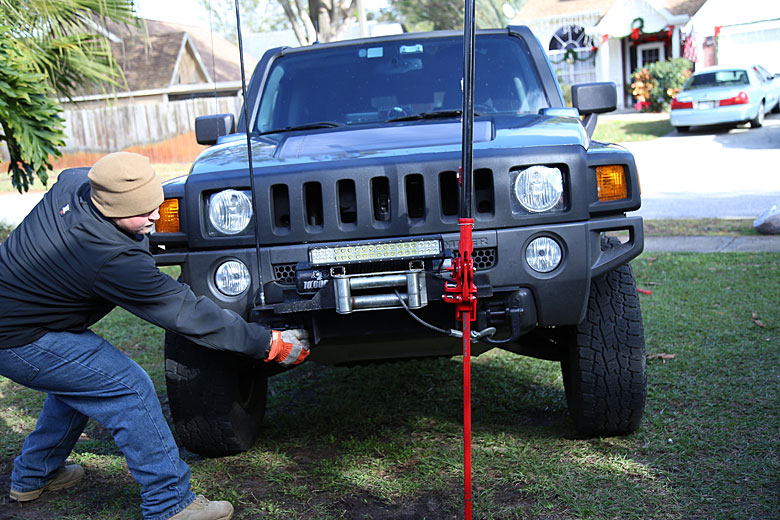
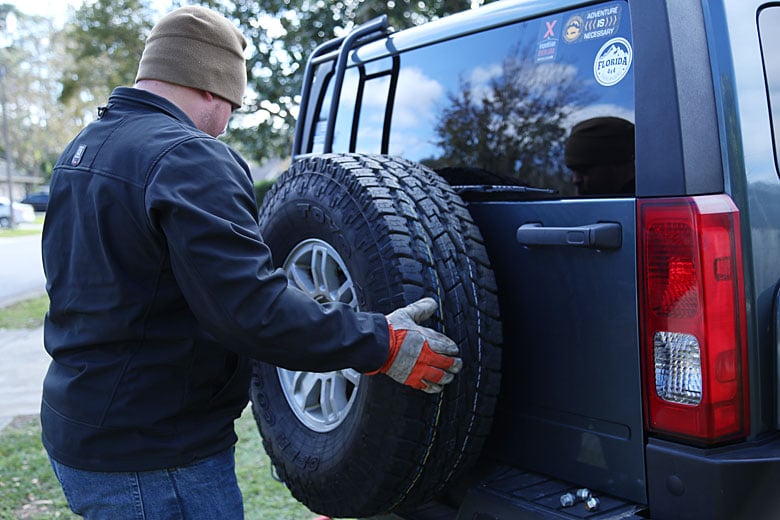
The solution, which should have been the first thing we tried, was using the Hi-Lift jack. I’d heard about this technique, but I wasn’t sure it was even safe or that it was a real thing. I lifted the front of the truck from the driver side of the roller fairlead until the front tires were up above the water line.
Then I pushed the truck off the jack. It requires a considerable amount of effort, but pushing the vehicle to one side or the other will shift the placement of the tires by about 18 inches.
I don’t have a steel bumper or any other considerable lift points on the back, so my solution was to take the hitch from the receiver and turn it upside down so that the ball was facing the ground. This provided a stable channel to place the foot of the jack in. Once high enough, we push the truck off again and shifted the rear wheels just enough to clear the previous ruts. After two hours of recovery work, I simply put the truck in gear and drove out of the hole.
If this is a technique you plan to attempt with your vehicle, I suggest wearing your winch gloves. There are an incredible number of opportunities to pinch fingers off or hit yourself with the jack or the vehicle. This isn’t an inherently safe process, but the risks can be minimized with due diligence and caution well exercised.
Emergency Extrication Spreader
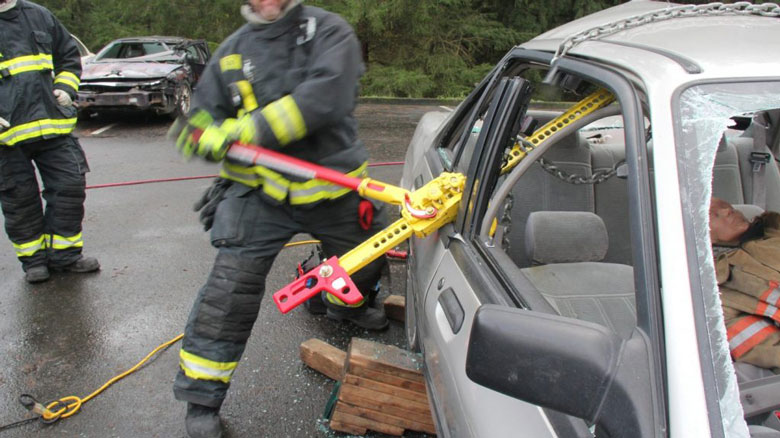
You read that correctly. I don’t want to overstate the practicality of this use, so we won’t spend a lot of time on it. Basically, there’s a 7,000 pound. spreader sitting on the roof rack of many overland rigs. This is the kind of thing that’s sort of “good to know” in the event of a major accident. I wouldn’t necessarily recommend dismounting the jack and going to work on someone’s coupe after they run a red light, but the option is there for remote travel. Rollovers are common when pushing a vehicle to its limits and having extrication tools could very well save someone’s life. However, I recommend training on this kind of thing. There are CE credit courses available, but often they’re exclusive to LEO, Military and EMS/FR.
Breaking a Tire Bead
Not only can a jack aid in breaking a tire bead, it can also aid in putting a tire back on the rim. This isn’t totally common, but in some cases it’s necessary to remove a tire from the rim while out in the backcountry. It’s not likely something you would do on a weekend run, as the vehicles can be towed or put on a trailer. This is more like the extremely remote bushcraft solution to a seriously bad problem. In the event that one vehicle loses two tires and no longer has spares available, it makes sense to borrow a spare tire from someone else. Unfortunately, not all bolt patterns are the same. Let’s say I have a GM, but my buddy has a Toyota and we both have 16” wheels and 33” tires. We could in theory, donate a wheel in the event of tragic loss. However, my wheel doesn’t fit his and vice versa.
The next best solution would obviously be a helicopter, but as we don’t have one of those we can use a tire. Using tire levers, tire spoons, large flat-head screwdrivers and/or a Hi-Lift jack, the rubber can be removed from one wheel and installed on another. The Hi-Lift will basically be placed under a jack point on either vehicle with the base sitting on the edge of the tire near the rim. Jacking the vehicle creates a massive amount of force on the tire and breaks the bead. Once the tire is completely removed, it can then be installed on the other rim by using the same technique that was used to remove it. I won’t go too in-depth on changing rubber from a rim here as I do plan to make that another topic later on.
Axle Retainer
This is a clever Old Wive’s Tale that turns out to be quite useful. This would definitely take someone that knows what snaps and pops mean while behind the wheel of a 4X4 vehicle. So if you’re ever under load or on a hill climb and you hear that axle shaft break, stop moving immediately. Park the vehicle and retrieve the jack, a couple of straps and your tool kit. Start by disassembling the jack until you have only the climbing rod. Place the rod against the tire and strap each end to the frame of the vehicle.
This will allow the vehicle to be limped out of danger while keeping the wheel on. Trying to drive any faster than a crawl will almost certainly damage the vehicle, so you’ll want to only move as far as necessary to ensure safety to yourself and the vehicle.
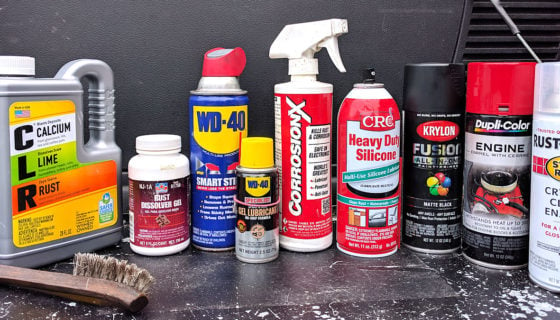
Base Plates
I didn’t give mention to this during my story time earlier, but there are improvisational techniques that can be used when jacking in soft mud. Physics tells us that if the surface tension of a liquid or suspension is weaker than the force acting on it, then whatever is applying force will sink. That’s nerd for, “you need a baseplate under a jack.” Base plates distribute the force of the jack across a greater area and thus prevent the jack from burying itself in the mud as you perform the lift.
Many manufacturers also sell a large plastic base plate that can be loaded up in the rig and taken anywhere the jack goes. These are great pieces of kit and necessary for recoveries using the jack in deep mud or loose sand. If a base plate isn’t available, you have the option of stacking logs or rocks if they’re large enough.
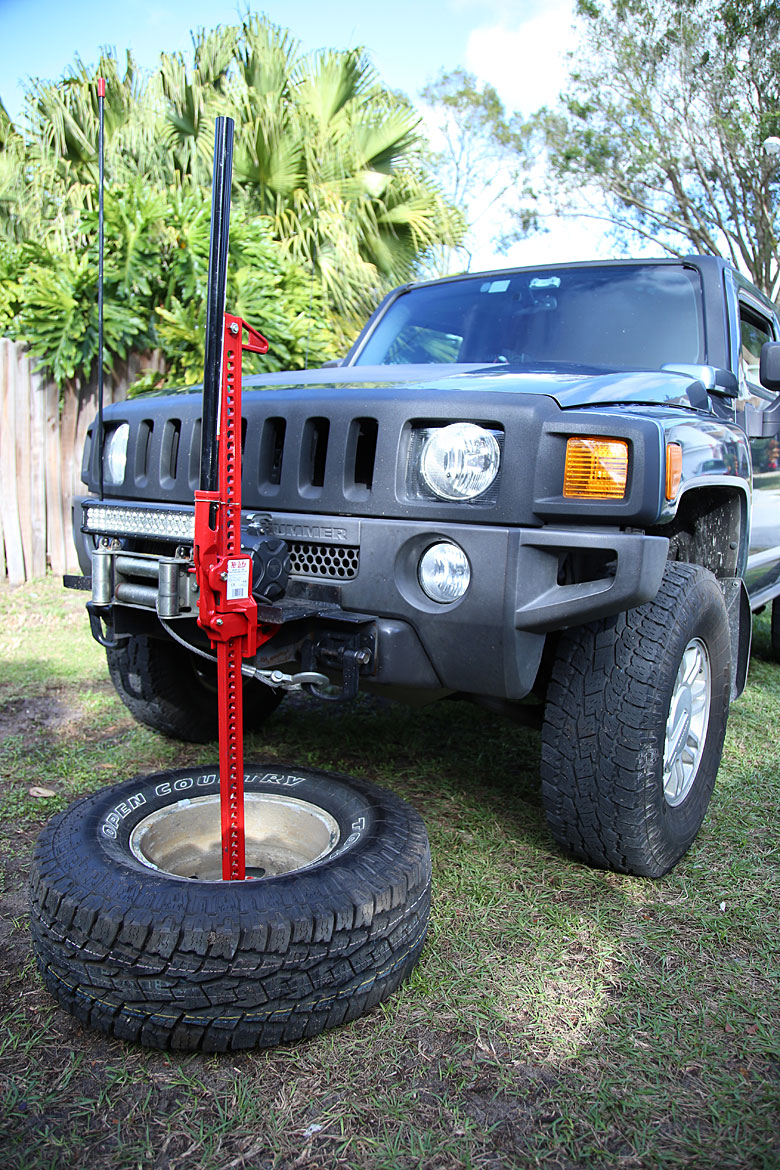
I can’t recommend that you try this, but this is a personal favorite of mine; using the spare tire. If you’ve pulled a farm jack off of the vehicle, you’re probably in some trouble. It makes sense to save the space and use the spare tire as a base instead. The way to do this is to lay the pretty side of the rim down in the mud and dirt. Then set the base of the jack inside the center of the wheel and get to work. Weaker alloy wheels always give me pause because I don’t want to break my wheel in the backcountry. The key here is to make sure the wheel is pressing against the terrain. You don’t want the structure of the wheel supporting the weight of the jack, but rather dispersing it into the dirt. Steel wheels are usually better suited for this kind of abuse, but there’s no guarantee on either. Overall, my advice is don’t do this because you can damage the wheel.
Conclusion
The Hi-Lift jack is one of the most versatile pieces of equipment available for off-road use. Remember that the jack alone is not enough to get you out of trouble, but is rather an important piece in a collection of useful tools. These jacks come in a couple of common sizes and have adapted to use a variety of accessories. Think seriously about your needs before buying a farm jack and its accessories, because space is at a premium and it disappears quickly.
This piece of kit shouldn’t scare you, but it needs to be taken very seriously. There are many people in the world that don’t like these things. I think this hatred comes from a lack of understanding of their immense power; whether that power is recovery or breaking your fingers. Approach every recovery situation with extreme caution and don’t get complacent. When I was first learning to use power tools, a very influential person in my life said, “Watch this equipment closely because it’s watching you all the time. The moment you lose focus, it will get you.” These activities are a lot of fun, but they’re also extremely dangerous and should be treated as such.
Your first use of the Hi-Lift jack should under no circumstances be during a recovery. Park the vehicle somewhere safe, away from children and pets; they don’t seem to pay attention too well. Practice lifting at different points on your vehicle before you go out. Don’t forget the emergency brake, as you don’t want to strain the drive line any more than necessary. Most importantly, have fun out there. That’s why we do this in the first place.
Editor-in-Chief’s Note: Derek Gill has been a Plank Owner here at ITS from the beginning and has an extensive background in healthcare, pharmaceutical research and technical diving. He’s been certified in SCUBA since 2000 and diving technical/CCR since 2010. He speaks several languages including Russian and Spanish as well as several computer languages. These combined skills have opened the door to more creative ventures in Network Security and Physical Security consulting. Derek is a veteran of the US Navy and a former Navy Corpsman who worked alongside the US Marine Corps. His military nickname, “Witch Doctor,” has stuck with him ever since and it can now be found across many internet forums where he takes pride in trolling sensational zealots from multiple industries.

Discussion