


Slick to Full Loadout: Building a Scalable and Modular Armor System
Slick to Full Loadout: Building a Scalable and Modular Armor System

When I attended SOFIC in 2011, I was impressed with the ECLiPSE line of armor carriers by BAE Systems. Going to a modular vest system totally made sense to me as I was then working in a street crimes unit which had us in both uniform and plain clothes assignments. The issue I kept running into had been scaling up and down from an under shirt ballistic vest, outer vest carrier and rifle plate carrier. Throwing my plate carrier over my uniform vest was no problem but there was no way to wear it over the outer vest carrier. Switching around with these different vest systems was a real PITA and not very practical.
The same issues arose in my plain clothes assignment, so I started my search for some type of modular setup. The BAE system is now nowhere to be found and hence the problem with the larger industrial military companies like BAE. Being large is great for the military, but with smaller ventures like the ECLiPSE line being either pushed between its subsidiaries or sold outright, those products may never reach the Law Enforcement or civilian side.
My Requirements
My requirements in a new vest system were pretty bold. Here’s what I needed a single vest to do without being “custom made” to keep costs down:
- Be able to carry “police cut” soft armor and be able to scale up to armor plates. Soft armor plate backers don’t give enough coverage for Police work in my opinion and the soft armor cut had to be reasonably concealable.
- Be sustainable for armor upkeep/upgrade. I wanted a soft armor cut that will be made 10 or 15 years from now (we’ll see if this works out.) No “custom” cuts, which would lead to added expense and time delays in the future. For those of you that get measured for a vest every five years, you know how long you have to wait to get your new vest. The SPEAR cut soft armor was an option in this area.
- Be able to scale from a “slick” rig all the way up to a tactical load out and all versions in between. This is what really narrowed things down. I didn’t want a vest with MOLLE/PALS all over, especially on the back as I never use it.
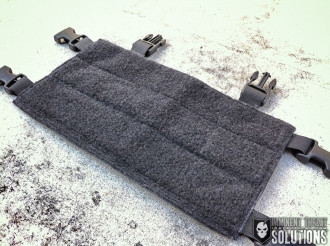
- Have hook and loop for ID panels front and rear.
- Have the ability to “clip-in” front panels (MOLLE panel, Hook and Loop panel and AR15 rifle panel.)
- Be able to carry a radio and medical kit on the sides of the cummerbund at all times, without the front panel clipped in.
The Answer
After much research my answer was found in the Mayflower Low-Profile Armor Carrier (with armor package). Bryan did a review in 2009 of the armor system which really helped with my final decision. The only other vest system which came close to my requirements was the Rogue Gunfighter LVR vest. I didn’t have a way of seeing one in person and I didn’t know of anyone who owned one, but it looked to be a good alternative. I would make sure to ask a bunch of questions about the soft armor though, as it appears to be a proprietary cut.
Once I narrowed down the Mayflower and Velocity soft armor I had to figure out what to do about making it modular. To start, I ordered the vest with the MOLLE/PALS mesh cummerbund, as I didn’t need the side plates and wanted to keep the bulk down. The only downside was that it only had 4 rows of webbing, which meant some items might hang off the bottom a bit. The ITS ETA Trauma Kit (I have the first generation version) and Blue Force Gear Ten-Speed are two examples. The MOLLE cummerbund allows me to run my radio and trauma kit on the vest at all times. The overall vest is low profile and provided excellent mobility which is a nice departure from my old vest that was full of MOLLE and very bulky.
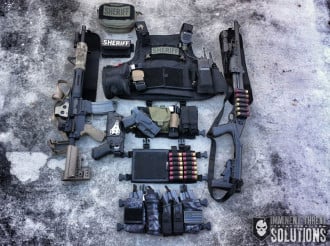
Next I had to figure out what type of clip-in panels to run up front. I’m going to break the vest down into the various configurations and describe the how and why of each. I’m running Extreme Gear Labs VOCR clip-in panels and a Haley Strategic D3. There are other panels out there that will clip directly into the Mayflower vests, but Darrin at EGL has been great to do business with and his products are solid.
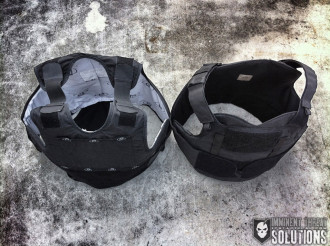
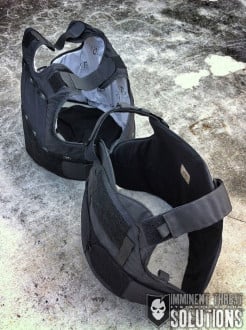
Setup 1 – Slick

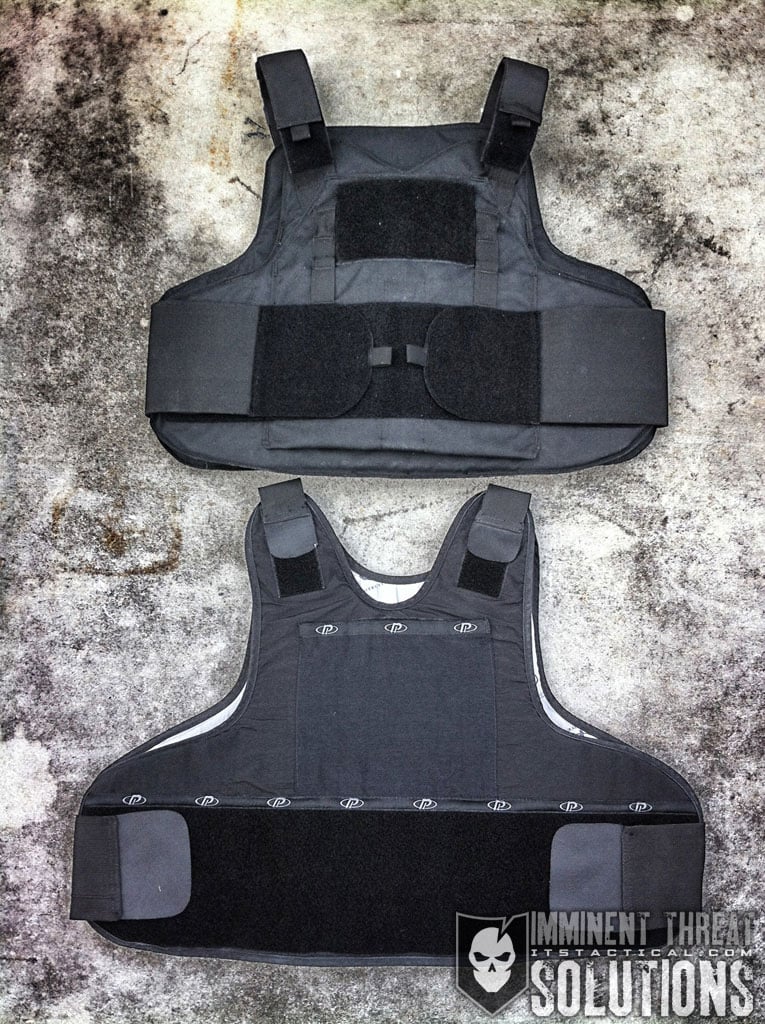
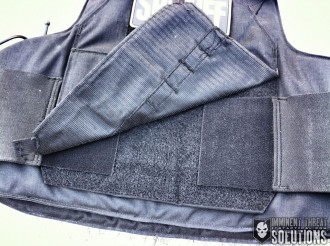
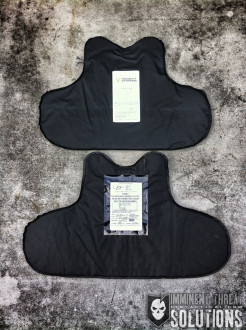
While I don’t intend to use the Mayflower as a typical “under uniform” vest, it can function very well in that area. Pictured is the Mayflower (right) compared to my issued PPE under uniform vest (now Point Blank). As you can see the Mayflower is pretty slim which is very impressive.
I think back to my days doing PSD missions and would’ve loved to have this type of setup. Our uniform requirements would change constantly going from diplomatic visits in a suit, to trips into Afghanistan. Trying to juggle all of this out of two suitcases at the hotel was challenging and more often than not we were under equipped in Afghanistan.
There’s no doubt you could run the Mayflower “slick” under a suit and in plain clothes. Then scale up to tactical missions in an overt type uniform.
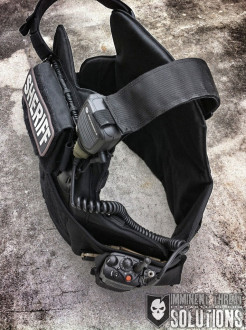
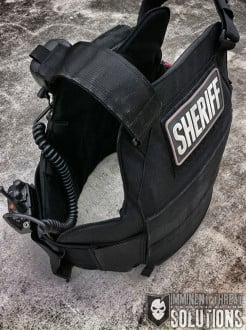
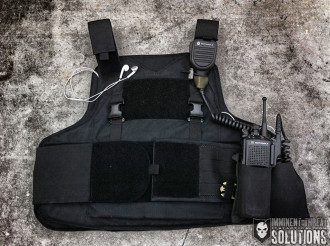
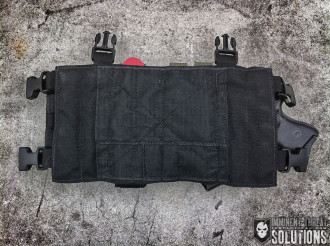
Setup 2 – Semi-slick Surveillance
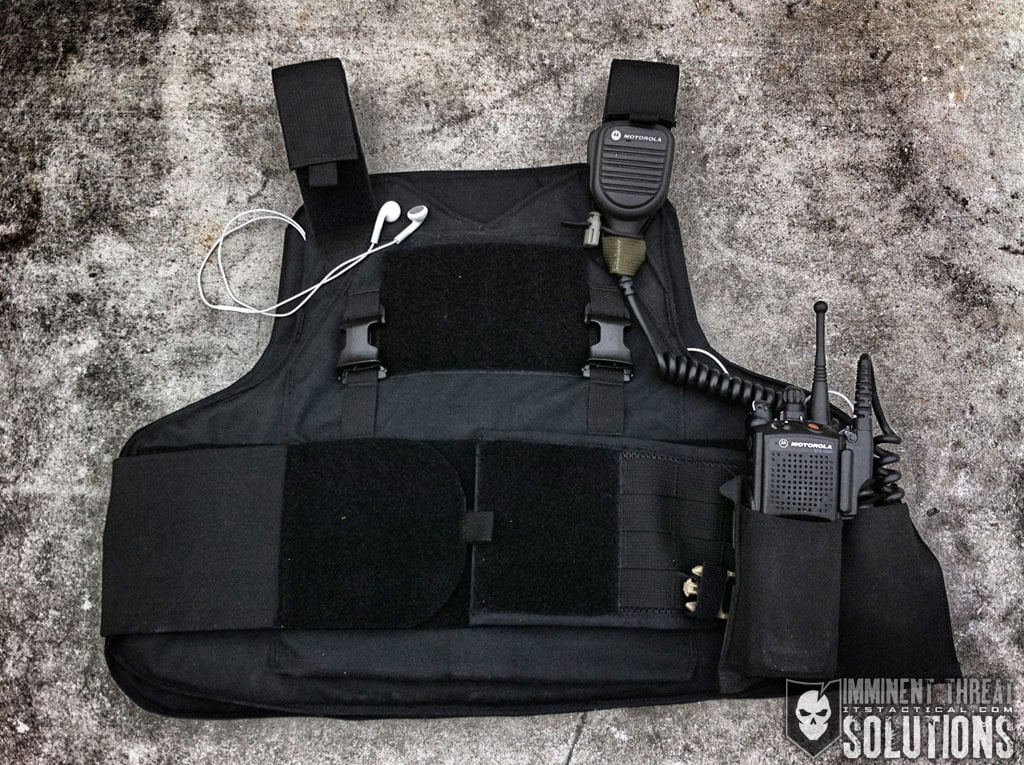
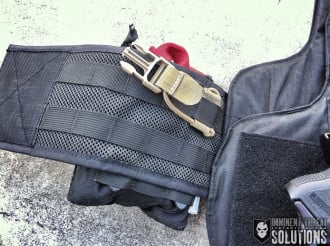
In this setup just one of the MOLLE/PALS cummerbunds is used to support my radio and the other side is a low profile cummerbund. I leave the upper SwiftClips attached to the front and this creates the “slickest” version of the vest I’ve personally run. The great thing about the vest is you can quickly switch out the cummerbunds as needed.
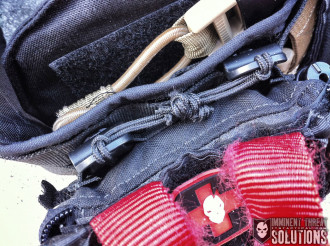
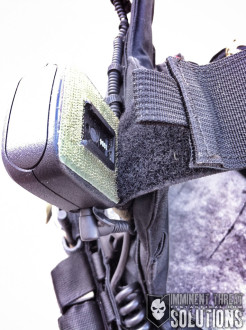
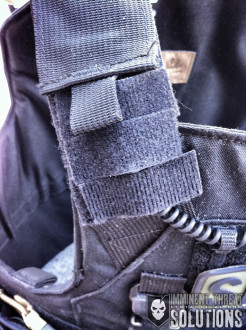
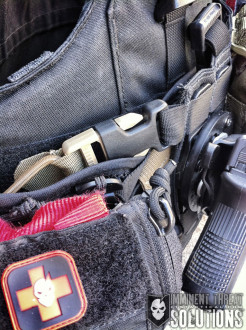
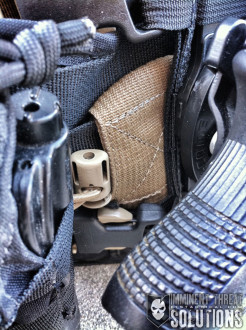
I’m able to use my iPhone earbuds with this configuration which takes away issues of clipping on an earpiece. Routing the earpiece cables and radio mic on the low profile shoulder straps can sometimes be a problem. I’m not completely happy with my setup and using shoulder pads might alleviate the difficulty I’m having. As you can see in the photos, I’ve rigged it using hook and loop fasteners and an M4 magazine bungee strap for the mic. My point being is simply a warning that you may run into issues mounting comms on these shoulder straps, especially if you’re switching different types of earpieces around.
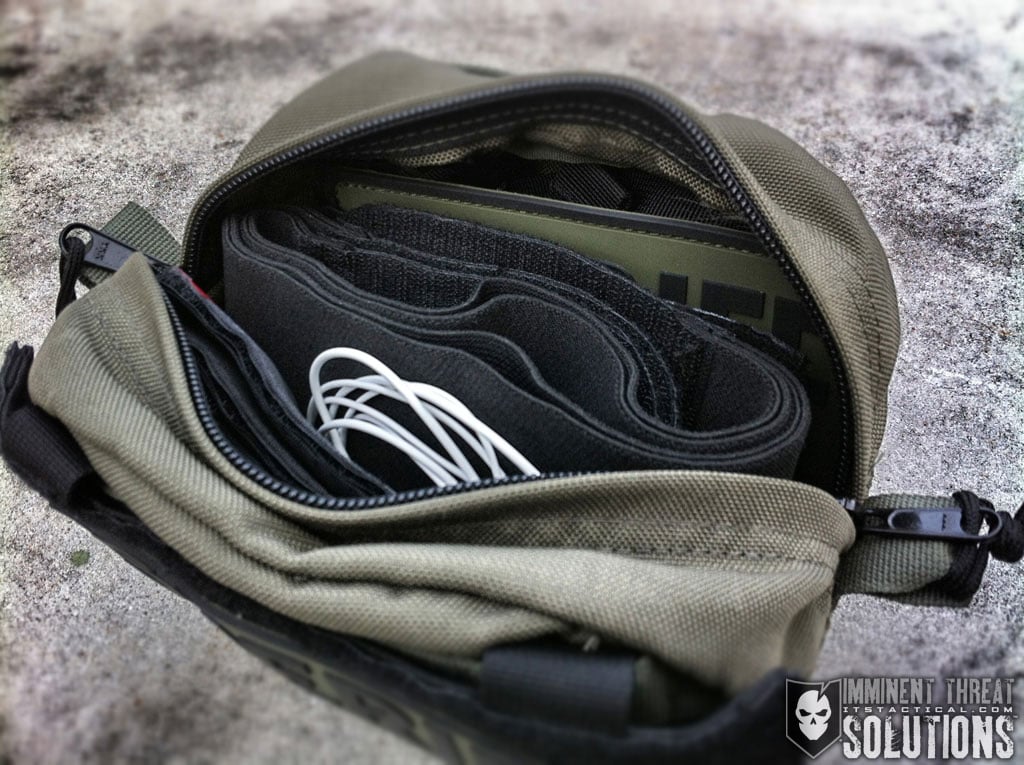
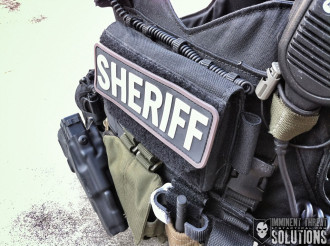
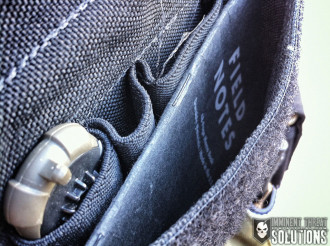
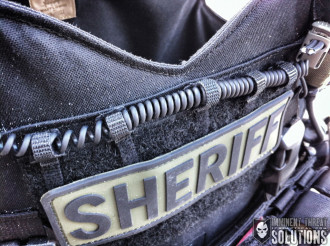
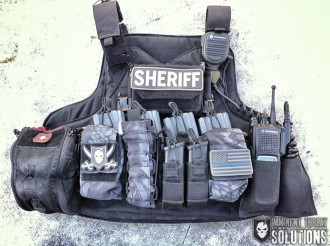
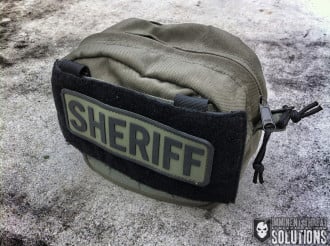
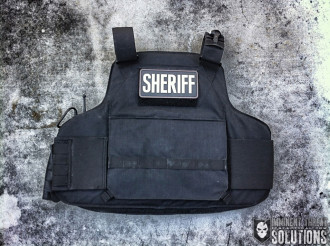
I use an old medical pouch to stow accessories in one place and mounted an old Eagle ID panel on the front which keeps a subdued Sheriff patch handy. Inside I keep the two low-profile cummerbunds, the hook backer for the D3 chest rig, the shoulder harness for the D3 and EGL hook-loop clip-in panel and a large subdued rear Sheriff patch. If needed, I could run the D3 or shotgun rig as a stand alone system.
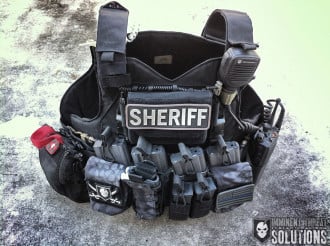
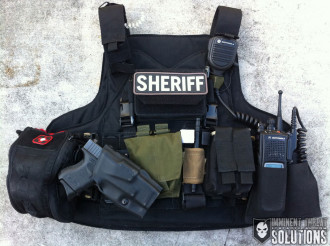
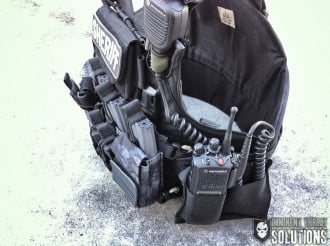
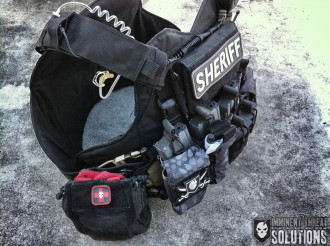
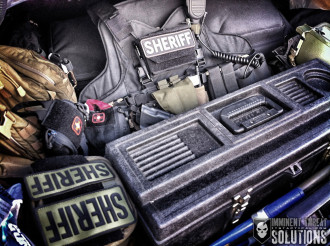
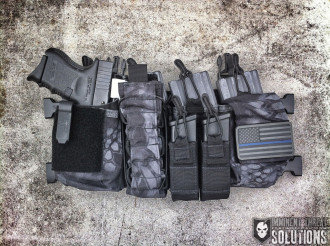
Setup 3 – Vehicle & Jump Out

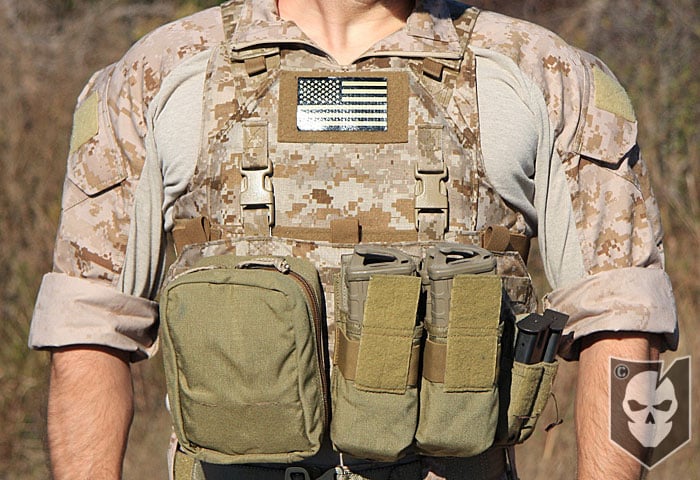
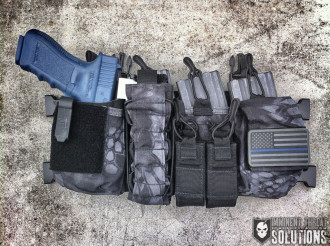
This is the configuration I use the most. The main component of the setup is the EGL Variable Objective Chest Rig which is a MOLLE/PALS panel. This allows you to obviously use anything designed to mount to MOLLE/PALS.
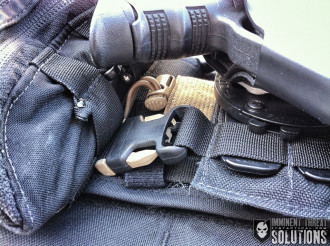
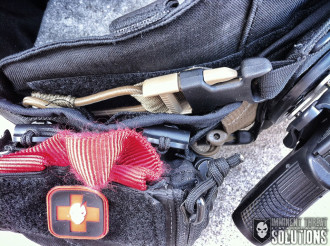
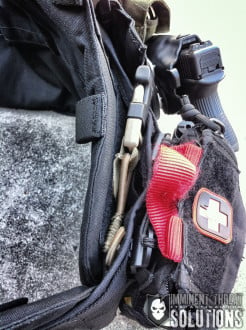
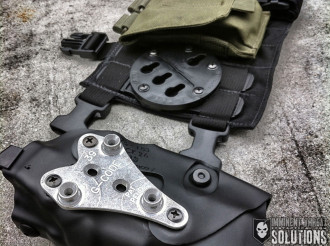
In my case I needed access to my pistol, handcuffs, tourniquet and two pistol magazines. I was able to mount all of these items with no problem using this setup. I used a G-Code RTI “H-Mar” MOLLE adaptor for my pistol as I run a Glock 26 and a Glock 21. Two extremes in pistol sizes I know, but being able to run each one on the same vest is a good option.
For vehicle work, having a chest mounted pistol is a valid platform. What’s also great is being able to take the holster off the vest if I end up running the pistol on my belt which can cut down on the bulk up front. I’ve also seen people using the G-Code RTI to mount other items such as medical kits and magazine pouches like the HGSI Taco system. Think about being able to clip-in different panels and also different accessories, ultimate versatility!
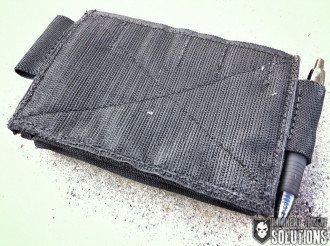
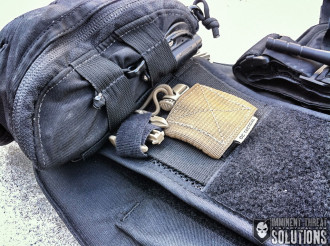
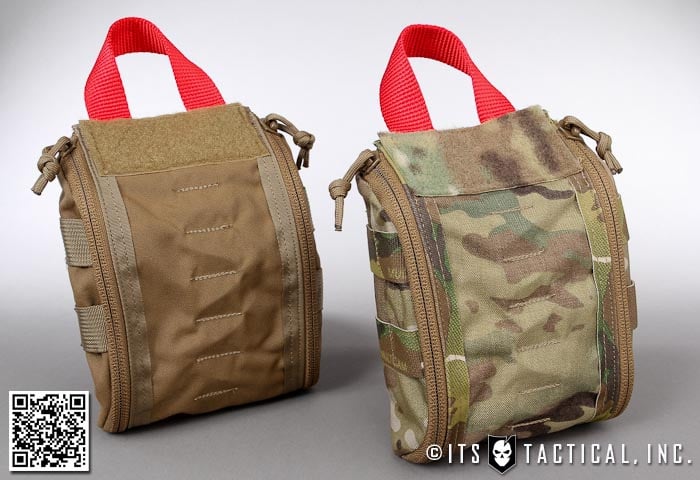
I also needed a “admin pouch” for paperwork, a pen and other small items. This is where things got tricky as the Low-Profile carrier doesn’t have MOLLE/PALS on the upper part of the vest like the Assault carrier. This made mounting a typical admin pouch impossible. Enter the EGL Hook & Loop Admin Pouch which has a hook backing and fits snugly in place. Again, being able to take the admin pouch on and off adds to the versatility of the overall system.
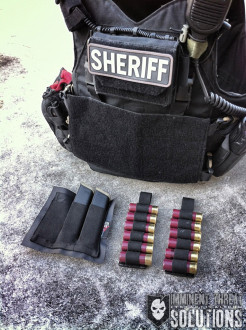
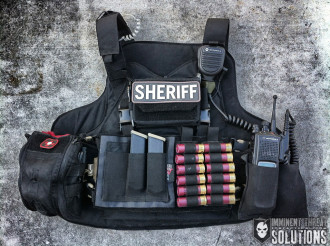
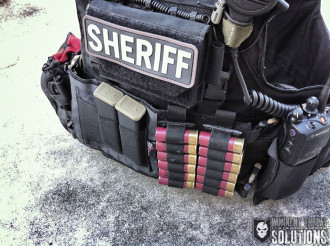
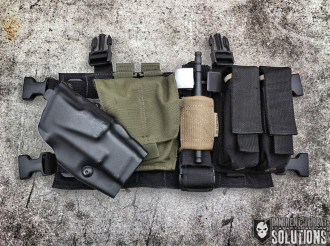
Setup 4 – Shotgun
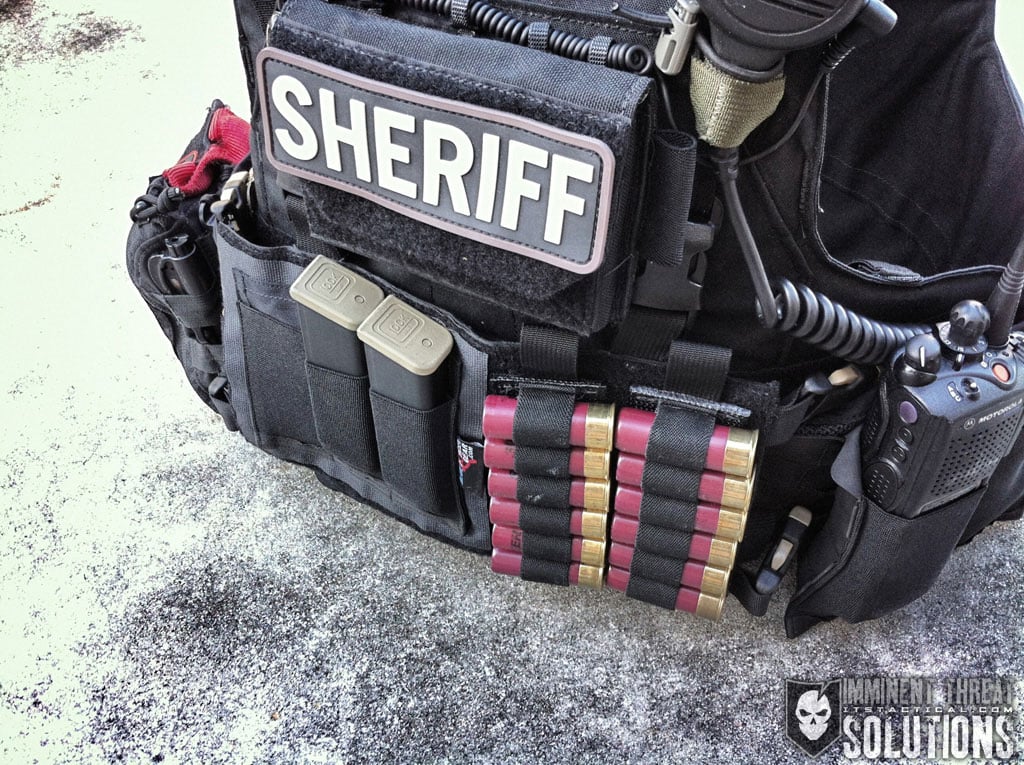
Running a shotgun also? This is no problem thanks to the EGL VOCR-SLAPhappy. Simply put, this is a loop faced clip-in panel which allows mounting of any hook backed accessory. In my case I’m using two OSOE Shotgun cards and a Blue Force Gear Ten-Speed Triple Pistol Dapper. There are numerous ways you could set this up to run a shotgun, gas gun or other system.
Setup 5 – Haley Strategic D3 Chest Rig

For my rifle I’m using the Haley Strategic D3. The D3 is a perfect fit for the Mayflower vest and takes care of my rifle setup. I will admit right now Travis does a much better job than I could describing the D3 platform so I will humbly direct you to his video for information on the D3 itself.
What’s nice about the D3 is the ability to run my INCOG holster with it. Since the majority of our work is from or out of a vehicle, this is a huge benefit. We don’t always have the luxury of being able to gear up ahead of time and having the ability to stuff my carry pistol directly into the D3 is awesome. This also cuts down on time as does all of these systems.
In a few of the photos in the gallery below, you’ll see my Glock 26 and a Glock 17 blue gun to give you an idea of size comparison using the INCOG. The only issue I see is moving the position of the pistol around more than two locations. I make it a point not to wear a drop down holster or carrying appendix for this reason. I work off my hip for uniform and plain clothes carry which helps with memory. The slight difference in location on the vest might not seem like much, but it is something to consider.
To quote our friends at Center Mass Group: “Professional sports teams don’t practice by just playing games, they run drills. In the sport of warfare, this is called dry-fire.” Practice, practice, practice!
Vest with Plates

I’ll tell you up front I have yet to run my level IV plates in the vest on the job, so I can’t talk about its use in a real world situation. I would say that if you plan on running the plates full time that you should invest in shoulder pads. The low profile design works great with the soft armor, but adding the weight of the plates (in my case heavy CPC level IV) would get uncomfortable really quick. I have Mayflower shoulder pads on order for this very reason. I’m hoping the shoulder pads will help with my comms routing as well.
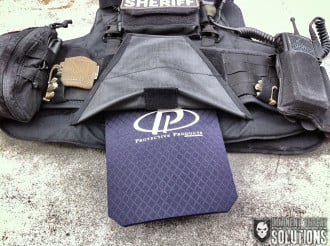
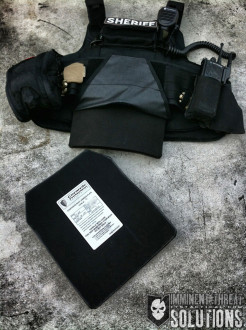
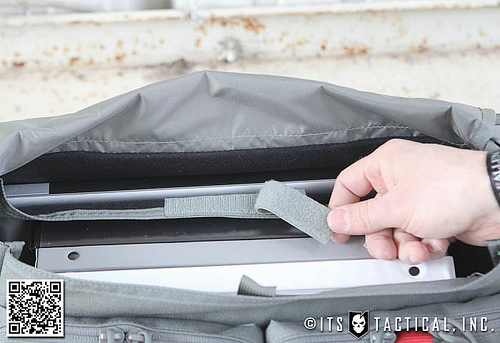
The nice thing about the Mayflower is how the plates are inserted from the outside. This cuts down on the time needed to add them to the vest. They also could be added while the vest is being worn if you have a buddy to help you.
Velocity Soft Armor
As I stated at the beginning of this article, I needed soft armor for use in a Law Enforcement role. The soft armor backers used in most plate carriers don’t give enough coverage in my opinion. The SPEAR cut is a good option and would allow them to be used in different vest platforms which is nice. This was initially the route I was looking to go, but I found it hard to find a vest that would answer all my needs.
After networking, I was assured the Velocity Cut would fit my requirements and several friends in the know told me Velocity really takes care of their customers, so I felt comfortable making an online order. I learned this first hand when the wrong vest was shipped, but they quickly resolved the issue to my satisfaction. I wouldn’t hesitate to order from Mayflower again.
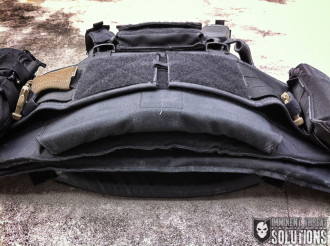
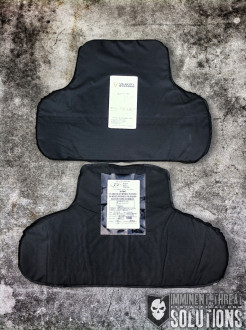
I’m 6’0″ and float around 220 pounds. After a few emails about sizing, I settled on the medium sized panels. I was happy to find the Velocity panels were close to my custom fit issued PPE vest panels (see photo comparison.) I did give up some of the side overlap I’m used to, but overall I’m happy with the Velocity cut. The back panel is a bit wider at the top which is nice and doesn’t cut down on mobility.
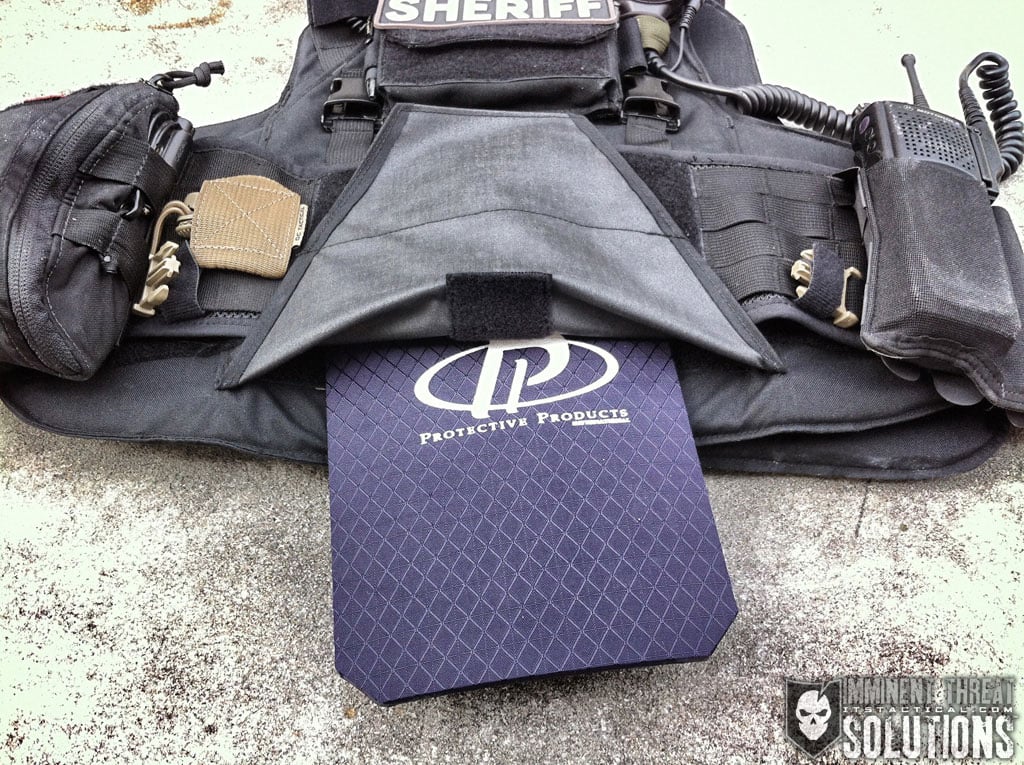
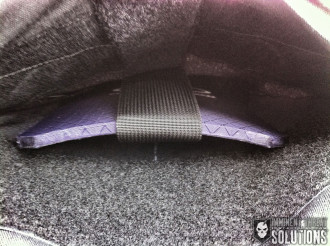
There’s no pocket for a typical front 5×8 soft armor trauma insert so if you want (or are required) to run one, you’ll have to come up with a mounting system of your own. You can run a 7×9 SPEED plate in the front and rear by using the straps inside the vest and this is the configuration I’m using right now. You just have to remove the SPEED plates if you put in your full size plates.
Cummerbunds
I wanted to mention the cummerbund configurations I’m using to hopefully answer some questions that aren’t addressed on the Mayflower website. First, the Low-Profile elastic cummerbunds need to be flipped around to get the hook and loop up front. If you’re using the vest without a hook backed panel like the D3 then this won’t matter. But otherwise you need the loop to help secure the panel to the vest. This is a tradeoff as the rear mounting of the cummerbund uses the hook to help secure it to the back. While this isn’t a huge deal and the rear panel will secure itself, it would be nice if the Low-Profile cummerbund had a double loop option.

Secondly, the “Mesh Cummerbund with PALS Webbing” utilizes only four rows of MOLLE/PALS webbing. This may or may not be an issue depending on the type of accessory you’re mounting. In my case the ITS ETA Fatboy (first generation shown) hangs a bit off the bottom of the cummerbund and the ITS ETA Tallboy is too long to use comfortably. I used Molly Stix on the Fatboy which fit just right and allows it to be removed if needed.
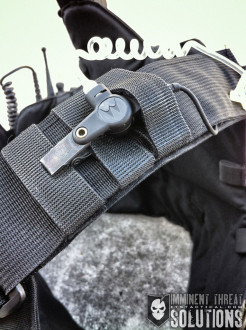
For a radio pouch, I’m using a Blue Force Gear Ten Speed SR25 double mag pouch. My MTX 5000 fits a bit better in it than the Ten Speed M4 pouch. Again, the 4 rows of MOLLE makes the Ten Speed hang off the bottom a bit and the mounting of the Helium Whisper does not use all of the webbing as it normally would.
I just wanted to mention this, as the 6×6 plate pocket cummerbund might be a better option for some.
Innovators
I want to make sure to mention the custom gear makers who are out there sewing products by hand. By “custom” I mean those out there who design, cut and sew their own items either in their living room (yes, this actually happens) or in a small shop. These are the “mom and pop shops” of the tactical industry. They either offer custom one-off items for you and me, or work with companies like Haley Strategic and ITS to design products like the D3 and ETA Trauma Kit Pouches.
While there are many shops out there doing good work, I’ll mention those whose items are on my vest system:
- Chris at Down Range Gear offers the Chest Rig/Armor Interface Kit which really gave me the flexibility to run the top chest rig straps on the inside of my cummerbund. This is a great option and works very well for my particular setup. I highly recommend you check out Chris’ other chest rig mounting options and he’s been making “Direct to Armor” panels for years.
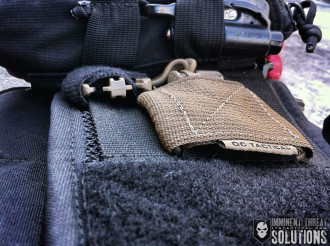
- Mike at OC Tactical designs and sews the Cat Trap Tourniquet Holder among other things. This low profile design allows me to mount a Cat Trap flat under any of the chest panels. This enables the carry of a TQ without one of the chest panels mounted. For more versatility, I’ve also run Cat Traps on my medical bags.
- Joel at Zulu Nylon Gear worked with Bryan to design the ITS ETA Trauma Kit Pouch. Joel has been a great friend to all of us here at ITS and continues to help with great new products.
- A special thanks to Darrin at Extreme Gear Labs for working with me during the setup of this vest system. Darrin really hooked me up with the speedy delivery of the Admin Pouch before a big mission my department was anticipating. If you need a custom product, Darrin is great to work with and delivers as promised. He also helped with me with questions I had about the MOLLE VOCR and SLAPhappy panels.
All of these individuals and the rest of the small gear industry really show how American ingenuity is alive and well today. Just like I look at items made during WWII and am amazed at American design and craftsmanship, so too will our grandchildren look at gear being made today and think the same.
If you’re a Crew Leader at ITS, make sure to check your member discounts, as I saved quite a bit of money on the Mayflower vest and armor package by using the discount code.
Click here to view the photos on Flickr.


*Everything on this vest was purchased by me with my own funds with the exception of the ITS ETA Kit and EGL Admin Pouch.
Discussion